
Have you ever gazed at your staircase and pondered, “This space has so much potential”? You’re not the only one!
Your staircase serves a greater purpose than just connecting different levels in your home; it also stands as a central feature in your living space.
Contents
Transform Your Steps: A DIY Guide to DIY Staircase Remodeling
With a little creativity and some DIY magic, you can transform your stairs into something truly special without draining your wallet.
From adding a fresh coat of paint to installing new treads or even updating your railings, you’ll find plenty of inspiration to breathe new life into your stairs.
Why settle for a boring staircase when you can create something truly unique and eye-catching? Imagine the compliments from friends and family as they admire your handiwork. Plus, these updates aren’t just about looks; they can also add value to your home and improve safety.
Get ready to get your hands dirty and immerse yourself in exciting and fulfilling DIY projects. Our detailed guides and valuable suggestions will equip you with all the tools necessary to transform your staircase from dull to fabulous.
Let’s get started on your DIY staircase remodel journey to a beautiful, revamped staircase that will make your home shine.
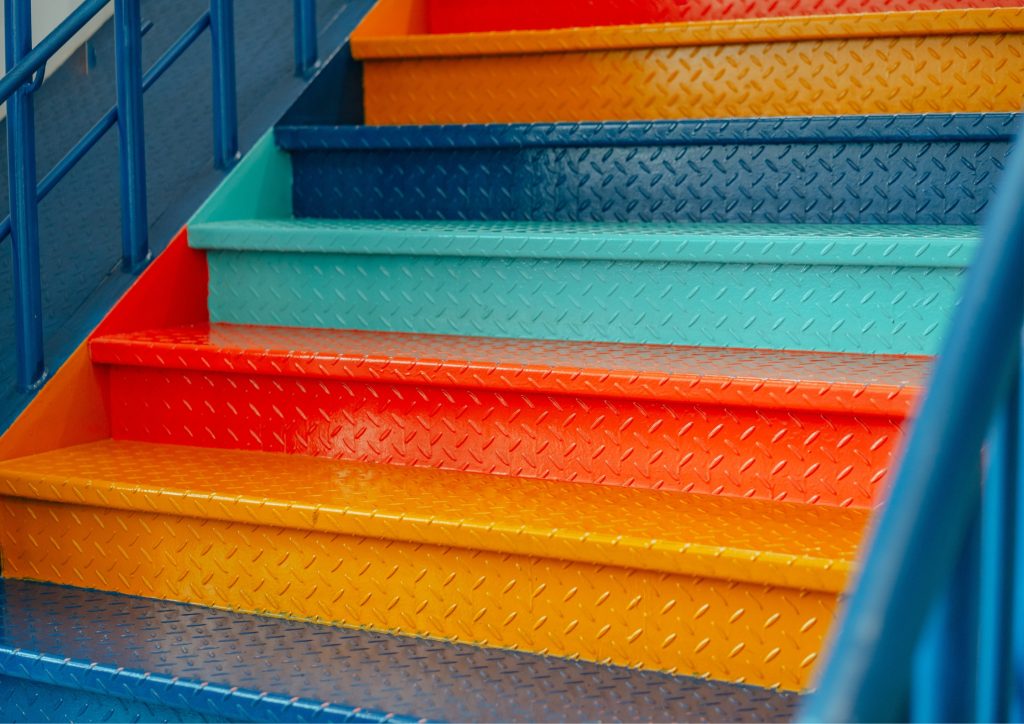
Fresh Paint for a Fresh Look
One of the easiest and most impactful DIY staircase remodel ideas is a fresh coat of paint. Paint is a powerful tool that can transform your stairs from drab to fab with just a few brush strokes. Whether you choose a bold color for a statement look or a soft neutral for a subtle change, paint can do wonders.
Choosing Your Color
The first step is to choose the right color. Think about the overall look you want to achieve. Do you want your staircase to be a standout feature in your home?
If so, consider a bold, vibrant color like deep blue, emerald green, or even a bright red. These colors can make your staircase the focal point of your home, adding a dramatic touch that draws the eye.
On the other hand, if you prefer a more understated look, go for soft neutrals like beige, gray, or white. These colors can make your staircase look clean, fresh, and timeless. They also have the added benefit of making your space look larger and more open.

Preparing the Surface
Before you start painting, it’s crucial to prepare the surface properly. Begin by cleaning your stairs thoroughly. Dust and dirt can prevent the paint from adhering properly, so use a vacuum or a damp cloth to wipe dwon each step. If your stairs have any old paint or varnish, you may need to sand them down to create a smooth surface for the new paint to stick to.
Once your stairs are clean and smooth, apply a coat of primer. Primer helps the paint adhere better and can also block any old stains or colors from showing through. Make sure to let the primer dry completely before moving on to the next step.
Painting the Steps
Now it’s time for the fun part: painting! Start with the treads (the horizontal part of each step) and the risers (the vertical part). Use a good quality brush or roller to apply the paint evenly. It’s usually best to start at the top of the stairs and work your way down to avoid stepping on the freshly painted surfaces.
You may need to apply two or three coats of paint to get the coverage you want. Be sure to let each coat dry completely before applying the next one. This will ensure a smooth, even finish.
Don’t Forget the Details
While painting the steps can make a big difference, don’t forget about the handrails and balusters (the vertical posts that support the handrail). Painting these elements can tie the whole look together and make your staircase look brand new.
For the handrails, consider using a different color or finish to create a nice contrast. For example, if your steps are painted a light color, a dark handrail can add a striking contrast.
Balusters can be painted to match either the steps or the handrail, or you can get creative and use a combination of colors. Just make sure the overall look is cohesive and fits with the rest of your home’s décor.
Finishing Touches
Once the paint is dry, add some finishing touches to complete the look of your DIY staircase remodel project. Consider adding a coat of clear polyurethane to protect the paint and give it a nice sheen. This is especially important for high-traffic areas like stairs.
You can also add decorative elements like stencils or decals to the risers for a unique touch. These small details, whether they feature intricate patterns, playful designs, or inspiring quotes, can significantly enhance the character of your staircase, making it truly one-of-a-kind and visually appealing.

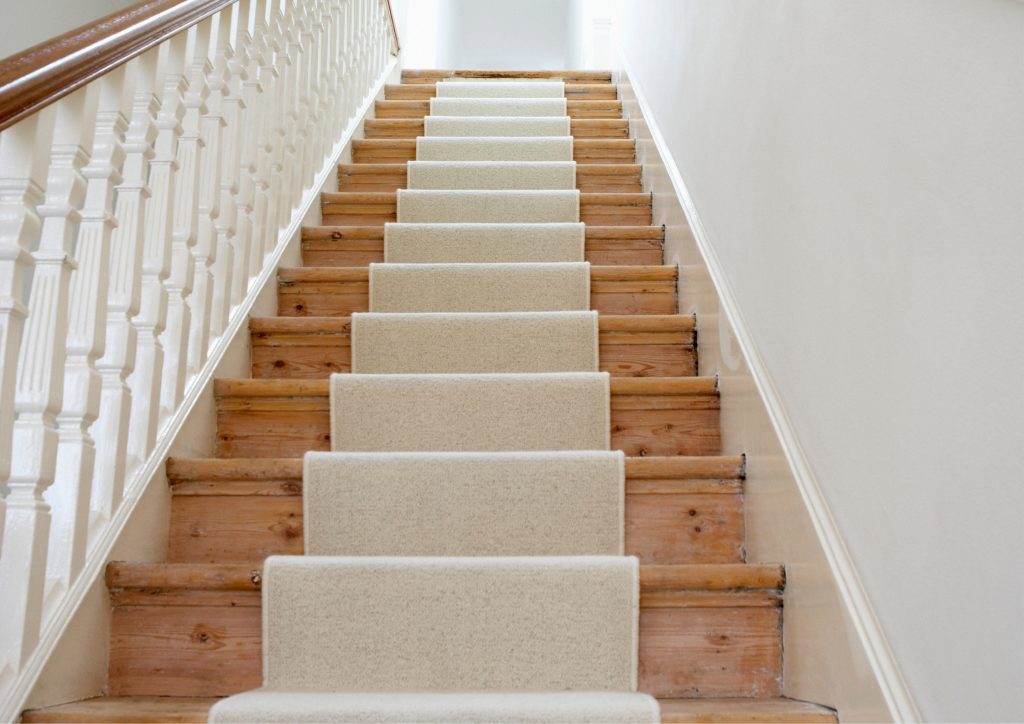
Add a Runner for Style and Safety
A staircase runner is a great way to add both style and safety to your DIY staircase remodel project. Not only does it provide a visual upgrade with its beautiful patterns and colors, but it also helps prevent slips and falls, making your staircase safer for everyone in your home.
By choosing a durable and stylish runner, you can enhance the look of your stairs while ensuring they are secure and comfortable to use.
Here’s how you can easily add a runner to your stairs in a weekend DIY staircase remodel project.
Choosing the Right Runner
The first step in adding a runner is choosing the right one. Staircase runners come in a variety of colors, patterns, and materials, so you have plenty of options to match your home’s décor.
If your home has a more traditional style, you might opt for a classic Persian or Oriental pattern. For a modern look, consider geometric designs or solid colors with a sleek finish.
Material is also an important consideration. Wool runners are durable and have a luxurious feel, but they can be more expensive. Synthetic materials, like nylon or polyester, are more affordable and still offer good durability.
Make sure to choose a runner that is designed for high-traffic areas, as your DIY staircase remodel project gets a lot of use.
Accurate measurements are crucial for a successful installation. Start by measuring the width of your stairs. Most runners are between 27 and 32 inches wide, but the exact width you choose will depend on the width of your stairs and the look you want to achieve.
Measuring Your Stairs
Generally, you’ll want to leave a few inches of exposed wood on either side of the runner. Next, measure the length of your stairs. You’ll need to measure each tread and riser, including the nose (the part of the tread that overhangs the riser).
Add these measurements together to get the total length of runner you’ll need. It’s a good idea to add a few extra inches to your measurement to account for any mistakes or adjustments.
Preparing Your Stairs
Before you lay down the runner, you need to prepare your stairs. Start by cleaning them thoroughly to remove any dirt and debris. If there are any old nails or staples, remove them carefully.
If your stairs are slippery, consider using a non-slip pad underneath the runner. These pads can provide extra grip and cushioning, making the stairs even safer.
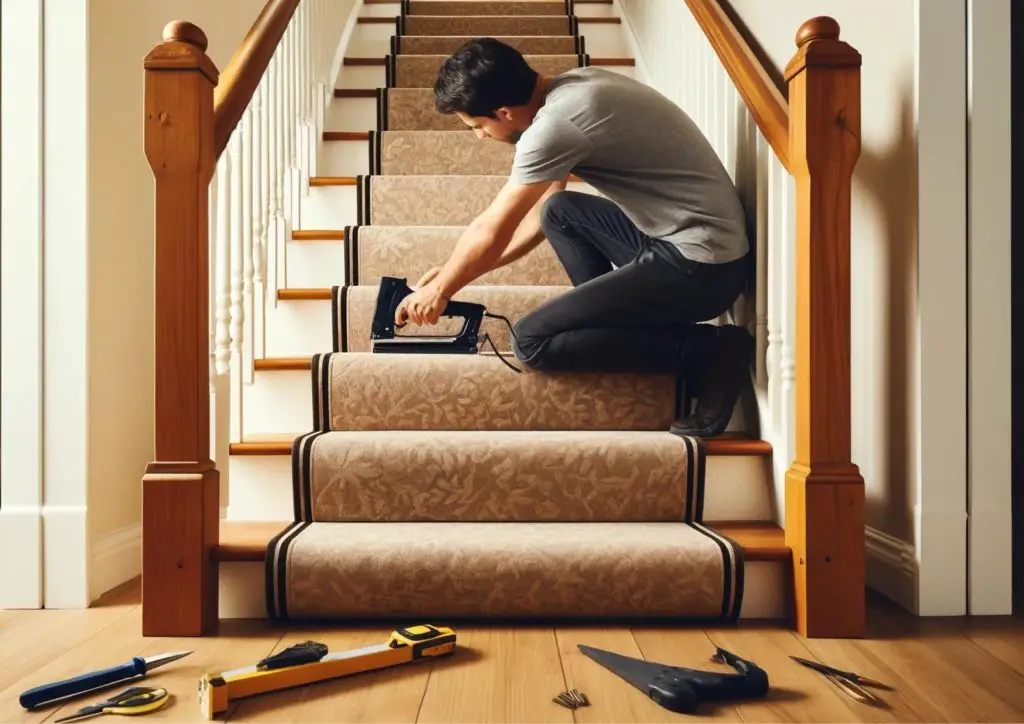
Installing the Runner
Now that you have your runner and your stairs are prepared, it’s time to install the runner. Start at the bottom of the stairs and work your way up. Here’s a step-by-step guide to help you with your DIY staircase remodel project:
- Align the Runner: Place the runner at the bottom of the first riser, making sure it is centered. You can use a measuring tape to ensure equal spacing on both sides.
- Staple the Bottom: Use a heavy-duty staple gun to attach the runner to the bottom of the first riser. Place staples along the top edge of the riser, about every two inches.
- Secure the Tread: Pull the runner tight and staple it to the back edge of the first tread. Again, use staples every two inches. Make sure the runner is smooth and free of wrinkles.
- Repeat the Process: Continue this process up the stairs, pulling the runner tight and stapling it to each riser and tread. Make sure to keep the runner centered and smooth as you go.
- Finish at the Top: When you reach the top of the stairs, trim any excess runner and fold the end under to create a clean edge. Secure this edge with staples.
Adding the Finishing Touches
Once the runner is installed, you can add some finishing touches to enhance its appearance and durability. Consider adding stair rods at the base of each riser.
These rods not only hold the runner in place but also add a decorative element to your staircase. You can find stair rods in various finishes, such as brass, nickel, or bronze, to match your home’s style.
Adding a runner to your DIY staircase remodel project is a fantastic way to combine style and safety in your home. With the right runner, proper measurements, and a bit of DIY effort, you can transform your stairs into a stunning and functional feature.
So, pick out your favorite runner, gather your tools, and get ready to give your staircase a fresh new look!
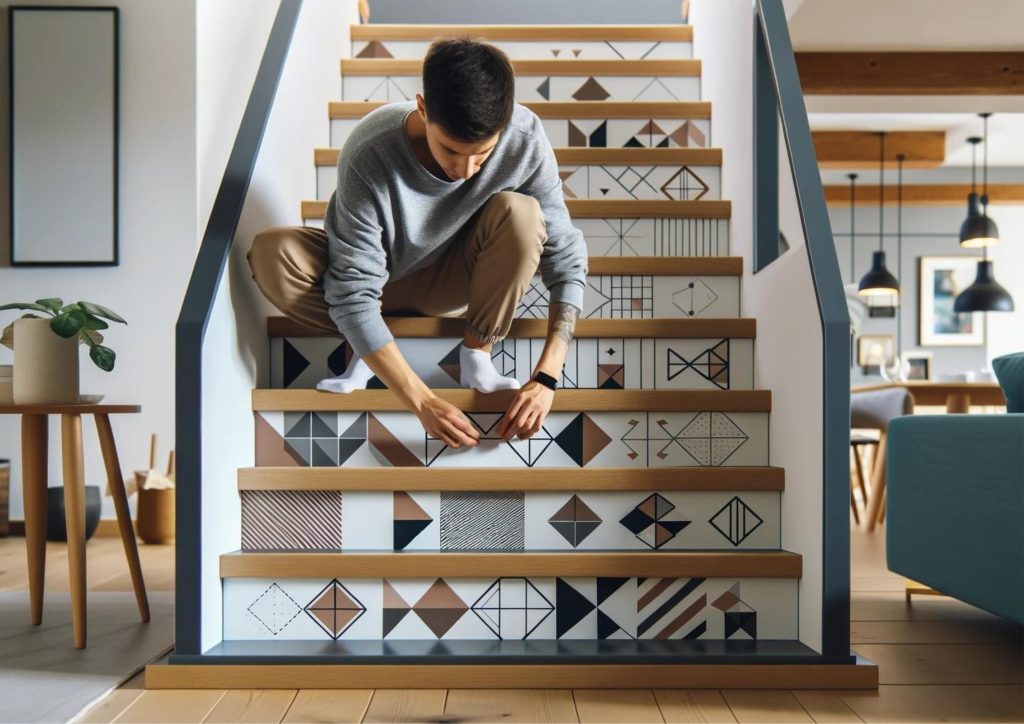
Get Creative with Decals
Decals are another simple yet impactful way to remodel your staircase. With a variety of designs available, from inspirational quotes to intricate patterns, decals can transform and make your DIY staircase remodel project into a work of art.
Here’s how you can get creative with decals and give your staircase an instant upgrade.
Choosing the Right Decals
The first step is to choose the decals that best suit your style and home décor. Here are some ideas to get you started:
- Inspirational Quotes: Add a motivational touch to your stairs with quotes that inspire you. Every time you climb the stairs, you’ll be greeted by words that lift your spirits.
- Geometric Patterns: For a modern look, choose decals with geometric shapes. These can add a contemporary and stylish feel to your staircase.
- Nature Themes: Bring a touch of the outdoors inside with decals featuring leaves, flowers, or other nature-inspired designs. This can create a serene and calming atmosphere.
- Custom Designs: If you have a specific design in mind, consider ordering custom decals. Many companies offer personalized options, so you can create something unique to your taste.
Preparing Your Stairs
Before applying the decals, make sure your stairs are clean and smooth. Here’s how to prepare your stairs for decal application:
- Clean the Surface: Wipe down the risers with a damp cloth to remove any dust, dirt, or grease. This will help the decals adhere better.
- Smooth the Surface: If there are any rough spots or imperfections, sand them down to create a smooth surface. A smooth surface ensures that the decals will stick properly and look their best.
Applying the Decals
Once your stairs are prepared, it’s time to apply the decals. Follow these steps for a smooth application:
- Measure and Plan: Measure the height and width of each riser to ensure that the decals will fit properly. Plan the placement of each decal to create a cohesive look.
- Cut to Size: If the decals are too large for your risers, carefully cut them to size with a pair of scissors or a craft knife. Make sure to leave a small margin to ensure a perfect fit.
- Apply the Decals: Starting from the bottom step, peel off the backing of the decal and position it on the riser. Use a squeegee or a credit card to smooth out any air bubbles and ensure the decal adheres properly.
- Repeat the Process: Continue this process for each riser, making sure to align the decals evenly. Take your time to ensure each decal is placed correctly and smoothly.
Adding Finishing Touches
After all the decals are applied, take a step back and admire your work. Here are a few finishing touches to consider:
- Seal the Decals: To protect the decals and make them last longer, consider applying a clear sealant over them. This can help prevent peeling and damage from foot traffic.
- Lighting: Add some LED strip lights along the edges of the stairs to highlight the decals and create a warm, inviting glow. This can make your staircase look even more stunning, especially in the evening.
Decals offer a simple and affordable way to remodel your staircase, adding a personal touch and a bit of flair to your home. So, get creative, have fun, and give your DIY staircase remodel project an instant upgrade with decals!
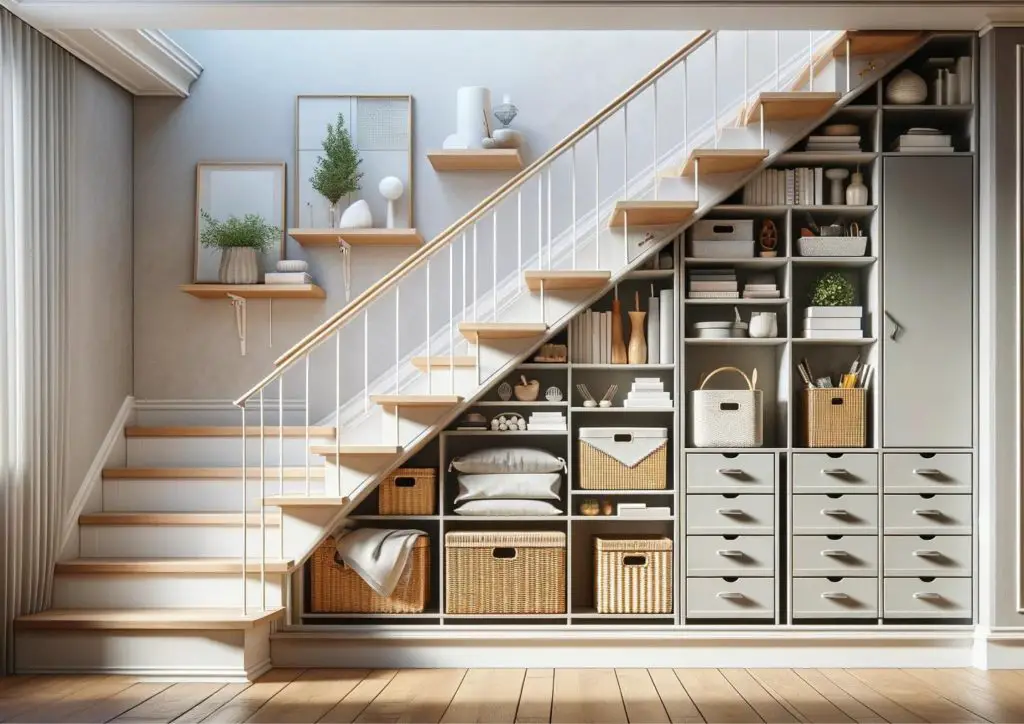
Under-Stair Storage
Don’t let the space under your stairs go to waste. Building storage into this often-overlooked area can add both function and style to your home. There are various creative ways to utilize this space:
- Shelves: Install custom shelves to display books, decorative items, or even shoes. Open shelving keeps items accessible and adds a visual appeal to your DIY staircase remodel.
- Drawers: Create pull-out drawers for hidden storage. These can be perfect for storing anything from linens to children’s toys.
- Closet: Transform the space into a small closet to hang coats, store cleaning supplies, or keep household essentials organized.
This DIY staircase remodel project might take a bit more time and planning, but the extra storage space will be worth it.
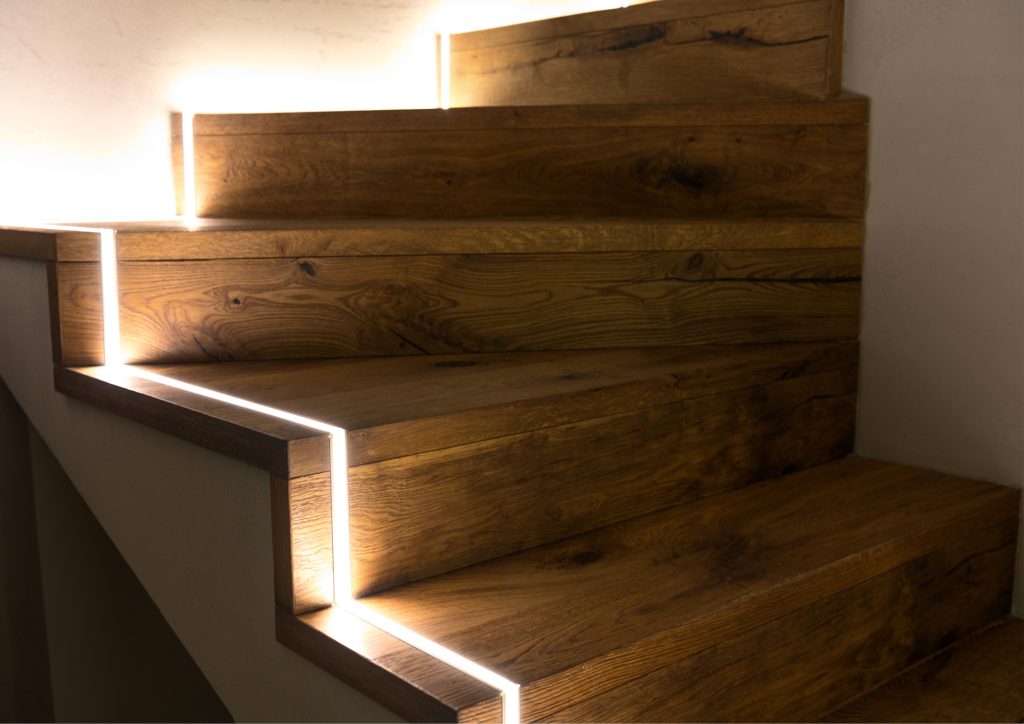
Add Some Lighting
Good lighting can make a big difference in how your staircase looks and feels. Properly illuminating your stairs can enhance their appearance, improve safety, and add a modern touch to your home. Here’s how you can achieve this with some simple DIY lighting ideas:
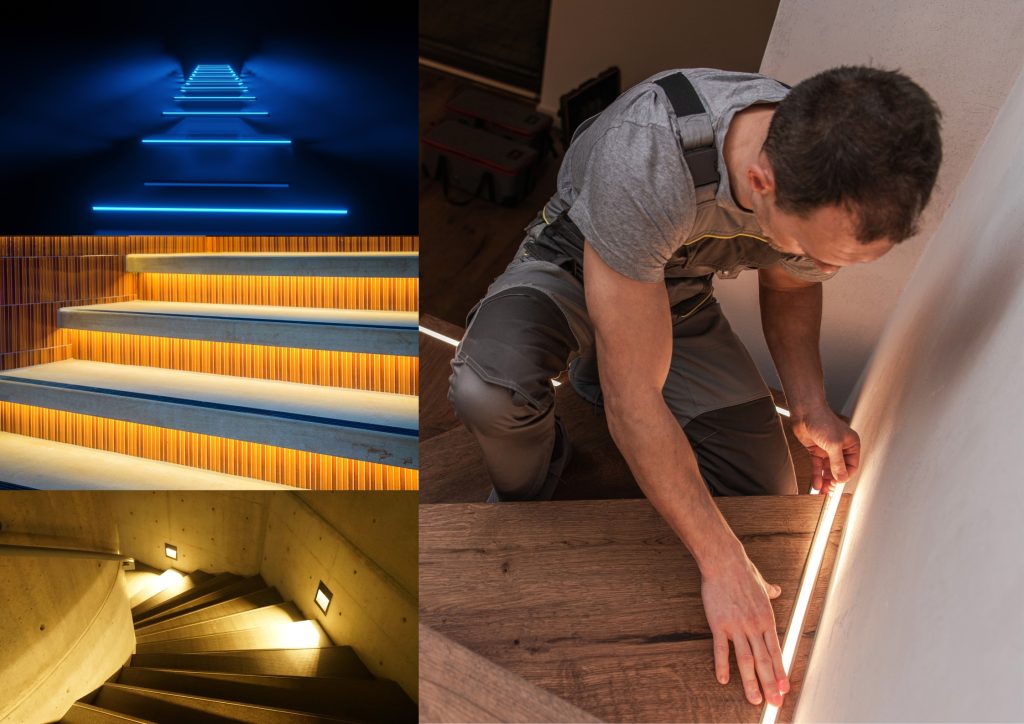
LED Strip Lights
Adding LED strip lights along the edges of your stairs is a fantastic way to brighten up your space. LED strips are flexible, easy to install, and come in various colors. Here’s how to do it:
- Measure and Plan: Measure the length of each stair tread and decide where you want the lights to go. Common placements include under the lip of each tread or along the wall beside the stairs.
- Choose Your Lights: Select LED strips that match your desired brightness and color. Warm white LEDs create a cozy atmosphere, while cool white or colored LEDs can give a more modern look.
- Install the Lights: Clean the surface where you’ll be attaching the lights. Peel off the backing and stick the LED strips in place. Ensure they are secure and aligned properly. Connect the strips to a power source and test the lights.
New Light Fixtures
Installing new light fixtures can also dramatically change the look of your staircase. Consider these options:
- Wall Sconces: Wall sconces placed at regular intervals along the staircase can provide even lighting and add an elegant touch. Choose fixtures that complement your home’s style.
- Pendant Lights: Hanging pendant lights at the top or bottom of the stairs can create a striking focal point. Make sure the pendants are at a height that doesn’t obstruct movement.
- Recessed Lighting: Recessed lights installed in the ceiling above the stairs can offer a clean, modern look. They provide ample light without taking up space.
Safety and Ambiance
Good lighting not only enhances the aesthetics of your staircase but also improves safety. Well-lit stairs reduce the risk of trips and falls, especially in the evening or early morning. Additionally, the right lighting can create a welcoming ambiance in your home.
Adding lighting to your staircase is a simple yet effective way to improve both its functionality and appearance.
Conclusion
Your staircase doesn’t have to be just a way to get from one floor to another. With these DIY staircase remodel ideas, you can turn it into a stunning feature of your home.
Whether you choose to paint, add a runner, install new treads, or get creative with decals, the possibilities are endless. So grab your tools and get ready to step up your space with a DIY staircase remodel. Happy renovating!


