Adding crown molding to a room can instantly elevate its aesthetic, giving it a polished and sophisticated finish. Despite its reputation for being a challenging DIY project, installing crown molding is quite manageable with the right steps and tools.
Contents
How to Install Crown Molding Like a Pro
This guide will walk you through the entire process, from selecting materials to the final touch of paint, ensuring you achieve professional results. Whether you’re a seasoned DIY enthusiast or a beginner looking to enhance your home, this step-by-step tutorial will provide clear and simple instructions.
By taking your time and paying attention to detail, you can transform your room with beautifully installed crown molding. So, gather your materials, follow these steps, and soon you’ll enjoy the elegant look of crown molding in your home.
Let’s get started and learn how to install crown molding like a pro!
Materials Needed
Before you begin, gather all the materials and tools you will need. Having everything at hand will make the process smoother and quicker. Here’s a list of what you’ll need:
- Crown molding
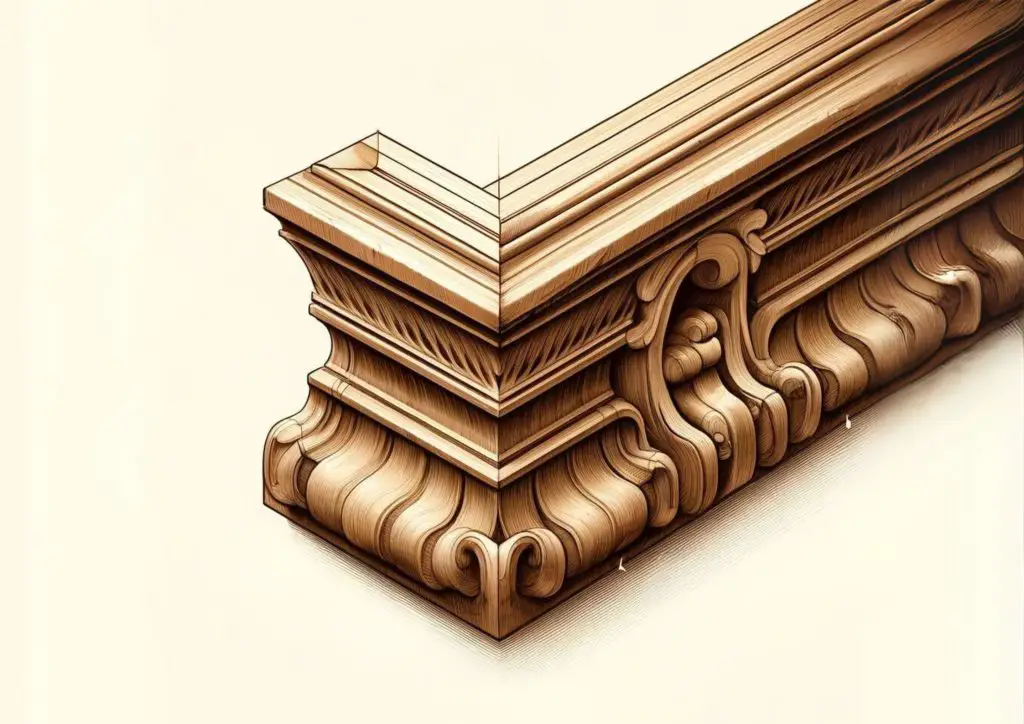
- Choosing the right crown molding material depends on your budget, the room’s environment, and the desired aesthetic.
- Each material has its unique benefits and drawbacks, so consider these factors carefully before making your decision
- Choose a style that fits your room’s decor. Make sure to buy a little extra to account for mistakes or miscuts.
| MATERIAL | DURABILITY | PRICE (PER LINEAR FOOT) | PROS | CONS |
| Wood | High | $1 – $30+ | Can be stained or painted; high-end look | Expensive; can warp or swell; requires maintenance |
| MDF | Medium | $1 – $3 | Smooth surface; affordable; resistant to warping | Less durable; can’t be stained; susceptible to impact |
| Polyurethane | High | $1.50 – $3.50 | Lightweight; durable; moisture-resistant | Can’t be stained; slightly more expensive than MDF |
| PVC | High | $1 – $3 | Durable; water-resistant; easy to clean | Can’t be stained; plastic appearance |
| Polystyrene | Low | $0.50 – $1.50 | Very lightweight; extremely affordable; water-resistant | Less durable; basic appearance; limited styles |
- Measuring tape: Essential for accurate measurements.
- Cutting Tool: A miter saw is ideal for precise cuts of wood.
- Nail gun or hammer and finishing nails: To secure the molding to the wall. Adhesives can also be used for certain materials like polystyrene.
- Wood filler: To fill any gaps or nail holes.
- Sandpaper: For smoothing the wood filler once it’s dry.
- Caulk and caulking gun: To fill any gaps between the molding and the wall or ceiling.
- Paint or stain: To finish the crown molding and match it to your room’s decor.
- Painter’s tape: To protect the wall and ceiling from paint or caulk.
- Ladder or step stool: To reach the top of the walls.
- Safety goggles and ear protection: To protect yourself while cutting the molding.
Specific Instructions Based on Material Choice
Wood Crown Molding
- Preparation:
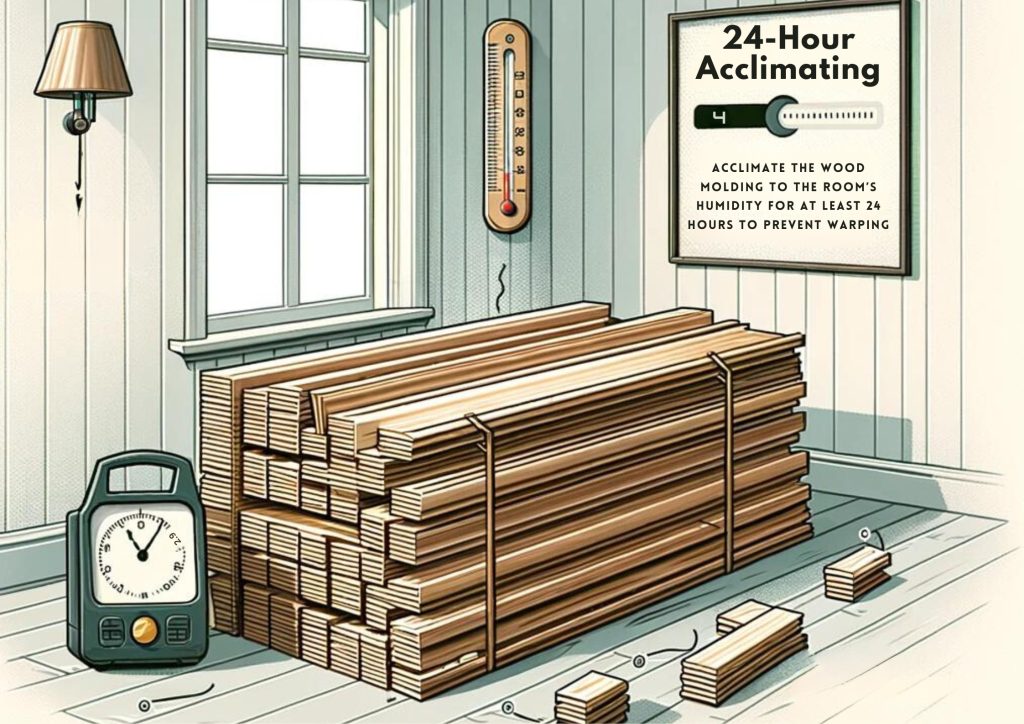
- Before cutting and installing, acclimate the wood molding to the room’s humidity for at least 24 hours to prevent warping.
- Sand the molding lightly to remove any rough edges.
- Cutting:
- Use a miter saw for precise cuts. For inside corners, cope one piece to fit snugly against the other.
- Wood can splinter, so cut slowly and carefully.
- Installation:
- Use finishing nails and a nail gun to secure the molding into the studs.
- Fill nail holes with wood filler, let it dry, and then sand smooth.
- Finishing:
- Stain or paint the molding after installation. Use multiple thin coats for the best finish.
MDF Crown Molding
- Preparation:
- MDF doesn’t require acclimation but should be kept dry to avoid swelling.
- Cutting:
- Use a fine-toothed blade on your miter saw to prevent chipping.
- MDF cuts cleanly but can produce a lot of dust, so wear a mask and goggles.
- Installation:
- Use a combination of nails and adhesive to secure MDF molding. MDF is heavier than polystyrene but lighter than wood.
- Fill nail holes with wood filler, let it dry, and then sand smooth.
- Finishing:
- MDF can’t be stained but can be painted. Use a primer first to seal the material, then apply your chosen paint color.
Polyurethane Crown Molding
- Preparation:
- Polyurethane doesn’t need acclimation. Ensure the surface is clean and dry before installation.
- Cutting:
- Use a standard miter saw. Polyurethane is easy to cut and handle.
- It is flexible, making it easier to work with on uneven walls.
- Installation:
- Use adhesive and nails to secure. Because it’s lightweight, you can often use fewer nails.
- Fill any gaps with caulk.
- Finishing:
- Polyurethane can be painted. Use a paint that is suitable for plastics.

PVC Crown Molding
- Preparation:
- PVC is ready to install out of the package. Ensure surfaces are clean and dry.
- Cutting:
- Use a fine-toothed blade to cut PVC molding. It cuts easily and doesn’t splinter.
- Installation:
- Use adhesive and finishing nails. PVC is lightweight and easy to handle.
- Fill any gaps with caulk.
- Finishing:
- Paint with a paint suitable for plastics. PVC can’t be stained.
Polystyrene Crown Molding
- Preparation:
- Polystyrene is ready to install and very lightweight.
- Cutting:
- Use a utility knife or miter saw. It cuts easily but can be less precise due to its softness.
- Installation:
- Often secured with adhesive alone due to its light weight. No need for nails.
- Fill any gaps with caulk.
- Finishing:
- Paint with any standard paint. It is often pre-primed, so you can apply paint directly.
Step-by-Step Guide for Wood Crown Molding
Step 1: Measure the Room
Accurate measurements are crucial for a professional-looking installation. Here’s how to measure your room:
- Measure Each Wall:
- Start by measuring the length of each wall where you plan to install crown molding. Use a measuring tape and make sure to measure from corner to corner.
- Write down each measurement carefully. It’s a good idea to draw a rough sketch of the room and label the measurements for each wall.
- Calculate Total Molding Needed:
- Add up the lengths of all the walls to get the total amount of molding you’ll need. It’s wise to buy about 10% more molding than your total measurement to account for mistakes or miscuts.
- Plan Your Cuts:
- Knowing the length of each wall helps you plan your cuts. Crown molding typically comes in 8-foot, 10-foot, or 12-foot lengths. Plan to use the longest pieces possible to minimize seams.
Step 2: Cut the Molding
Cutting the crown molding correctly is one of the most important steps. Proper cuts ensure that the pieces fit together neatly, especially in the corners. The cutting process varies slightly depending on the material:
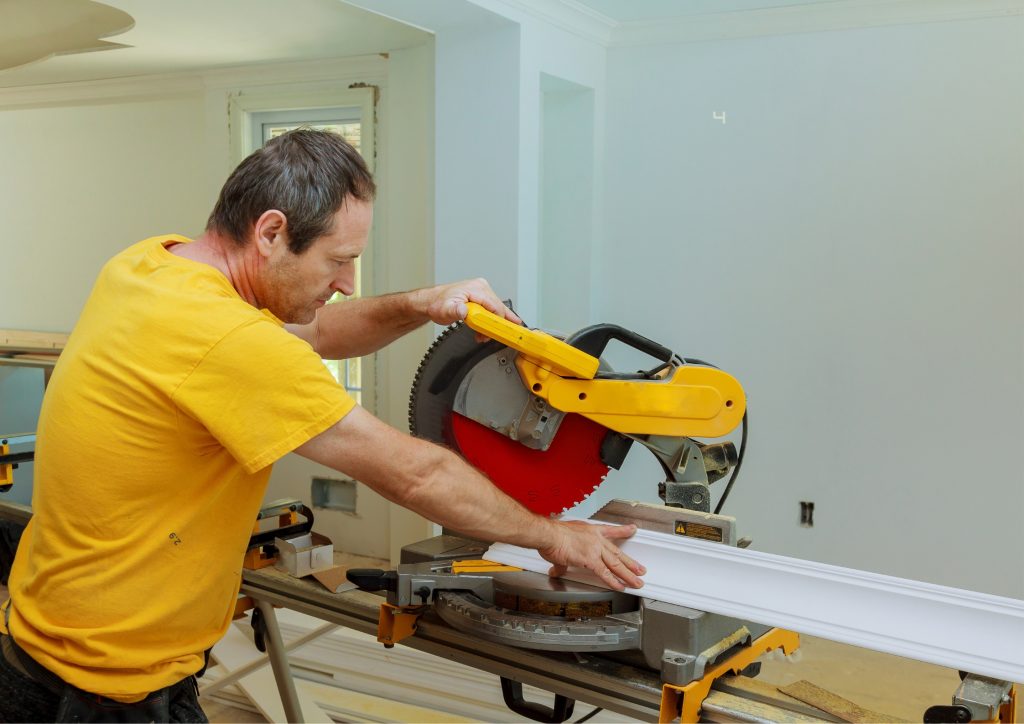
- Set Up the Miter Saw:
- Set up your miter saw at a 45-degree angle. Crown molding is installed at an angle, so the cuts must be made at an angle too.
- If you’re new to using a miter saw, practice on a few scrap pieces of molding before making the actual cuts.
- Cutting Inside Corners:
- For inside corners, you need to cope the molding. This means cutting one piece at a 45-degree angle and then using a coping saw to cut along the profile of the molding. This ensures a tight fit against the adjoining piece.
- Cut the first piece with the miter saw at a 45-degree angle. Then use a coping saw to carefully cut along the profile of the molding. This may take some practice, so take your time.
- Cutting Outside Corners:
- For outside corners, both pieces of molding are cut at 45-degree angles in opposite directions. When the two pieces are joined together, they form a 90-degree angle.
- Measure and mark the length of the molding, then cut each end with the miter saw set at 45 degrees.
- Dry Fit the Pieces:
- Before nailing anything in place, dry fit the pieces to make sure they fit correctly. If any adjustments are needed, make them now.
Step 3: Prepare the Walls
Preparing the walls before installation ensures that the crown molding adheres well and looks neat.
- Clean the Top of the Walls:
- Use a damp cloth to wipe down the top of the walls where the molding will be installed. This removes any dust or debris that could prevent the molding from adhering properly.
- Mark the Studs:
- Use a stud finder to locate the studs in the walls. Mark their locations with a pencil. This is important because nailing the molding into the studs provides a stronger hold.
- Apply Painter’s Tape:
- Apply painter’s tape along the top edge of the wall and the ceiling. This protects the surfaces from any stray paint or caulk.
- Make a Guide Line:
- If you want the molding to be perfectly straight, use a level to draw a guideline along the wall where the bottom edge of the molding will go. This will help ensure the molding is level when installed.

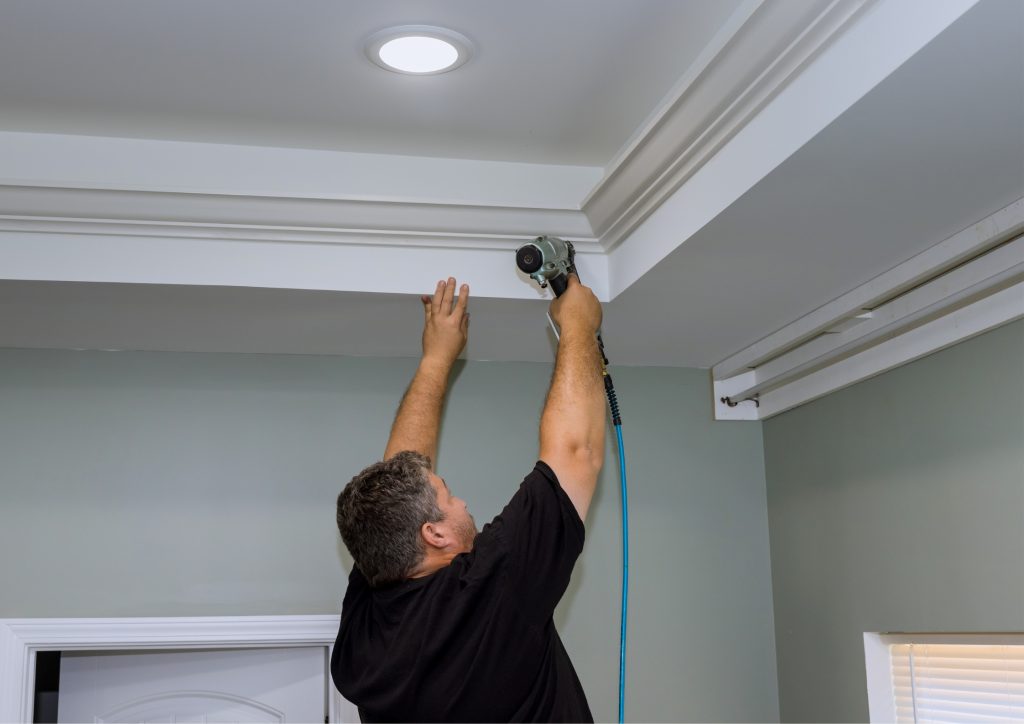
Step 4: Install the Molding
With the walls prepared and the molding cut, you’re ready to start installing.
- Start with the Longest Wall:
- Begin with the longest wall in the room. This makes it easier to get a straight and level installation.
- Hold the molding up to the wall, aligning the bottom edge with the guideline if you drew one.
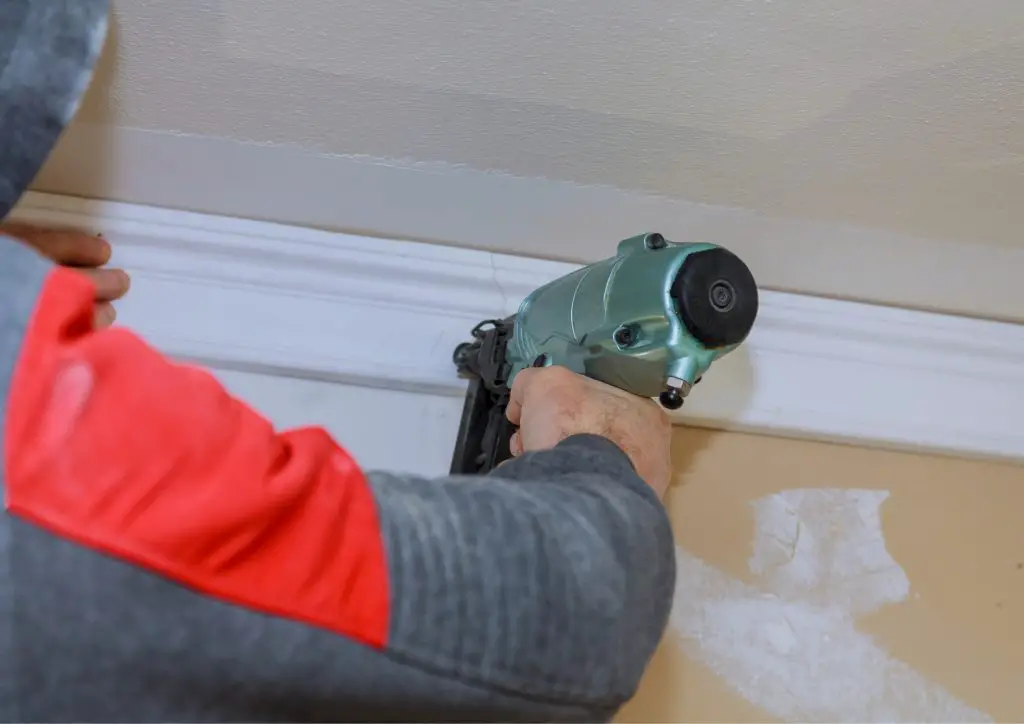
- Nail the Molding in Place:
- Use a nail gun or hammer and finishing nails to secure the molding to the wall. If using a nail gun, make sure to wear safety goggles and ear protection.
- Place nails every 16 inches, making sure to nail into the studs for a secure hold. If using a hammer, be careful not to dent the molding.
- Install the Corner Pieces:
- For inside corners, install the coped piece first. Press it into the corner and nail it in place. Then fit the adjoining piece into the coped piece and nail it.
- For outside corners, fit the two pieces together at the 45-degree angles you cut. Make sure the joint is tight, then nail both pieces in place.
- Continue Around the Room:
- Continue installing the molding around the room, making sure each piece fits snugly into the corners and aligns with the previous piece. Use a small amount of wood glue at the joints for added strength if desired.
Step 5: Fill the Gaps
Once the molding is installed, filling any gaps or nail holes is important for a polished look.
- Fill Nail Holes:
- Use wood filler to fill in the nail holes. Apply a small amount of filler to each hole with a putty knife, then smooth it out.
- Let the wood filler dry completely according to the manufacturer’s instructions.
- Sand the Filler:
- Once the filler is dry, use sandpaper to smooth it out. Sand lightly until the filler is flush with the surface of the molding.
- Check for Gaps:
- Look for any gaps between the molding and the wall or ceiling. If you find any, use wood filler to fill them in. Let the filler dry and then sand it smooth.
Step 6: Caulk the Edges (Continued)
- Apply Caulk (Continued):
- Use your finger or a caulk smoothing tool to smooth out the caulk and press it into the gap. This will help to blend the molding seamlessly with the wall and ceiling. Make sure to wipe any excess caulk off the molding and wall with a damp cloth before it dries.
- Let the Caulk Dry:
- Allow the caulk to dry completely according to the manufacturer’s instructions before moving on to painting or staining. This usually takes a few hours, but it’s best to check the packaging for specific drying times.
Step 7: Paint or Stain
The final step is to paint or stain the crown molding to match your room’s decor.
- Protect the Surrounding Area:
- Use painter’s tape to protect the wall and ceiling from paint or stain. Make sure the tape is pressed down firmly to prevent any paint from seeping underneath. Cover the floor and any furniture with drop cloths or old sheets to protect them from paint splatters.
- Apply Paint or Stain:
- Use a paintbrush or roller to apply paint or stain to the crown molding. Follow the grain of the wood if you are using stain. Apply the paint or stain in thin, even coats to avoid drips and runs.
- For best results, apply at least two coats of paint or stain. Let each coat dry completely before applying the next. This will ensure a smooth and even finish.
- Touch Up:
- Once the final coat is dry, carefully remove the painter’s tape. Touch up any areas where the paint or stain might have bled through. Use a small brush for precise touch-ups.
- Clean Up:
- Clean your brushes or rollers according to the instructions on the paint or stain can. Dispose of any used painter’s tape and clean up your workspace. Make sure to properly ventilate the room to help with drying and to remove any paint fumes.

Tips for Success
- Measure Twice, Cut Once: Accurate measurements are crucial for a professional-looking installation. Double-check your measurements before making any cuts.
- Practice Coping Cuts: If you’re new to coping, practice on some scrap pieces of molding first. This will help you get a feel for the technique and improve your accuracy.
- Use a Stud Finder: Locating the studs in your walls will ensure that your nails have a solid hold. This is especially important for heavier materials like wood.
- Take Your Time: Don’t rush the installation process. Taking your time to ensure accurate cuts and proper alignment will result in a more professional finish.
- Seek Help if Needed: If you’re having trouble, don’t hesitate to ask for help from a friend or family member. Having an extra set of hands can make the installation process much easier.
By following these steps and tips, you can install crown molding like a pro and give your room a sophisticated finish. Whether you are a beginner or have some DIY experience, this guide will help you achieve a professional look.
Conclusion
Installing crown molding can be a rewarding DIY project that can truly elevate the look and feel of any room. The choice of materials plays a crucial role in achieving the desired aesthetic, with options ranging from traditional wood to more modern alternatives such as MDF, polyurethane, PVC, or polystyrene.
Each material comes with its own set of advantages and considerations, so it’s important to choose one that suits both your budget and desired outcome.
Choose high-quality wood for a seamless finish. MDF is budget-friendly and paintable. Polyurethane for durability in high humidity. PVC for outdoor use, weather-resistant. Polystyrene lightweight, easy DIY option.
Regardless of the material chosen, the key to a professional-looking installation lies in meticulous planning and attention to detail. By following these detailed steps and taking your time to complete each stage with care, you can achieve a professional result that will enhance the overall appearance of your space.
Whether you prefer a traditional and sophisticated appearance with wood crown molding or a more contemporary and cost-effective option with MDF, this guide will assist you in expertly navigating the installation process. Embrace the change and savor the refined elegance that crown molding can add to your living space.


