Art comes in all forms, shapes, and sizes. I realized just how true this is when I saw some people make rubber boot dog. Not the real dogs, of course, but something that qualifies as art.
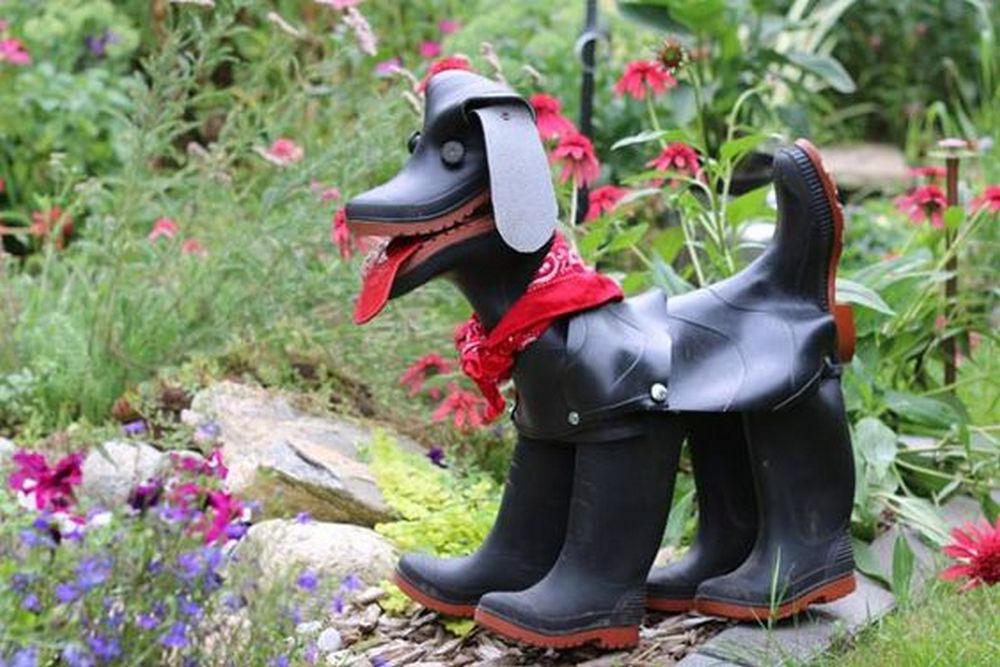
We have a lot of unused pairs of boots on our farm. Somehow, we have managed to collect more than 20 pairs in a span of three years. As to how that happened, I still do not know. But I’m just happy to share that the 20 pairs are now down to just four.
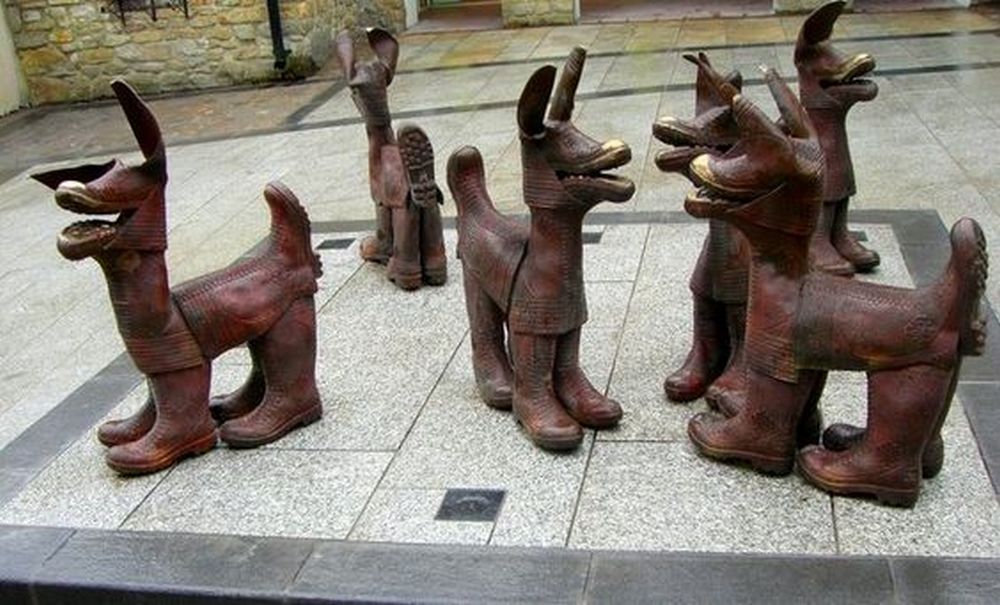
A friend of mine who volunteers in one of the dog shelters asked if I could donate the old boots to their office. Without any hesitation, I had them delivered the same day. I visited a few weeks later and out of curiosity, I asked what they did with the boots. I was pleasantly surprised when someone handed me a rubber boot dog.
I was really impressed! It took imagination and creativity to be able to come up with something so adorable. In fact, I must say, it was arf-absolutely amazing!
Contents
Crafting a Rubber Boot Dog
Materials
- Boots
Tools
- Frame
- Scissors
Instructions
Step 1: Prepare the Boots
- Start by completely cleaning the rubber boots to get rid of any trash or dirt. This guarantees that your artwork will look nice and be clean.
Step 2: Cut the Boots
- Carefully cut the rubber boots for your dog into the required forms with the scissors. Pieces for the head, ears, body, and tail could have to be cut out. Plan your cuts depending on the boot parts that would naturally depict these body parts; for instance, the head could come from the foot part of the boot.
Step 3: Assemble the Frame
- Create or get ready a frame your dog will need as its skeleton. This frame can be molded to fit the posture you wish for your dog and should be strong enough to keep the boot pieces in place.
Step 4: Attach the Boots to the Frame
- Start forming your dog by attaching the boot’s cut pieces to the frame. To fasten the boot pieces on the frame, you might need extra tools including wire or strong adhesive. Arange the bits to reflect a dog sitting, standing, or in any pose you like.
Step 5: Add Details
- Use additional pieces of cut rubber to add details like eyes, a nose, and a tail. You can also use other materials like buttons for the eyes or paint to add color and features.
Step 6: Final Touches
- Once all pieces are securely attached and the glue or adhesive has dried, give your rubber boot dog a final inspection. Trim any rough edges or adjust any parts as necessary.
Step 7: Display
- Choose a suitable location to display your rubber boot dog. It can be an excellent conversation starter and a unique piece of decor for your home or garden.
Click on any image to start the lightbox display. Use your Esc key to close the lightbox.

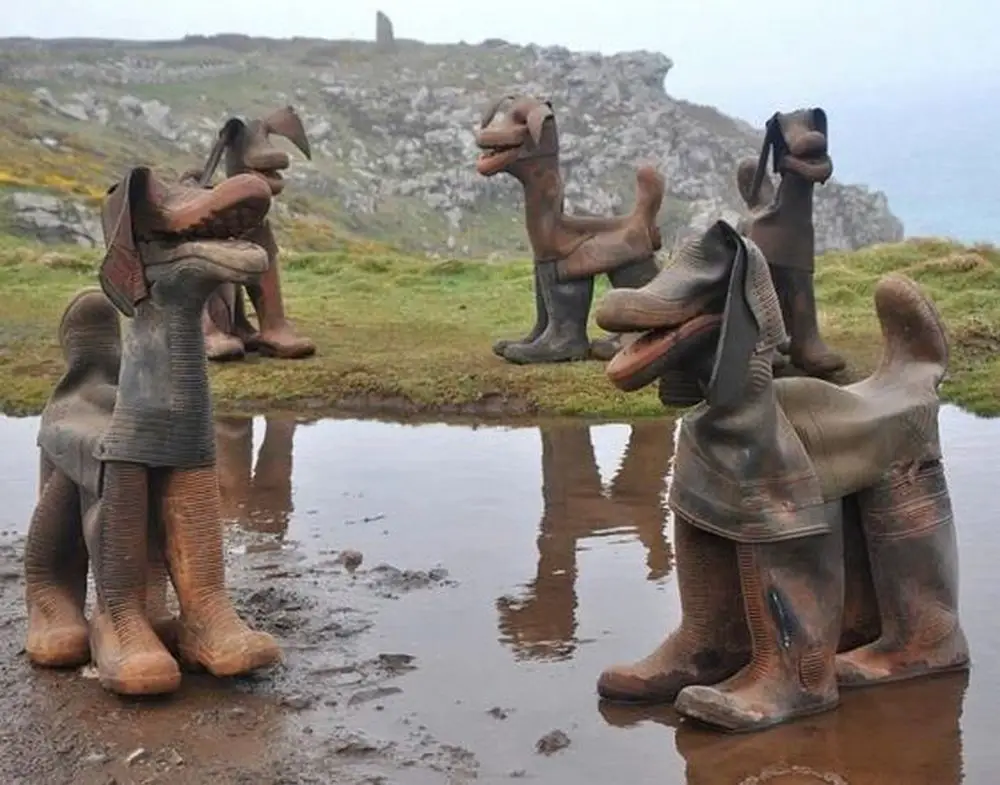
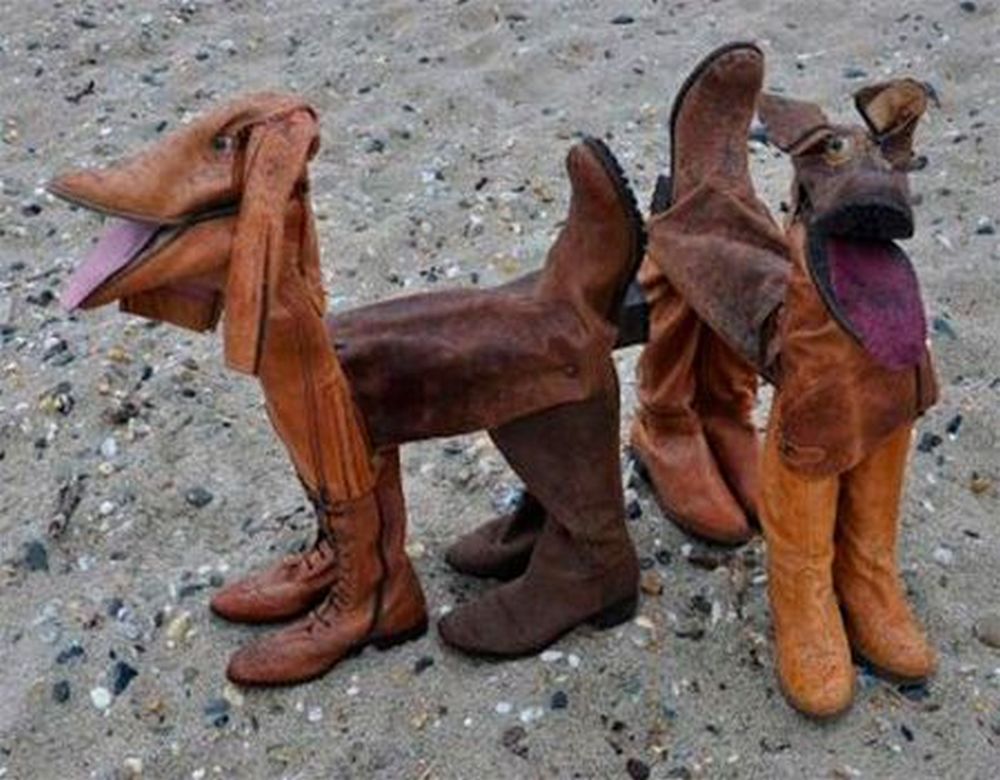
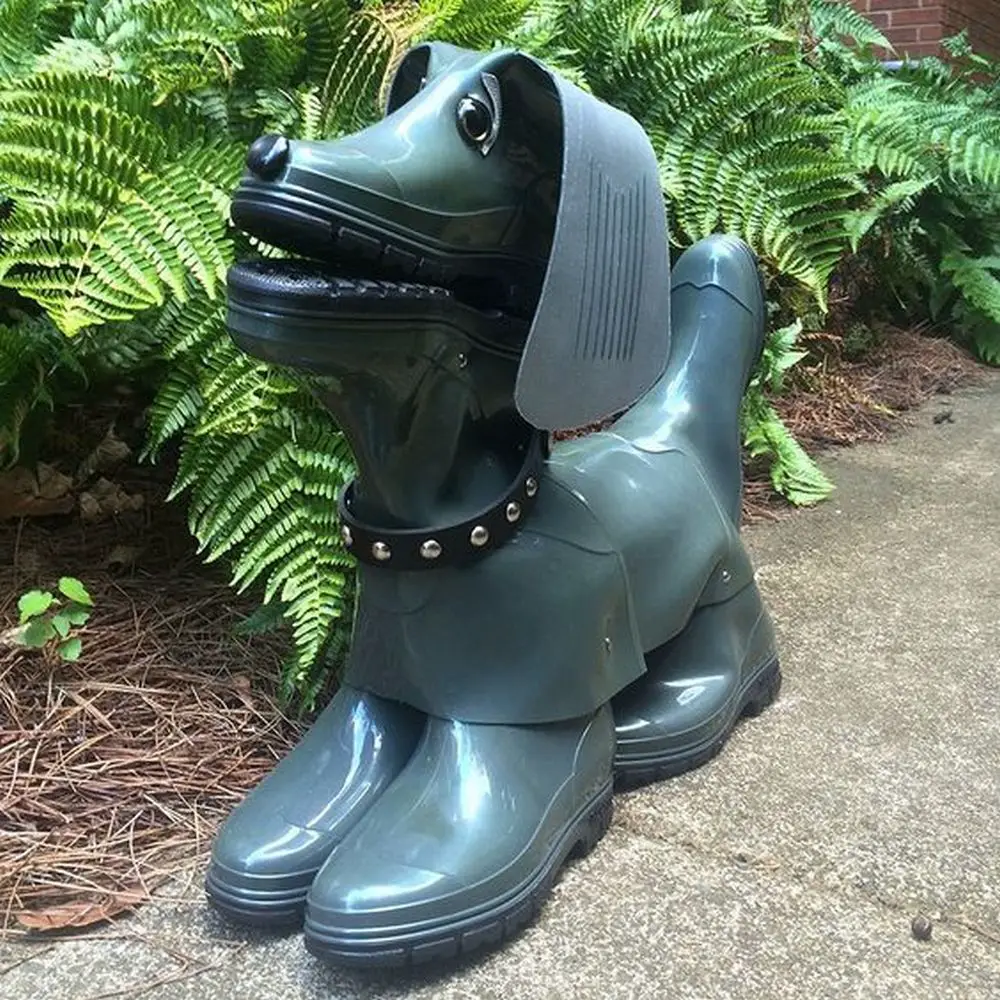
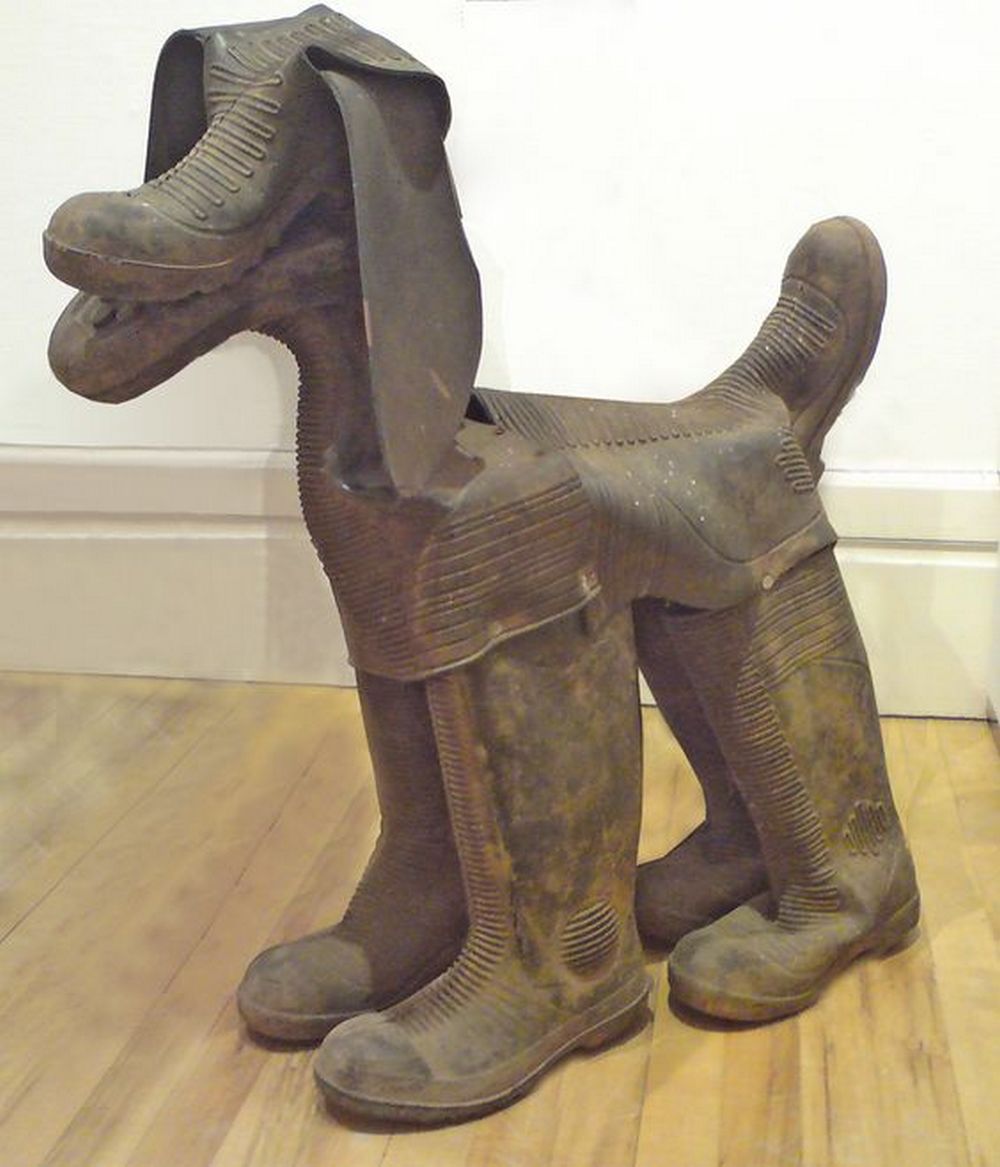

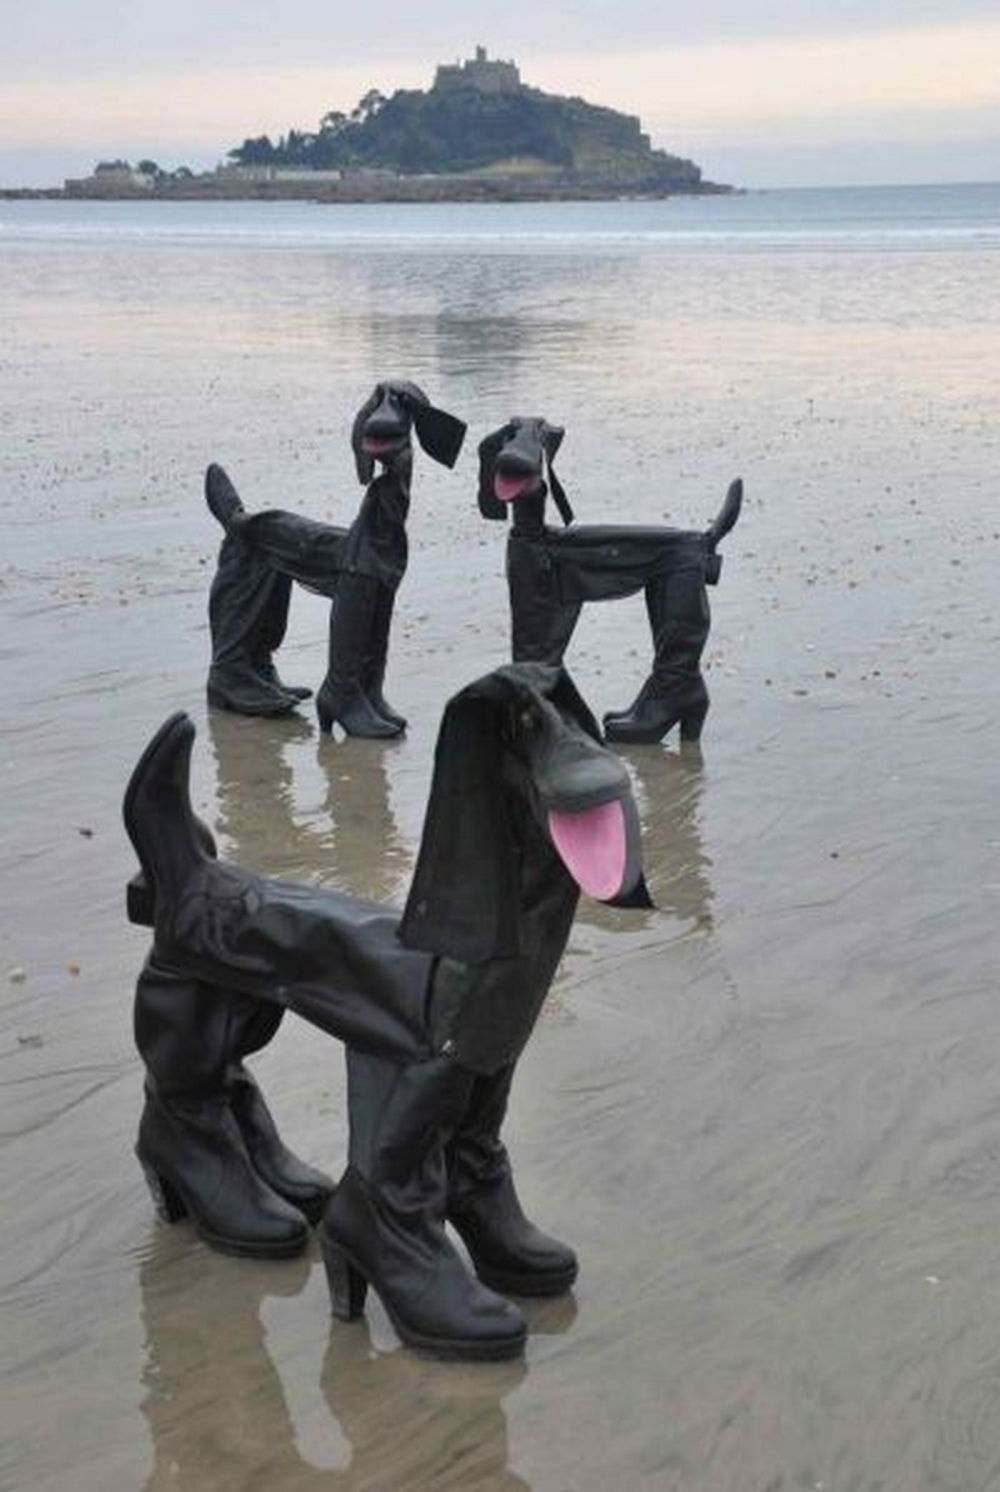


Want to start making this adorable DIY project? Watch the video below…
Customization Ideas for Rubber Boot Dogs
Creating a rubber boot dog from old footwear is not only a fun and eco-friendly project, but it also opens up endless possibilities for customization. Each boot dog can be a reflection of your personal style or a whimsical addition to your home decor. Below are some creative ideas to help you customize your rubber boot dog and make it truly one-of-a-kind.
Choose a Theme
- Storybook Characters: Transform your rubber boot dog into a character from your favorite storybook. Whether it’s Toto from “The Wizard of Oz” or Max from “Where the Wild Things Are,” using elements like color and additional fabric can bring these characters to life.
- Seasonal Themes: Adapt your rubber boot dog to the changing seasons. Use pastel boots and floral patterns for spring, or bright colors and sunglasses for a summer-themed dog. For fall, consider boots with leaf patterns, and for winter, accessorize with a scarf or a snowy white color scheme.
Play with Colors
- Monochromatic Magic: Create a sleek, modern look by choosing boots in varying shades of the same color. This approach gives the artwork a cohesive yet visually interesting appearance.
- Bold and Bright: Go vibrant by selecting boots in bold and contrasting colors. This will make your rubber boot dog a standout piece that adds a pop of color to any room.
Add Textures and Materials
- Fabric and Textiles: Enhance your boot dog with materials like felt, leather, or burlap. These can be used to create detailed features like ears, tails, or even decorative collars, adding depth and texture.
- Natural Elements: Incorporate materials from nature, such as small branches for legs or a tail, or floral arrangements around the neck like a lei. This can help your boot dog blend beautifully with outdoor decor.
Incorporate Patterns
- Pattern Play: Choose boots with interesting patterns, or paint your own designs onto plain boots. Stripes, polka dots, or even thematic motifs like paw prints or bones can add an element of fun and artistic flair.
- Cultural Patterns: Draw inspiration from different cultures, like using Aztec prints or Scandinavian designs, to give your boot dog a unique cultural twist.
Focus on Functionality
- Garden Guardian: Convert your rubber boot dog into a functional piece by adding a small planter space at the top, turning it into a whimsical guardian for your garden.
- Illuminating Feature: Incorporate a small LED light inside the boot dog, turning it into a charming night light or a glowing garden feature that enhances the ambiance of your outdoor spaces at night.
Personalize with Accessories
- Collars and Tags: Add a personalized collar made from a strip of leather or a colorful fabric. Attach a tag with your boot dog’s name or a fun message engraved on it.
- Hats and Apparel: Depending on the season or occasion, dress up your rubber boot dog with hats, scarves, or even a painted-on bandana. Each accessory can highlight special events or simply add more character.
Interactive Elements
- Movable Parts: For those who are more mechanically inclined, adding joints or hinges to parts like the head or tail can make your rubber boot dog an interactive piece of art.
- Sound Components: Incorporate a small sound chip that barks or plays music when pressed. This can be especially delightful in a setting where children are present.
Customizing your rubber boot dog allows you to engage your creativity while repurposing materials in an environmentally friendly way. Whether displayed in your garden, used as a doorstop, or given as a personalized gift, each rubber boot dog can carry a charm and character as unique as its creator.
How to Care for and Display Your Rubber Boot Dog
Creating a rubber boot dog is not only a fun DIY project but also an opportunity to add a unique piece of art to your home or garden. Once you’ve crafted your rubber boot dog, proper care and thoughtful display are essential to maintain its charm and ensure it can be enjoyed for years to come. Here are some tips on how to care for and effectively display your rubber boot dog.
Placement Considerations
- Indoor Display: If displayed indoors, place your rubber boot dog in a location where it will complement your existing decor. Ideal spots might be entryways, corners of living rooms, or as a whimsical addition to a child’s bedroom. Ensure it’s positioned away from high traffic areas to avoid it being knocked over.
- Outdoor Display: For outdoor displays, choose a sheltered spot such as under a porch or amidst a garden to protect your creation from harsh weather conditions. Sunlight can fade colors and rain can cause wear, so a semi-protected environment is best.
Environmental Protection
- Weatherproofing: If your rubber boot dog is to be kept outside, consider applying a clear weatherproof sealant. This can help prevent fading and wear from exposure to elements like UV rays and moisture.
- Temperature and Humidity Control: For indoor pieces, avoid placing your rubber boot dog near heat sources such as radiators or air conditioning vents. Extreme temperatures and fluctuations in humidity can cause materials to deteriorate over time.
Cleaning and Maintenance
- Regular Dusting: Use a soft brush or cloth to gently dust your rubber boot dog. This will prevent dust accumulation which can dull the appearance over time.
- Spot Cleaning: Should your rubber boot dog get dirty, use a damp cloth to gently clean the surface. Avoid harsh chemicals or abrasive cleaners that could damage the paint or material of the boots.
Enhancing Stability
- Securing the Base: To prevent your rubber boot dog from tipping over, consider securing it to a base. A simple wooden or acrylic base can add stability and make the piece easier to move without damage.
- Weight Distribution: Ensure that any additions or modifications, like the placement of plants or accessories, do not offset the balance of your rubber boot dog, making it prone to falling over.
Interactive Displays
- Seasonal Updates: Change accessories like scarves, hats, or collars seasonally to keep your rubber boot dog looking fresh and engaging throughout the year.
- Lighting: Adding a spotlight or arranging ambient lighting around your rubber boot dog can enhance its features and make it a focal point in any room or garden.
Long-Term Care
- Check for Wear and Tear: Periodically check your rubber boot dog for signs of wear or damage. Addressing issues like cracks or loose parts promptly can help maintain its appearance and structural integrity.
- Refresh and Update: Over time, consider refreshing your rubber boot dog with new paint or additional decorative elements. This can help rejuvenate its look and allow it to evolve with your changing tastes and decor.
Proper care and strategic display of your rubber boot dog will not only prolong its life but also enhance its appeal as a piece of home decor. Whether you choose to keep it indoors or make it a part of your garden landscape, your rubber boot dog can provide a delightful touch of creativity and personality to your space.
Conclusion
A rubber boot dog serves as a charming and eco-friendly addition to any home decor, blending creativity with sustainability. Its quirky design adds a whimsical touch that can spark conversations and delight visitors. Properly cared for and displayed, this unique piece can offer lasting enjoyment and style in any setting.
For more unusual home decoration, check out our wood block clock project!


