Shoes and boots are your hardest-working accessories, and they aren’t cheap. Despite the expense, however, it is easy enough to fall into the habit of carelessly piling them up inside a closet. But knowing how to store shoes properly will help you keep them supple and wearable for years. And that can save you a lot of money.
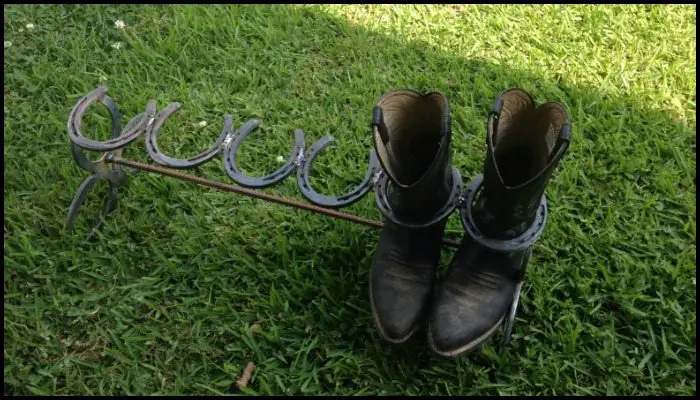
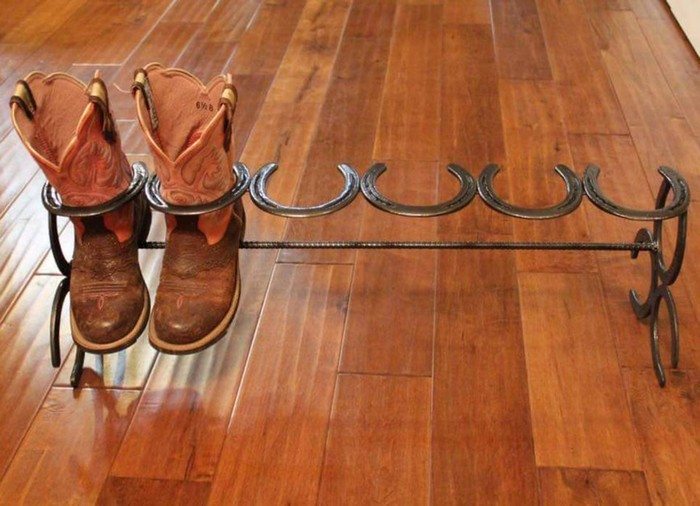
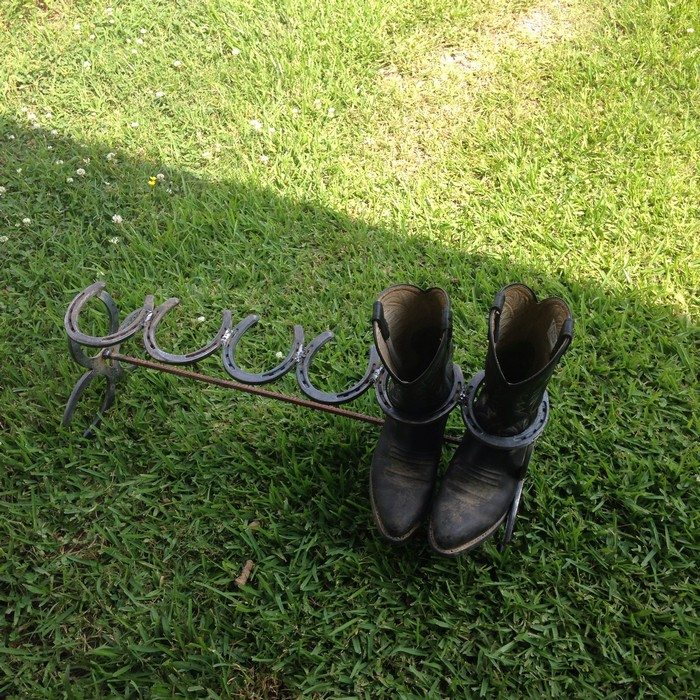
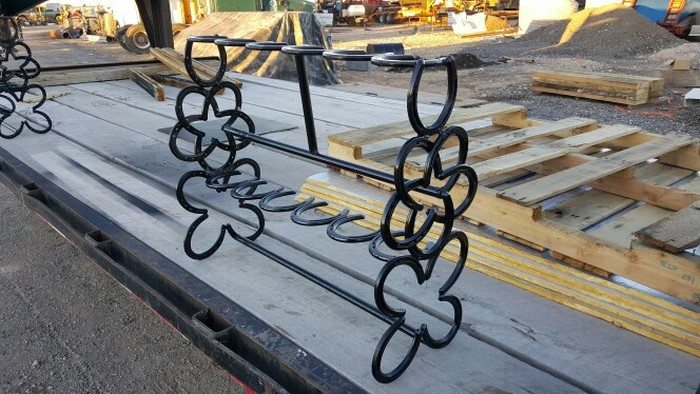
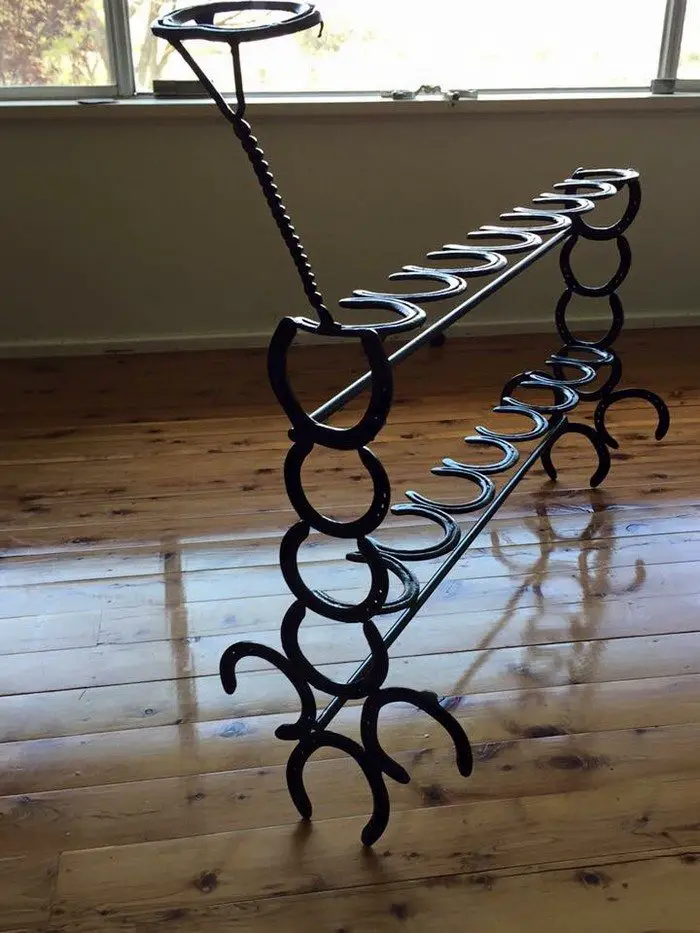
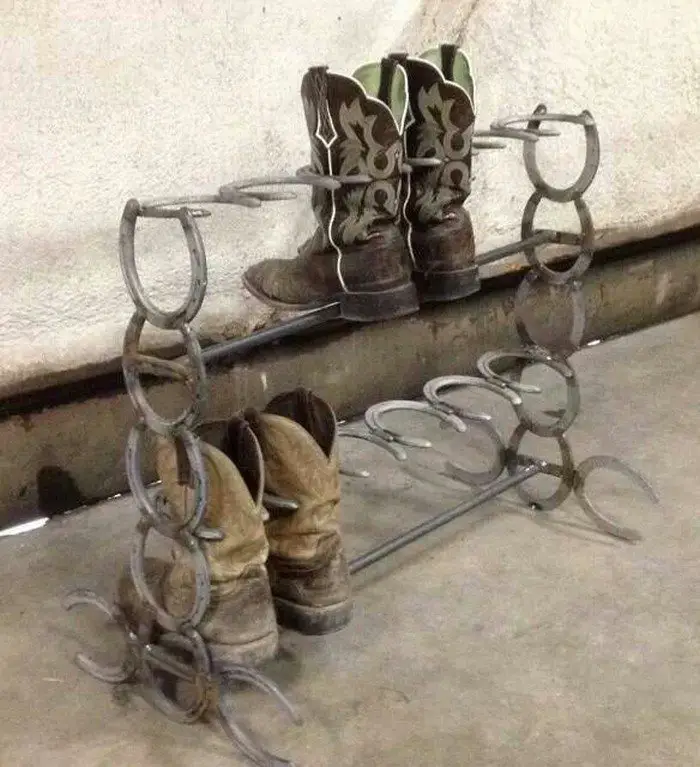
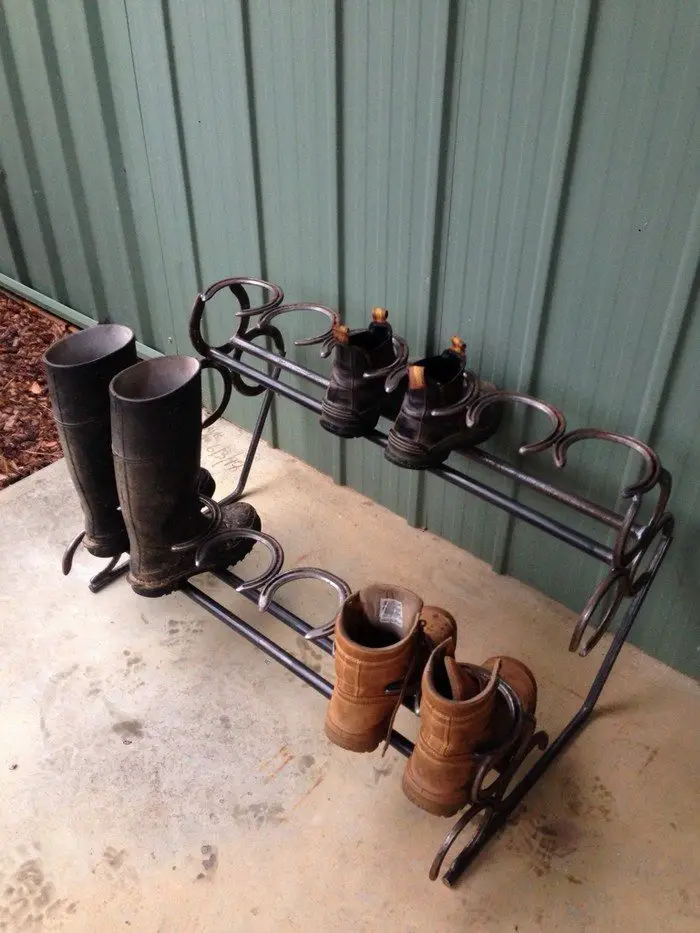
Got plenty of boots or high-top sneakers and having trouble storing them? This horseshoe boot rack is the perfect storage rack for them!
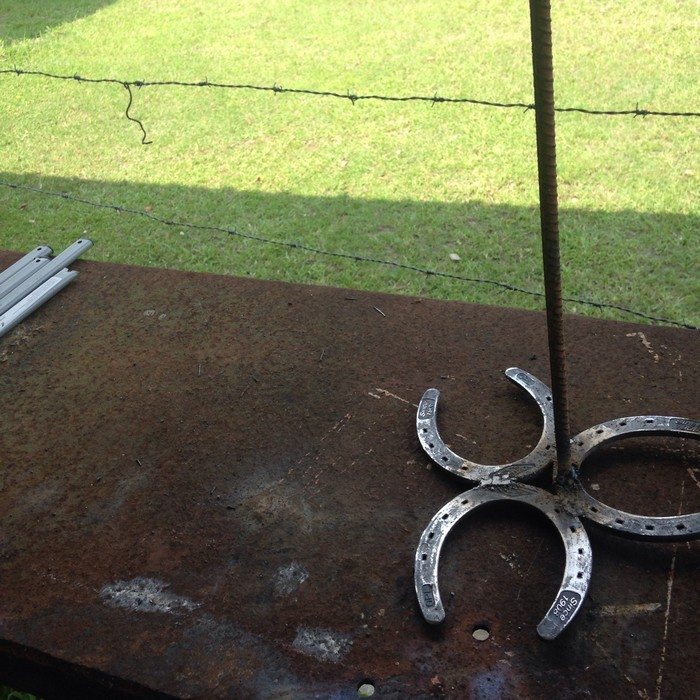
This project is easy metalwork that simply involves attaching horseshoes side by side. Rebar is also attached under the horseshoes because this is where your boots will sit. The higher the boots, the farther down the rebar should be from the horseshoe. If it is for high-top sneakers, then the rebar should be installed closer to the horseshoe. This way the horseshoe can hold the shaft in place.
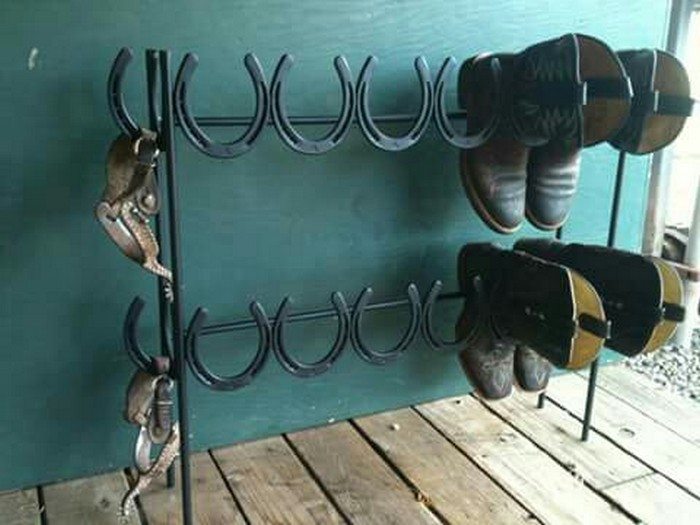
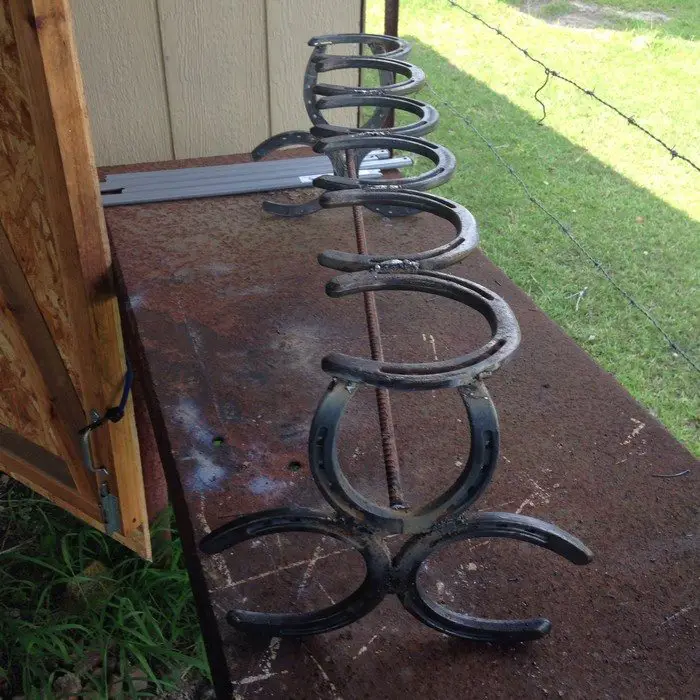
There are also other horseshoe boot rack designs that you can build – it all depends on what you like and the kind of boots you have. You can even add an extra piece of rebar with a horseshoe at the side to prop your hat on. You can also design one that includes an umbrella holder.
This project is not just a unique boot rack that you can build for yourself – it is also a great DIY gift idea for friends and family. :)
So is this going to be your next project?
Contents
Building a Horseshoe Boot Rack
Materials
- Horseshoes
- Rebar
Tools
- Welder
Instructions
Step 1: Design Your Rack
- Decide on the size of your boot rack. A standard size can hold three pairs of boots, requiring 12 horseshoes and a piece of rebar about 24 inches long.
Step 2: Prepare Materials
- Clean the horseshoes and rebar with a wire brush to remove rust or debris. This ensures a stronger weld.
Step 3: Lay Out the Sides
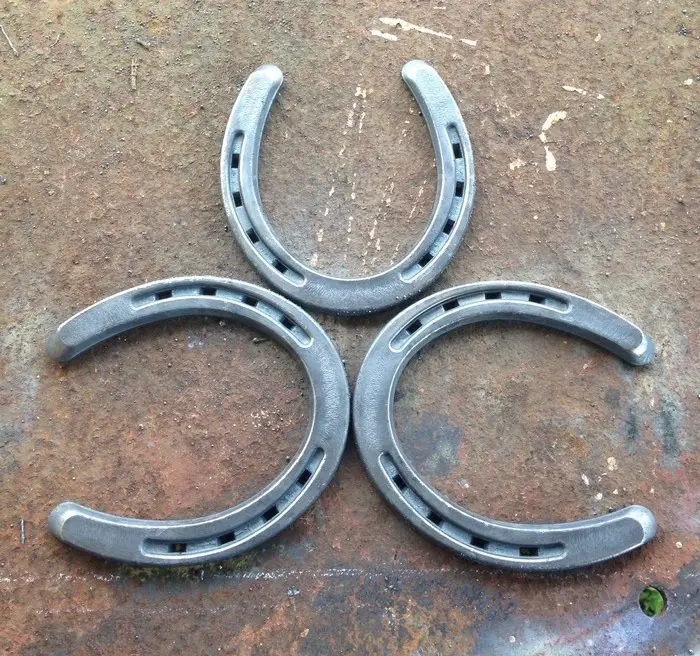
- For each side of the rack, align three horseshoes in a triangular formation. This will provide a stable base.
Step 4: Weld the Sides
- Put on your welding mask and gloves. Weld the sides of the horseshoes together where they touch. Repeat for the other side of the rack.
Step 5: Attach the Rebar
- Measure and cut the rebar to the desired length. This will serve as the support bar for the boots.
- Connect the rebar to the bottom of your horseshoe with your welding torch. Make sure the bar is parallel to the base of the shoes. This connects the sides and provides a place for the boots to rest.
Step 6: Weld Top Horseshoes
- Arrange six horseshoes in a row on top of the sides. These will act as holders for the boots.
- Weld each horseshoe in place, ensuring they are evenly spaced and securely attached.
Step 7: Finishing Touches
- Use an angle grinder to smooth any rough edges or excess weld material. This step is optional but recommended for a clean finish.
- Clean the rack with a wire brush to prepare for painting or sealing.
Step 8: Prime and Paint
- Apply a primer to prevent rust. Once the primer is dry, paint the rack in your chosen color. Rust-resistant paint is best for longevity.
Step 9: Let It Dry
- Allow the paint to fully dry before using the rack to store your boots.
Tool Safety and Welding Techniques for Beginners
Before diving into your project, understanding and respecting the power of welding tools is crucial. Welding involves intense heat, bright light, and the manipulation of metal, posing potential hazards without proper precautions. Ensuring a safe welding environment is the first step toward successfully creating your horseshoe boot rack.
Personal Protective Equipment (PPE)
- Welding Helmet: Protects your face and eyes from ultraviolet light, sparks, and debris.
- Gloves: Use heavy-duty, fire-resistant gloves to shield your hands from heat and metal splinters.
- Protective Clothing: Wear long sleeves and pants made from thick, natural fibers to prevent burns. Avoid synthetic materials that can melt onto the skin.
- Safety Glasses: Wear them under your welding helmet for additional eye protection.
- Ear Protection: Earplugs or earmuffs protect against noise from grinding and welding.
Setting Up Your Workspace
- Ventilation: Welding can produce harmful fumes. Work in a well-ventilated area or use a fume extractor to minimize inhalation risks.
- Fire Safety: Keep a fire extinguisher nearby. Ensure the area is free of flammable materials to prevent accidental fires.
- Secure Setup: Clamp down the horseshoes and rebar firmly to your workbench to prevent movement while welding your boot rack.
Basic Welding Techniques for Your Horseshoe Boot Rack
- Starting the Arc: Practice striking the arc on scrap metal before starting on your boot rack. A smooth, consistent start is key to a strong weld.
- Travel Speed and Angle: Maintain a steady travel speed and keep the welding gun at a 15 to 20-degree angle relative to the surface. This ensures even welds that fully penetrate the metal pieces of your boot rack.
- Welding in Sections: Avoid continuous long welds to minimize warping. Short, staggered welds across your boot rack project will result in a stronger and cleaner finish.
- Cooling Periods: Allow your horseshoe boot rack to cool periodically. This prevents overheating, which can warp the horseshoes and rebar, affecting the final shape of your boot rack.
Practice Makes Perfect
- Trial Runs: Before starting on your horseshoe boot rack, practice welding on similar materials. This will help you get comfortable with welding and understand how the metal reacts.
- Patience and Learning: Each weld project, including your horseshoe boot rack, improves your skill. Don’t be discouraged by initial mistakes; they’re valuable learning experiences.
Constructing a horseshoe boot rack as a beginner welder is a rewarding project and an excellent welding introduction. By following these safety guidelines and techniques, you’ll ensure a safer welding experience and a functional and stylish addition to your home. Remember, the journey of mastering welding takes time and dedication. Each project, including your horseshoe boot rack, builds your skills and confidence in this valuable craft.
Click on any image to start the lightbox display. Use your Esc key to close the lightbox. ?
Care and Maintenance of Horseshoe Boot Racks
Crafting a horseshoe boot rack is not just an exercise in creativity and craftsmanship; it’s also an investment in your home’s organization and aesthetic appeal. Like any valued piece, a horseshoe boot rack requires proper care and maintenance to ensure it remains both functional and visually striking for years to come.
This section delves into the essentials of keeping your boot rack in prime condition, blending practicality with preservation.
Regular Cleaning
Begin with a soft brush or cloth to remove dust and dirt on your horseshoe boot rack. Regular dusting prevents build-up that can obscure the rack’s finish and detail.
Use a damp cloth to wipe down the horseshoes and rebar for a deeper clean. If necessary, a mild soap solution can be applied, but ensure that the rack is dry thoroughly afterward to prevent rusting.
Rust Prevention
Periodically inspect your boot rack for signs of rust or corrosion, especially if it’s placed in areas with high humidity or direct exposure to the elements.
Applying a clear coat of metal sealant or rust protector annually can shield your rack from moisture and prevent rust. This step is crucial for racks located in entryways or outside.
If rust appears, address it promptly. Use a wire brush to scrub the affected area gently, then apply a rust converter before re-sealing the metal.
Paint Touch-Ups
The paint on your horseshoe boot rack may chip or scratch over time. You can easily touch up these areas using matching paint to keep the rack looking fresh and new.
A complete repaint can be undertaken for a more significant refresh or style change. Ensure to remove old paint and rust, prime the metal, and apply your new choice of paint, following with a sealant for durability.
Environmental Considerations
The ideal location for your horseshoe boot rack significantly influences its endurance. By positioning the rack indoors or under a covered area, you shield it from direct exposure to the elements. Sun, rain, and snow can accelerate wear, leading to fading, rust, and corrosion.
An indoor setting or a sheltered outdoor space not only preserves the integrity of the metal but also maintains the rack’s rustic charm, making it a lasting addition to your home’s organization and decor.
Humidity and moisture are primary culprits in the battle against rust and corrosion, especially for metal items like your horseshoe boot rack. In regions or seasons when dampness prevails, placing a dehumidifier near your boot rack can significantly reduce the risk of moisture damage.
This proactive step keeps the air around your boot rack drier, thus mitigating the potential for rust development and ensuring that your rack continues to provide a sturdy, attractive home for your boots.
Seasonal Adjustments
Adapting to the changing seasons is crucial for caring for your horseshoe boot rack, particularly in locales prone to harsh winter weather. Salt and melted snow from boots can be detrimental, not only to the floors beneath but also to the rack itself.
Implementing a strategy to manage salt and moisture during winter months is essential. Placing a drip tray underneath your boot rack is a simple yet effective approach. This tray collects water, preventing it from pooling on the floor where it can cause damage or create a slipping hazard.
Moreover, it minimizes the contact between salty, corrosive water and the base of your boot rack, thereby reducing the likelihood of rust and extending the lifespan of your cherished piece.
Routine Inspections
Make it a habit to examine your boot rack regularly for signs of wear, loose components, or potential weak points. Inspect each horseshoe and the rebar for any movement or detachment. If you discover any loose parts, address them promptly.
Tightening or, if necessary, re-welding these elements ensures the rack remains safe and preserves its structural integrity. Such diligence guarantees that your horseshoe boot rack will continue to serve as a reliable, secure storage solution for your footwear, maintaining its functionality and aesthetic appeal for years.
Maintaining your horseshoe boot rack involves routine care, preventative measures, and timely interventions to address wear and tear. By following these guidelines, you can enjoy your rack’s functional beauty and rustic charm for many years, making it a storage solution and a cherished piece of your home’s decor.
Conclusion
Welding a horseshoe boot rack offers a unique blend of practicality and artistic expression, creating a durable storage solution that adds rustic charm to any home. Mastering the welding process for this project enhances one’s DIY skills and results in a personalized piece that proudly displays your footwear. This boot rack becomes a functional centerpiece that stands the test of time through careful crafting, adherence to safety standards, and regular maintenance.
Do you still have more horseshoe at hand? Read our post on the 10 repurposed horseshoe projects!


