
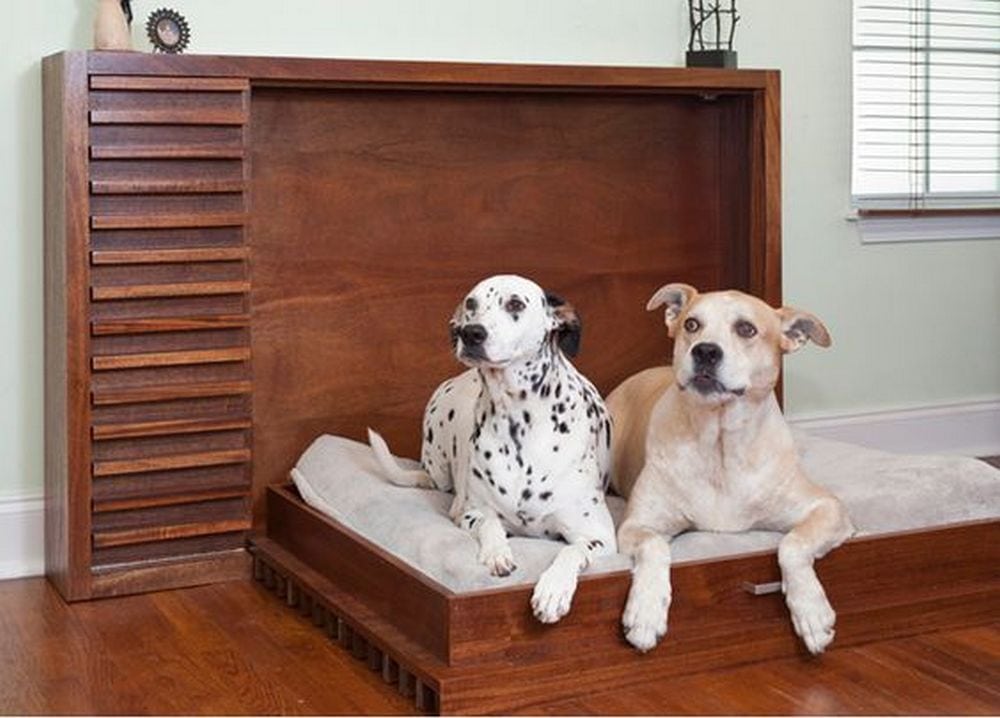
I love my pets. I have a goldfish, a gorgeous macaw, and a beagle. I love all of them equally, of course. But one day, my youngest son told me I was playing favorites and that I don’t like the dog at all. My son was close to crying and so I asked why. He said that the dog has no place of its own to sleep in. The fish has the bowl, the bird has the cage, and the dog sleeps on the floor. My bad.
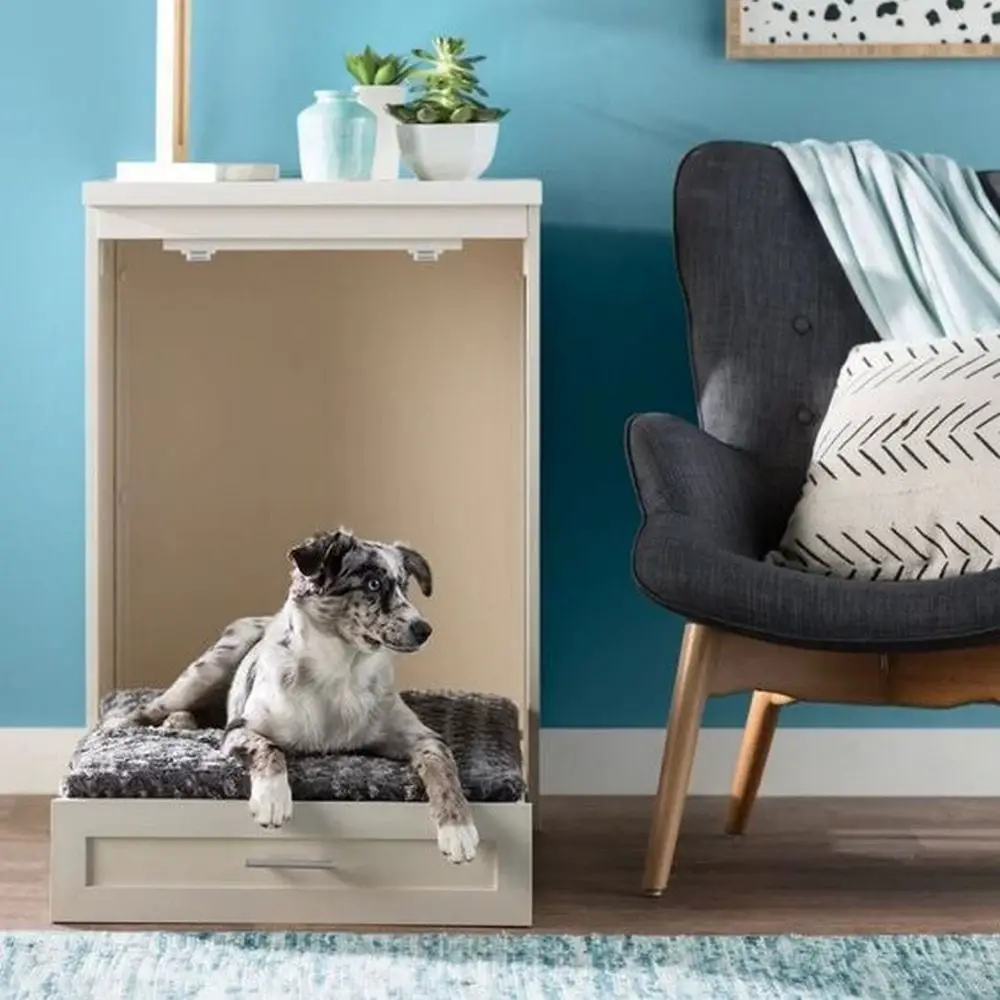
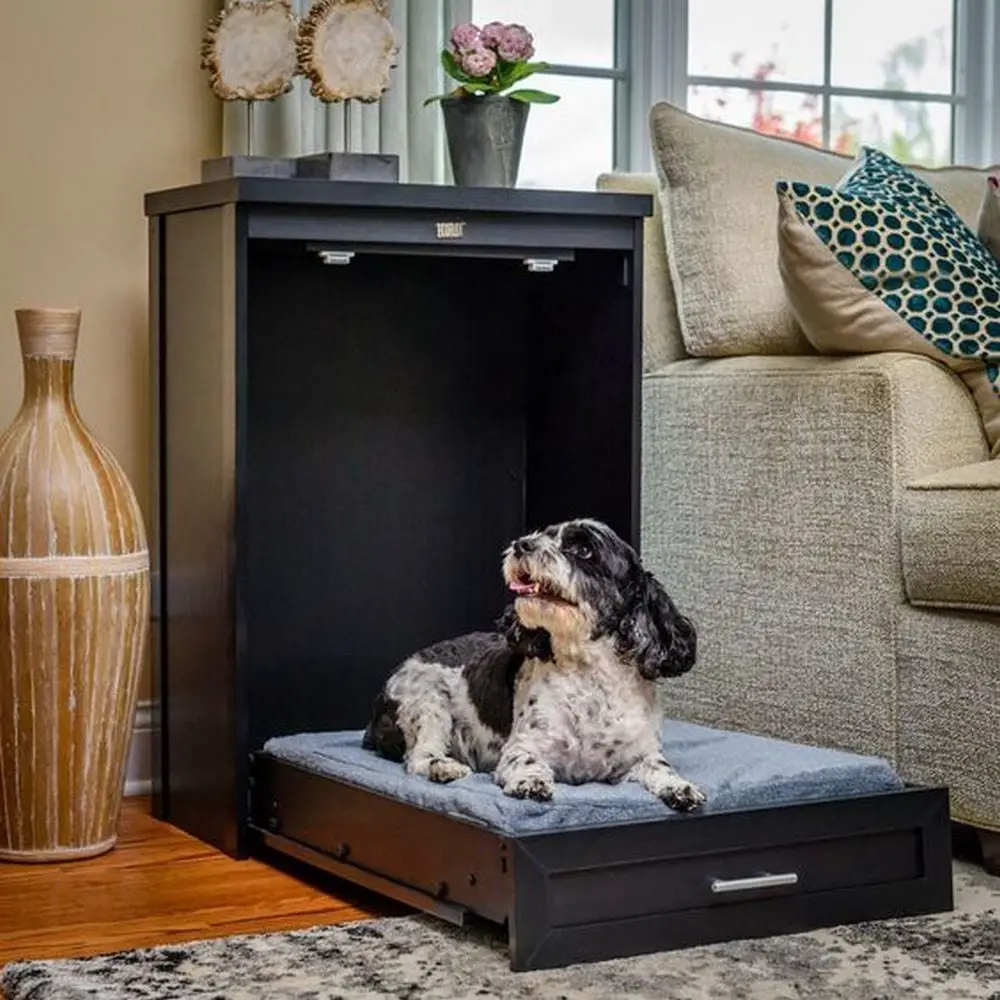
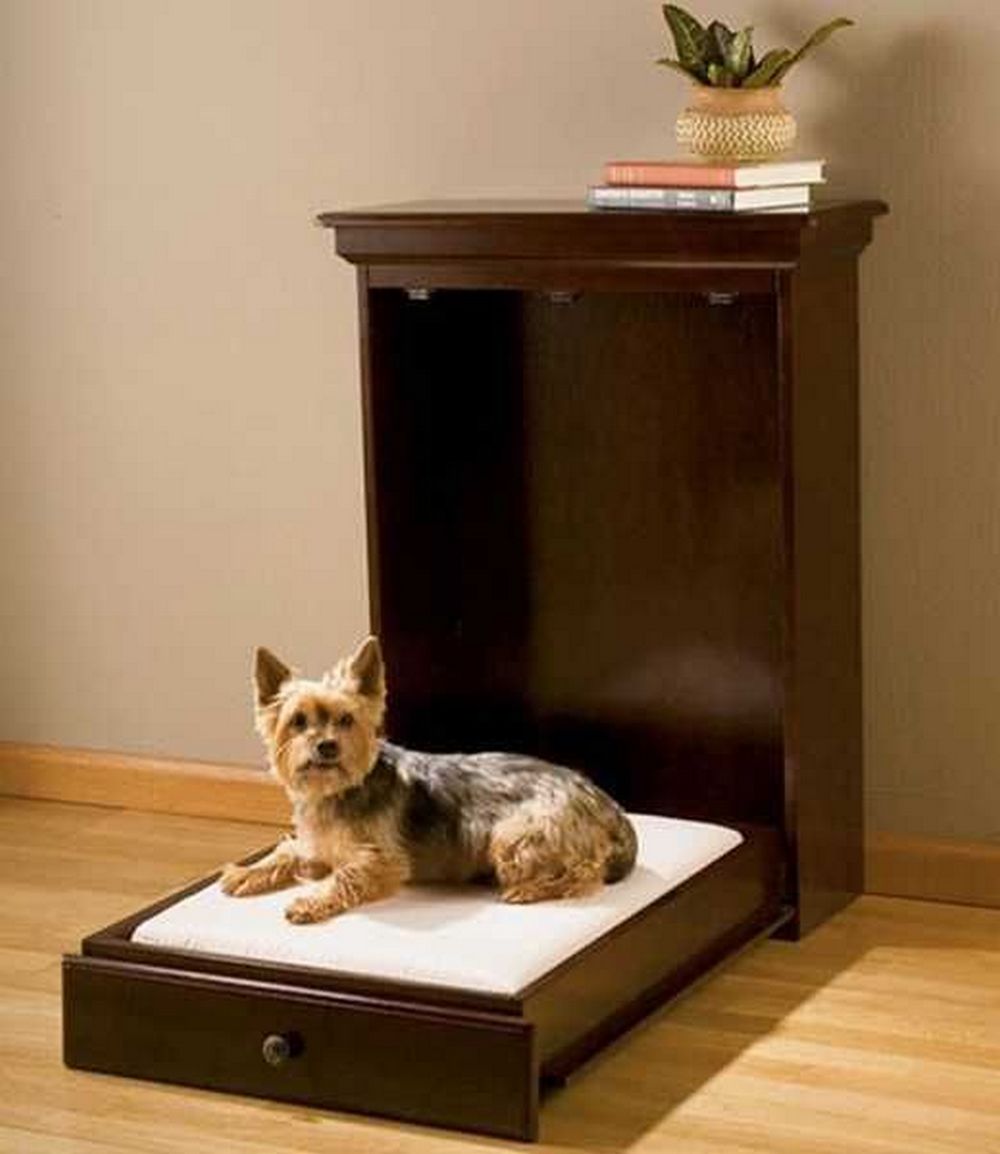
And so my husband and I went to work. The first thing that we did was look up DIY dog bed projects online. Good thing we came across this beautiful pet murphy bed. Right then and there, we decided we’ll make one. And that we did.
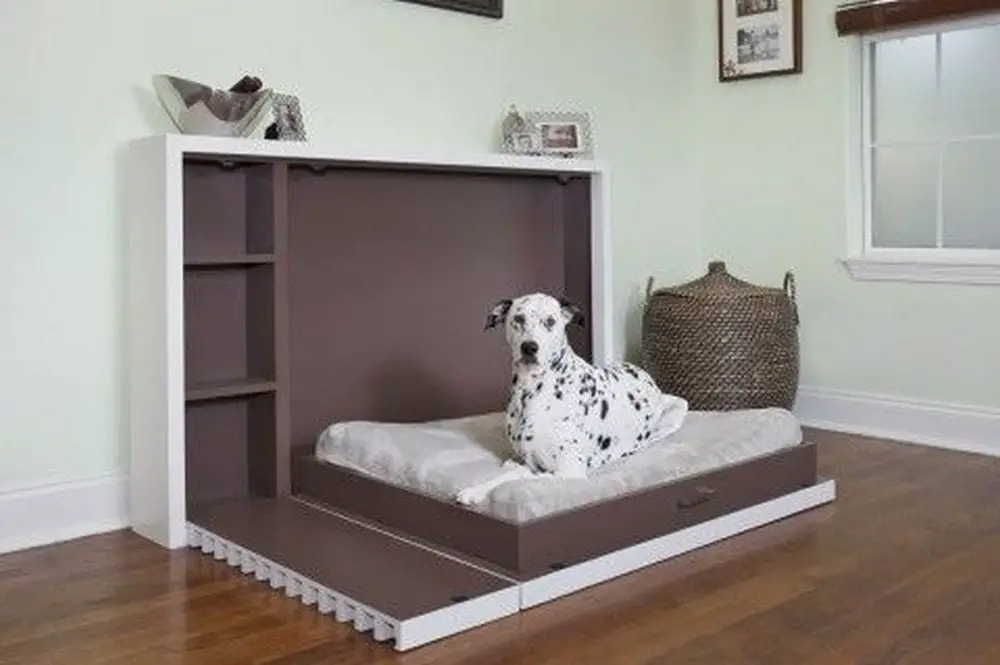
We love that it’s so easy to store away – one lift and it’s out of sight. It’s functional and doesn’t take up space when not in use. Our pet beagle loves it so much he’s been sleeping soundly!
Contents
Building a Pet Murphy Bed
Materials
- Wood (cut to size)
- Wood glue
- Finishing nails
- Trim-head screws
- Toy-box hinge
- Magnetic catches
- Wood filler
- Primer
- Semi-gloss paint
- Locking pin
Tools
- Miter saw
- Circular saw
- Pneumatic nailer
- Screwdriver
- Putty knife
- Paint brush
Instructions
Step 1: Cut the Wood
- Cut the wood to the necessary widths for the front panel, bed frame, and bed platform using the circular saw. Make sure every component is exactly measured to fit your particular pet weight and available area.
Step 2: Assemble the Frame
- Arange the frame parts on a level ground. After applying wood glue to the joints, pneumatic nailers will help you to fasten them. Verify the frame is square then let the glue set.
Step 3: Attach the Bed Platform
- Arange the bed platform inside the frame. Drilling trim-head screws through the frame into the platform will help to secure it. Your pet sleeps mostly here, thus make sure it’s strong.
Step 4: Install the Toy-box Hinge
- Attach the toy-box hinge to the top edge of the bed platform and the matching section to the frame. When not in use, this hinge will enable the bed to fold up into the frame.
Step 5: Apply Wood Filler
- Applying wood filler to any gaps or nail holes on the bed frame and platform with the putty knife can help Let it dry totally; then, for a clean finish, sand smooth.
- Step 6: Prime and Paint.
Step 6: Prime and Paint
- Using a paint brush, give every wood surface a coat of primer. Follow up with a coat or two of semi-gloss paint in your preferred color once the primer has dried. Let it totally dry.
Step 7: Install Magnetic Catches
- Install magnetic catches at the rear of the bed platform and inside the frame. When the bed is folded up, these will ensure a tight closing.
Step 8: Install Locking Pin
- Attach the side of the frame the locking pin mechanism to. When the bed is folded down, this will serve as extra safety measure to secure it in place.
Step 9: Final Assembly
- To guarantee everything is tight and safe, check all hinges and screws. As necessary for seamless operation, make any changes.
Step 10: Add Comfort Features
- To make the platform cozy for your pet, add cushions, a comfy mattress, or bedding.
Click on any image to start the lightbox display. Use your Esc key to close the lightbox.


You can get more step-by-step instructions here…
Design Variations for Different Pets
When designing a pet Murphy bed, it’s important to consider the specific needs and sizes of different pets. A well-designed bed not only provides a comfortable sleeping area but also integrates seamlessly into your home decor while saving space. Here, we explore several design variations to help customize the pet Murphy bed for various types of animals.
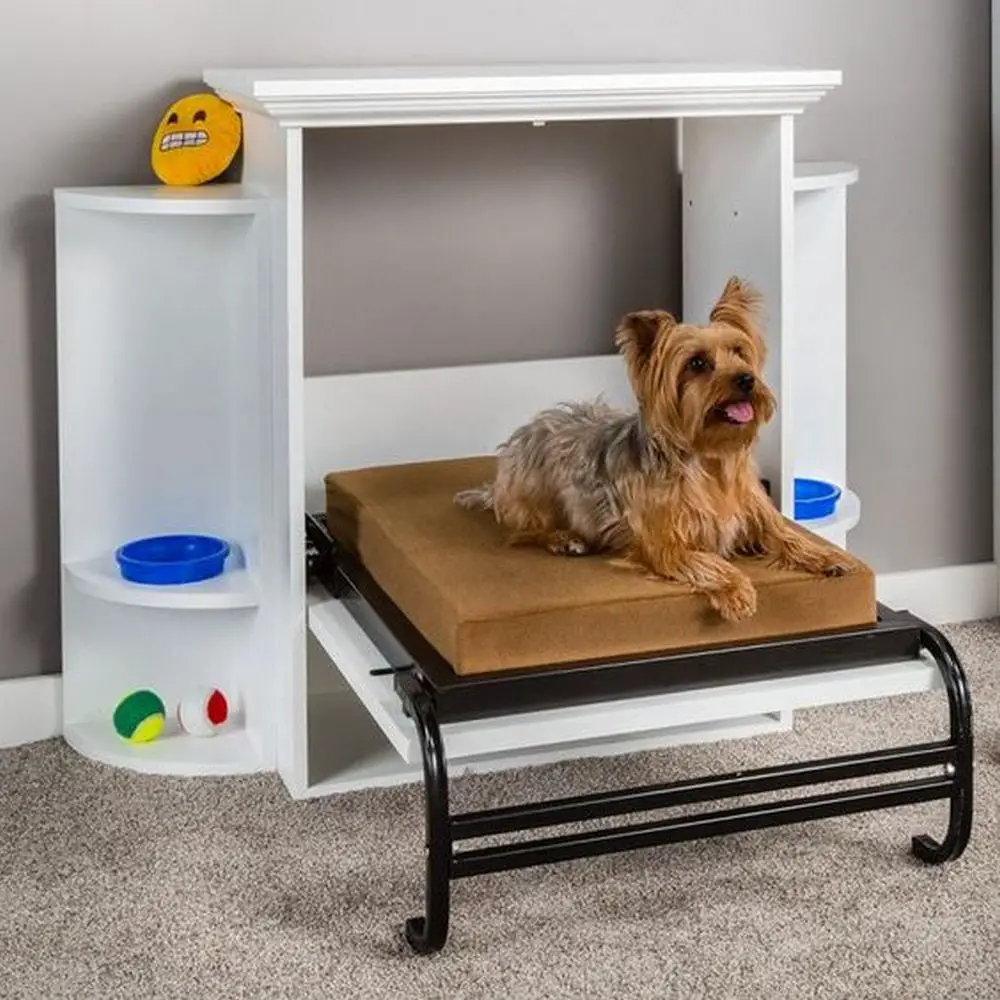
For Small Dogs and Cats
Compact and Cozy: Small dogs and cats require less space but prioritize comfort and warmth. Design the pet Murphy bed with a smaller frame and include a heated pad or soft, plush materials that cater to their love of snug spaces. Installing additional cushions that can be easily removed and cleaned will also help keep the area hygienic and cozy.
For Large Dogs
Robust and Spacious: Large dogs need a sturdier and more spacious version of the pet Murphy bed. Use thicker wood and reinforce the structure to support heavier weights. The bed should be low to the ground to make it easy for larger breeds to access without jumping. Consider a side entry, which can be easier for big dogs to maneuver in and out of.
For Multiple Pets
Multi-Level Design: If you have multiple pets that like sleeping together, consider a multi-level pet Murphy bed. This design can include separate compartments for each pet while only taking up the vertical space of one bed when folded up. Ensure each compartment has its own locking mechanism for safety and stability.
For Cats Specifically
Incorporate Play Features: Cats love to climb and explore, so adding play features into the pet Murphy bed design can make it more appealing. Include scratch pads, hanging toys, or even a small climbing tree that folds out when the bed is down and tucks away neatly when not in use. This approach not only provides a bed but also a play area, making it a perfect multifunctional solution for active cats.
Each variation of the pet Murphy bed is tailored to meet the unique needs and behaviors of different pets, ensuring they have a safe, comfortable place to rest that also compliments your living space.
Maintenance and Care
Maintaining and caring for your pet Murphy bed ensures that it remains a comfortable and safe space for your pet to rest, while also preserving its aesthetic and functional qualities over time. Proper maintenance not only extends the lifespan of the pet Murphy bed but also helps in keeping your pet healthy and happy. Here, we outline essential tips for the upkeep and care of your pet Murphy bed, providing a guide to help you keep it in top condition.
Regular Cleaning
- Weekly Bedding Wash: To maintain a hygienic environment for your pet, wash the bedding of the pet Murphy bed at least once a week. Use a gentle, pet-safe detergent and ensure that the bedding is completely dry before placing it back on the bed. This helps prevent the buildup of allergens and bacteria, which can cause skin irritations and other health issues in pets.
- Surface Wipe-down: Regularly wipe down the outer surfaces of the pet Murphy bed using a damp cloth. For wooden surfaces, use a cleaner that is safe for wood and non-toxic to pets. This will help remove dust, pet hair, and potential paw marks, keeping the bed looking clean and fresh.
Inspection and Repairs
- Monthly Mechanism Check: Inspect the folding mechanism of the pet Murphy bed each month. Ensure that all hinges, screws, and locking pins are tight and functioning correctly. Lubricate the hinges lightly if they begin to squeak or show resistance. This preventive maintenance prevents accidents caused by malfunctioning components.
- Surface Integrity Check: Regularly check for any signs of wear such as chips, cracks, or loose wood pieces on the pet Murphy bed. Use wood filler to repair any minor damages and touch up with paint or sealant to protect against moisture and pests. Keeping the wood intact and well-sealed ensures the structural integrity of the bed and prevents injuries to your pet.
Odor Control
- Deodorizing the Bed Area: Pets can often leave behind a natural odor that may become trapped in the bedding or the wood of the pet Murphy bed. To combat this, use natural deodorizers like baking soda. Sprinkle baking soda on the bed’s surface during cleaning, let it sit for a few hours, and then vacuum or wipe it off. This will help absorb odors without the use of harsh chemicals.
- Ventilation Strategies: Ensure that the pet Murphy bed is placed in a well-ventilated area to prevent the accumulation of dampness and odor. If the bed is in a more enclosed space, consider using moisture absorbers or small fans to improve air circulation. This helps keep the bed dry and odor-free, making it more inviting for your pet.
Protecting the Bed
- Use of Protective Covers: Consider using a removable and washable cover for the pet Murphy bed. These covers not only make cleaning easier but also protect the mattress and the wooden parts from potential damage and stains. Choose a durable fabric that can withstand frequent washing and is comfortable for your pet.
- Pet Training: Train your pet to use the pet Murphy bed properly. Discourage behaviors such as scratching, biting, or chewing on the bed. Providing alternative toys and scratch pads can redirect these natural behaviors away from the bed, keeping it in better condition.
Seasonal Adjustments
- Warmth in Winter: During colder months, add extra blankets or a warming pad to the pet Murphy bed to provide additional warmth for your pet. Ensure any electrical elements are safely installed and regularly checked for damage.
- Cooling in Summer: In warmer weather, switch to lighter, breathable fabrics for the bedding to help regulate your pet’s temperature. Consider placing the bed in a cooler part of the house away from direct sunlight.
Properly maintaining your pet Murphy bed not only enhances your pet’s comfort but also contributes to the overall cleanliness and orderliness of your home environment. By following these care tips, you can ensure that the bed remains a beloved, durable retreat for your pet for years to come.
Conclusion
Constructing a pet Murphy bed offers your cherished animal friend a cozy and room-saving sleeping place. Appropriate materials and a little DIY attitude will help you design a bed that combines utility with elegance so your pet rests comfortably and safely. This project improves the quality of life for your pet as well as gives your house décor a distinctive, individual touch.


