We have several paintings at home given to us by our friend who’s a very good painter. She usually gives us her artwork when there’s an occasion. And these aren’t just random paintings. They’re mostly paintings that mean a lot to us.
Because her gifts are personalized, we feel guilty that we just give her stuff we bought from the mall. When we got the invitation for her first solo exhibit, my husband and I decided that we give her something with sentimental value.

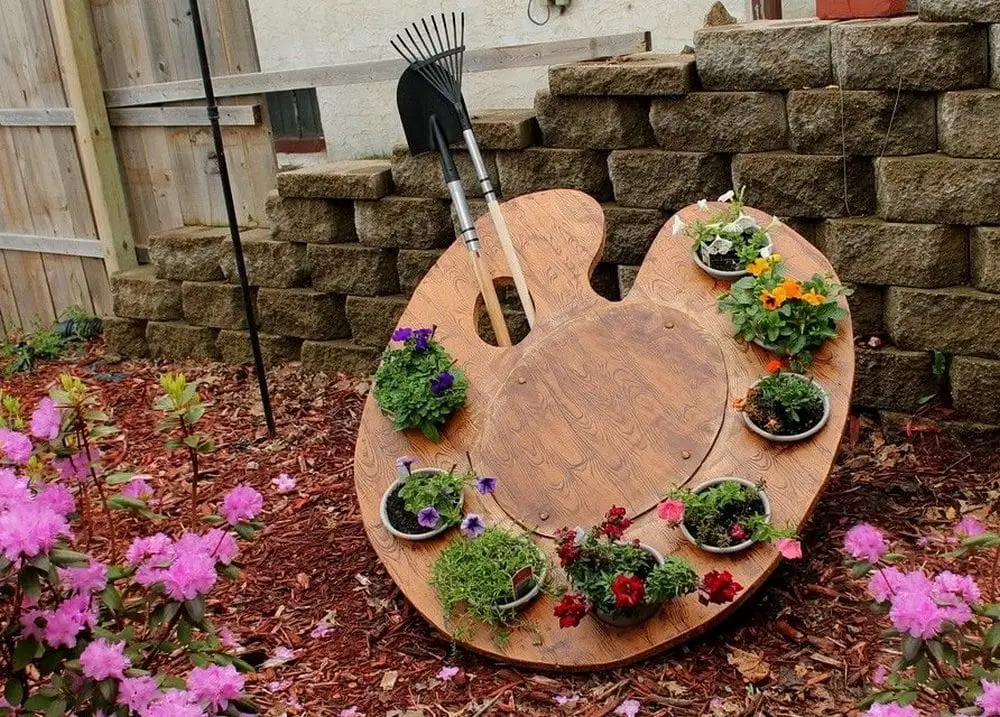
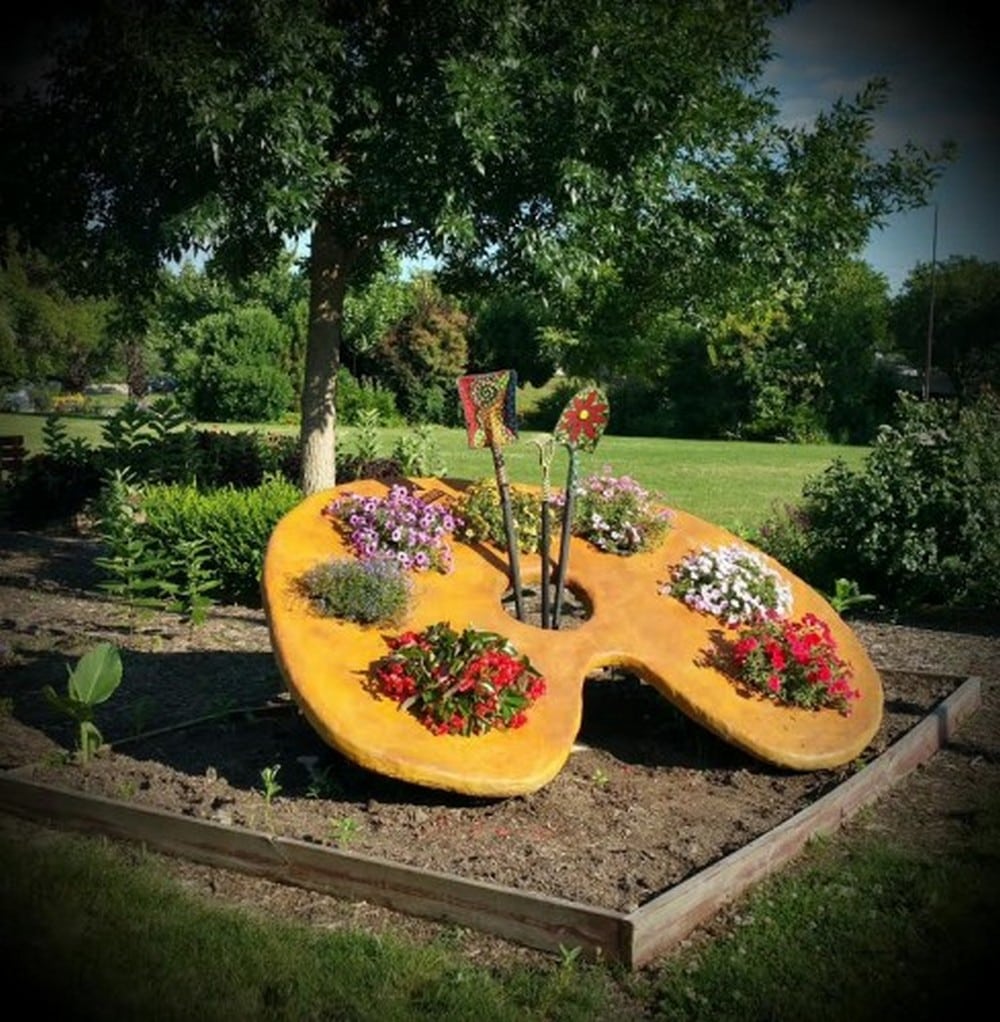
Fortunately, we saw this DIY paint palette planter which is just the ideal gift for her. Aside from her love for painting, she is also quite passionate about gardening. It’s hitting two birds with one stone. She gets to display her love for gardening and showcase her talent for painting!
This is a unique way to bring life to a typical garden. Imagine several colored flowers blooming and looking like they’re painted!
Contents
Making a Paint Palette Planter
Materials
- 1 – 1/2 Sheet of 2″ foam board (or plywood)
- 1″ x 4″ x 6′ pine board (or scrap wood)
- Jigsaw
- Flowers
- Flower pots
- Paint
- Primer
- 3M blue masking tape
- 2 – 4″ 5/16″ lag bolts
- 4- 2″ 5/16″ lag bolts
- 10 – 5/16″ washers
- gorilla glue
- construction screws
- washer with nuts
- black electrical tape
Tools
- Small shovel and rake
- router
- overhead projector
- sharpie
- laser copier
Instructions
Step 1: Design Your Palette
- Create a Template: Use the overhead projector and sharpie to project and trace a paint palette shape onto your foam board or plywood. You can create a custom design or find a template online that suits your aesthetic preferences.
- Cut Out the Palette: Using a jigsaw, carefully cut out the palette shape from the board. Ensure smooth edges to avoid any rough spots that could snag or be aesthetically displeasing.
Step 2: Prepare the Surface
- Smooth the Edges: Use the router to smooth the edges of your cut-out palette. This gives a professional finish and prepares the surface for painting.
- Apply Primer: Coat the entire palette, front and back, with a layer of primer. This will help the paint adhere better and ensure a longer-lasting finish. Allow the primer to dry completely.
Step 3: Paint the Palette
- Tape Design: Use the 3M blue masking tape to create any designs or patterns on your palette. This could be geometric shapes, stripes, or a freehand design that mimics splattered paint.
- Paint: Apply your choice of paints in the design you desire. You can use multiple colors to mimic a real artist’s palette. Let the paint dry, then remove the masking tape to reveal clean lines.
Step 4: Attach the Supports
- Prepare the Support Strips: Cut the pine board into strips that will act as the frame or stand for your palette. These should be cut to match the dimensions of your palette’s edge.
- Attach the Supports: Using the lag bolts and washers, attach the support strips to the back of the palette. Use gorilla glue along with the bolts for extra stability.
Step 5: Set Up for Planting
- Drill Drainage Holes: Using the jigsaw or a drill, make several drainage holes in the bottom of your palette. This is crucial to prevent water accumulation and ensure plant health.
- Attach Flower Pots: If desired, you can secure flower pots to the palette using construction screws and washers. Alternatively, you can plant directly into the foam board or plywood if it’s thick enough to hold soil and roots.
Step 6: Plant Your Flowers
- Add Soil: Use the small shovel to fill the pots or the palette itself with potting soil.
- Plant Flowers: Choose your desired flowers and plant them into the soil. Use the rake to smooth and properly distribute the soil around the plants.
Step 7: Final Touches
- Apply Protective Coat: If the planter will be outdoors, apply a weather-resistant sealant over the paint to protect it from the elements.
- Decorate: You can add final touches like decorative stones, additional paint details, or even a varnish to give a glossy finish.
Click on any image to start the lightbox display. Use your Esc key to close the lightbox.

You can get more step-by-step instructions here…
Plant Selection for Your Paint Palette Planter
A paint palette planter offers a unique canvas for combining art with nature. The choice of plants can greatly enhance the aesthetic value and thematic intent of your planter. Whether aiming for a burst of color, a play on textures, or a thematic garden piece, selecting the right plants is crucial for achieving your desired outcome.
Consider Sunlight and Exposure
Before choosing your plants, consider where your paint palette planter will be located. Will it be in full sun, partial shade, or full shade? This factor alone can determine which plants will thrive in your planter.
- Full Sun Plants: Opt for sun-loving species like petunias, marigolds, or succulents if your planter is going to bask in several hours of sunlight.
- Partial Shade Plants: For areas that receive a mix of sun and shade, plants like impatiens, begonias, and ferns can be ideal.
- Shade Plants: In less sunny spots, choose shade-tolerant plants such as hostas or caladiums.
Choose Plants for Seasonal Interest
To keep your paint palette planter visually engaging throughout the year, select plants that offer seasonal color and texture changes.
- Spring Blooms: Consider bulbs like tulips or daffodils for early color.
- Summer Vibrancy: Annuals like zinnias and cosmos provide bright, long-lasting flowers.
- Autumn Shades: Add plants with fall interest like ornamental kale or chrysanthemums.
- Winter Texture: Evergreens or winter-blooming pansies can add life during colder months.
Plant Size and Growth Habits
When planning your paint palette planter, think about the mature size of the plants. Use taller plants as a backdrop, mid-sized plants for the body, and trailing plants to spill over the edges.
- Tall Plants: Snapdragon or salvia can add height and structure.
- Medium Plants: Geraniums and heliotropes fill out the middle space nicely.
- Ground Cover and Trailers: Sweet alyssum or ivy can drape beautifully over the edges, enhancing the palette’s artistic appeal.
Color Coordination
Decide whether you want your plant colors to harmonize with your paint choices or create striking contrasts.
- Harmonious Colors: Choose plants that complement the colors on your palette; for instance, pastel flowers with soft-hued paints.
- Contrasting Colors: Opt for bold colors that stand out against the paint backdrop, like bright red geraniums against a blue-painted planter.
Maintenance and Care
If you’re not an experienced gardener, choose low-maintenance plants that require minimal care but still provide visual impact.
- Drought-Tolerant: Succulents and cacti are perfect for busy gardeners or less water-rich environments.
- Self-Cleaning Flowers: Petunias and begonias often don’t require deadheading to keep blooming.
By considering these factors when selecting your plants, your paint palette planter will not only reflect your artistic style but also thrive in its environment, bringing joy and color to your space season after season.
DIY Painting Techniques for Your Paint Palette Planter
Personalizing your paint palette planter is not just about planting your favorite flowers; it’s also about expressing your artistic flair. These DIY painting techniques can help you customize your planter, making it a standout piece in your garden or a thoughtful gift.
Basic Color Blocking
Color blocking is a straightforward technique that involves painting large blocks of colors on your paint palette planter. This method allows for bold contrasts and is a great way to highlight specific areas of the planter.
- Choose two to three complementary or contrasting colors.
- Use painter’s tape to create sharp lines and geometric patterns.
- Apply the paint in sections, letting each color dry before moving on to the next.
This technique ensures that your paint palette planter becomes a vibrant focal point in any space.
Stenciling
Stencils are perfect for adding intricate patterns or icons to your paint palette planter without needing advanced drawing skills.
- Purchase or make your own stencil that reflects a theme you love.
- Secure the stencil onto the planter using tape.
- Use a sponge or small brush to apply paint over the stencil.
- Carefully remove the stencil to reveal a clean, detailed design.
Using stencils, your paint palette planter can feature anything from leaves and flowers to abstract patterns or animal shapes.
Splatter Painting
Splatter painting is a playful technique that brings an energetic and spontaneous feel to your paint palette planter.
- Dip a stiff brush or a toothbrush in paint thinned slightly with water.
- Flick the bristles over the surface of the planter to create a splattered effect.
- Layer different colors for a dynamic appearance.
Each splatter on your paint palette planter will be unique, adding a lively and artistic touch.
Gradient Effect
Creating a gradient effect on your paint palette planter can give it a sophisticated and calming appearance.
- Choose two colors that blend well.
- Start with the lighter color at one end, gradually blending into the darker color as you move.
- Use a dry brush technique to soften the transition between shades.
This technique can make your paint palette planter look like a professional artist’s tool, complete with a custom paint job.
Distressed Look
A distressed paint job can give your paint palette planter an antique look, full of character and rustic charm.
- Paint your planter in a base color and let it dry.
- Apply a layer of candle wax on areas you want to look worn out.
- Paint over with another color and then gently sand the areas with wax to reveal the base layer.
This technique adds a historical depth to your paint palette planter, making it seem as if it has a story to tell.
Sealing and Protecting
After painting, it’s crucial to seal your paint palette planter to protect the design from weather elements and watering.
- Choose a clear outdoor sealant suitable for the paint type used.
- Apply evenly across the entire surface of the planter.
- Allow it to dry completely before planting.
This step ensures that your paint palette planter maintains its beautiful appearance throughout the seasons, preserving your artistic efforts.
By employing these painting techniques, your paint palette planter will not only be a container for plants but also a testament to your creativity and personal style, enhancing the beauty of your home or garden.
Conclusion
Completing your DIY paint palette planter adds a touch of artistic flair and personality to your garden or home. Each step in the creation process allows for customization and experimentation, making your planter a unique showcase of your gardening and artistic skills. Enjoy the blend of beauty and functionality as your flowers bloom in this personalized art piece.
We have more incredible decoration ideas. Check out our bookcase steps guide!


