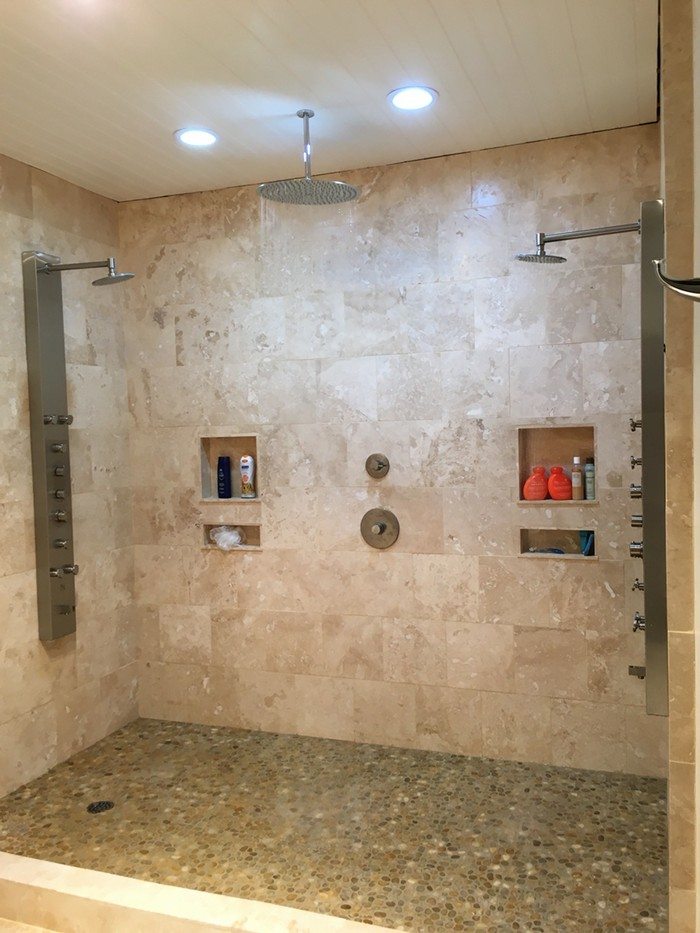
Want a refreshing new look to your bathroom? How about this pebble shower floor idea? It is not only beautiful, but it’s also a low-cost flooring project!
Here, your expenses are minimized since you can simply gather good pebble stones from certain locations in your area. Although purchasing bags of rocks is not costly, too.
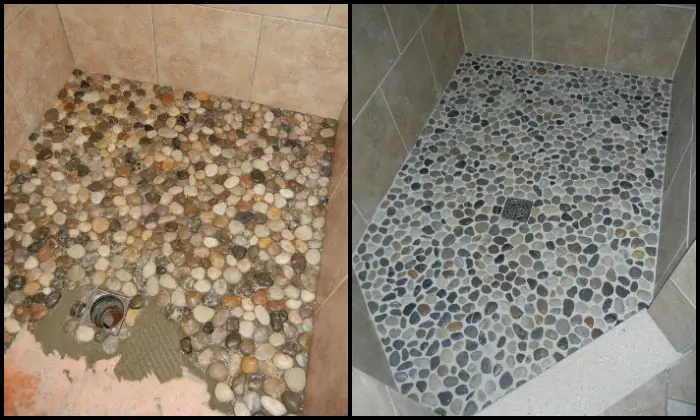
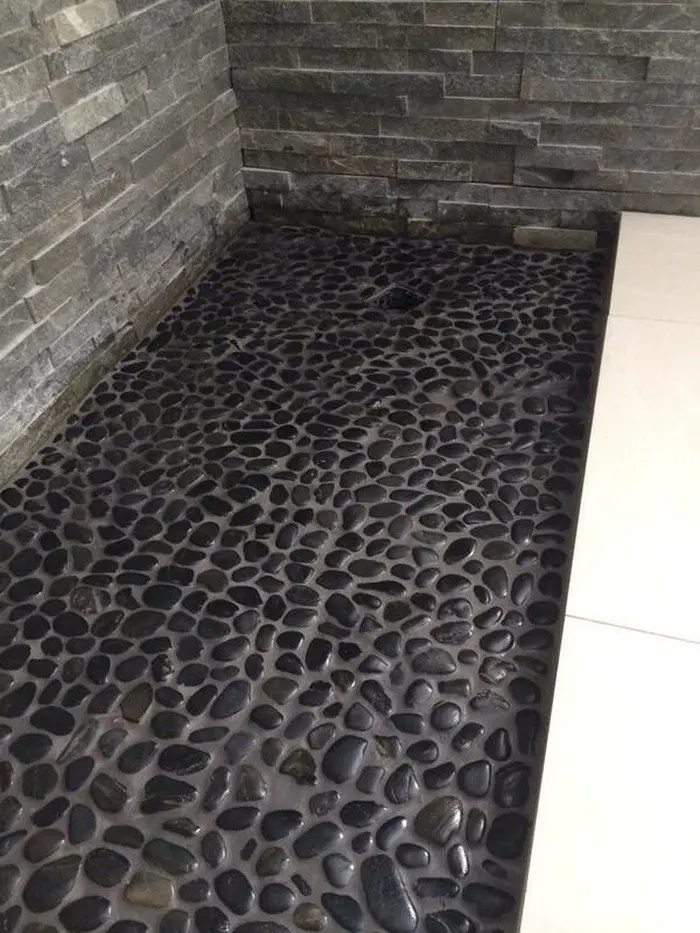
You can also DIY your pebble shower floor, which is another reason why this is an inexpensive project. Yes, it’s easy you can install your own pebble shower floor even without prior experience. The owner-builder of the featured project above just proved it’s possible! ;)
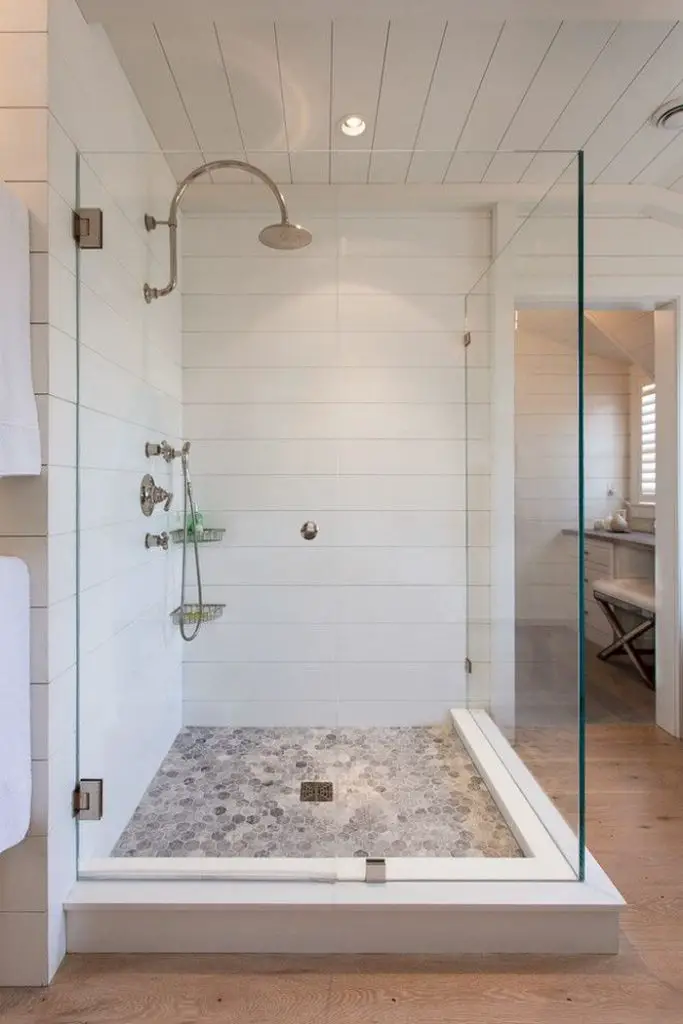
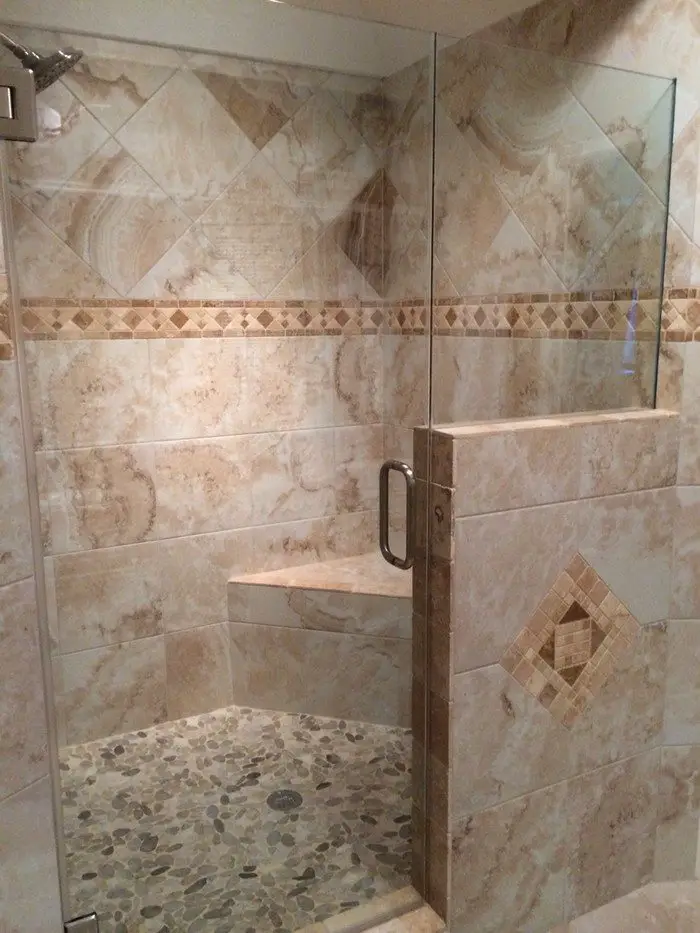
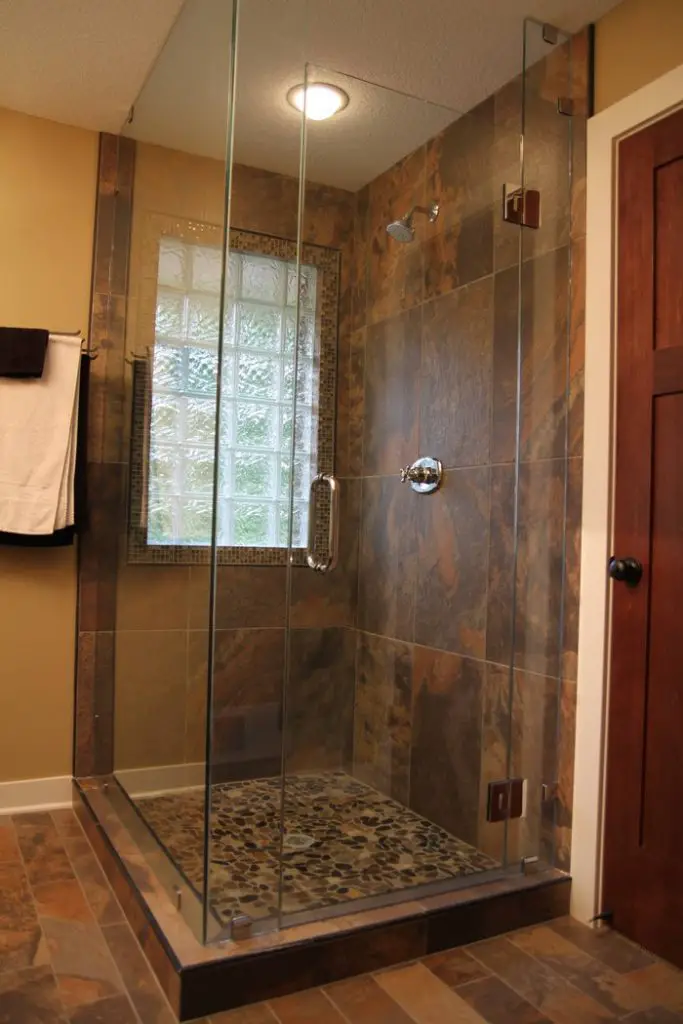
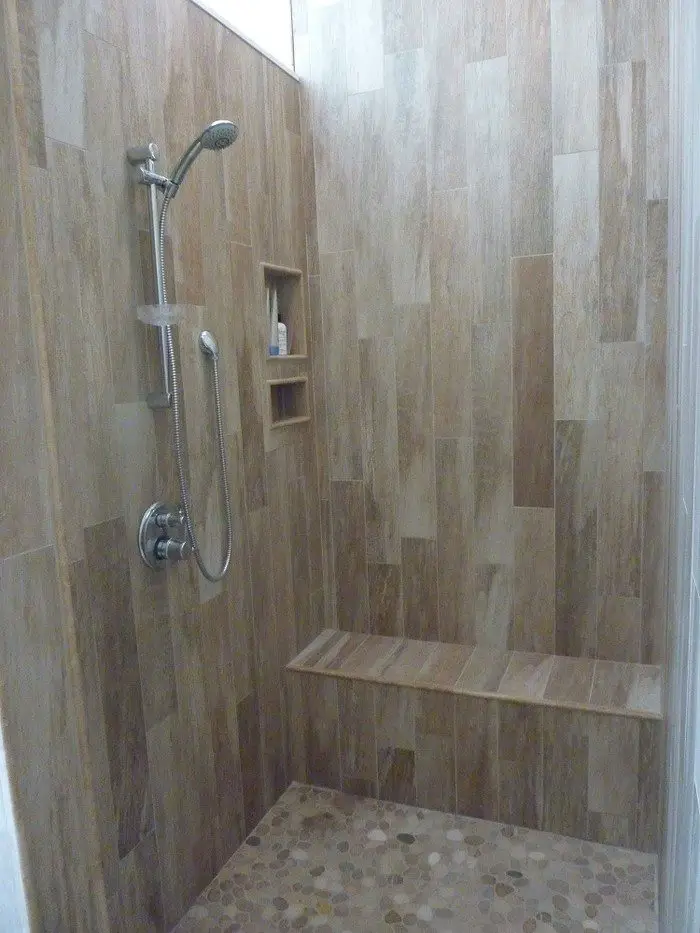
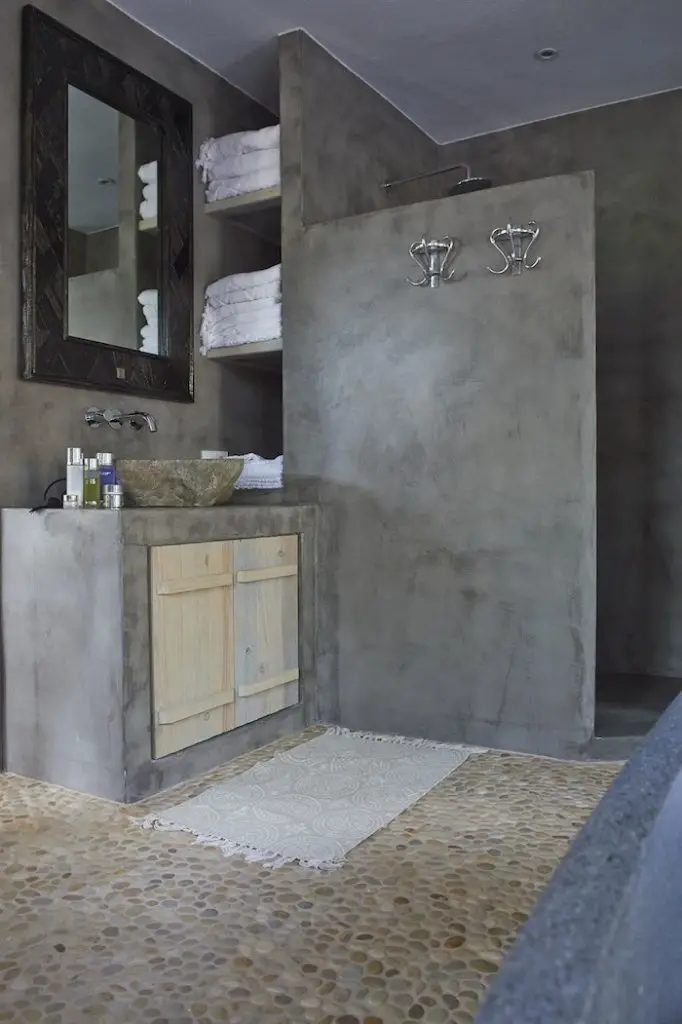
You can customize it to your liking, whether like a dark-colored floor or a light one resembling the beach/sand. (View our album below for ideas!)
Having a pebble shower floor gives you a nice foot massage each time you step on it. And it is not slippery at all! It doesn’t just look great – it also feels great!
If you do enough research, your DIY pebble shower floor project should be successful. And while we say it’s a project that can be done independently, consulting someone with experience is still recommended. That way you can have a high quality finished DIY project that you can be proud of!
So is this going to be your next ‘challenge’? :)
Contents
How to Install a Pebble Shower Floor
Materials:
- Bags of Pebble Stones
- Kerdi Floor System
- Tile Grout
- Floor Sealer
Tools:
- Trowel
Steps:
Step 1: Prepare the Shower Floor Base
Ensure the shower floor is clean, dry, and level. Install the Kerdi Floor System, following the manufacturer’s instructions. This waterproofing system helps prevent leaks and ensures a durable foundation for the pebble tiles.
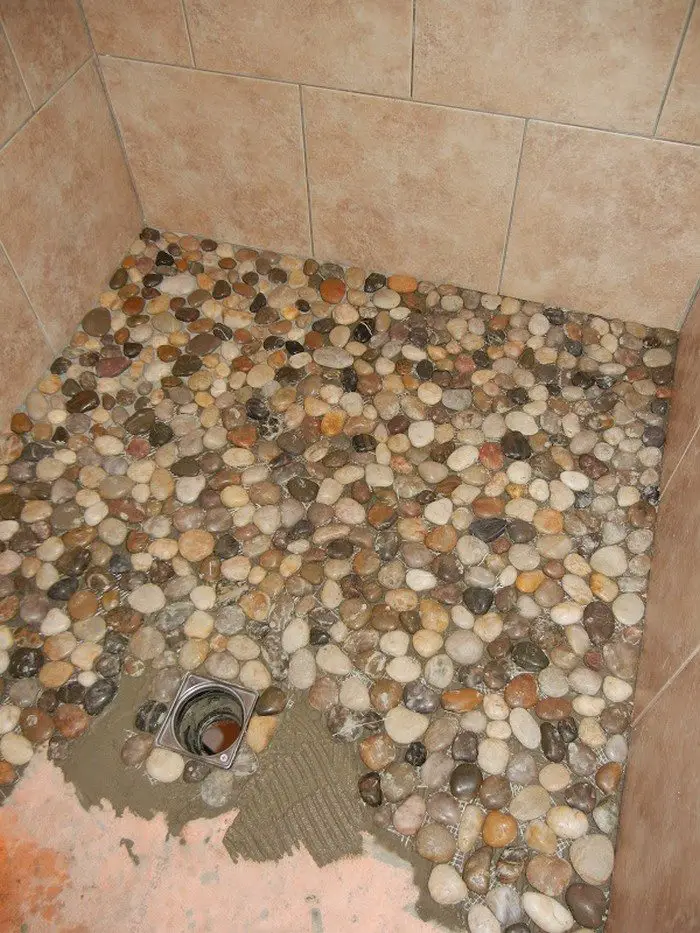
Step 2: Apply Thin-Set Mortar
Use a trowel to spread a layer of thin-set mortar evenly over the shower floor. Apply it in small sections to prevent drying before the pebbles are placed. The mortar should have enough ridges to grip the pebbles securely.
Step 3: Arrange the Pebbles
Press the pebble stones into the wet mortar, ensuring even spacing for a natural look. If using pebble sheets, stagger them to prevent visible grid lines. Adjust individual pebbles as needed to maintain a uniform, organic flow.
Step 4: Let the Mortar Set
Allow the mortar to dry for at least 24 hours before proceeding to the next step. This ensures the pebbles stay firmly in place.
Step 5: Apply Grout
Using a trowel, spread tile grout over the pebbles, ensuring it fills all gaps between the stones. Remove excess grout with the trowel’s edge while exposing the pebbles.
Step 6: Clean the Surface
After about 20-30 minutes, wipe the pebbles with a damp sponge to remove grout residue. Avoid removing too much grout from between the stones. Let the grout cure for 24-48 hours.
Step 7: Seal the Pebble Floor
Once the grout is fully cured, apply a floor sealer to protect the pebbles and grout from moisture and stains. Use a brush or roller for even coverage. Allow it to dry completely before using the shower.
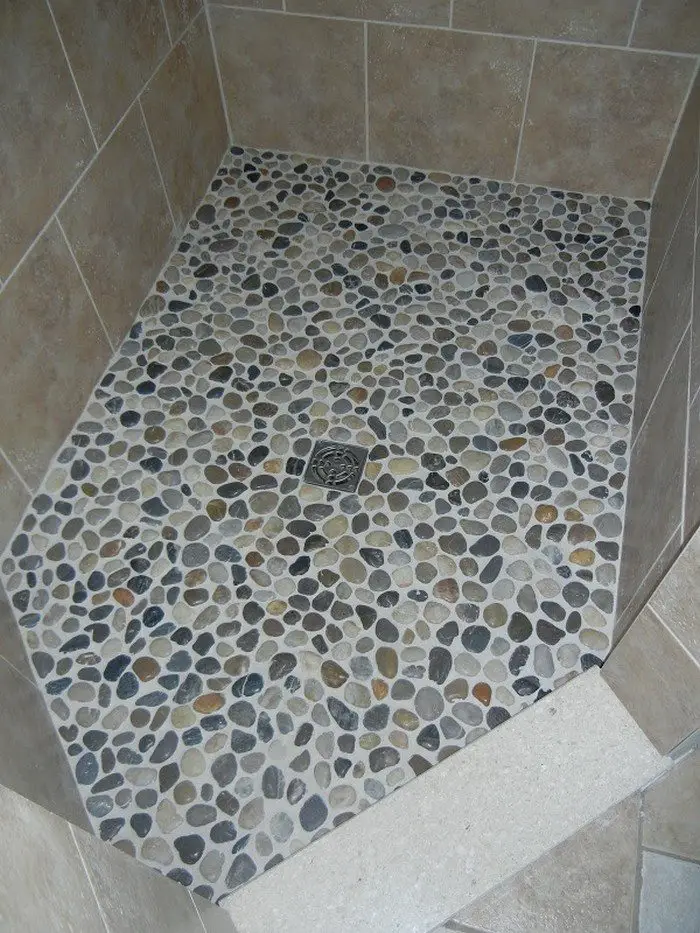
Step 8: Enjoy Your Pebble Shower Floor!
After sealing, your pebble shower floor is ready to use. Regularly clean and reseal the surface to maintain its beauty and functionality.
Pros and Cons of a Pebble Shower Floor
A pebble shower floor brings a natural, spa-like feel to any bathroom. The textured surface provides a unique aesthetic and practical benefits, but it also comes with some challenges. Understanding the pros and cons can help you decide if this flooring style suits your shower.
Pros of a Pebble Shower Floor
Aesthetic Appeal
Pebble flooring adds an organic, natural look that complements various bathroom styles. Whether you prefer earth tones, beach-inspired hues, or darker stones, there’s plenty of room for customization.
Slip Resistance
Unlike smooth tiles, pebbles provide traction, reducing the risk of slipping. Their irregular surfaces make them a great choice for safety-conscious homeowners.
Comfortable Underfoot
Walking on a pebble shower floor can feel like a gentle foot massage. The uneven texture stimulates pressure points, enhancing relaxation during showers.
Cost-Effective
Pebble floors can be an affordable option, especially for DIYers. Gathering natural stones (where permitted) or purchasing pre-assembled pebble sheets helps decrease costs.
Easy to Install as a DIY Project
Pebbles are easier to lay out than traditional tiles that require precise cuts. They don’t require exact measurements, making them a great project for first-time DIYers.
Cons of a Pebble Shower Floor
Grout Maintenance
A pebble floor has more grout lines than standard tile, making it more susceptible to mold and mildew buildup. Regular cleaning and resealing are necessary to prevent discoloration.
Water Drainage Issues
The uneven surface can lead to water pooling in certain areas. Proper slope and a well-installed drain system are essential to avoid standing water.
Can Feel Rough on Sensitive Feet
While many enjoy the foot-massage effect, some people find pebbles uncomfortable. This depends on the type and size of the stones used. Smooth, rounded pebbles tend to be more comfortable than jagged ones.
Requires Regular Sealing
To prevent water absorption and extend the lifespan of the floor, sealing is a must. Without it, grout can deteriorate, and pebbles may become loose over time.
Longer Cleaning Process
Because of its textured surface and grout lines, a pebble shower floor requires more effort to clean compared to smooth tile floors. Dirt, soap scum, and grime can settle in between the stones.
A pebble shower floor is a stunning addition to any bathroom, offering a mix of beauty, safety, and comfort. However, it does require consistent maintenance to keep it looking and functioning its best. If you’re willing to put in the effort, it can be a long-lasting and visually appealing upgrade to your shower space.
Click on any image to start the lightbox display. Use your Esc key to close the lightbox.![]()

How to Properly Seal a Pebble Shower Floor
A pebble shower floor adds a beautiful, natural touch to your bathroom, but without proper sealing, it can absorb moisture and develop mold or mildew. Sealing helps protect the pebbles and grout from water damage, stains, and wear over time. Follow these steps to keep your pebble shower floor in top condition.
Choose the Right Sealer
Not all sealers work the same way. Look for a penetrating or enhancing stone sealer designed for natural stone and grout. A penetrating sealer soaks into the surface, protecting the floor from within, while an enhancing sealer adds a slightly darker, glossy finish to bring out the stone’s natural colors.
Clean the Shower Floor Thoroughly
Before sealing, remove any soap scum, dirt, or residue. Use a mild stone-safe cleaner and a soft brush or sponge to scrub the surface. Rinse with warm water and let the floor dry completely for at least 24 hours to ensure no moisture gets trapped under the sealer.
Apply the Sealer Evenly
Pour a small amount of sealer onto the floor and use a clean cloth, sponge, or paintbrush to spread it evenly over the pebbles and grout. Ensure full coverage without pooling. Work in small sections for better control.
Allow the Sealer to Penetrate
Let the sealer sit for 10-15 minutes to absorb into the surface. Avoid stepping on the floor during this time. If necessary, apply a second coat for added protection, especially in high-moisture areas.
Wipe Off Excess Sealer
Wipe off any extra sealer using a dry microfiber cloth before it dries on the pebbles. Leaving excess sealer can cause a hazy residue or make the surface slippery.
Let the Floor Cure
Allow the floor to dry completely for 24-48 hours before using the shower. During this time, avoid any water exposure to ensure the sealer sets properly.
Reseal as Needed
A pebble shower floor should be resealed every 6-12 months, depending on usage and exposure to moisture. To check if resealing is needed, sprinkle a few drops of water on the surface. If the water absorbs instead of beading up, it’s time to reapply the sealer.
Regularly sealing your pebble shower floor helps maintain its beauty, prevents water damage, and extends its lifespan. With proper care, your shower floor will stay protected and looking fresh for years.
Choosing the Right Pebbles for Your Shower Floor
Selecting the right pebbles for your shower floor is essential for both aesthetics and functionality. The right pebbles will not only enhance the look of your bathroom but also provide comfort, durability, and slip resistance. Here’s what you must consider when choosing the perfect pebbles for your shower floor.
Natural vs. Synthetic Pebbles
Natural pebbles are harvested from rivers, beaches, and quarries, offering an authentic look and feel. They come in various shapes and sizes, with smooth, rounded stones being more comfortable underfoot. Synthetic or manufactured pebbles are designed to mimic natural stones but may have a more uniform appearance. These are often pre-mounted on mesh sheets for easier installation.
Size and Shape Matter
The size and shape of the pebbles determine the overall texture and comfort of your shower floor. Small, rounded pebbles provide a smoother surface and better comfort, while larger or irregularly shaped pebbles create a more textured feel, which some may find uncomfortable. If you prefer a foot massage effect, opt for slightly irregular pebbles, but avoid overly jagged ones that could be rough on your feet.
Color and Aesthetic Appeal
Pebbles come in various colors, from earthy browns and tans to cool grays, blacks, and even whites. Consider the overall design of your bathroom when choosing pebble colors. Darker stones create a modern, spa-like look, while lighter ones give a beachy, airy feel. If you want a natural riverbed appearance, mixing shades can add depth and character.
Slip Resistance and Drainage
A pebble shower floor naturally provides traction, reducing the risk of slipping. However, the level of slip resistance depends on how the pebbles are arranged and grouted. Flat-cut pebbles offer a smoother surface but may become slippery when wet. Rounded pebbles create natural grooves between them, improving grip and water drainage. Ensure the pebbles are installed with proper spacing and a slight slope to direct water toward the drain.
Ease of Installation
Loose pebbles require careful placement and grouting, while pebble tile sheets (pre-mounted on mesh) make installation easier. However, some pebble sheets may have visible seams, so it’s important to stagger them to create a more natural flow. If you prefer a DIY-friendly option, choose pebbles with interlocking mesh backing for a seamless finish.
Durability and Maintenance
Porous pebbles can absorb water and stain over time if not properly sealed. Polished pebbles may look glossy but tend to be slippery, while matte, unpolished pebbles provide a better grip. To ensure longevity, always choose pebbles compatible with waterproof sealers and reapply the sealer as needed to prevent water damage and mold growth.
Choosing the right pebbles for your shower floor balances style, comfort, and practicality. With the right selection, your pebble shower floor will be visually stunning, safe, and enjoyable for years to come.
Conclusion
A pebble shower floor is a beautiful and functional addition to any bathroom, offering natural aesthetics, slip resistance, and a spa-like feel. While installation requires proper preparation, grouting, and sealing, the result is a durable and stylish surface that enhances your shower experience. With regular maintenance and resealing, your pebble floor will stay in top condition for years, making it a worthwhile investment in both design and comfort.
We have more way to revamp your bathroom. Check out our small bathroom design ideas article!


