Knife holders are not very expensive, but why spend money on a regular knife block when you can easily make one that’s simple yet more elegant and functional!

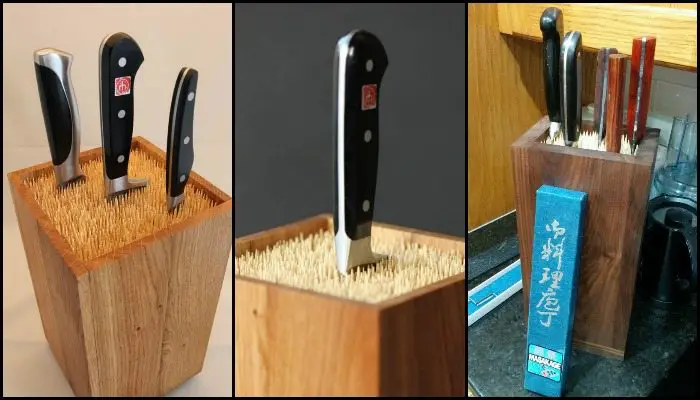
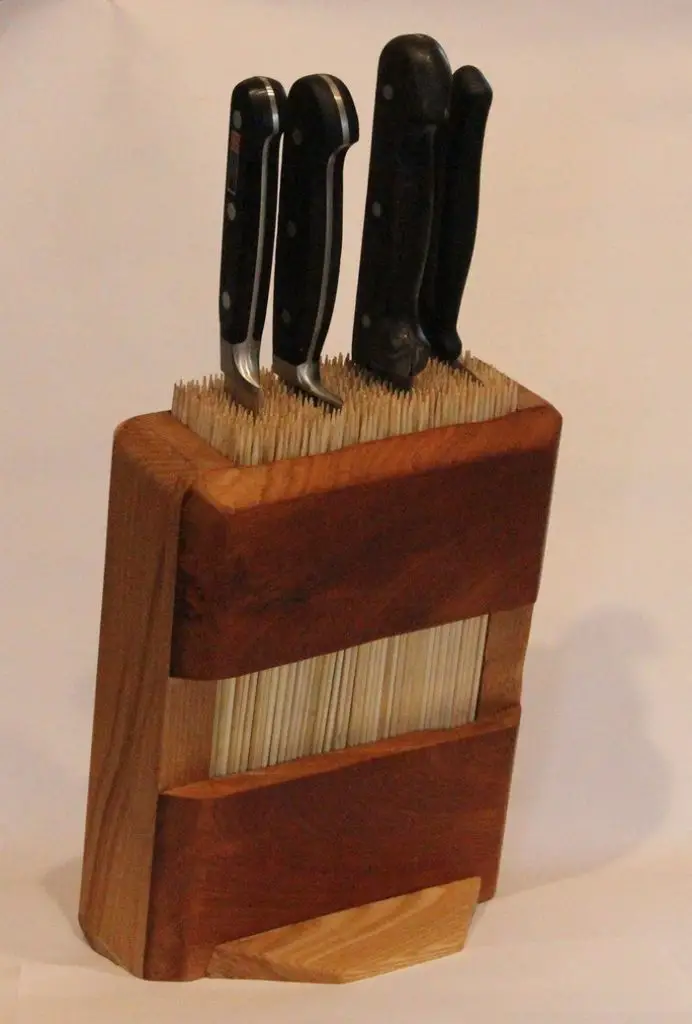
This clever universal knife holder design came from the creative mind of Martin Robitsch. There are plenty of versions sold by different sellers, however they are a little more expensive than the regular knife blocks!
So instead of purchasing one, why not make your own universal knife holder. Follow the tutorial by DIYer strooom. It’s a really simple build, you can even modify the design according to your taste.
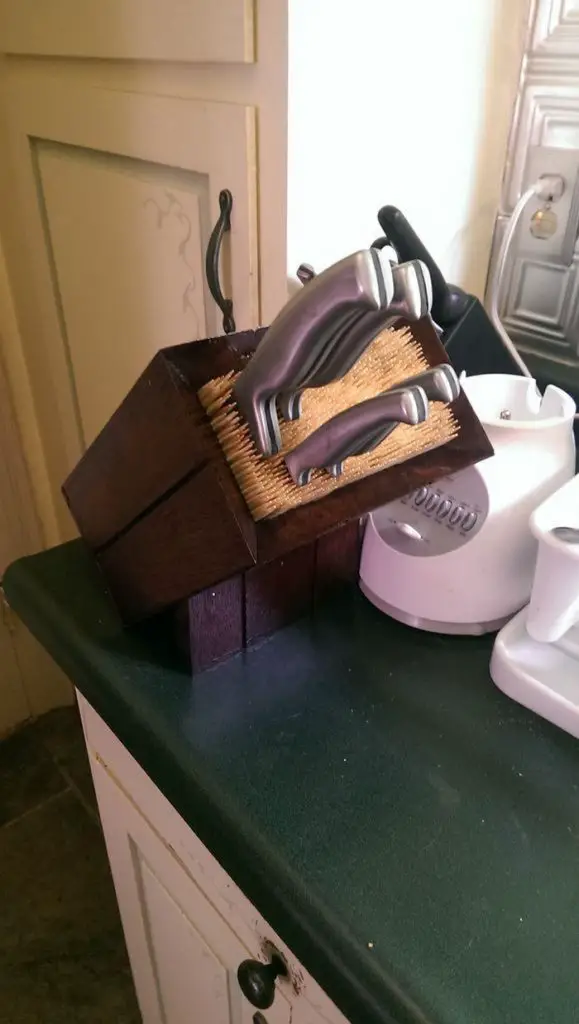
You can also make yours bigger to make sure it will hold all your kitchen knives.
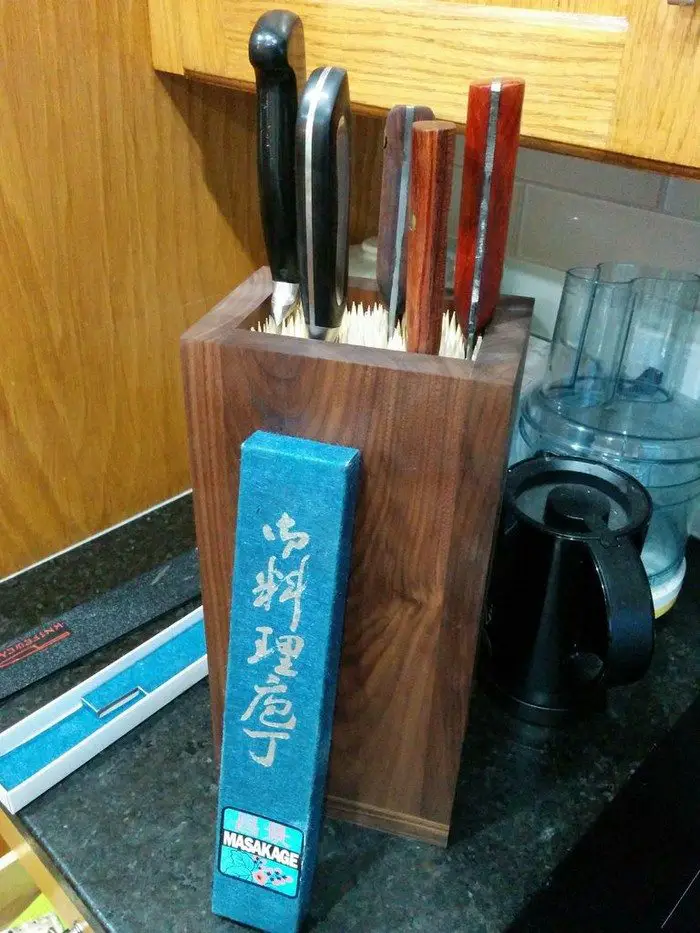
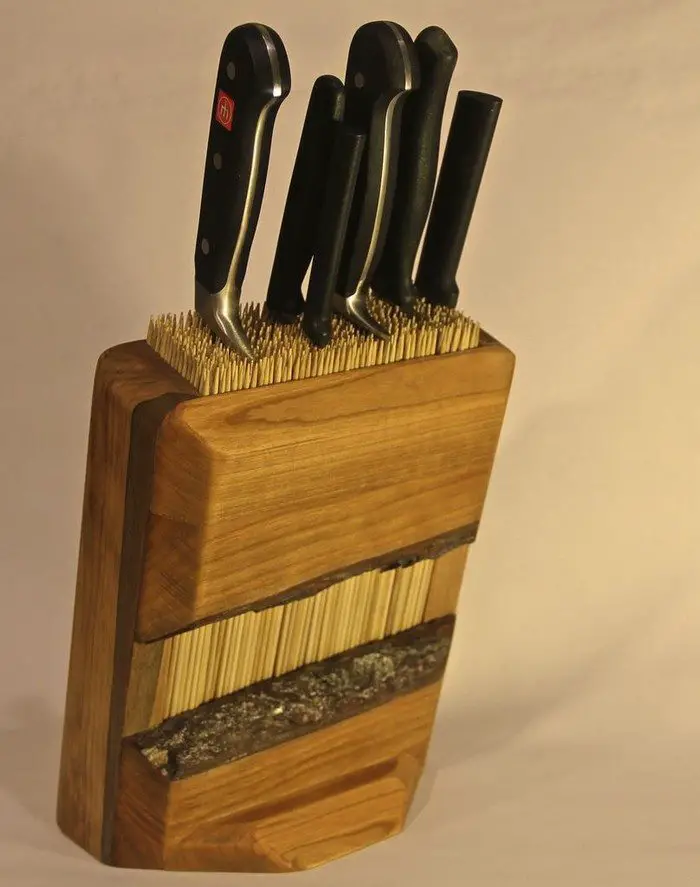
Have a look at our small album of universal knife holders below and be inspired to make your own!
It’s a great DIY gift idea, too. :)
Do you know anyone who needs a new knife block?
Click on any image to start lightbox display. Use your Esc key to close the lightbox.![]()
Contents
Building a Universal Knife Holder
Materials
- 9mm thick Oak Wood
- Bamboo Skewers
- Wood Glue
- Wood Oil
Tools
- Measuring Tape
- Saw
- Belt Sander
- Random Orbital Sander
- Wood Clamps
- Router (optional)
Steps

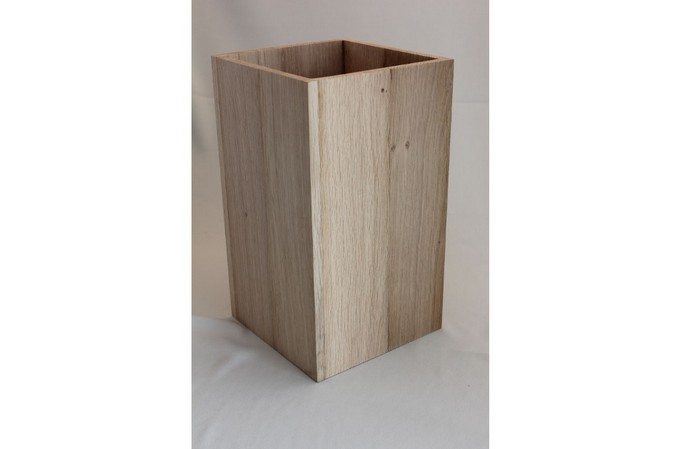
Assembling the box: The hardest part is gluing the universal knife holder box together. It may seem simple, but it’s a bit difficult to glue 5 pieces together while keeping right angles everywhere. So I decided to help you with some step-by-step advice:
- Put one side on a flat surface.
- Glue the bottom on top of it: Align the bottom and one corner.
- Glue one extra side at the opposite corner. (So I added a side to the left.)
- Apply clamps and some weights.
- Glue the remaining sides, one by one.
- Finish by applying a bit of glue to all inner joints with your finger.
Ideally, the side will stick out just a little on all four of the universal knife holder sides. That’s OK (better than being too small). This excess will be removed in the next step.
It is important to take your time. Take it one part at a time and let it dry enough for the parts to stick together. My glue takes about 30 minutes, but 24 hours for full hardening out. So patience is your friend here!
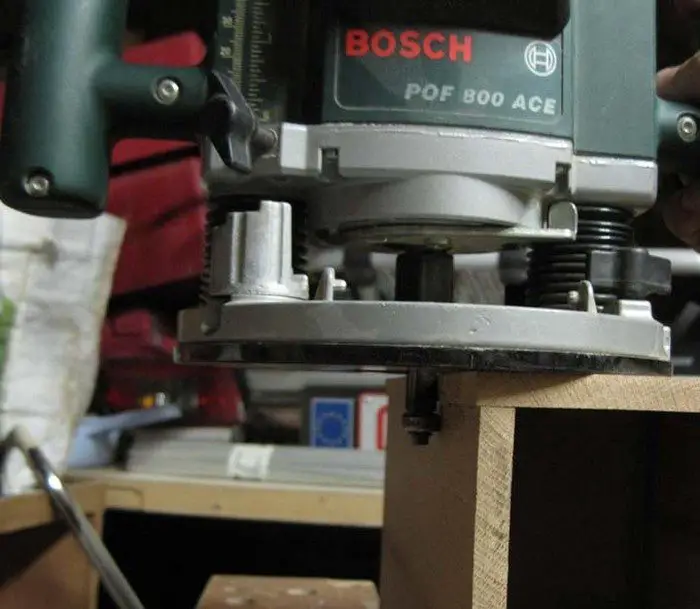
Trimming the sides of the box: On each side, the side panels will stick out a little bit. This could be removed by sanding it. But I always use a router for this.
You need a straight router bit with a ball bearing. This will trim the panels to be exactly flush with the adjacent sides.
You could also do this with a sander, but it will take more time and will not be as precise.
Sanding the box: Now use a sander to finish the box. It should end up nicely square, and all panels need to be clean and smooth.
I usually start with the belt-sander using a grain of 80, then I finish with the orbital sander using a grain of 120 or 180.
Important tip: when using the belt-sander, keep the direction of the belt more or less parallel to the grain of the wood. If you you sand it across the grain, you will get visible scratches which are harder to remove. Always keep your belt-sander moving over the piece, never let it rest in one position. If you keep it still, it may leave a groove which is again hard to remove.

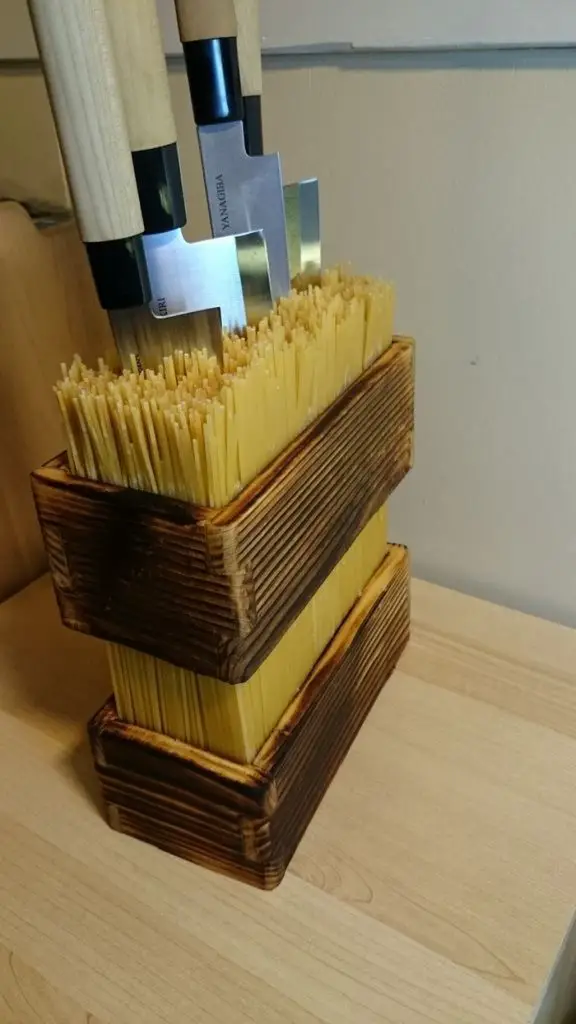
Trimming the bamboo skewers: In my case, the Bamboo Skewers were 25 cm, but still they varied a bit in length. A little variation is no problem, but still I decided to adjust the ones that were sticking out too much.
Here is how I did it:
- Cut a piece of wood that fits in the box.
- Then put the skewers in, with the tip pointing down
- Because of the extra piece of wood, the sticks will stick out, and the longest ones will stick out the most.
Use the belt-sander to carefully trim them down so they are more even.
Note : the dust will fall in the box, so be careful when you remove the sticks, as some saw-dust will fall out.
Remove the temporary piece of wood at the bottom of the box. If it is hard to shake it out, put in a screw so you can pull it out.
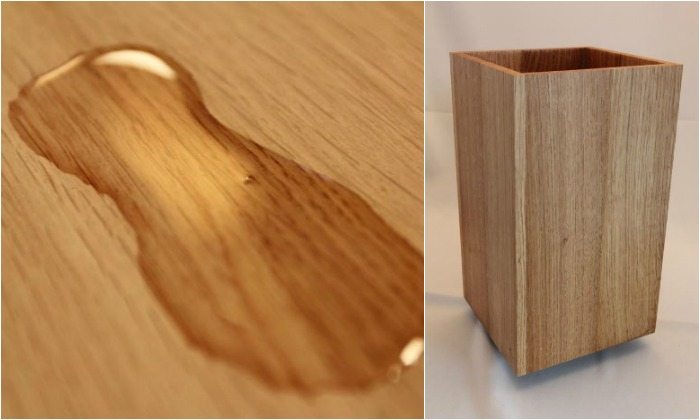
Surface finishing the box: Oil the box, or use any other finishing of your liking.
I like oil, I think if the wood could talk, it would prefer the oil as well. :-)
After applying the oil, I added 4 felt pads at the bottom, in order to not scratch any surface I later put the knife block on.
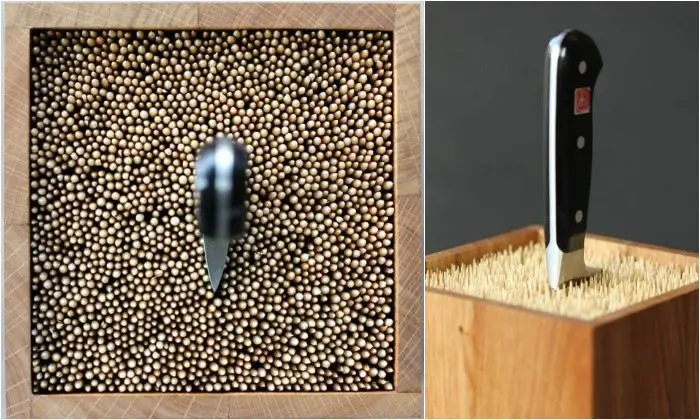
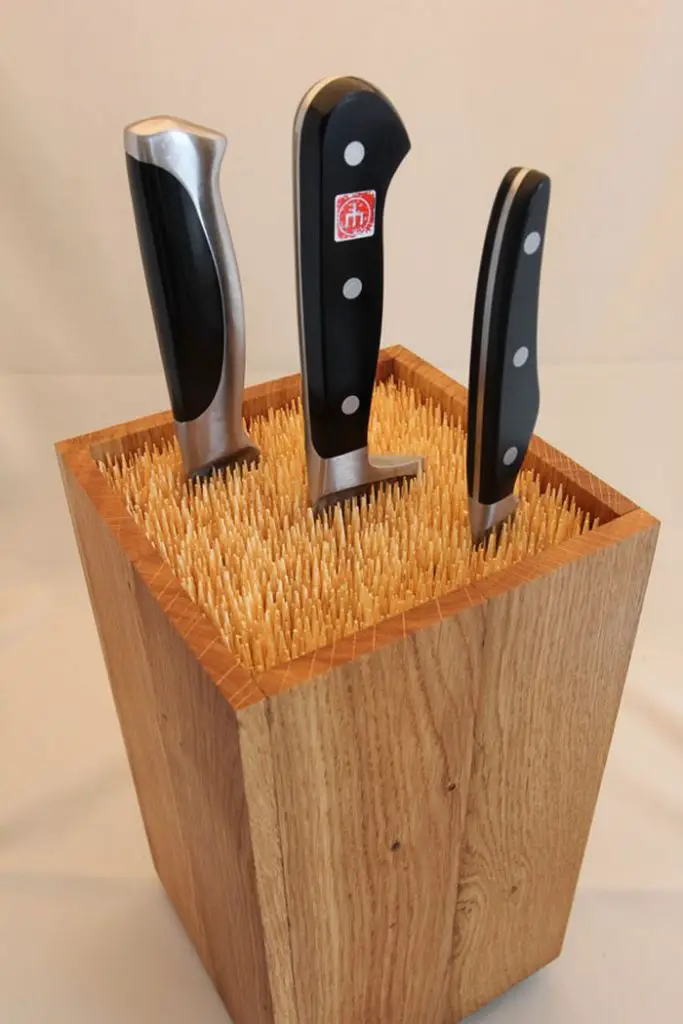
Adding bamboo skewers: Make sure they all go in nicely parallel to the length of the box. Admire your result, and if you are proud, send me a picture of it!
Happy woodworking & happy cooking!
Thanks to strooom for this great project!
Customization Options for Your Universal Knife Holder
Making a universal knife holder provides an excellent chance to customize your kitchen equipment to fit your own requirements and style. Personalization enables you to include features and details that turn your knife block into a conversation starter as well as a useful instrument. Consider these customizing choices for your universal knife block:
Personalize with Unique Designs and Shapes
Consider more than only the conventional rectangle block. The architecture and design of your kitchen can be accommodated by customizing a universal knife block into a circular or oval shape. For an extra special touch, you can etch or carve beautiful patterns onto the surface. Making the shape and design your own, whether you like clean modern lines or elaborate floral patterns, makes your knife block genuinely unique.
Add Functional Features
Build in more storage options to make your universal knife holder even more useful. Give kitchen shear slits or a built-in place for honing steels some thought. To make meal preparation easier, add a little shelf or slot to accommodate a tablet or smartphone. These useful extras make sure your knife block meets all of your culinary demands.
Choose Your Materials and Finish
Your universal knife holder might look and feel much different if you choose the correct materials. For a contemporary touch or an environmentally responsible choice, think about stainless steel or bamboo, although wood is still a popular choice because of its warmth and classic appeal.
To go along with the décor of your kitchen, you can also try out other treatments including glossy paint, matte varnish, or a distressed appearance. With unique benefits in terms of appearance and durability, every material and finish makes your universal knife holder a work of art as well as a useful utility.
Through careful consideration of these personalization choices, you can design a universal knife holder that not only improves the efficiency of your kitchen but also expresses your own sense of style. Whether your goals are aesthetics, utility, or a combination of the two, these changes can elevate a basic knife holder to the centre of your kitchen.
Maintaining Your Knife Block
Maintaining your universal knife block is crucial for ensuring it stays clean, hygienic, and attractive while keeping your knives in top condition. Regular maintenance can extend the life of both your knives and the block itself. Here are some essential tips to help you keep your universal knife holder in the best possible shape:
Regular Cleaning
It’s important to clean your universal knife holder regularly to prevent the buildup of bacteria and debris. Remove all knives and shake out any crumbs or residue. For wooden and bamboo blocks, use a small brush or vacuum with a hose attachment to get into the slots. You can also wipe down the exterior and the slots with a damp cloth dipped in a mild soap solution, followed by a dry cloth to remove any moisture.
Deep Cleaning
Every few months, give your universal knife block a deep clean. For blocks with removable parts, disassemble them and wash each component according to the manufacturer’s instructions. If your block is a solid piece, consider using a thin pipe cleaner or a special brush designed for knife slots to remove any compacted debris. After cleaning, ensure the block is completely dry before reassembling or inserting knives to avoid mold growth.
Proper Oiling
For wooden knife blocks, periodic oiling is necessary to keep the wood from drying out and cracking. Use a food-safe mineral oil or a specific wood conditioner. Apply a small amount of oil to a clean cloth and rub it over the surface of the wood, paying extra attention to any end grains. Allow the oil to soak in for a few hours before buffing off any excess with a dry cloth.
Avoiding Moisture and Direct Sunlight
Place your universal knife holder in a location where it is not exposed to continuous moisture or direct sunlight. Excessive moisture can lead to swelling and warping of the wood, while sunlight can fade the color and weaken the material. Ideally, store the block in a dry area and ensure that knives are dry before inserting them into the slots.
By following these maintenance tips, your universal knife holder will continue to be a functional and beautiful addition to your kitchen for years to come. Regular upkeep helps prevent damage and ensures that your block remains a safe, hygienic place to store your knives.
Conclusion
Building your own universal knife holder allows you to customize a vital kitchen tool to fit both your functional needs and aesthetic preferences. Through the choice of materials, design, and added features, you can create a piece that not only stores your knives efficiently but also enhances your kitchen decor. Proper maintenance will ensure that your handmade knife block serves as a durable and stylish culinary companion for years to come.


