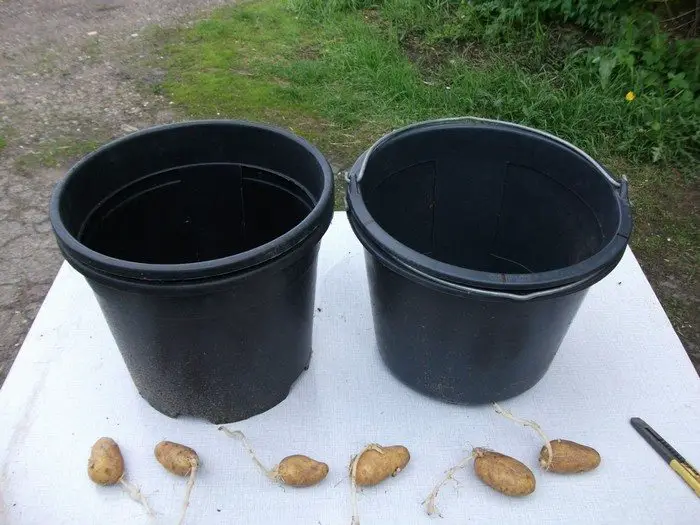
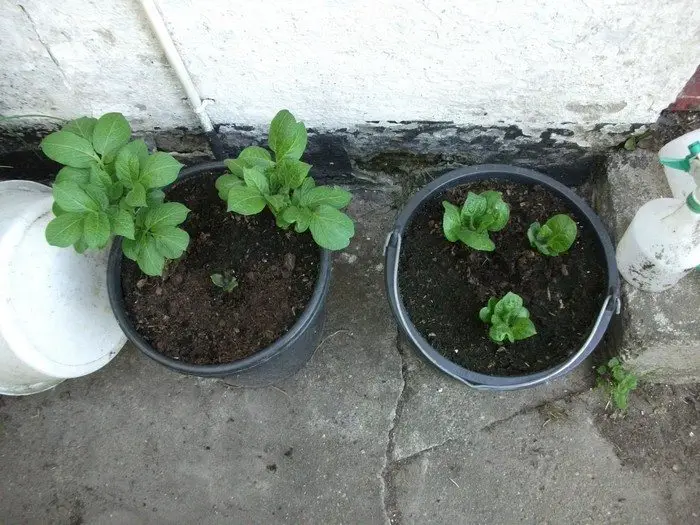
We know that potatoes can easily be grown in a single bucket. But you can make harvesting easier too by using two buckets instead of one!
Growing potatoes in buckets is simple and very effective. A windowed inner bucket allows you to have better access to your produce. No need to dig out all the soil in your container just to make sure you don’t miss any spud good for harvest.
There are several easy ways to grow humble spud. However, if you’re looking for something that is easy and quick to build, uses the least amount of space, and is very easy to use then this is the idea for you.
The beauty of growing potatoes in buckets lies in its simplicity. All you need are a few sturdy buckets, some good-quality soil, and, of course, your potato seedlings. It’s a minimalist setup that can be assembled quickly, even in small spaces like balconies or patios.
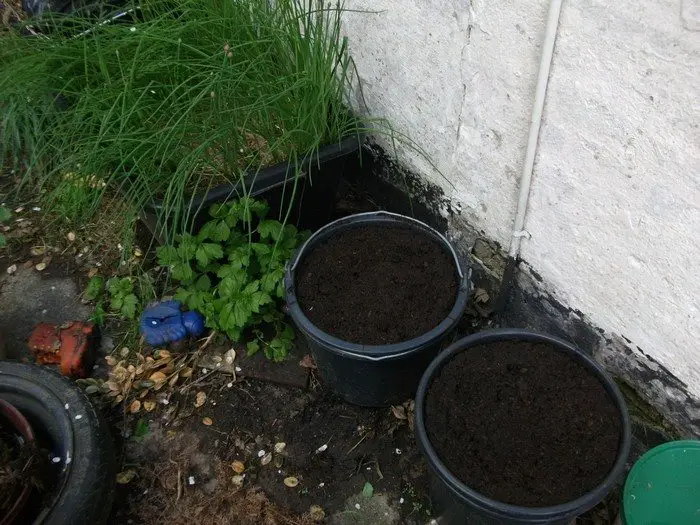
Not only does growing potatoes in buckets simplify the planting process, but it also streamlines the care and maintenance of your potato crop. The buckets are easy to move, you can position them in the sunniest spots or provide protection during inclement weather.
Best of all, the process of harvesting becomes a breeze. When the time comes, you simply upend the bucket, revealing your treasure trove of fresh, homegrown potatoes without the need for extensive digging or laborious tasks.
Just remember to use only black buckets and NOT to place them in direct sunlight. ;)
The choice of black buckets serves a specific purpose—black is an exceptional heat-absorbing colour. By using black buckets, you’re harnessing the sun’s energy to create a cozy, warm microclimate when growing potatoes in buckets, ideal for the prosperous growth of your potato plants.
However, the caution against direct sunlight is equally important. While the heat-absorption capacity of black buckets is advantageous, direct sunlight can sometimes prove a bit too intense for your potato crop.
To strike the perfect balance when growing potatoes in buckets, refrain from placing the buckets in areas where they’re subjected to relentless, harsh sunlight throughout the day. Instead, choose locations where your buckets can enjoy a harmonious blend of sunlight and shade.
This approach ensures that the heat-retaining qualities of the black buckets work to your advantage, nurturing your potato plants without exposing them to excessive heat stress.
In essence, this careful combination of black buckets and strategic placement is a winning formula when growing potatoes in buckets. It capitalizes on the heat-absorbing prowess of the containers while safeguarding your precious spuds from the unforgiving rays of direct sunlight.
Want to learn how to make these no-dig potato grow buckets? Follow the step-by-step tutorial below!
Contents
How to Grow Potatoes in Buckets
Ready to embark on a potato-growing adventure that defies tradition and embraces innovation? Discover the art of growing potatoes in buckets. Whether you’re an urban dweller with limited space or a gardening enthusiast looking to simplify your planting process, this guide is your passport to a world of convenience, versatility, and abundant harvests.
Materials
- 2 pcs of at least 12-Litre Black Buckets
- Soil
- Potatoes
Tools
- Sharp Knife
- Speed Marker
- Drill or Soldering Iron
Click on any image to start the lightbox display. Use your Esc key to close the lightbox. ?

Steps
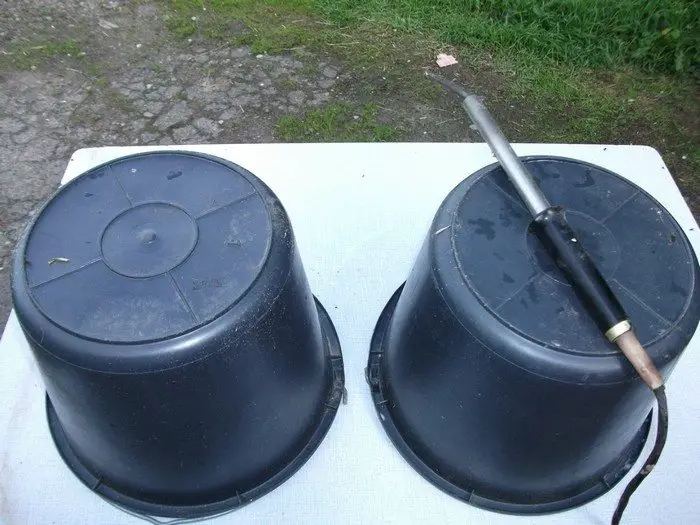
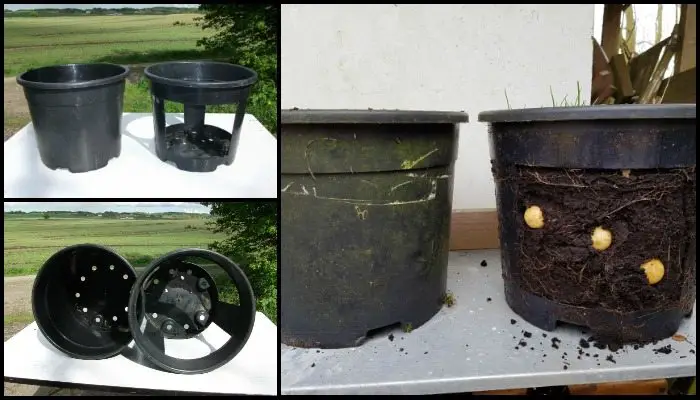
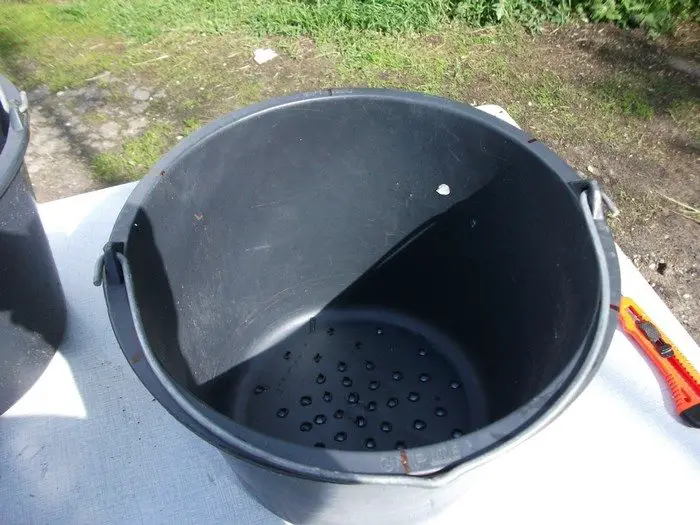
1. Preparing the buckets: First, you’ll make some holes in the bottom of both buckets in order to drain the soil. This is important because potatoes can rot if there is too much water around them.
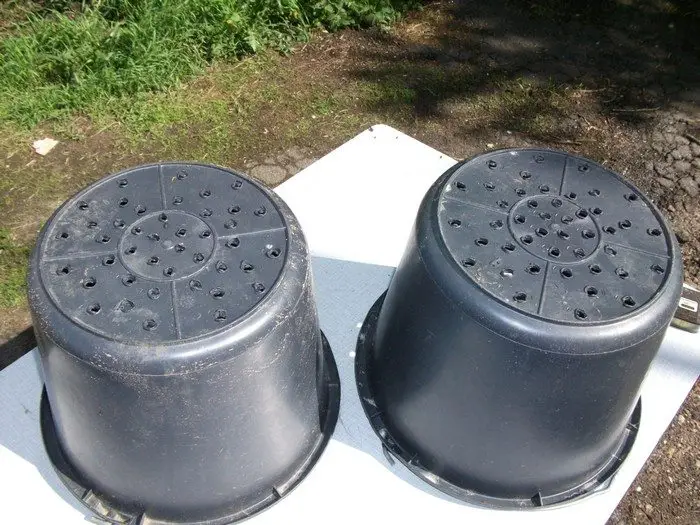
Once done set one of the buckets aside. You don’t need to do anything more with that bucket. This one will be the outer bucket.
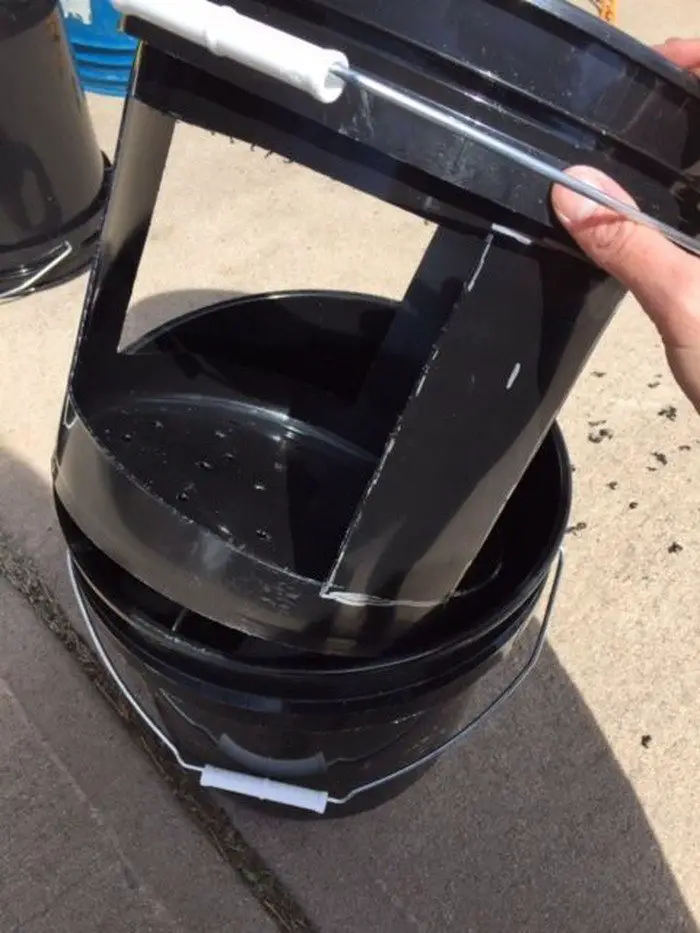
2. The inner bucket: Divide the bucket rim into 3 parts, 120° each. Then draw a line vertically down the bucket.
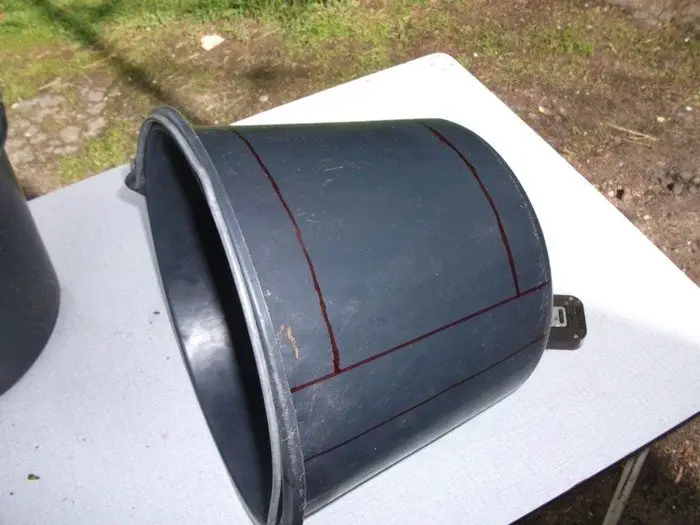
Draw 2 lines parallel to the first line 5 cm (2 inches) on each side of these. Measure 5 cm (2 inches) from the top and the bottom and make 2 lines between the b-lines.
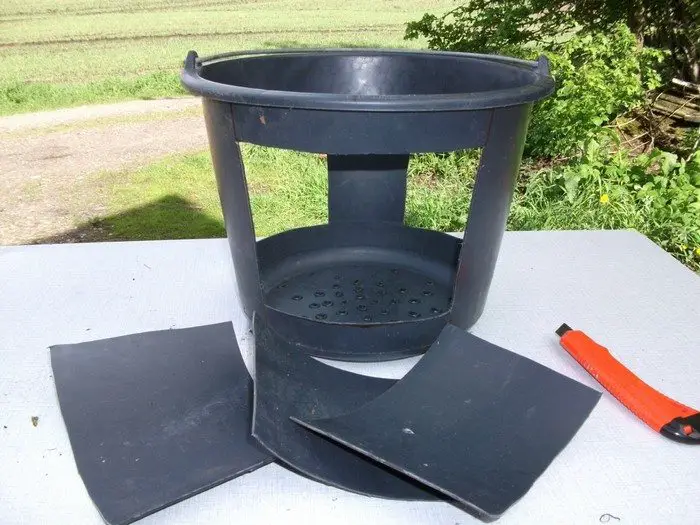
These are referred to as the C Lines. Now, take out the rectangle formed by the B- and C-lines. Finally, you’ll have a bucket with three windows like this one.
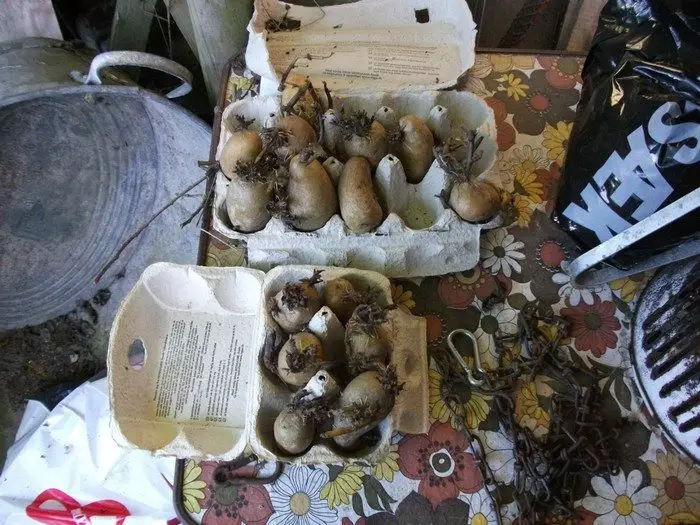
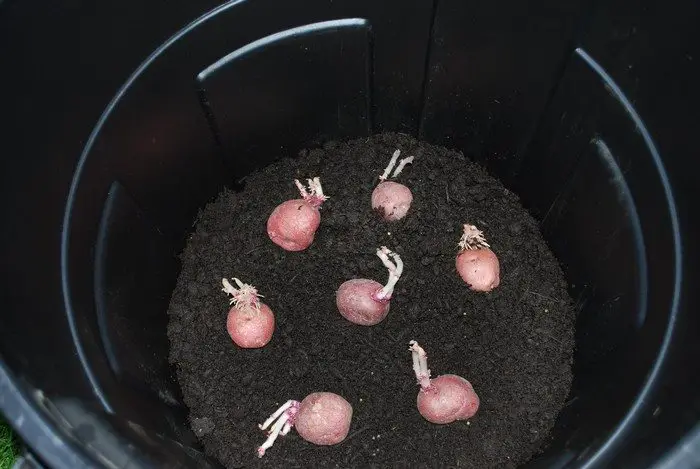
3. Planting potatoes: Start sprouting the potatoes before making the buckets.
Place the inner bucket in the outer bucket. Then fill the buckets half with soil.
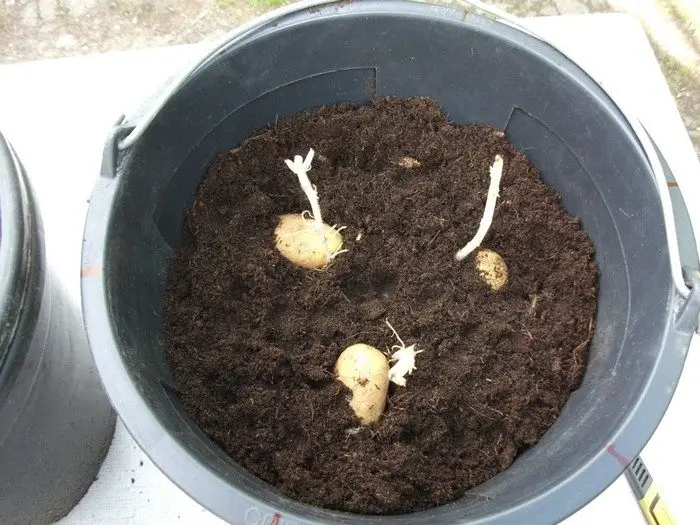
Now place one potato right in front of each window half the way from the middle to the side of the bucket. Fill the buckets with soil, taking good care of the fragile sprouts.
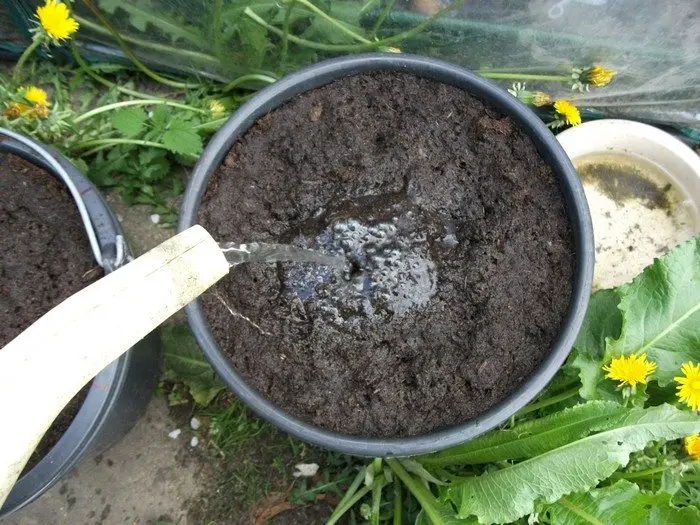
Finally, give the potatoes a good amount of water. The soil will pack around the potatoes, so add more soil.
Remember, potatoes must not get any kind of light, they’ll turn green and become poisonous (produce solanine). Place the buckets in a light spot, but avoid direct sun. Give the potatoes enough water but don’t let them soak.
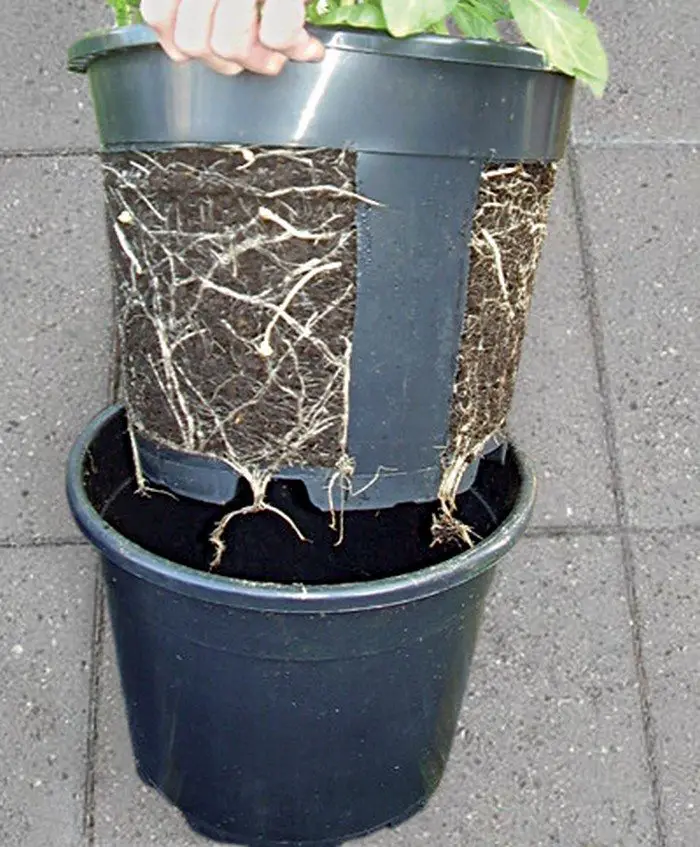
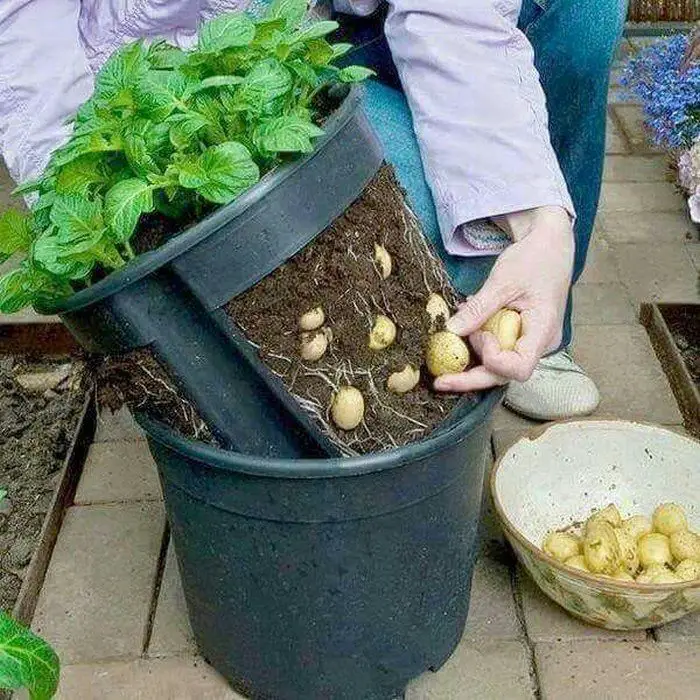
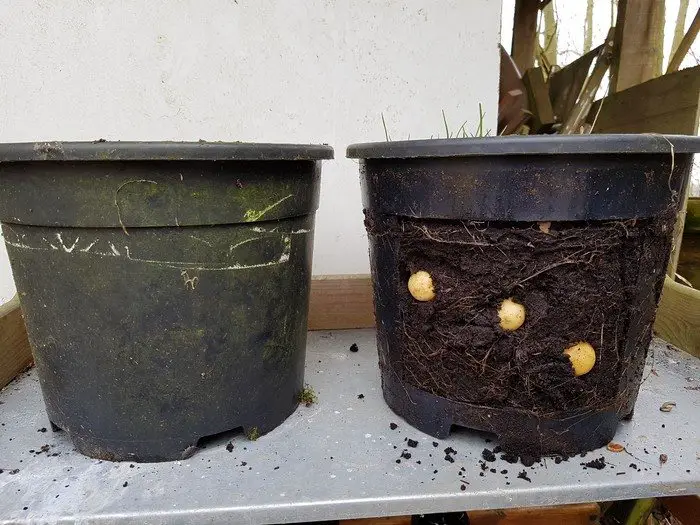
4. Harvesting: When the potato plant begins to bloom the first harvest is ready.

Remove the inner bucket from the outer bucket and take the number of potatoes you want. Spare the soil that falls out of the bucket. When finished, place the inner bucket in the outer bucket and place the soil back on top of the surface where you took the potatoes. The soil will repack around the rest of the potatoes. It is necessary to add more soil and continue to keep the potatoes out of direct sunshine.
You can continue harvesting potatoes from the same plants until late autumn/early winter.
Thanks to Pothuset for this great project!
Grow your own root vegetables at home with these Root Vegetable Grow Bags!
Another intriguing method to experiment with is to grow potatoes vertically with 5 easy wire-fencing tricks. This approach adds an element of versatility to your gardening expertise.
No-Dig Potato Success Made Easy!
Unlock the secret to a hassle-free potato harvest! The ingenious approach of growing potatoes in buckets combines simplicity and efficiency, making it perfect for both novice and experienced gardeners alike. By planting your potatoes in buckets, you save space, minimize effort, and maximize your yield.
From the initial setup to the moment of harvest, the four straightforward steps will be your trusty companions on the journey to growing potatoes in buckets, a process that’s remarkably user-friendly and hassle-free. This method not only simplifies the entire potato-growing experience but also guarantees a rewarding yield with the least amount of digging involved, ensuring the most worthwhile experience ever.
Bid farewell to the laborious and time-consuming practices of traditional tilling and embrace a smarter way of growing potatoes in buckets. Ready to make potato growing more enjoyable?


