Potato grow bags or tater totes offer no-dig convenience and help a lot in growing your own, good-quality spuds! You can buy potato bins from stores, but you can save more or have more potato grow bags for the same cost if you DIY…
Making your own potato grow bags is very easy and it brings a number of advantages. First, you can grow more potatoes since you are providing the plant with a lot of vertical space. Spuds grow along the stem so the higher your mulch is the happier the potato!
Harvesting the spuds is also better with potato grow bags. Here, you don’t risk damaging any of the potatoes since you don’t have to dig through the dirt. You can also be assured that you are not missing any of the spuds because looking for all of them is easier (possible) with this container garden!
And when you need to relocate your potatoes, no problem!
Worried about potato bugs? You can get rid of them by planting nasturtiums, marigolds, and bush beans around your potatoes :)
Is this the perfect idea for producing your own spuds? Read on to learn how to sew your tater totes and set up your potato garden!
Contents
Making Potato Grow Bags
Materials
- Landscape Fabric
- Nylon Sewing Thread
Tools
- Scissors
- Measuring Tape
- Sewing Machine
Steps
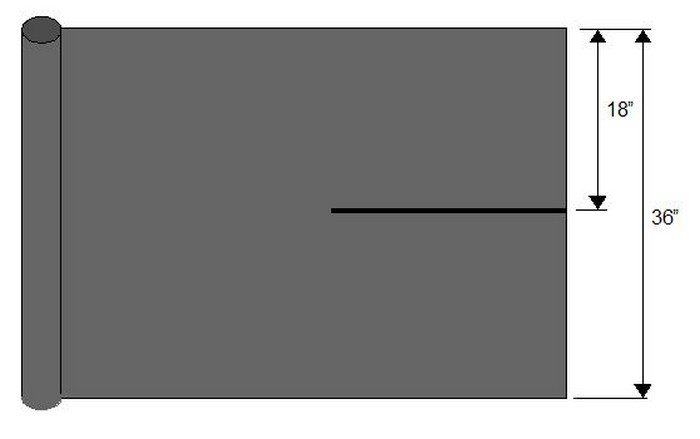
Tater tote construction: The landscape fabric I had on hand was a partial roll 36″ wide. I cut the remaining fabric on the roll down the middle, making each half 18″ wide strips. I cut the strips into 48″ long pieces.
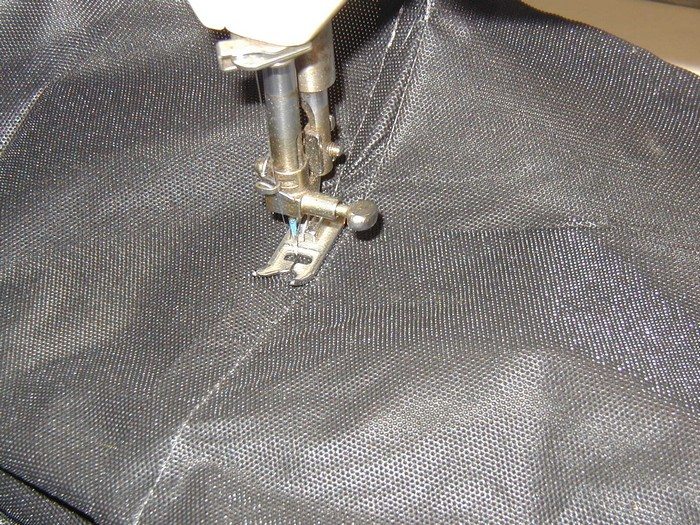
 Fold the fabric in half and sew the short ends together with nylon sewing thread at least 1/2″ from the edge. For more stability, I folded the finished seam to one side and sewed it down, too.
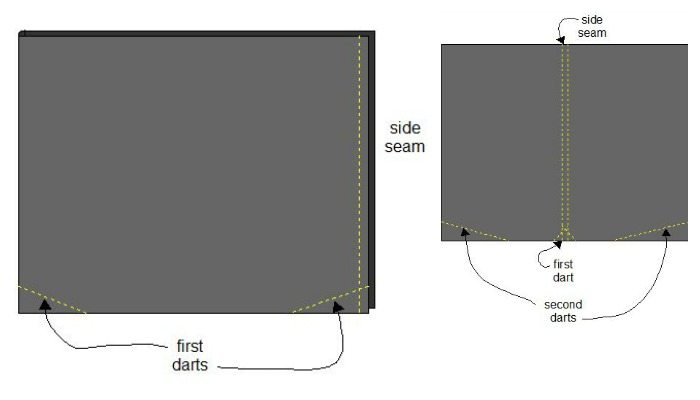
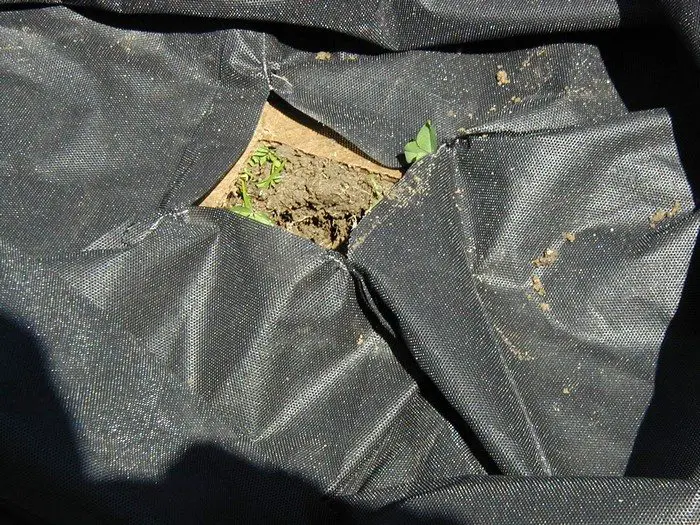
Sew darts about 3″ long at each corner along the bottom. Pull the opening apart between darts to fold the fabric in opposite direction to sew two more darts at the bottom, being careful to leave an opening.
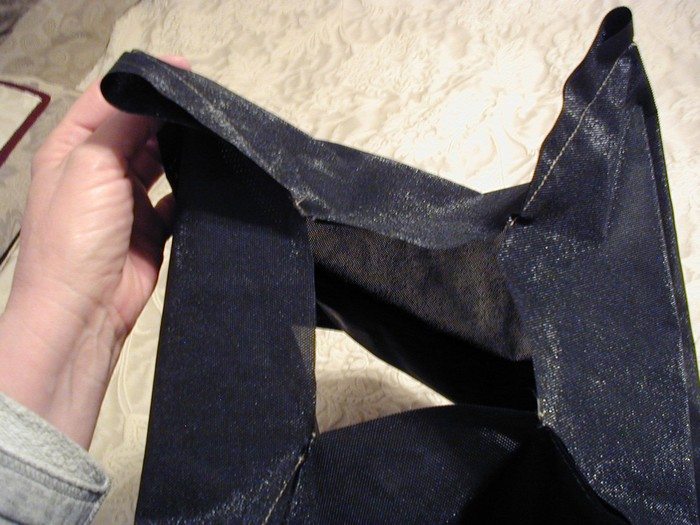
When you are finished with the sewing portion, you should have a square hole in the bottom of your Tater Tote ready for planting.
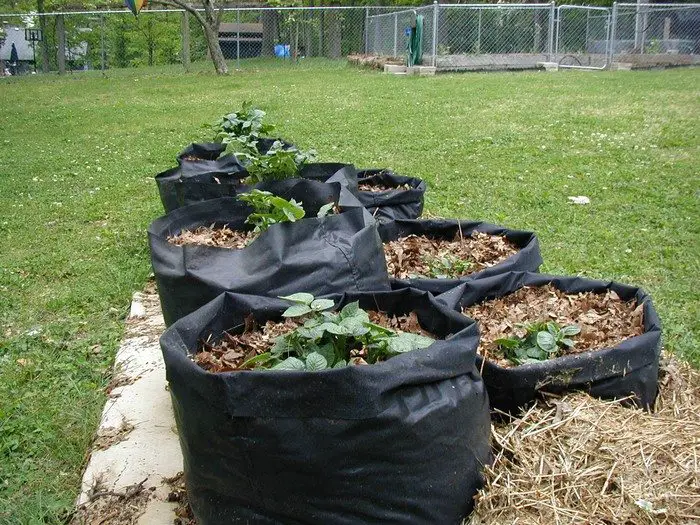
These Totes finished out at around 14-15″ in diameter and about 16-18″ tall, but you can make them any size you want or your materials allow.
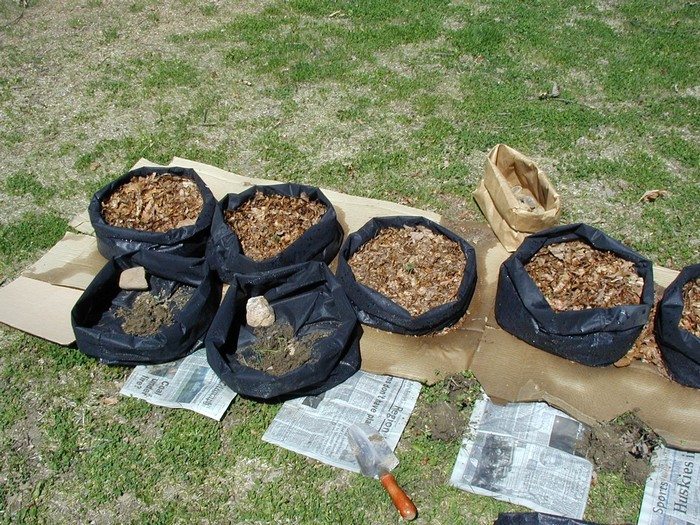
Planting taters in totes: Place a biodegradable mulch material (newspaper, cardboard) on the ground for weed control where you would like to plant your Tater Totes.
Measure the diameter of your Totes and use this dimension from center to center between your Totes. Cut out holes through the paper to expose the ground where your Totes will be positioned over.
Roll the sides of your Tater Totes down until they form a shallow bag. Place the Totes over the holes in the paper. Dig very shallow holes in the ground to plant your seed potato and lightly cover it with soil and compost.
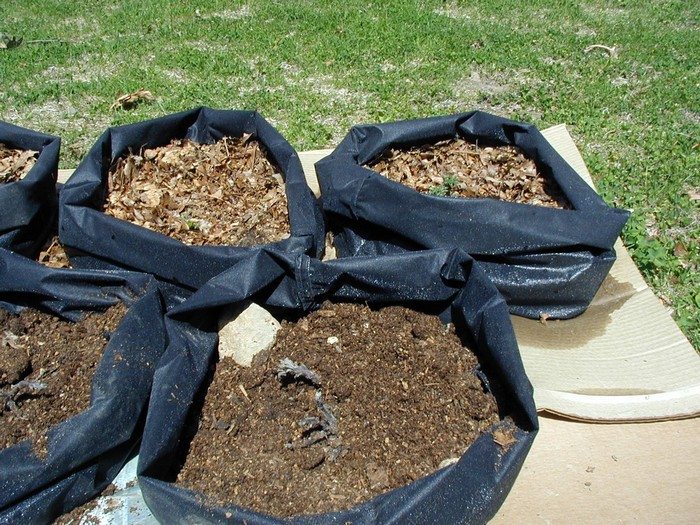
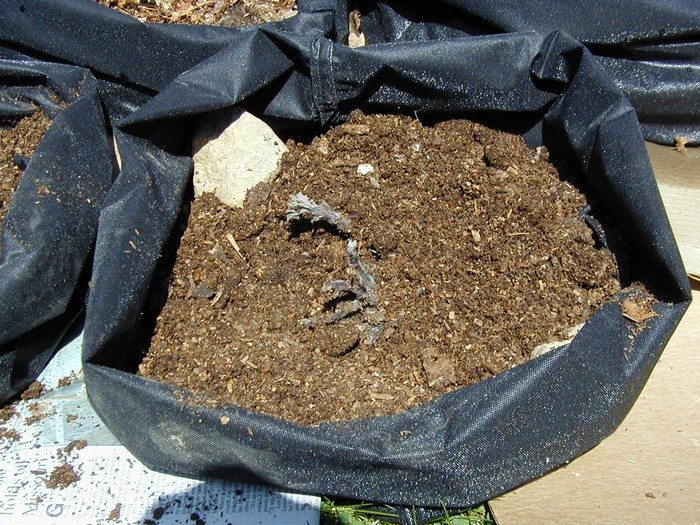
Place a rock or two in the bottom of the Totes to weigh them down. Place a layer of mulch in the bottom of the Totes to cover the spuds. Mulch can be anything you have plenty of like: shredded leaves or paper, hay, straw, sawdust, etc.
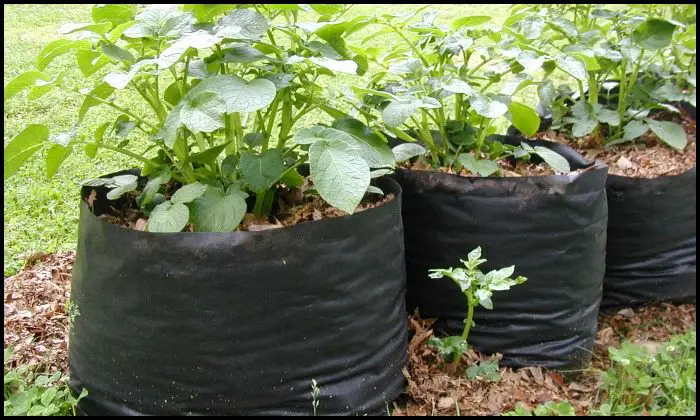
Add the mulch: As the potato leaves grow, unroll the sides of the Tater Totes a little at a time to allow more mulch to be placed around plants. Planting a group of Tater Totes at one time allows the plants to help support each other.
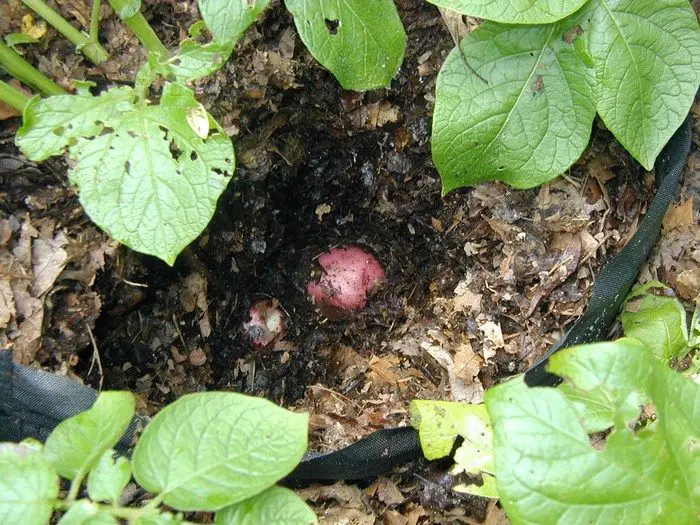
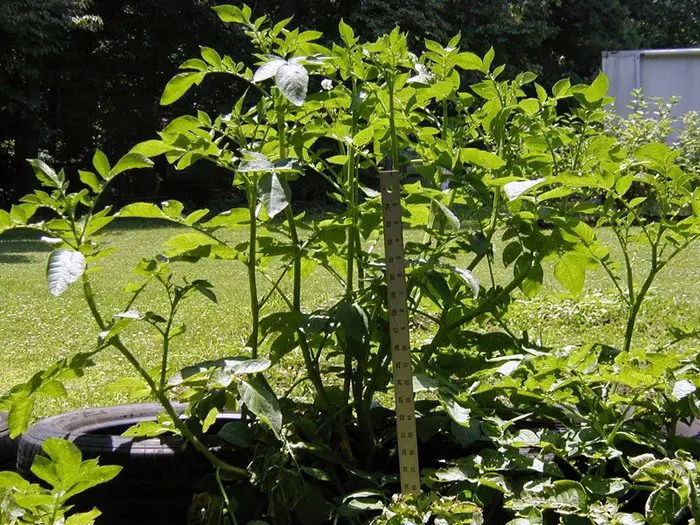
Spud harvesting: The potato plants will continue to grow well beyond the height of the Tater Totes and become top heavy and may fall over. At that time you may want to check around near the bottom of the potato grow bag for potatoes.
If you’re careful, you may be able to harvest spuds without damaging the plants, allowing the smaller potatoes to continue growing.
Happy harvest!!
Information update:
This year
- I lightly fertilized the soil before planting with composted manure with sawdust and green sand mix, and only fertilized once afterward with liquid fish emulsion before the rains came and stayed for 6 weeks. By then the plants were so huge I saw no need to fertilize
- 9 out of 10 red potato plants survived the constant rain. I attribute that to the porous Tote fabric which allowed good air circulation, and water drainage.
- The one plant that died showed signs of severe rot (blight?) and an infestation of slugs, both caused by the wet weather. The rot was located within a layer of hay mulch I used when I ran short of the shredded leaves. My best guess is that it was not the hay, as much as mixed mulches, that caused the rot. The shredded leaf mulch is heavier and compacted the hay layer, possibly trapping moisture in that area.
- I used bush beans and nasturtiums as companion plants and had no bug problems at all. There were plenty of earthworms living in the Tote mulch.
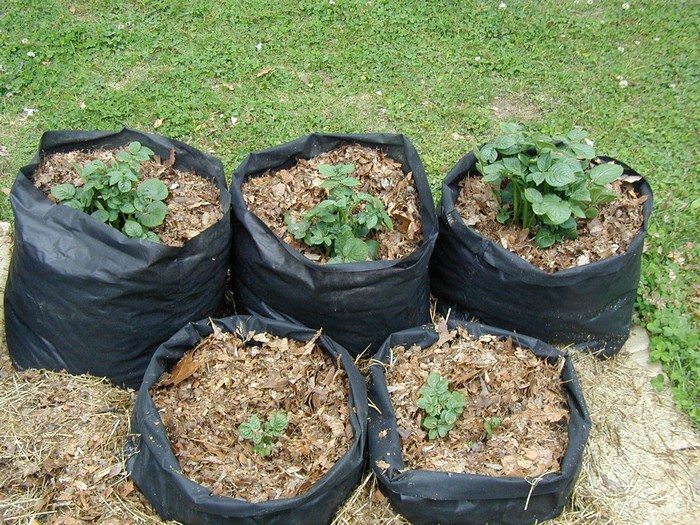
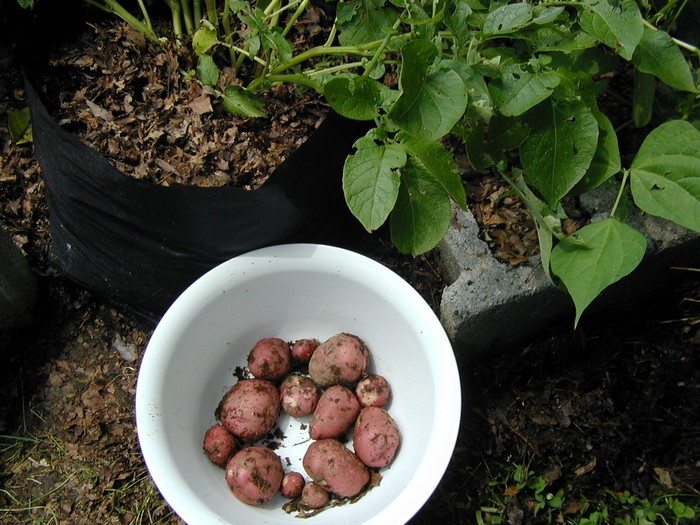
The final tally is in
I harvested approximately 1-3/8 pounds (0.63 kg) of red potatoes per Tater Tote.
I harvested twice from 4 of the Totes and kept the plants intact for a second harvest, but chopped them back to within 18″ of the Tote because they shaded the sun from other plants.
At least 2 potatoes were found in the dirt UNDER each Tote!
Next year
- I will definitely reuse these Tater Totes and make a bunch more.
- I will not mulch between the potato grow bags to allow more airflow and water drainage.
- I will cut back (trim) the potato plants, after they reach 2′ over the top of the potato grow bag.
- I will plant them in blocks of 9 (3 plants x 3 plants) for easier care, and they can more evenly support each other.
- I will plant at least one traditional hill of potatoes as a control for comparison purposes (I don’t believe traditionally grown potatoes would have survived the wet weather this season).
Thanks to WVSundown for this great project!
Watering Techniques for Potato Grow Bags
Watering potato grow bags correctly is crucial for achieving a healthy crop of potatoes. Unlike traditional garden beds, grow bags require specific watering strategies due to their unique material and structure. Here, we explore efficient watering techniques to ensure your potato plants thrive, maximizing yield and maintaining plant health.
Consistent Moisture is Key
Potato grow bags need consistent moisture levels to prevent the soil from drying out or becoming waterlogged. It’s essential to check the moisture daily, especially in warmer weather. A simple way to test this is by inserting a finger into the soil; if the top inch is dry, it’s time to water.
Deep Watering Method
To encourage deep root growth, water deeply rather than frequently. This means watering until you see water coming out of the bottom of the potato grow bag. This method ensures that the water reaches the deeper roots, promoting strong and healthy growth.
Use of Mulch
Adding a layer of organic mulch, such as straw or grass clippings, on top of the soil in your potato grow bags can help retain moisture.Mulch acts as a barrier to reduce water evaporation and also helps to keep the soil temperature stable.
Avoid Overhead Watering
When watering potato grow bags, avoid overhead sprinklers. Directing water at the base of the plant minimizes moisture on the foliage, which can help prevent the onset of fungal diseases like blight, which are common in potatoes.
Monitoring and Adjustments
As your potato plants grow, their water needs may increase, especially during the hot summer months.Monitor the plants for signs of water stress, which includes wilting or yellowing leaves. Adjust your watering schedule accordingly to ensure your potato grow bags receive just the right amount of water.
Scheduled Watering
For your potato grow bags to get water at the best times, set up a regular watering schedule. The best time is early morning when water may seep deeply into the soil before the heat of the day speeds up evaporation. Although watering in the evening is also fine, it should be done early enough to let the leaves dry before midnight, therefore lowering the chance of illness.
Drip Irrigation System
Put up a drip irrigation system for your potato grow bags. This efficient and water-conserving system sends water directly and at a controlled pace to the root of every plant. Drop irrigation reduces waste and guarantees that water is applied where it is most required without soaking the plants.
Water Reservoirs
Water reservoirs are either included by design in some potato grow bags or can be added later. These reservoirs enable water to slowly seep into the soil as needed, therefore helping to maintain constant moisture levels. Particularly helpful during the hottest summer months when it might be more difficult to keep moisture levels constant.
Check for Drainage
Make sure your potato grow bags have enough drainage to keep water from collecting at the bottom, which can cause root rot and other problems for your potatoes. Increase drainage if needed by using a more porous soil mix or by drilling more holes.
Adjusting to Weather Conditions
Watering should always be adjusted to suit the weather. Lower the quantity of extra watering during times of intense rain.
Implementing these watering techniques can provide an ideal growing environment in your potato grow bags, leading to a bountiful and healthy potato harvest.
Grow your own root vegetables at home with these Root Vegetable Grow Bags!
Here’s a recap of the photos to make it easier. Click on any image to enlarge it…