Need a raised garden bed? Here is an idea that’s easy to do, beautiful and essentially free!
Build your own elevated flower/garden bed by weaving branches and twigs – a wattle raised garden bed. Though this attractive garden bed may seem complicated, the technique is actually very easy to do. Even big kids can make their own little wattle raised garden bed – it’s that easy. :)
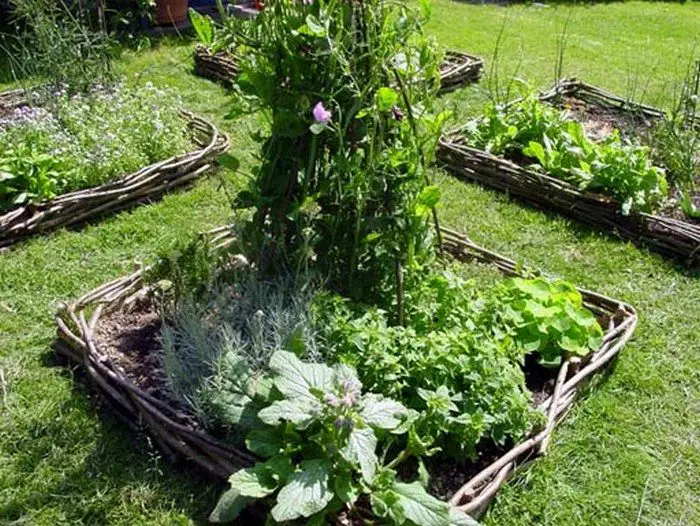
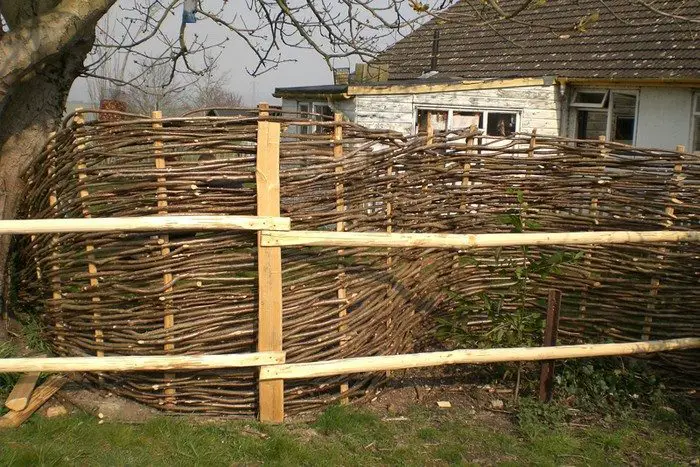
The elevated wattle flower bed featured in this project is great for growing some plants or producing just enough for a small family. This wattle raised garden bed is also a beautiful addition to your yard and makes tending to plants easier.
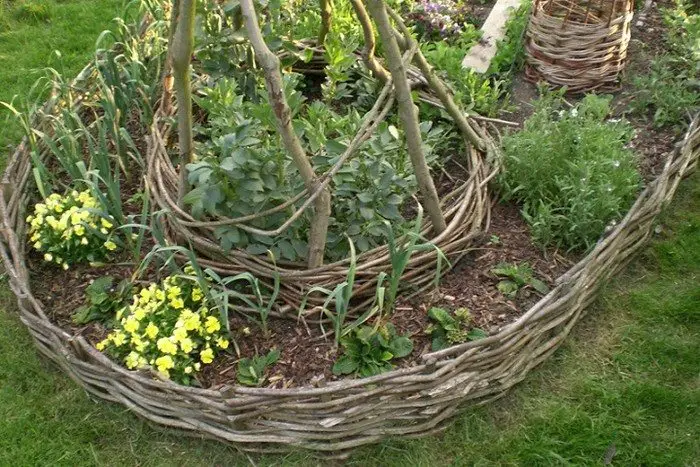
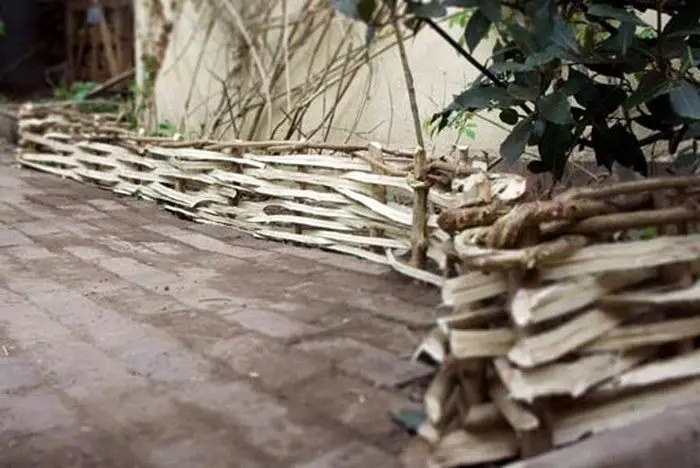
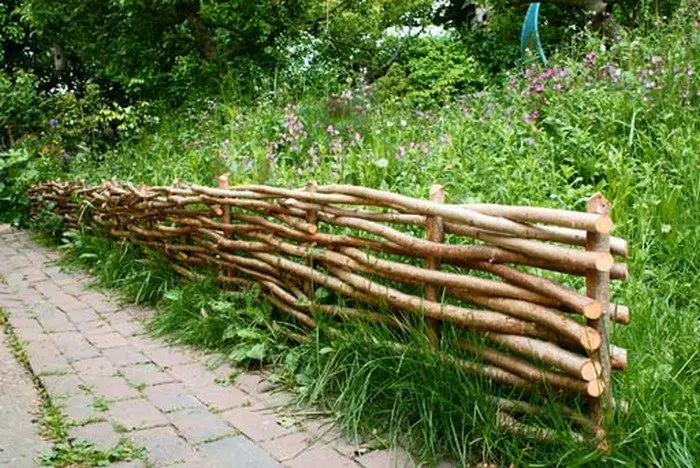
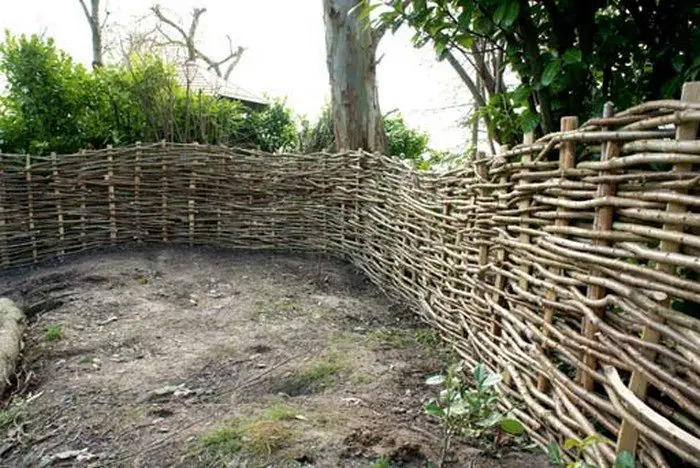
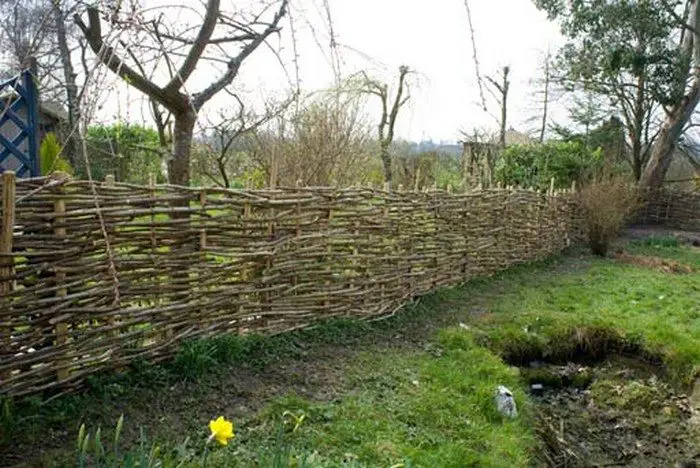
You can also use this technique to make fences and garden edging. Read on to learn how to make a garden bed and be inspired by more wattle ideas below!
Contents
How to Make Your Own Wattle Raised Garden Bed
Step into the world of natural and rustic gardening. In this tutorial, explore the age-old technique of wattle fencing and discover how to apply it to create a charming and eco-friendly wattle raised garden bed.
Whether you’re an experienced gardener or just starting your horticultural journey, this step-by-step approach will empower you to craft a sustainable, aesthetically pleasing garden space that’s both functional and environmentally conscious.
Ready to embark on a journey of creativity and tradition? Let your gardening dreams thrive while embracing nature’s beauty.
To start crafting your own wattle raised garden bed, gather the basic materials listed.
Materials
- Lots of long twigs and branches (Willow, Dogwood, Cornel, and more depending on what is available in your area)
- Strong, thick, straight Sticks (for the frame)
- Drum Barrel of water (or any large container of water for soaking the rods)
- Garden Fabric
- Branches, Garden Waste, Compost, Soil and Seeds/Plants
Steps
Step 1: Gather the rods
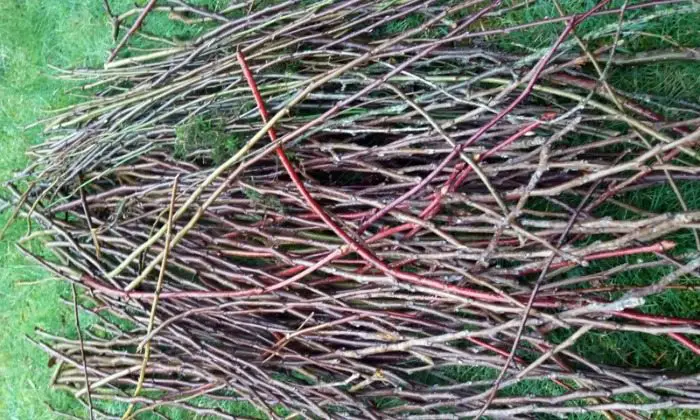
First of all, you have to collect the rods. You can use willow of course. But dogwoods look very nice too. Mind that the rods should be flexible and long enough. And that they have a diameter of app. 1 to 2 centimeters (0,4 to 06 inches). It looks very pretty if you collect rods of different colors.
And please keep in mind, that the best time to cut the rods is January. Plus, you must not cut them after February because it then damages the plant. Maybe you also want to watch out for landscapers, that do some park cleaning in the spring to get some big rods…
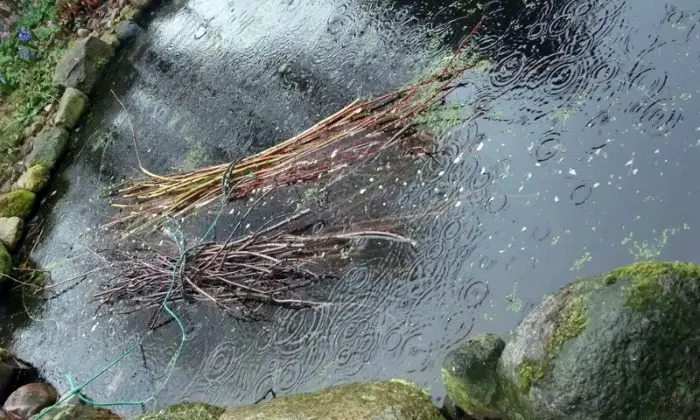
Step 2: Soak the rods
To make the rods smooth and flexible, you should soak them for at least one night. You can use your garden pond to do so. If you have none, you can also use a rain barrel – or your bathtub.
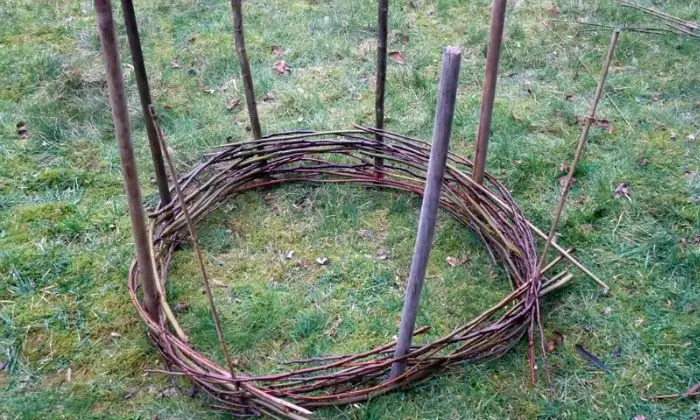
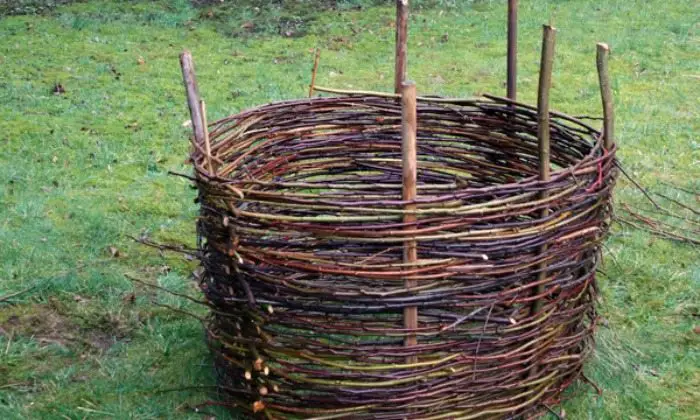
Step 3: Choose form and function, then start weaving
After supplying some thick, straight sticks, that will serve as frames for your elevated bed (or fence), you have to choose the size and form of your woven something: The length of the sticks defines the height, distance and position of the form and size of the bed (or fence). It might be a bit more difficult to weave a straight fence since you lose some firmness if you weave linearly.
Then, start to weave the rods. Try to start the weaving of every new rod with one stick after the other. You can use some thin bamboo sticks if there are no strong ones. Probably, if you use thin sticks your elevated bed won’t last long.
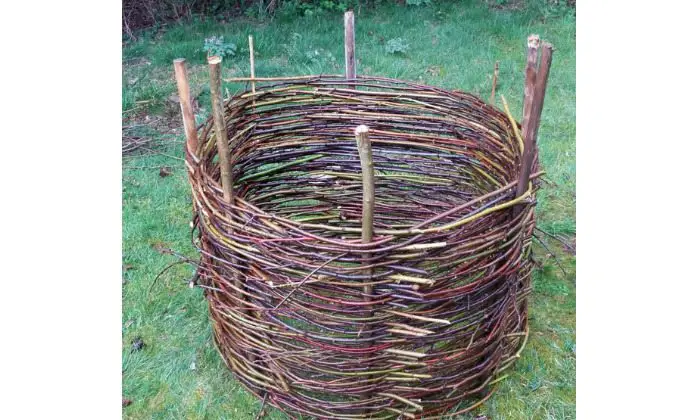
Step 4: Finish weaving and arrange the elevated flower bed
When you reach the height, you wish to have, you can finish your weaving by braiding the ends of your rods into the tracery. Some rods may be too thick to do so. After, furnish the tracery on the inside with a special garden canvas, that lets the water diffuse from the inside to the outside, but no roots etc.
Get ready to start your elevated flower bed. Begin with some branches, and add some garden waste, some compost and some good mulch…
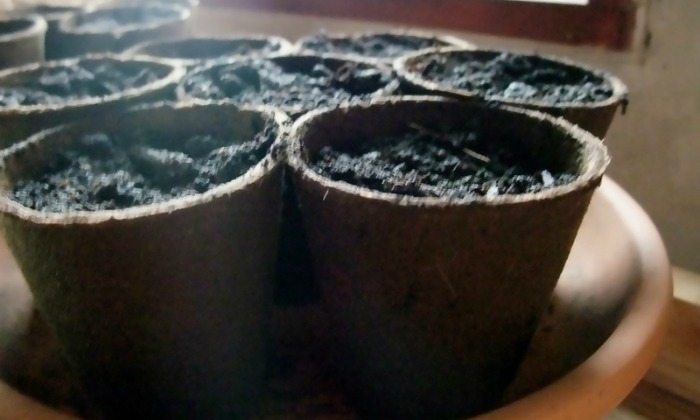
Step 5: Seed and plant
Seed vegetables in April. Plant carrots, beetroot, green squash and pumpkins – which can then go into your nice elevated flower bed in the middle of May.
Thanks to ikoglin for sharing insights into this great wattle raised garden bed project.
Here’s a recap of the photos to make it easier. Also included are more wattle-edging ideas for inspiration. Click on any image to enlarge it…
Benefits of Wattle Raised Garden Beds
Wattle raised garden beds are not just a charming addition to your garden; they offer numerous benefits. These eco-friendly structures, made from interwoven branches, provide a natural and sustainable way to cultivate plants. Let’s explore the advantages of using a wattle raised garden bed.
Environmental Friendliness
Wattle raised garden beds stand out for their commitment to environmental sustainability. Their construction primarily uses natural materials, typically sourced from local environments. This approach significantly lessens the ecological footprint associated with gardening.
Use of Natural, Renewable Resources
The essence of a wattle-raised garden bed lies in its use of branches and twigs, materials that are both renewable and biodegradable. Unlike synthetic or metal garden beds, wattle beds integrate seamlessly into the natural cycle, decomposing over time without leaving harmful residues.
Reduction in Synthetic Products
Opting for a wattle raised garden bed minimizes reliance on synthetic or heavily processed gardening products. These beds eliminate the need for plastic liners and metal frames, which are common in conventional garden beds. Reducing synthetic material usage is a step towards a more organic gardening practice.
Local Sourcing and Reduced Carbon Footprint
Wattle raised garden beds often use materials found in the gardener’s immediate environment. By utilizing locally sourced wood, the carbon emissions associated with transportation and manufacturing of commercial garden bed materials are significantly reduced. This local sourcing supports the local ecosystem and promotes a smaller carbon footprint in gardening activities.
Contribution to a Healthier Ecosystem
By choosing a wattle-raised garden bed, gardeners actively contribute to a healthier ecosystem. These beds encourage biodiversity, as the natural materials can become habitats for beneficial insects and microorganisms. This supports a balanced garden ecosystem, promoting healthier plant growth and a more vibrant garden environment.
Soil Health Improvement
Wattle raised garden beds are crucial in enhancing soil health, a fundamental aspect of successful gardening. These beds’ unique structure and materials offer several benefits to the soil, contributing to healthier, more productive plants.
Enhanced Soil Aeration
The design of a wattle-raised garden bed naturally improves soil aeration. The gaps between the woven branches allow air to circulate freely through the soil. This increased airflow provides essential oxygen to plant roots, promoting healthier root systems and, in turn, stronger plant growth.
Improved Drainage
Good drainage is vital for preventing waterlogged soil, which can lead to root rot and other plant diseases. The elevated design of a wattle-raised garden bed ensures that excess water drains away more effectively than in traditional ground-level beds. This improved drainage is particularly beneficial during heavy rains or in areas with clay-heavy soils.
Soil Temperature Regulation
Wattle raised garden beds are effective at regulating soil temperature. The natural materials used in these beds act as insulators, keeping the soil warmer in cooler months and slightly cooler during hot periods. This temperature regulation extends the growing season, allowing gardeners to plant earlier in the spring and harvest later into the fall.
Prevention of Soil Compaction
Another significant benefit is the prevention of soil compaction. In traditional garden beds, soil becomes compacted over time due to walking and working on the soil surface. Wattle-raised garden beds elevate the planting area, reducing the likelihood of compaction as there is less direct contact with the soil. This results in a looser, more crumbly soil structure, ideal for plant growth.
Accessibility for All Ages
Wattle raised garden beds are celebrated for their accessibility, making gardening an enjoyable activity for people of all ages and abilities. Their unique design addresses common physical challenges associated with traditional gardening, creating a more inclusive gardening experience.
Easier Access and Ergonomic Benefits
The raised nature of wattle garden beds brings the soil closer to the gardener. This elevation means less bending and stooping, reducing strain on the back, knees, and hips. For those with mobility issues, such as the elderly or those with disabilities, this makes gardening much more accessible and enjoyable. The ergonomic benefits allow for longer, more comfortable gardening sessions.
Safe and Comfortable for Children
These garden beds are also ideal for young gardeners. The accessible height makes it easier for children to reach into the beds without overexerting themselves. This encourages involvement in gardening from an early age, fostering a love for growing plants in a safe and manageable way.
Adaptable for Various Physical Abilities
Wattle raised garden beds can be adapted to suit different physical requirements. They can be built at various heights to accommodate gardeners who prefer to garden while seated or those who have limited reach. This adaptability makes wattle garden beds versatile for community gardens, schools, and therapeutic gardening programs.
In summary, wattle raised garden beds are aesthetically pleasing, environmentally friendly, beneficial for soil health, and accessible to gardeners of all ages. This makes them an excellent choice for anyone looking to enhance their garden sustainably and practically.
Troubleshooting Common Issues in Wattle Garden Beds
Wattle raised garden beds, while durable and eco-friendly, may encounter some common issues over time. Understanding how to address these problems can ensure your garden bed remains functional and beautiful for years. Here are some common issues and solutions for maintaining your wattle-raised garden bed.
Issue: Weakening or Rotting of Wattle Materials
Over time, the natural materials used in wattle garden beds can begin to weaken or rot, especially in damp conditions.
Solution: Regularly inspect the wattle for signs of decay. If you find weakened or rotting sections, replace these parts promptly with fresh, sturdy branches. To prevent rot, ensure good air circulation around the bed and consider using wood treated with a natural preservative.
Issue: Loose Weaving
The intertwining branches may become loose, compromising the structure’s stability.
Solution: Tighten or replace any loose branches. Adding new layers of weaving can reinforce the structure. For additional support, insert sturdy stakes at intervals along the bed.
Issue: Pests and Insects
Wood attracts certain pests, like termites or carpenter ants, which can damage the wattle.
Solution: Regularly check for pest infestations. Remove affected parts and treat the area with an eco-friendly pest control solution if pests are present. Keeping the area around the bed clean and debris-free can also help deter pests.
Issue: Soil Erosion or Leakage
Sometimes, soil can escape through larger gaps in the wattle weave, particularly if the bed is on a slope.
Solution: Line the interior of the wattle bed with a breathable landscape fabric. This will hold the soil in place while allowing water to drain. For beds on slopes, consider terracing or additional supports to prevent erosion.
Issue: Insufficient Drainage
Poor drainage can lead to waterlogged soil, harming plant health.
Solution: Ensure the bottom of the bed allows for drainage. If necessary, drill small holes or layer the bottom with gravel. Regularly check and clear any blockages in the drainage system.
Addressing these common issues promptly will help maintain the integrity and functionality of your wattle-raised garden bed, ensuring it remains a productive and attractive feature in your garden.
Wattle Garden Bed Maintenance and Care
Maintaining a wattle raised garden bed is key to ensuring its longevity and effectiveness in your garden. These natural and attractive beds require specific care to remain functional and beautiful. Here’s a guide to help you keep your wattle garden bed in top condition.
Regular Inspection and Repair
Routine Checks: Periodically inspect your wattle garden bed for signs of wear or damage. Look for broken or rotting branches and loose weaving.
Timely Repairs: Address any issues as soon as they are spotted. Replace damaged branches and tighten any loose weaving to maintain the bed’s structure and appearance.
Pest and Disease Control
Monitoring: Keep an eye out for signs of pests or disease. Common indicators include unusual leaf spots, wilting plants, or visible insects.
Natural Solutions: Use organic pest control methods to treat any infestations. Encourage beneficial insects like ladybugs, which can help control harmful pests naturally.
Soil Health Management
Nutrient Enrichment: Regularly add compost or organic matter to your soil. This practice enriches the soil, providing essential nutrients to your plants.
Mulching: Apply a layer of mulch around your plants. Mulch helps retain soil moisture, suppresses weeds, and can add organic matter as it decomposes.
Watering Practices
Consistent Watering: Ensure your wattle garden bed receives adequate water. The frequency will depend on your climate, soil type, and the needs of your plants.
Drainage Check: Make sure your bed has good drainage. Poor drainage can lead to waterlogged soil, which can harm plant roots.
End-of-Season Care
Clean-Up: At the end of the growing season, clear out any dead plants and debris. This helps prevent disease and pest problems.
Soil Preparation: Turn the soil lightly and add fresh compost to prepare the bed for the next planting season.
Proper maintenance and care will keep your wattle-raised garden bed a productive and attractive part of your garden for many years. Regular attention and eco-friendly practices are key to the longevity and success of your wattle garden bed.
FAQ on Wattle Raised Garden Beds
What is a wattle raised garden bed?
A wattle-raised garden bed is a type of garden bed made by weaving branches, typically from willow or other flexible woods, into a sturdy, raised structure. This technique is ancient and offers a natural, eco-friendly way to create raised beds for gardening.
How long do wattle garden beds last?
The lifespan of a wattle raised garden bed varies depending on the materials used and the climate. Typically, they can last anywhere from 5 to 10 years. Regular maintenance, like replacing rotting branches and ensuring good drainage, can extend their life.
Are wattle garden beds suitable for all types of plants?
Yes, wattle raised garden beds are versatile and suitable for various plants, including vegetables, herbs, flowers, and small shrubs. The key is to ensure appropriate soil and watering for your chosen plants.
How do I maintain a wattle raised garden bed?
Maintain your wattle garden bed by regularly inspecting for and repairing any damage or loose weaving, controlling pests using natural methods, enriching the soil with compost, ensuring consistent watering, and preparing the bed at the end of each growing season.
Can I build a wattle raised garden bed myself?
Absolutely! Building a wattle raised garden bed is a DIY-friendly project. It requires gathering flexible branches, like willow, and weaving them into a desired shape and size. There are many resources and tutorials available to guide you through the process.
Summary
Embark on a journey of rustic elegance. Discover the art of wattle fencing and how to apply it in creating a sustainable, visually captivating raised garden bed. Whether you’re a seasoned gardener or a beginner, this step-by-step tutorial empowers you to craft a natural, eco-friendly garden space that combines tradition with modern creativity.
The concept of a wattle raised garden bed embodies the perfect fusion of age-old techniques and contemporary environmental consciousness. It’s a testament to the enduring beauty of traditional craftsmanship while embracing the principles of eco-friendliness.
This ingenious approach not only provides a canvas for your gardening dreams but also reflects your commitment to nurturing the natural world while enjoying its bounties. So, whether you’re already well-versed in the art of gardening or taking your very first steps into this green world, the wattle raised garden bed promises a rewarding and educational journey.
Say goodbye to ordinary garden beds and weave your dreams into reality with ease. Why wait? Seize the opportunity to infuse your garden with eco-friendly elegance. Craft your wattle raised garden bed today and watch as your outdoor space blossoms into a sanctuary of natural artistry and sustainable living.
Additionally, the beauty of creating your wattle raised garden bed lies in its simplicity. The materials required for this project are easy to obtain, and the steps involved are straightforward, making the entire process a breeze. You’ll find that crafting your wattle raised garden bed is an accessible and enjoyable endeavor.
Ready to make your own wattle raised garden bed? Happy building!


