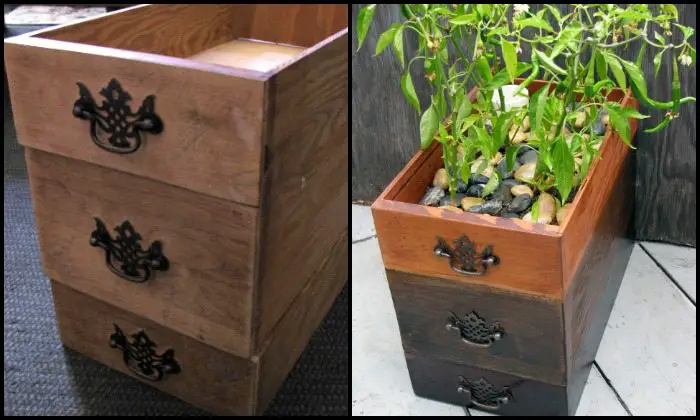
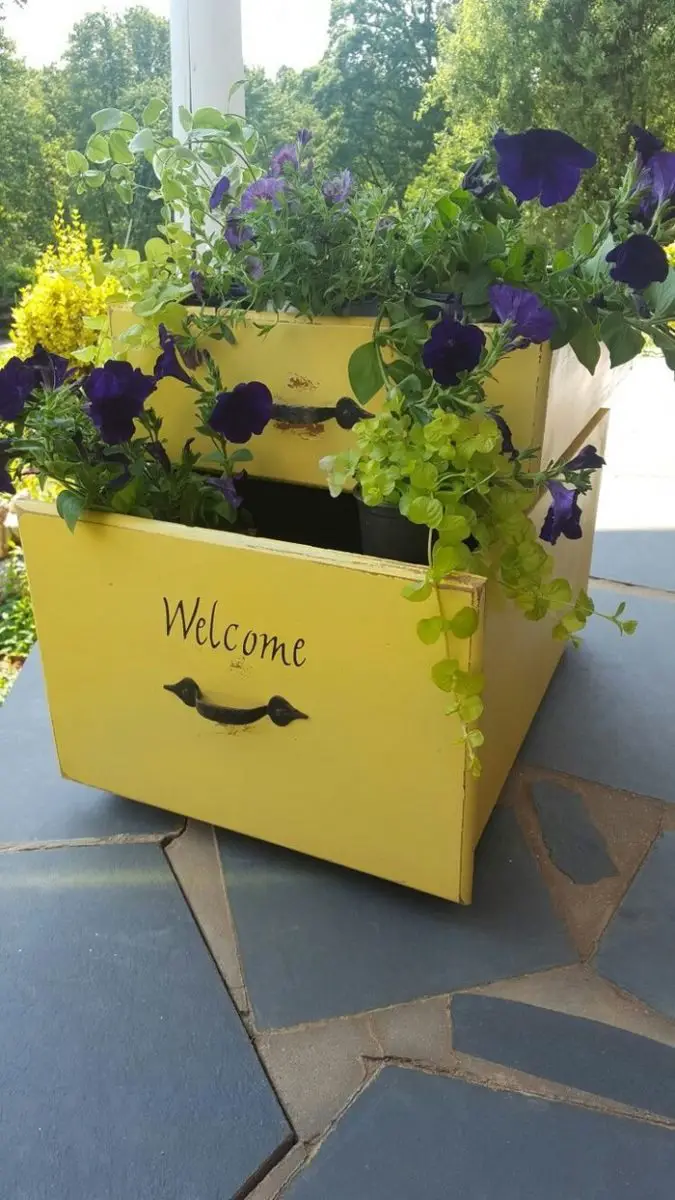
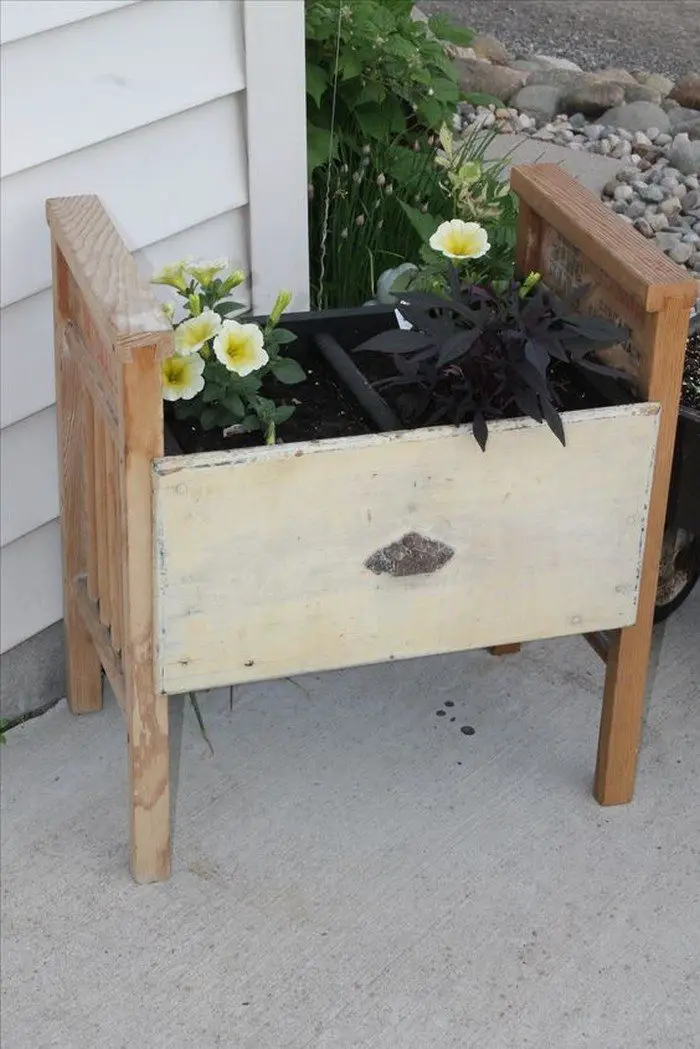
Always forgetting to water your plants? Here’s a self-watering dresser drawer planter you can easily build…
This DIY dresser drawer planter is a great repurposing project that doesn’t only solve your problem with watering plants regularly, but it is also a beautiful addition to your outdoor area!
To make this dresser drawer planter, you will need to gather three drawers either from old furniture you own or from the thrift store. You will also need PVC and ABS pipes. Take note that you first have to know the overall dimensions of the three dresser drawers stacked together. This will determine the sizes of the pipes you will get.
Read on to learn how to make this amazing DIY dresser drawer planter, and tell us what you think.
Do you have any ideas for improving this self-watering dresser drawer planter?
Click on any image to start the lightbox display. Use your Esc key to close the lightbox.![]()

Contents
Building a Dresser Drawer Planter
Materials
- Dresser Drawers
- 1 pc – 2″ diameter PVC Pipe (length equivalent of total height of all drawers stacked)
- 3 pcs – 3″ diameter ABS Pipe (1/3 of total height)
- 2 pcs – Plastic Baskets (something stiff and porous enough to serve as non-toxic, water-proof, weight-bearing screen)
- Outdoor Stain & Sealant Combo Wood Finish
- Wood Glue
- Wire, String or Cable Ties
- Landscape Tarp, Opaque Plastic Bag or River Rocks
- Potting Mix
- Fertilizer
- Plants or Seeds
- Painter’s Tape
- Old Newspapers (for easy cleanup)
Tools
- Paintbrush
- Drill
- Utility Knife
- Garden Trowel
Instructions
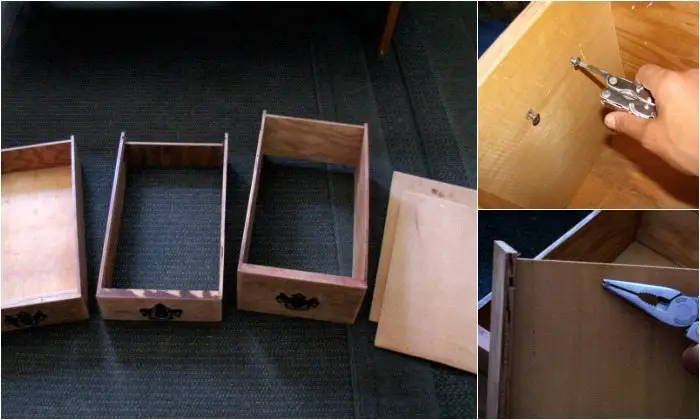
Remove hardware and bottoms: Remove hardware by unscrewing from the inside, and take out any nails that prevent the bottoms from sliding out.
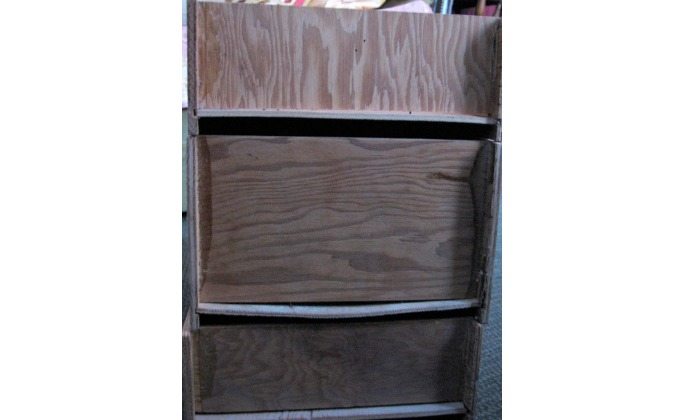
Pull out the bottoms from all but one drawer and set them aside for later.
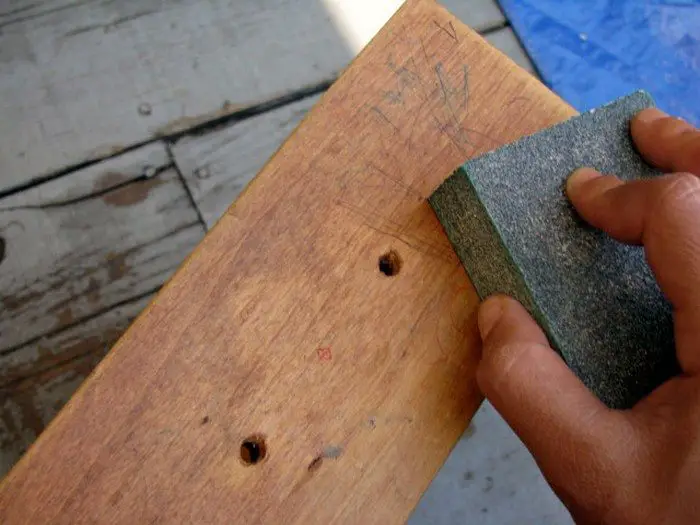
Stack, glue and sand: Sand the outside to get the surface ready for staining and end up with a clean, even coat. If you don’t mind marks, found drawers without them, or decided to use paint instead, feel free to skip this step.
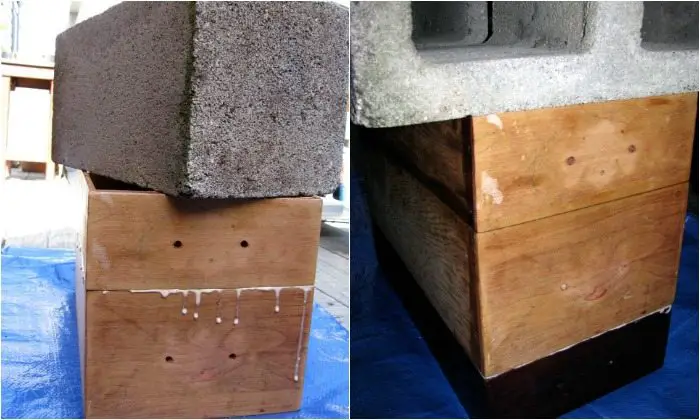
I used a cinderblock for weight while the glue set, since I didn’t have large enough clamps, but anything heavy with a flat base should work. Wipe off any excess wood glue before it dries.
The original plan was to stain each one separately to prevent dripping/bleeding, but the timing was such that I needed to take up less space, so I ended up assembled them first and just using painter’s tape instead.
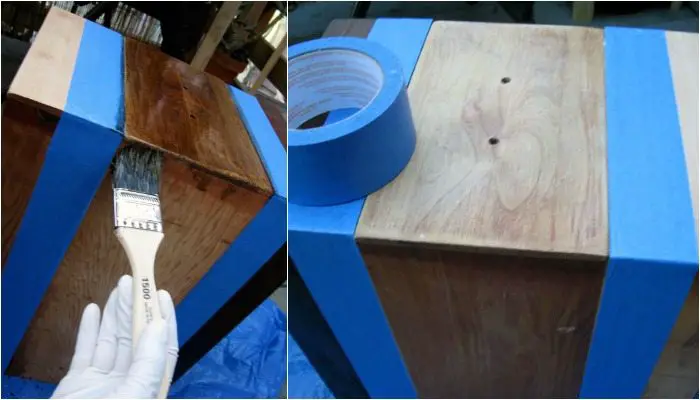
Stain and seal: Lay down a tarp or old newspaper. Use painter’s tape if you want different colors with clean lines between them, and brush along the grain until all areas are covered. Let the first coat to dry completely before applying another. While that’s drying, you can switch to the drilling and cutting.
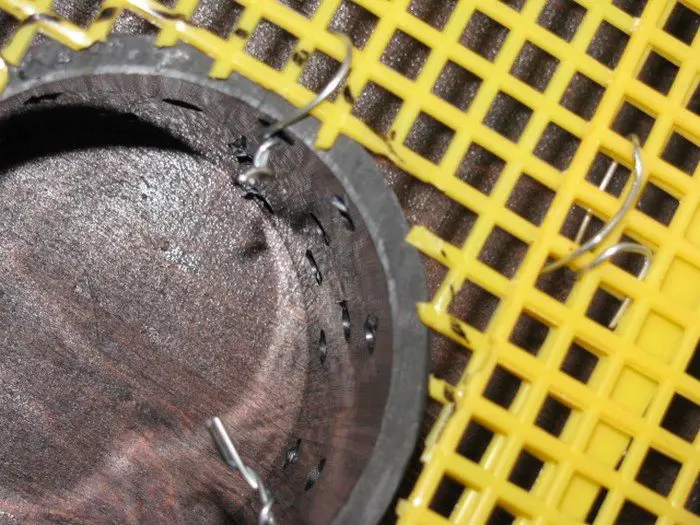
Drill holes and cut screen: Drill holes in all ABS pipes to allow the soil to pull water up from the reservoir without spilling into it.
I also used holes at the bottom of the fill tube instead of cutting it at an angle, only because the drill was out and it serves the same purpose of allowing water to flow into the reservoir.
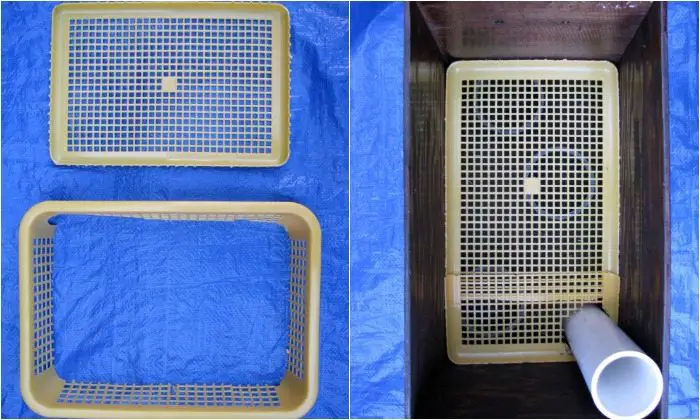
I needed two baskets to fill in the extra length of the drawer, so I did the same to both, cut down the edge, and laid one on top of the other. Yours may be a different length or from a different material, as long as it serves as a screen and ends up fitting snugly against all sides.
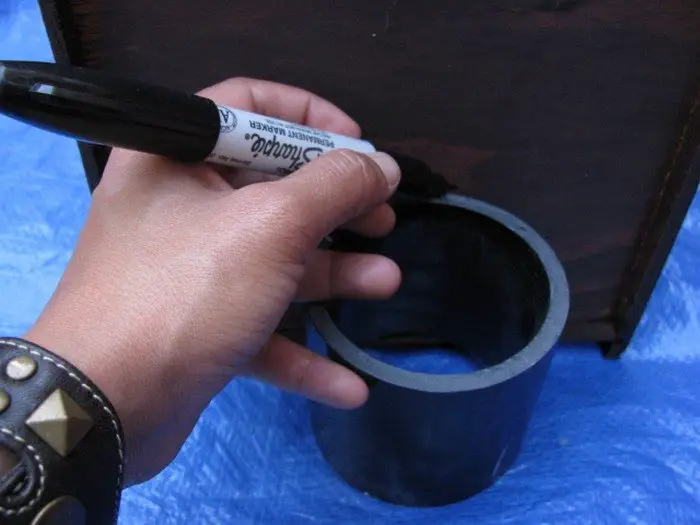
Use one of the ABS pipes to mark a spot for the overflow hole, then drill. This is to allow excess water to flow out, so your roots will never be water-logged.
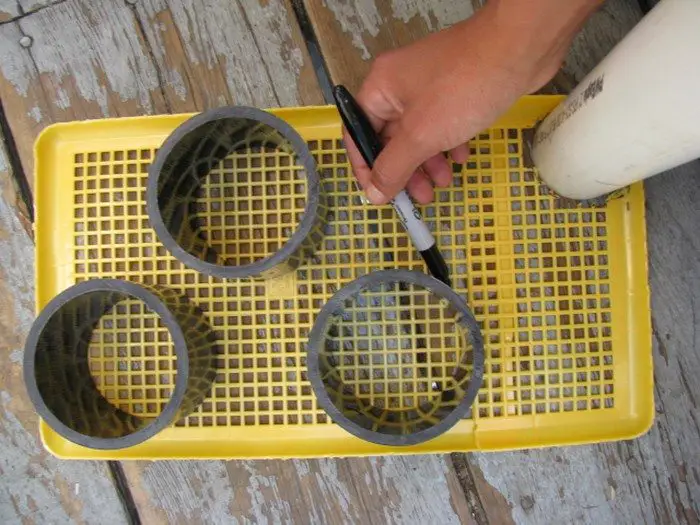
Cut, connect and attach the insides: Set all pipes on top of the screen/basket bottom and trace around them with a marker.
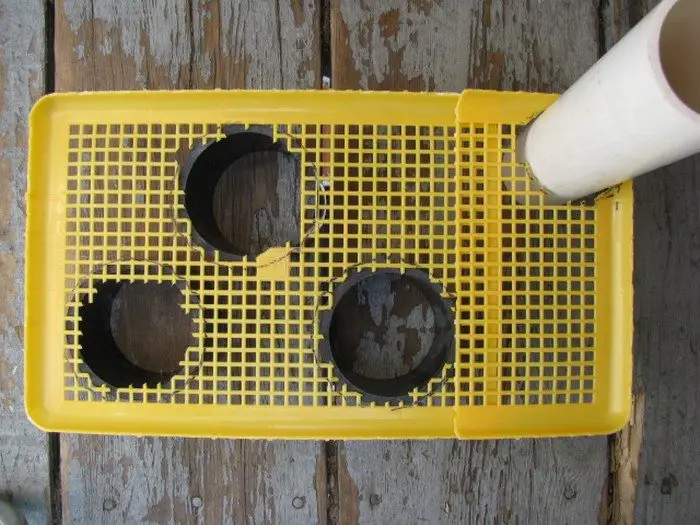
Cut inside the lines to allow some space to help support the weight of the soil. Some designs only use one pipe as the wicking chamber and the others as pure support (uncut at the top), but I decided to try using all 3.
Use wire, string or cable ties to attach the wicking chambers and fill tube to the screen.
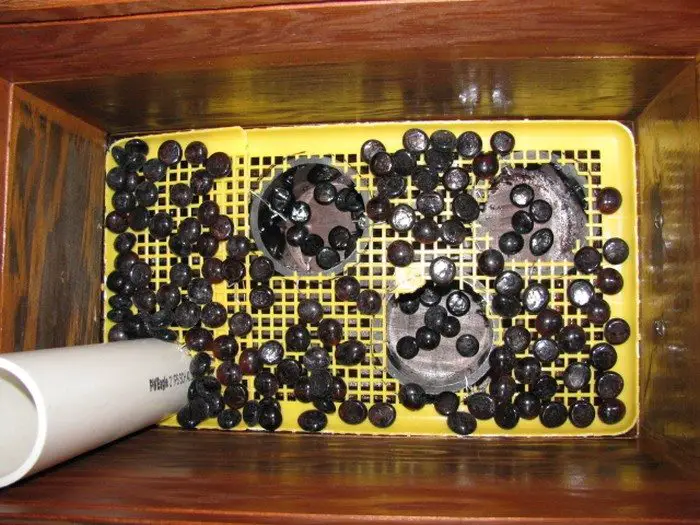
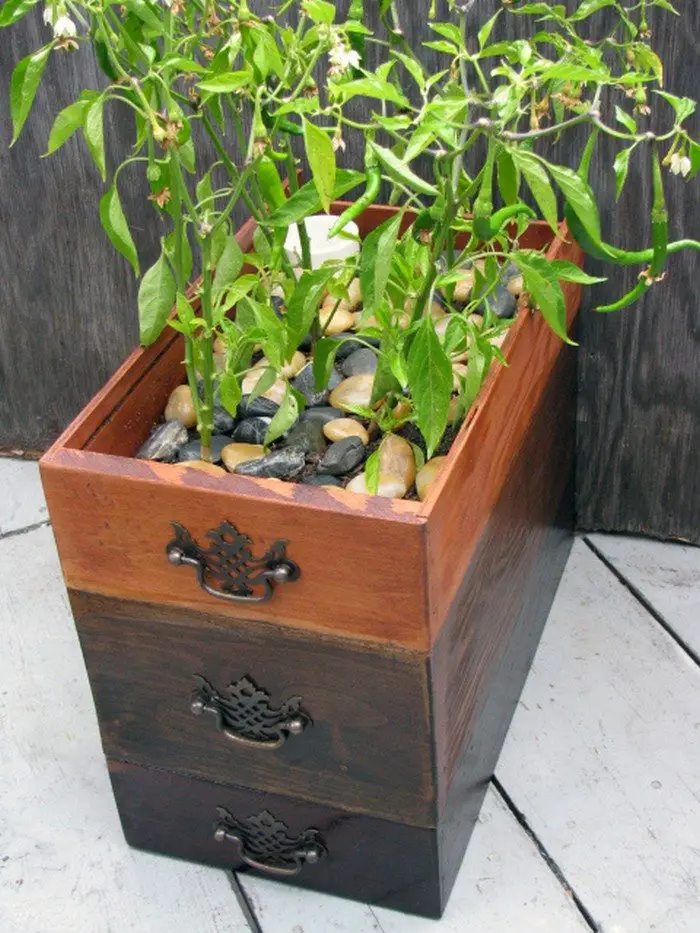
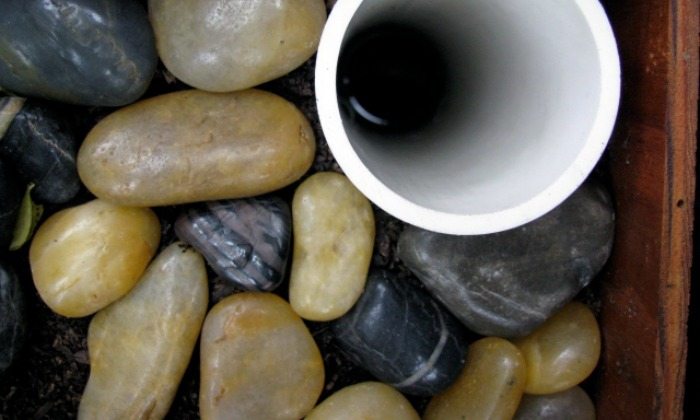
Once all drawers are completely dry and assembled, place the screen, wicking chambers and fill tube unit inside and layer with river stones or small rocks.
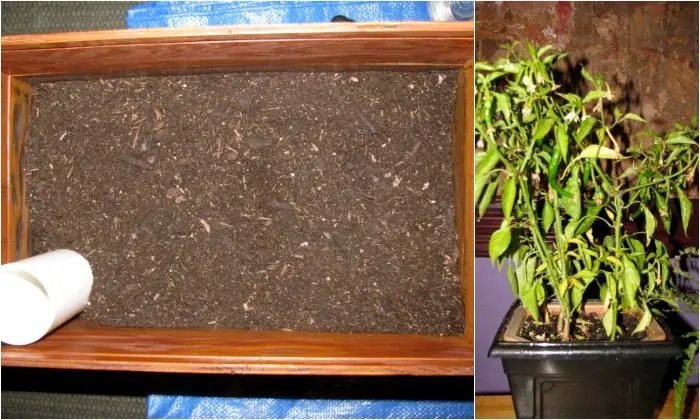
Add soil, plants and topsoil covering: Fill at least halfway with potting mix.
Transplant something you already have, or follow the directions on the seed packet(s) to start something new. I chose these peppers since they were the most in need of room to grow.
Add more soil and enough fertilizer for the size of your container. Leave at least an inch from the brim for the topsoil cover, which could be a piece of landscape tarp, opaque plastic bag, or more river rocks.

Soak it, sit back and watch it grow: Water your dresser drawer planter the way you normally would (from the surface, not the fill tube) to give the transplant roots a chance to mix with the new soil and the fertilizer a chance to seep in. Give it a nice thorough soak for the first one.
After that, all you have to do is use the fill tube maybe once a week, watering until some spills out the overflow hole, sit back and watch it grow!
Thanks to Chandra Nalaani for this great project!
Advanced Moisture Control Techniques for Your Dresser Drawer Planter
Maintaining the ideal moisture level in your dresser drawer planter is crucial for the health of your plants. Overwatering can lead to a host of problems. Your plants could drown or have their growth stunted.
Here are some advanced moisture control techniques for healthy plant growth.
Use of Moisture Sensors
Invest in a moisture sensor to take the guesswork out of watering your dresser drawer planter. These sensors can provide real-time soil moisture readings. Insert the sensor into the soil and set it to alert you when moisture levels drop below a plant-specific threshold. This technology helps in maintaining consistent moisture levels, which is especially useful for those who might not have the time to check their planters daily.
Mulching
Applying a layer of mulch on top of the soil in your dresser drawer planter can significantly help in retaining soil moisture. Organic mulches like wood chips or straw not only keep the soil moist but also add nutrients as they decompose. Ensure the mulch is not touching the plant stems directly to avoid rot and fungal infections.
Automated Watering Systems
For those who enjoy DIY projects, setting up an automated watering system can be a rewarding upgrade to your dresser drawer planter. Use a simple drip irrigation system powered by a timer to provide regular, measured amounts of water based on the specific needs of your plants. This system is particularly effective for maintaining optimal soil moisture and is ideal for busy gardeners.
Water-Absorbing Crystals
Incorporate water-absorbing polymer crystals into the potting mix of your dresser drawer planter. These crystals swell up when watered, slowly releasing moisture back into the soil as it dries out. They’re a great addition to help manage moisture in drawer planters where space and soil depth may limit natural water retention.
Adjusting Watering Schedules Seasonally
Be mindful of seasonal changes and adjust your watering schedules accordingly for your dresser drawer planter. Plants typically require less water in the cooler months and more during the hot season. Monitor weather conditions and modify your watering frequency to prevent overwatering or drought stress.
By implementing these advanced moisture control techniques, you can better manage the watering needs of your dresser drawer planter, ensuring that your plants remain healthy and vibrant throughout the year.
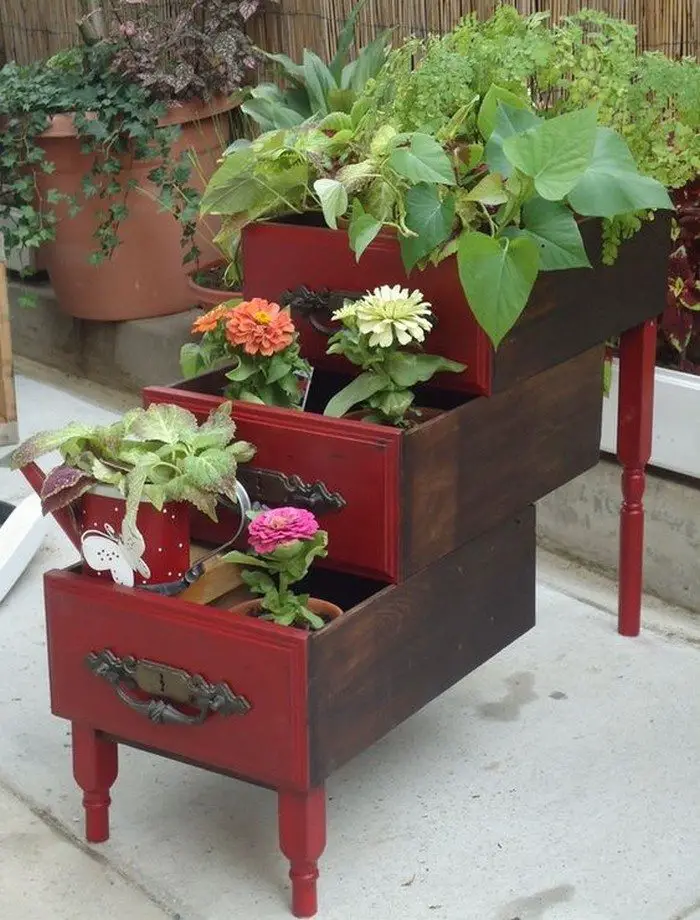
Customization and Decoration Tips for Your Dresser Drawer Planter
Transforming a dresser drawer into a planter provides a unique opportunity to get creative with your gardening. Customizing and decorating your dresser drawer planter not only enhances its visual appeal but also allows you to express your personal style.
Here are some tips to help you make your dresser drawer planter a standout piece in your garden or home.
Choosing a Theme
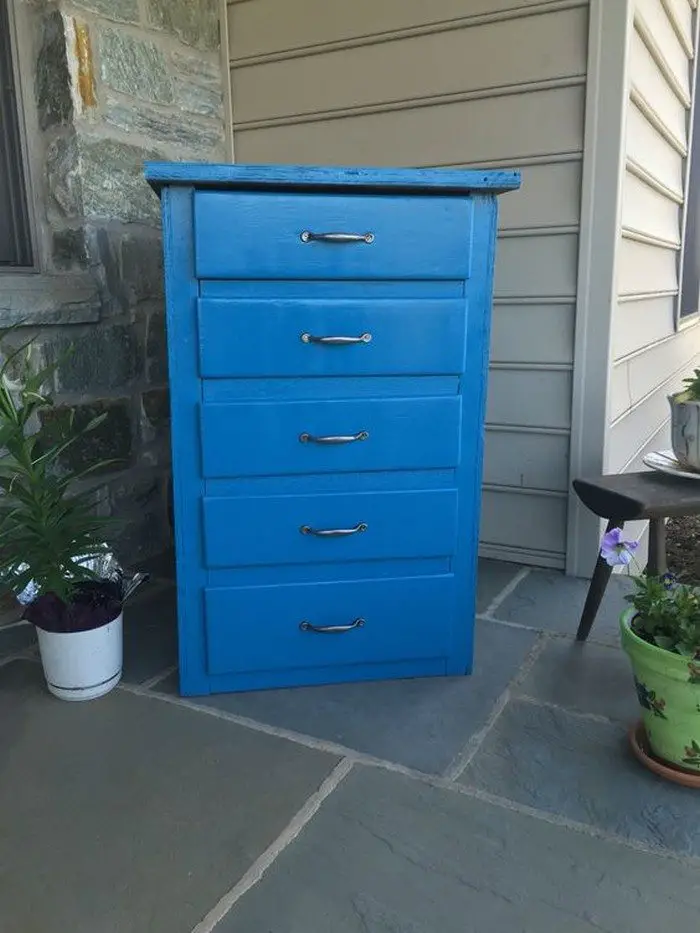
Start by deciding on a theme that reflects your personal taste or complements the environment where the dresser drawer planter will be placed. Whether it’s rustic, modern, whimsical, or vintage, a cohesive theme can guide your choices in colors and decorations. For example, a vintage theme could include antique knobs and a distressed paint finish.
Painting Techniques
Painting your dresser drawer planter is an easy way to add a splash of color and personality. Use outdoor paints to ensure durability against the elements. Techniques such as sponge painting, stenciling, or even chalkboard paint can add texture and interest. Don’t forget to seal your paint job with a weather-resistant clear coat to protect it from moisture and sun exposure.
Adding Hardware and Accessories
Swapping out old drawer handles with new ones can make a big difference. Choose hardware that complements your theme—ceramic knobs for a country feel, sleek metal handles for a modern look, or whimsical shapes for a playful touch. Additionally, you can attach legs to elevate your dresser drawer planter off the ground, enhancing its presence and making it easier to tend your plants.
Incorporating Lighting
Adding lighting can transform your dresser drawer planter into a stunning night-time feature. Solar-powered LED lights can be used to illuminate the plants from within or to highlight the planter itself. Fairy lights draped over the edges or battery-operated candles placed inside the drawers can create a warm, inviting glow.
Using Decorative Liners
Lining the insides of your dresser drawer planter with decorative liners not only looks good but can also help protect the wood from moisture. Choose from a variety of materials such as burlap for a rustic touch or waterproof fabric with vibrant patterns to add a burst of color.
Creative Top Dressing
Top dressing is the practice of covering the surface of the potting soil with decorative materials. For your dresser drawer planter, use pebbles, moss, or even decorative glass to add texture and color. This not only helps the soil retain moisture but also adds a finished look to your planting.
By employing these customization and decoration tips, you can ensure that your dresser drawer planter is not only functional but also a true reflection of your creative flair. Whether it’s through paint, accessories, or lighting, each modification makes your planter uniquely yours.
Conclusion
Building a dresser drawer planter allows you to creatively repurpose old furniture into a beautiful and functional garden feature. With some simple modifications and personalized decorations, your planter can become a centerpiece in your outdoor or indoor space. Tackle this project to add a unique touch of greenery to your home while recycling materials in an environmentally friendly way.
We have more creative planters for your home. Check out our picture frame planter project!


