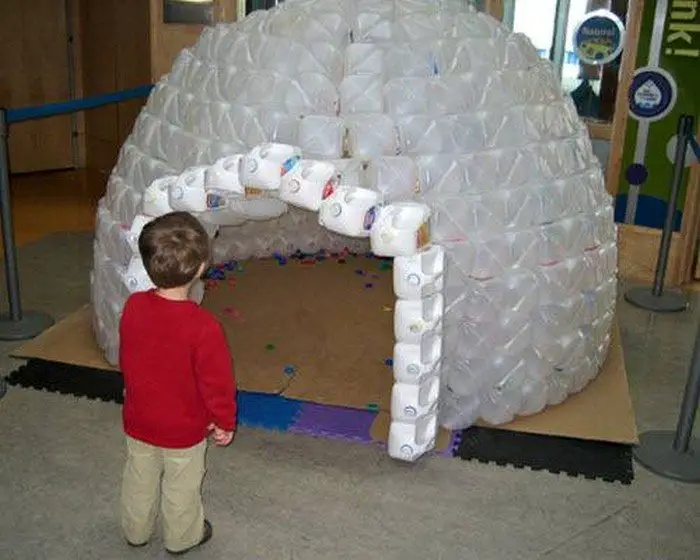
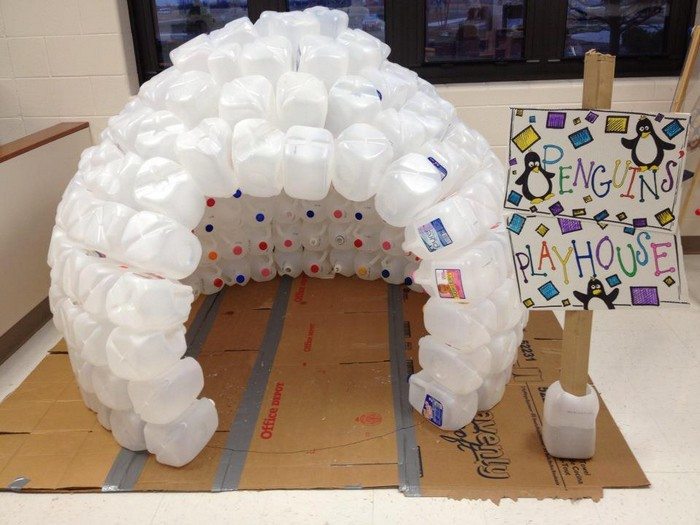
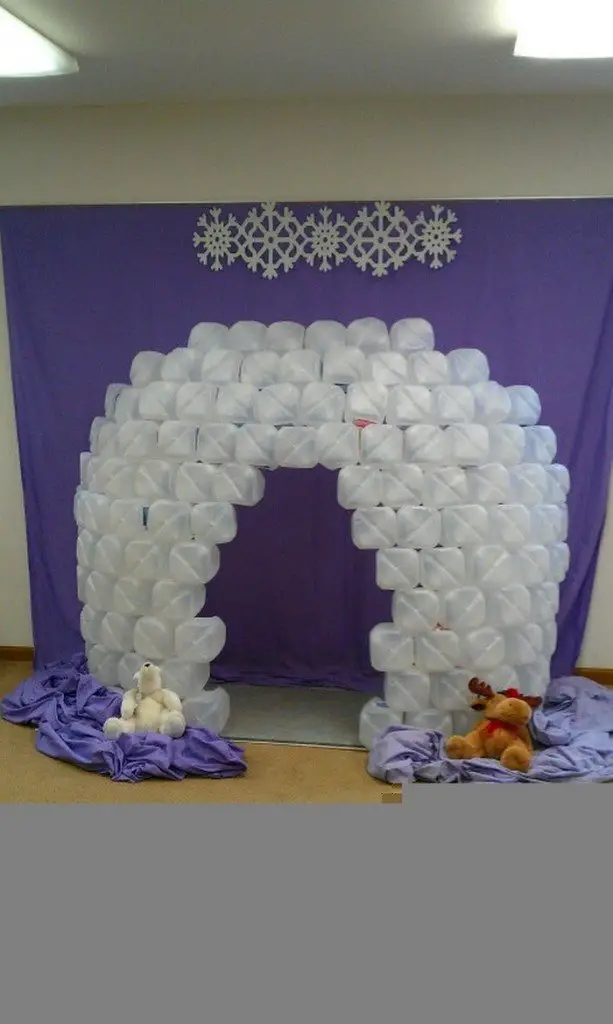
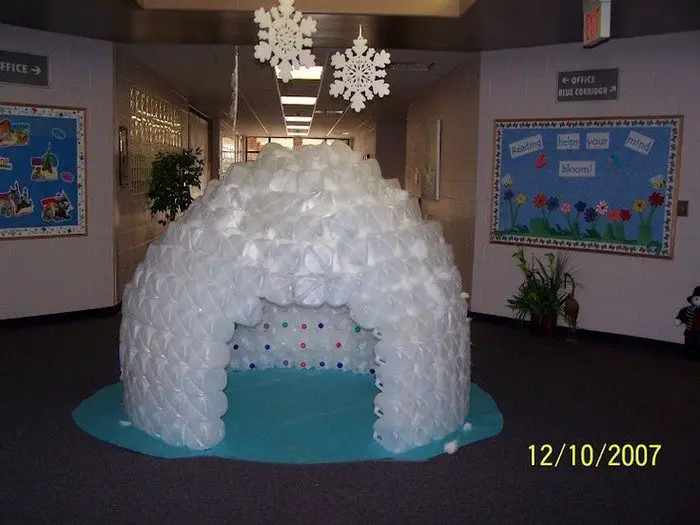
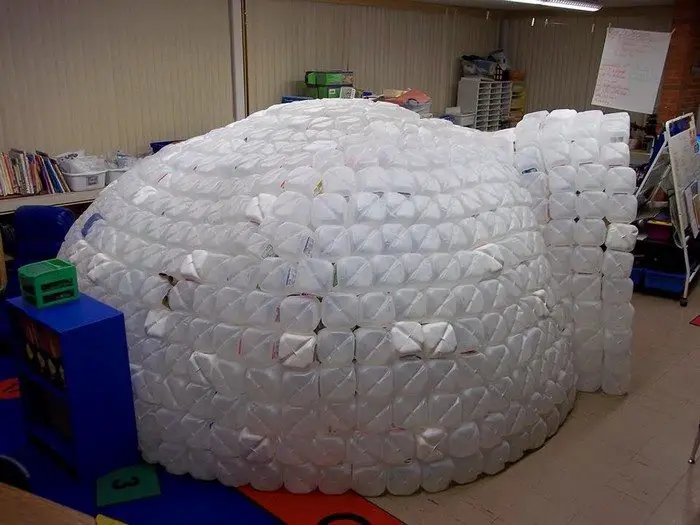
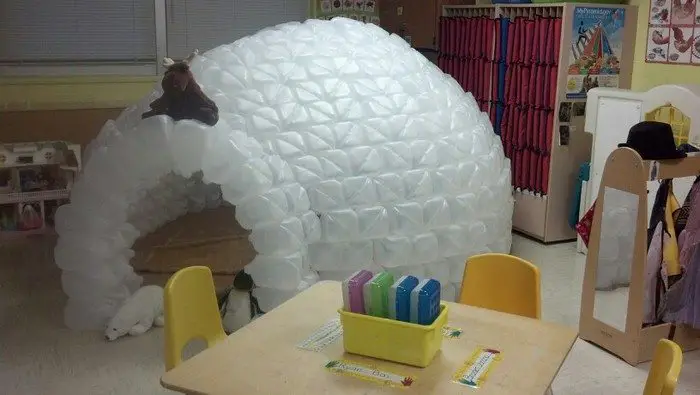
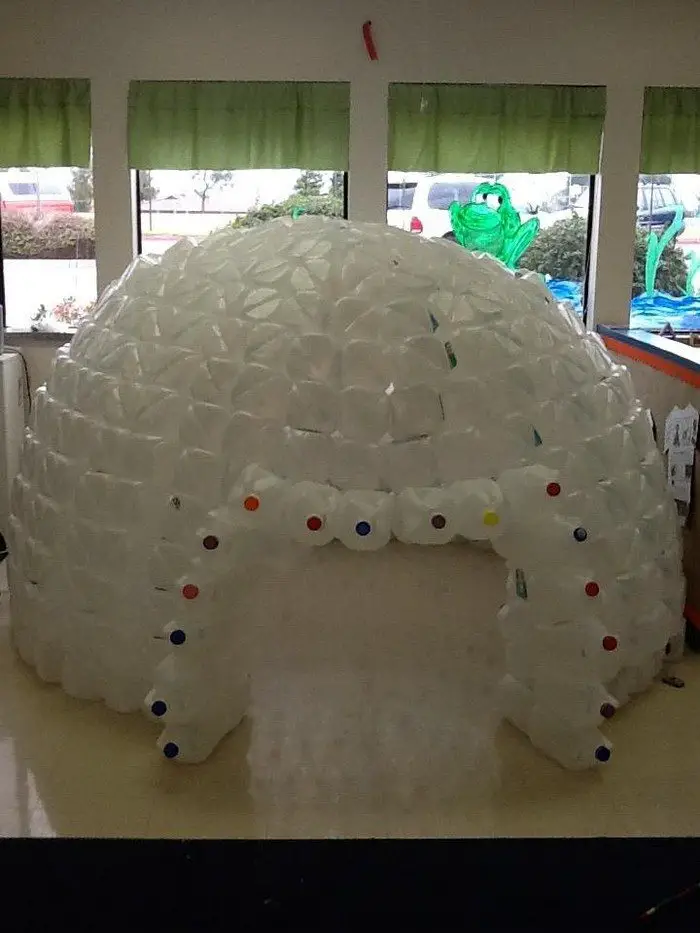
What a fantastic idea to put all those plastic milk jugs we collect to good use! Building a milk jug igloo provides an exciting and imaginative fort that will surely bring joy to the little ones. :)
Ready for hours of fun and creative playtime?

Plastic containers are among the most persistent – and prevalent – debris polluting our oceans and clogging landfills. In 2014, researchers estimated that some 5 trillion plastic items were afloat in our oceans. Many of them were milk jugs.
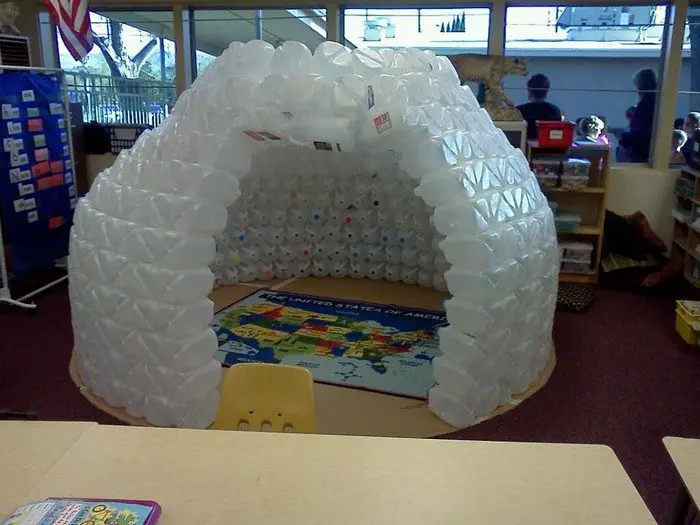
This recycling idea is commonly done as a students’ classroom activity/project which provides lots of educational benefits to the children. They can use the end product as a playhouse or a reading nook.
Milk jug igloos are very easy to build as the only tool you will need is a hot glue gun. The time to build one, however, is the most ‘difficult’ aspect since you will have to collect around 500 pieces of plastic milk jugs for a spacious igloo. But if you have access to lots of empty plastic milk jugs, then the kids can have an awesome igloo of their own in no time!
Want to build a milk jug igloo with the kids? Learn more about it from the article by Hubpages linked below!
Do you know someone who will like this idea?
Contents
How to Make a Cute Milky Jug Igloo?
This step-by-step guide will take you through the process of crafting an adorable igloo using milk jugs. Get ready to embark on a creative adventure that will not only provide hours of fun but also teach valuable lessons in recycling and imagination.
Whether you’re a craft enthusiast, a parent looking for an engaging project with your children, or simply seeking a unique decorative piece, this guide has got you covered.
Gather the essential materials to start making a cute Milky Jug Igloo that will bring smiles to all who see it!
Materials
- Around 500 Milk Jugs
- Cardboard Base
- Around 80 Hot Glue Gun Sticks
Tools
- Hot Glue Gun
- Scissors or a Box Cutter (for cutting the cardboard)
Instructions
Step 1: Preparation
- Collect and Clean Milk Jugs: Start by collecting around 500 milk jugs. Make sure they are thoroughly cleaned and dried to avoid mold and unpleasant odors.
- Prepare the Cardboard Base: Cut a large piece of cardboard into a circular shape. This will be the foundation of your igloo. The size of the base will determine the igloo’s size, so adjust according to the space available and the number of jugs you have.
Step 2: Laying the First Row
- Arrange the First Layer of Jugs: Place milk jugs in a circle on the cardboard base, with the handles facing inward. This creates the igloo’s entrance and walls.
- Glue the Jugs to the Base and Each Other: Use the hot glue gun to attach the jugs to the cardboard and to each other at their sides. Ensure a tight fit to improve the igloo’s stability.
Step 3: Building the Walls
- Start the Second Row: Begin the second layer by placing jugs on top of the first row, offsetting them to create a staggered effect. Glue each jug to the ones below it.
- Continue Adding Rows: Repeat this process, continuing to stagger the jugs and glue them together. As you build higher, gradually angle the jugs inward to create the dome shape of the igloo.
Step 4: Creating the Dome
- Narrow the Circle: As you add more rows, start narrowing the circle to form the dome. This might require cutting some jugs to fit smaller spaces as you near the top.
- Complete the Dome: Continue adding and gluing jugs until you close the dome. The last few jugs may need to be significantly altered to fit the diminishing space.
Step 5: The Entrance
- Construct the Entrance: Build the entrance by creating a small archway. This can be done by carefully arranging jugs in a semicircle and gluing them together, as well as to the adjacent walls of the igloo.
- Reinforce the Entrance: Use additional jugs or cardboard to reinforce the entrance, ensuring it is sturdy and can withstand use.
Step 6: Finishing Touches
- Inspect and Secure Jugs: Go over the entire structure, securing any loose jugs with more hot glue.
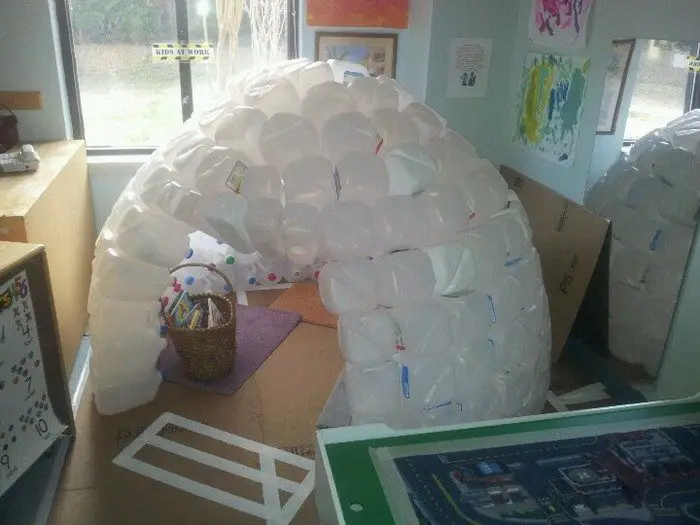
- Add Decorative Elements: Encourage creativity by decorating the igloo with waterproof paints, markers, or stickers.
Step 7: Enjoy Your Igloo
- Introduce Comfort Elements: Place cushions, blankets, and soft lighting inside to make it cozy.
- Implement Usage Rules: To ensure longevity, establish rules for its use, especially if intended for young children.
Click on any image to start the lightbox display. Use your Esc key to close the lightbox.![]()

Additional Tips
Here are other helpful insights to guarantee the success of your milk jug igloo project:
1. Wash and Dry
The first step in building a milk jug igloo involves the meticulous washing and drying of the milk jugs. This crucial process ensures that all containers are free from residue and unpleasant odors, which could otherwise detract from the construction experience. Engaging children in this initial step teaches them the importance of cleanliness and instills a sense of preparation and attention to detail.
This cleanliness is not merely about aesthetics; it’s about ensuring a healthy and pleasant building environment. Imagine the sense of pride and accomplishment as you and your children or students work together in an atmosphere as fresh and inviting as the project itself. The act of washing and drying transforms into a lesson on the importance of starting any project with a clean slate, setting the stage for a visually appealing and odor-free milk jug igloo.
2. Collect and Sort
Once the milk jugs are prepared, the next step is to collect and sort them by size and color. This organizational task is fundamental to the planning phase of the igloo’s design, allowing builders to easily access the materials they need during the construction phase. It’s an opportunity to introduce children to basic principles of sorting and classification, valuable skills in many areas of life.
Involving children in the collection and sorting process can be a highly creative. Encourage them to think about the design and aesthetics of the milk jug igloo. What patterns can they create with the colors available? How might the size of the jugs influence the structure’s stability or appearance? This stage is about more than just organization; it’s a canvas for creativity.
Allowing children the freedom to experiment with different configurations makes the building process more enjoyable and imbues the final structure with a sense of individuality and personal expression. The milk jug igloo reflects their creativity and imagination, showcasing their unique perspectives and artistic flair.
3. Reinforce the Structure
Ensuring the milk jug igloo’s durability is paramount. To fortify the structure, utilizing zip ties or duct tape becomes essential, as these materials help to securely bind the milk jugs together. This reinforcement step is crucial for the milk jug igloo’s longevity, allowing it to stand strong against the energetic play and exploration of children.
You guarantee the igloo’s resilience by meticulously connecting each jug, making it a steadfast sanctuary for imaginative adventures. This method not only promises the structural integrity of the milk jug igloo but also ensures a safe environment where children can play, explore, and learn.
4. Add Decorative Touches
The construction of the milk jug igloo offers a perfect canvas for children to showcase their artistic talents. Encourage them to bring their visions to life by decorating the igloo with markers, paint, or stickers. This phase of the project allows children to personalize their milk jug igloo, turning it into a reflection of their creativity and individuality.
As they adorn the igloo with colorful designs and motifs, they not only enhance its aesthetic appeal but also develop a deeper connection with their creation. The milk jug igloo becomes more than a play area; it evolves into a bespoke piece of art, filled with the stories and dreams of its young architects.
5. Embrace Natural Lighting
Incorporating openings for natural light into the milk jug igloo design is a transformative step. These apertures allow sunlight to filter through, creating a serene and mystical atmosphere within. The play of light and shadows inside the igloo captivates the imagination, turning an ordinary playtime into an extraordinary adventure.
This thoughtful integration of natural light beautifies the igloo and enhances the sensory experience of those within. The milk jug igloo becomes a luminous haven, where the boundaries between the mundane and the magical blur, sparking wonder and delight in the hearts of its occupants.
6. Incorporate Soft Furnishings
Elevate the comfort level of the milk jug igloo by introducing soft blankets, plush pillows, and cozy cushions to its interior. This thoughtful addition will transform the space into a warm and inviting haven for your children to relish. Nestled amidst the milk jug walls, these soft furnishings will provide a comfortable seating or lounging area where your kids can unwind, read, play games, or simply indulge in moments of relaxation.

By incorporating these additional suggestions, you can guarantee the success of your milk jug igloo endeavour while delighting in the process of creativity, strengthening bonds, and fostering imaginative play, thus creating cherished and enduring memories together.
Suppose you’re seeking an extra dose of adventure. Why not explore the process of creating a wooden teepee tent that will also ignite your kids’ imagination and become their cherished hideaway?
Safety Tips and Best Practices
Constructing a milk jug igloo is an innovative and sustainable project that combines environmental awareness with practical craftsmanship. While this activity can be immensely rewarding and fun, ensuring the safety of all participants and adhering to best practices is paramount. Below are the safety tips and best practices to keep in mind while building your milk jug igloo.
Supervise the Use of Hot Glue Guns
The hot glue gun is an essential tool in assembling a milk jug igloo, but it can also pose burn risks, especially to young children. Always supervise its use and ensure that anyone handling the glue gun understands how to use it safely.
Work in a Ventilated Area
Using hot glue in a confined space can lead to the inhalation of fumes that might be irritating or harmful over time. Make sure to work in a well-ventilated area to keep the air fresh and safe to breathe.
Wear Protective Gear
Consider wearing gloves to protect your hands from hot glue burns. Although it might be more cumbersome to work with gloves on, they can provide a valuable layer of protection, especially during extensive gluing sessions.
Handle Scissors and Cutters with Care
Cutting the cardboard base or modifying milk jugs to fit might require sharp tools like scissors or box cutters. Use these tools with care, and ensure they are kept away from young children. Always cut away from your body to reduce the risk of injury.
Prepare Materials in Advance
Having all your milk jugs cleaned, dried, and possibly pre-sorted by size can streamline the building process. Preparation minimizes delays and keeps the project moving smoothly.
Test Glue Temperatures
Hot glue guns can vary in the temperature of the glue they produce. Test the glue on a piece of scrap material to ensure it’s not so hot that it warps the plastic or so cool that it doesn’t bond properly.
Create a Stable Foundation
Ensure the cardboard base is sturdy and large enough to support the weight and size of the igloo. A strong foundation is critical to the overall stability of the structure.
Plan the Layout
Before gluing, plan the layout of your milk jug igloo. Determine the size and shape, and consider marking the cardboard base to guide the placement of the jugs. This planning step can prevent mistakes that might require difficult corrections later.
Incorporate Learning and Fun
The process of building a milk jug igloo offers numerous learning opportunities, from understanding geometric principles and recycling benefits to developing teamwork and problem-solving skills. Make the experience enriching by incorporating fun facts, challenges, and educational discussions.
Interactive Learning Activities
Building a milk jug igloo is more than just a fun craft project; it’s a rich opportunity for interactive learning. This activity can be transformed into an educational journey, touching on subjects like recycling, mathematics, engineering, and even art.
Below are several interactive learning activities to enrich the experience of creating a milk jug igloo, making it a playful endeavor and a valuable educational tool.
Environmental Education: Understanding Recycling
Activity: Recycling Relay Race
Create a relay race where participants must sort recyclable materials correctly, including milk jugs, paper, metals, and glass. Use this to discuss why recycling is essential and how it impacts our planet. Highlight how repurposing materials like milk jugs for projects like the igloo can reduce waste.
Math in Construction: Geometry and Counting
Activity: Calculate the Igloo
Challenge participants to calculate how many milk jugs will be needed to complete the igloo based on its dimensions. This can involve measuring the base circumference, estimating jug dimensions, and applying basic geometry to predict the total number of layers and jugs per layer. This activity introduces practical applications of mathematics in a fun, hands-on way.
Science of Materials: Properties and Sustainability
Activity: Material Science Exploration
Explore the properties of the materials being used, particularly plastic. Conduct experiments to test strength, insulation, and biodegradability. Discuss the importance of choosing sustainable materials and the environmental impact of plastic waste, emphasizing the role of reusing materials in reducing our ecological footprint.
Art and Design: Creative Expression
Activity: Design Your Igloo
Encourage participants to contribute to the design phase by sketching out how they envision the final milk jug igloo, including any decorative elements. This can include painting some jugs, adding LED lights for illumination, or designing an entrance. This activity fosters creativity and personal expression, allowing each participant to leave their mark on the project.
Teamwork and Leadership: Building Together
Activity: Role Assignment and Collaboration
Divide participants into teams responsible for different phases of the igloo construction, such as collection, cleaning, assembly, and decoration. Assign leadership roles and rotate them to give each participant a chance to lead. This teaches valuable lessons in teamwork, responsibility, and leadership within a collaborative project.
Interactive Storytelling: Imaginative Play
Activity: Create an Igloo Story
Once the milk jug igloo is built, encourage participants to create stories or plays that revolve around the igloo. They could imagine it as a fortress, a scientist’s lab, or a magical cave. This activity stimulates imaginative play and enhances storytelling and public speaking skills.
Incorporating these interactive learning activities into the milk jug igloo project transforms it into a multidimensional educational experience. Participants engage not just in building a physical structure, but in a journey that spans environmental science, mathematics, material science, art, teamwork, and storytelling. This project elevated the humble milk jug from a piece of trash to a cornerstone of learning and creativity.
Unleashing Milk Jug Igloo Magic!
This guide provides you with all the essential knowledge and steps. From washing and organizing the milk jugs to reinforcing the structure and unleashing creativity through decorations, this project offers a memorable and engaging experience.
And with the additional tips and considerations provided, you can ensure a successful and enjoyable journey into the world of DIY creativity.
So, get ready to build your very own Milk Jug Igloo and watch as your kids’ faces light up with joy!


