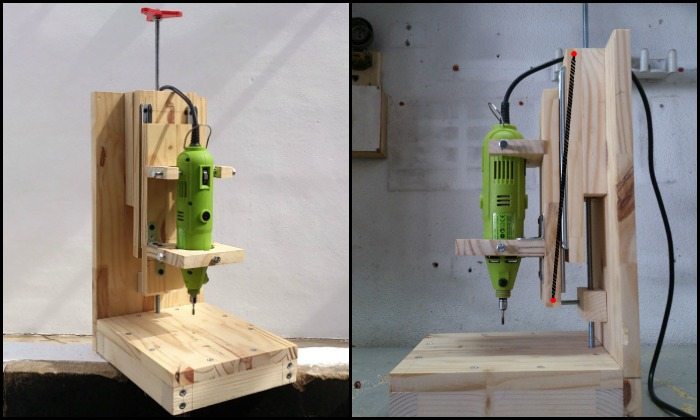
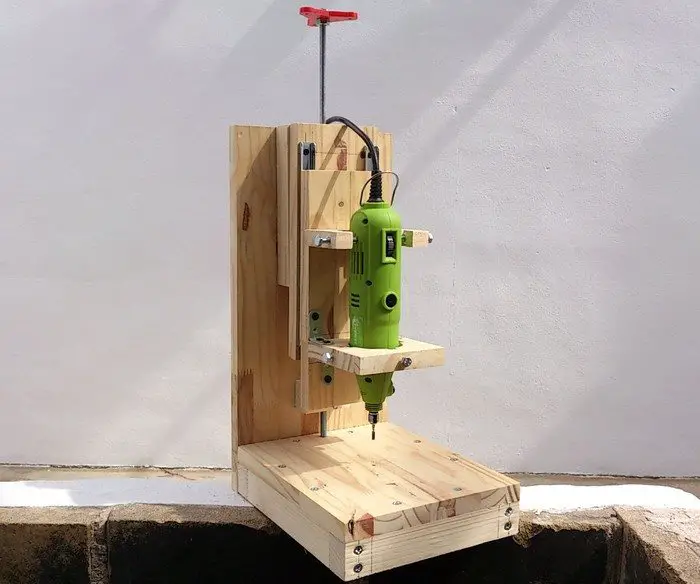
Here’s a nice little project for all the DIY-ers out there – a DIY drill press that costs only $20!
Every builder would agree that it’s more fun to work on projects when we are able to create precise cuts, holes, and all other details. And this DIY drill press is one of those tools that can help make that possible and easy!
If you need perfect holes and grooves on your project this is the tool for you, especially for small projects. You can use it for wood, metal, plastic, or any other material.
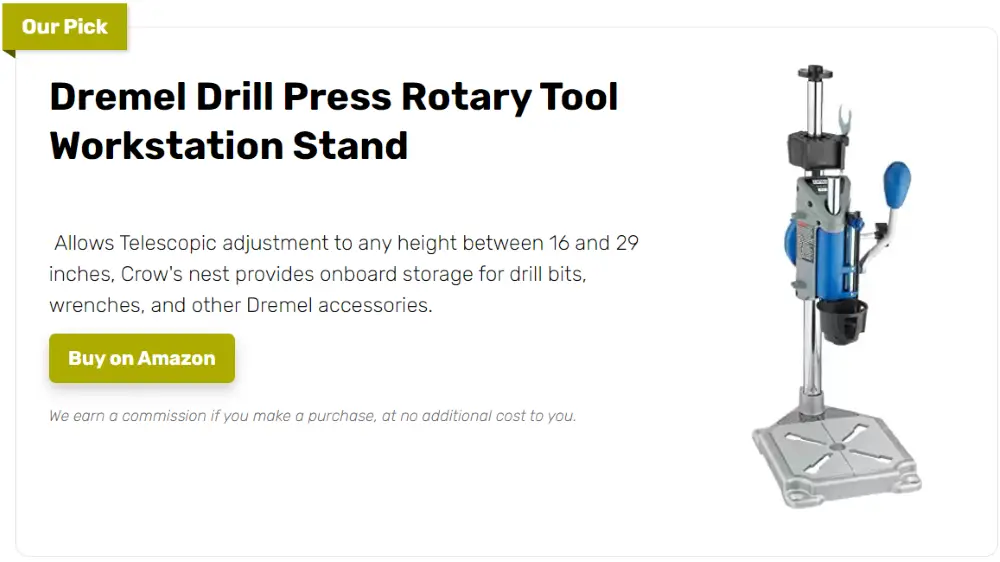
Do you need this drill press in your workshop?
Click on any image to start the lightbox display. Use your Esc key to close the lightbox ![]()
Materials:
- 3/4″ Wooden Board
- 1×1-1/2″ Wood Slat (around 79″ long)
- 2x Small Drawer Guides
- long and short Wood Screws
- Wood Glue (optional)
- High-Speed Drill
- M8 Threaded Rod
- M8 Threaded Tube
- M6 Screws and Nuts
Tools:
- Ruler and Pencil
- Square and Bevel
- Wood Saw and Jewelers Saw
- Mitre
- 80 grit Sandpaper
- Drill
- Wood Clamp (optional)
- Screwdriver
Step:
The base: Sorry about the lack of pictures, but by the time I decided for this project to become a tutorial I had already finished the base.
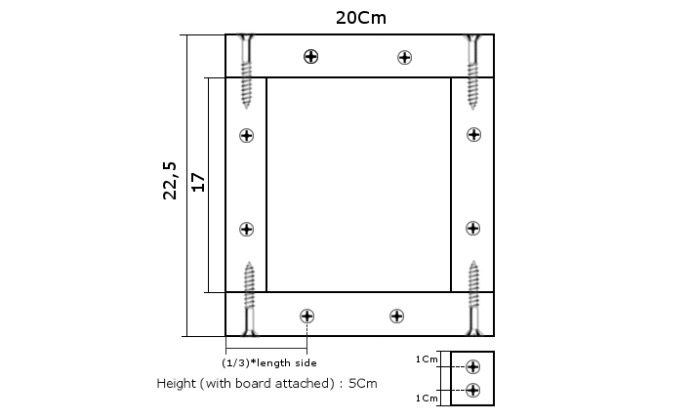
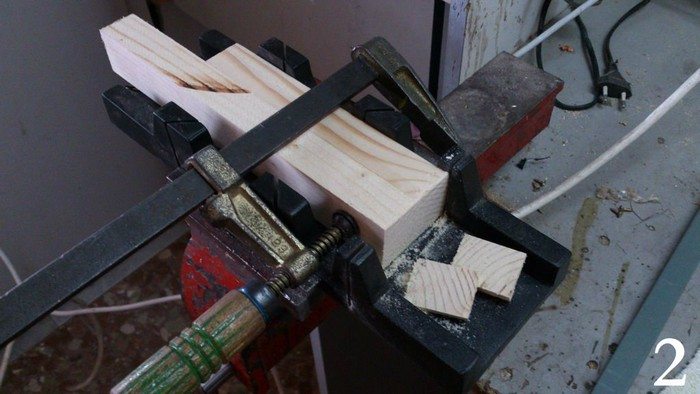
To make the base, cut four pieces out of the wooden slat. The dimensions are specified on the image. To avoid problems when assembling them I used a mitre and a clamp to keep the slat attached to it. This tool keeps the blade in a vertical position, avoiding irregular cut. A minimal amount of sanding might be made afterwards.
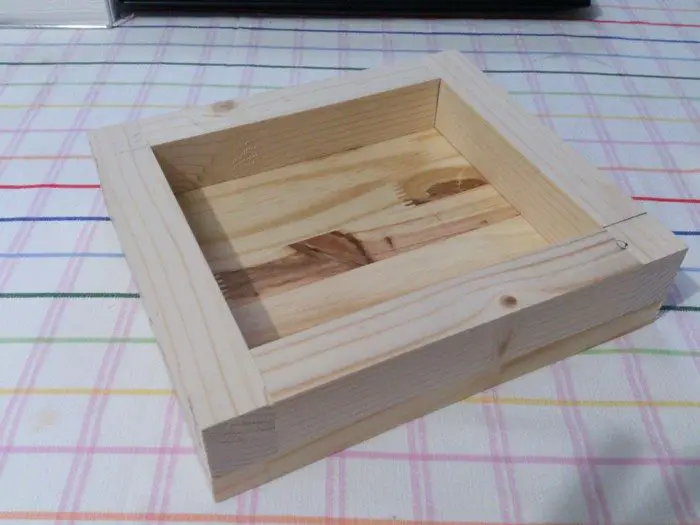
When you’ve finished cutting the slat, make the definitive rectangle shape with it. Play with the position of the slats to find the optimal configuration. Once aligned, hold them together by applying pressure with the clamp to the short sides of the rectangle. Now they’re ready to be drilled.
Mark the position of the screws. I’ve chosen to put them 1cm away from the edge. With some measurements, find the center of the slat and mark the position, once you’ve found it, drill the holes, which must be slightly narrower than the screw.
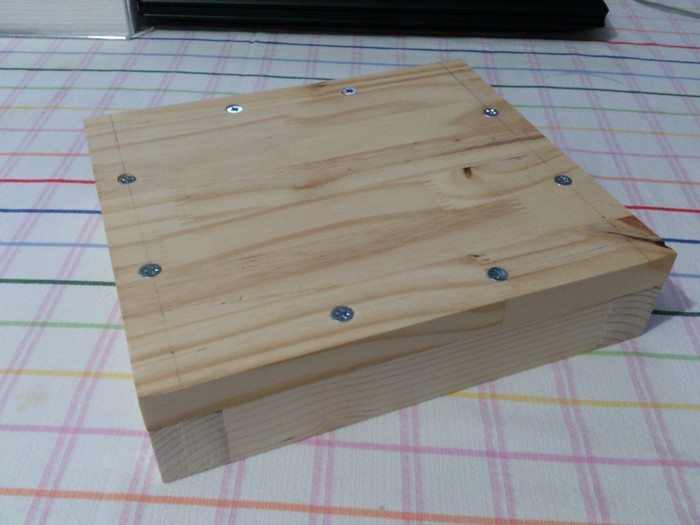
Once all the holes are drilled you can remove the clamp (or not if you prefer) and place the screws. I put some wood glue at each union to reinforce them.
TIPS:
- If you remove the clamps when the holes have already been made, make some marking where two pieces come together (like circles, triangles, lines). If you disorder them, you can always put them together like a puzzle.
- If your wood screws have an angled head you can use a special bit or a large metal bit (8mm for example) to make a countersink so the screws don’t protrude.
- To attach the cover, just draw the contour over some wooden board, cut it and attach it to the slat frame with more screws. I placed 2 at each side, leaving a gap between them of about 1/3 the length of that side. If you’re like me, the chances are some of the slats or parts of the board will slightly protrude from the shape we’re looking for. So grab that 80 grit sandpaper or an equivalent tool and start sanding until the edges are completely flat.
- If you want your sanding to be more accurate put some sandpaper over a wood plank and use it to sand the wood, that will ensure your pieces will come out straight.
NOTE: It’s not necessary to copy the dimensions to the millimeter, just get the general idea and use the materials you find more convenient.

The arm: The next part of the drill press will be the arm that will hold the guides to attach the drill. To make it, I cut a 40cm tall board with the same width than the base, then I sand the edges.
To install the guides we need to set a separation between the board and the drill. To achieve this, I cut two pieces of wood from a slat, they are 17cm tall. Once attached to the board they’ll provide some separation so the drill can be more far away from the board and I can work with larger materials easily.
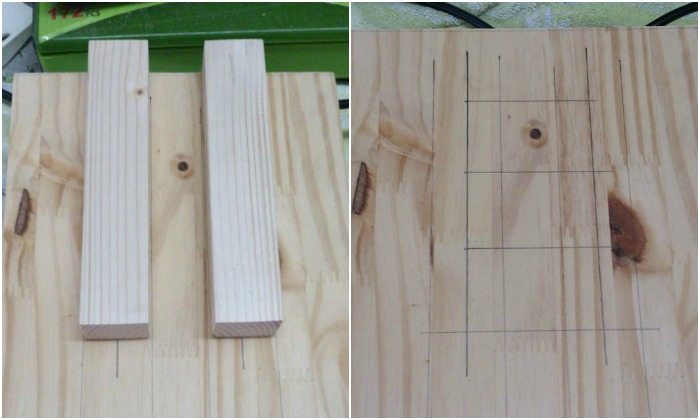
To attach these slats I marked the center of the large board. Then I added 5cm to each side, and the space between the opposite edges of the slats must be 10cm. With this in mind I used a square and a bevel to trace parallel lines to delineate the place where the slat will stay. Also, I used half the width of the slat to draw another parallel. That line will be useful to know where I should put the screws.
To place the screws I divided the length of the slats by 4, that will give me the space between each one of the three screws. I marked those places and proceeded to drill the holes through them. Then I attached the slats to their corresponding location with a clamp. Using the holes I had previously made as a guide, I drilled the rest of the hole through the slats.
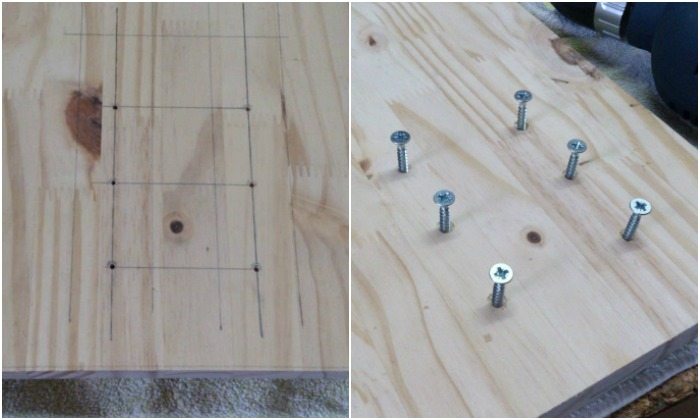
Once the holes are drilled, I made the countersinks and inserted the screws until the point comes out at the other side…

That will be useful because I want to remove the slats, put some glue and then put them back in place. After this, I placed the slats and screwed them in place.
We don’t want to attach the arm to the base now because that operation should be made when the guides are ready to be installed. That will allow us to make some corrections on the go if necessary.
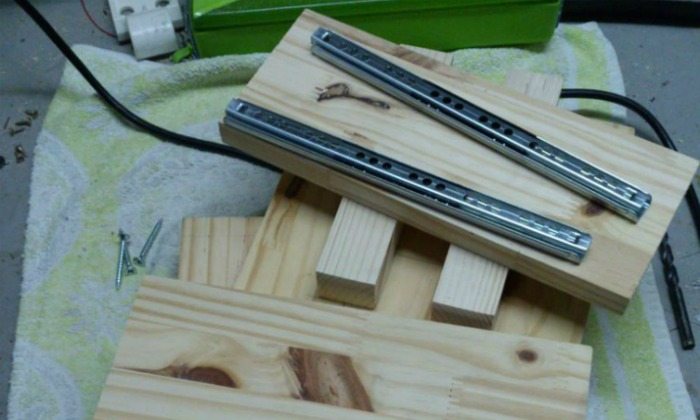
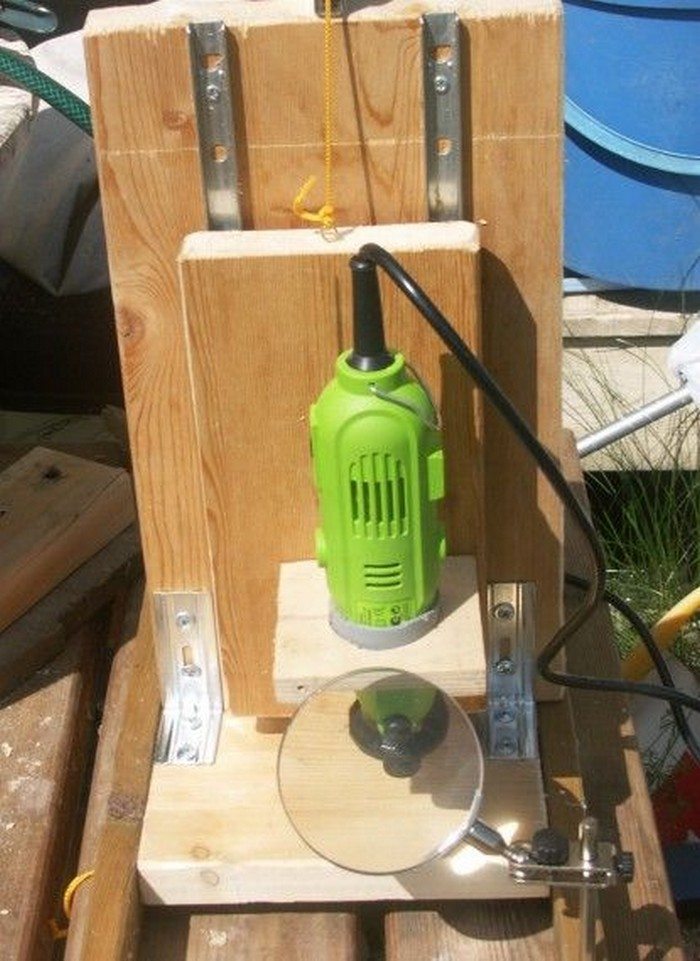
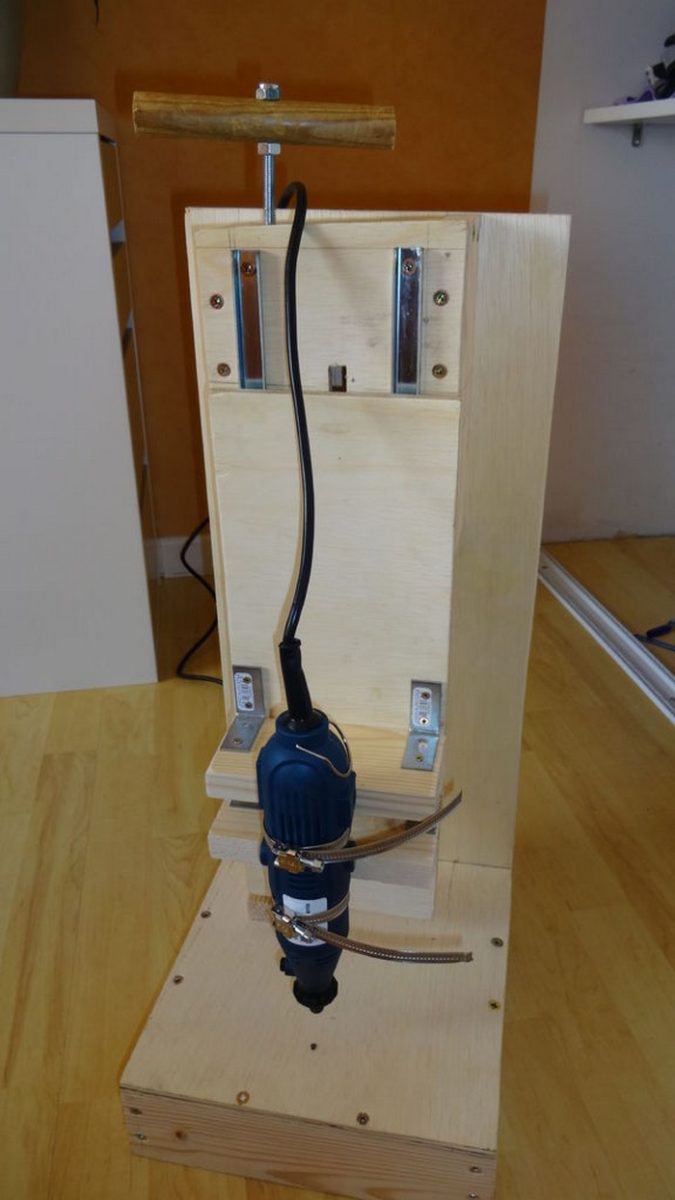
The guides: Placing the guides is the trickiest operation. They must be completely perpendicular with respect to the base, and they must be completely parallel to each other to avoid getting stuck.
Continued Page 2…


