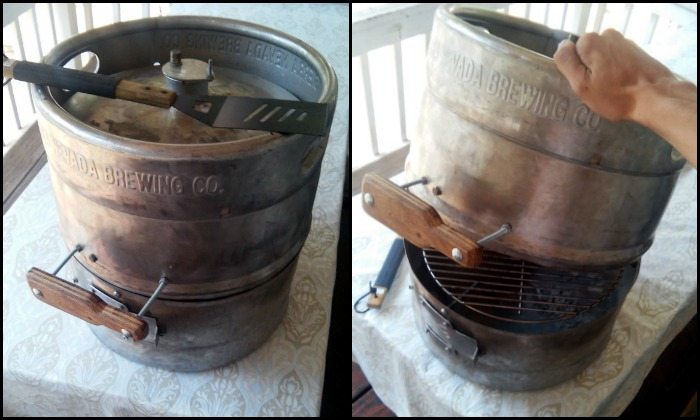
Don’t have a barbecue in your backyard but want one? Of course, you can always buy one but if you’re looking for a conversation starter then DIY-ing is the way to go. And if you have access to out-of-service beer kegs, this is the DIY keg BBQ grill project for you!
Contents
From Keg to Grill: Crafting a BBQ Grill for Your Backyard
The theme is quite obvious, barbecued food pairs famously well with beer, after all. There’s something especially appealing about drinking a cold beer with a plate of brisket, ribs, pulled pork, and the collards or cornbread that accompany them.
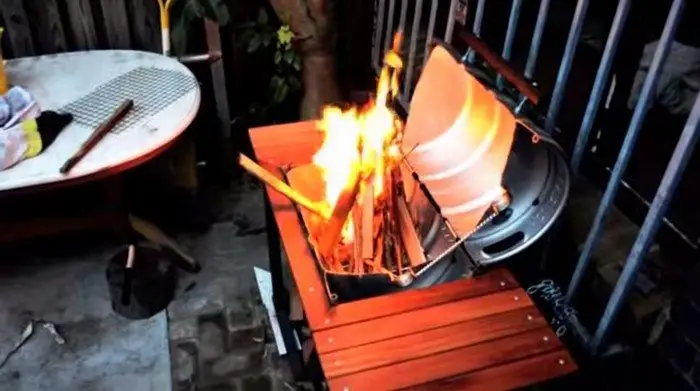
Building a Grill Beer Keg
The first thing to be aware of when building a keg BBQ grill (or doing any project with beer kegs for that matter), is that you have to properly ask for an out-of-service unit from its owner. Beer kegs are part of breweries’ capital outlay and are very expensive, so it is illegal to get beer kegs without their permission.
The breweries will decide if their beer kegs are good for scrapping and you will have to get a certification that proves the unit is no longer their property.
When you’ve finally acquired an out-of-service beer keg from your local brewery, the next thing to do is to make sure that the keg is depressurized. This is very important for your safety, especially since this project involves cutting the unit in half! If you do not know how this process is done, ask for help from someone who does.
Also be sure to wear proper, protective gear at all times. Working with barrels/beer kegs is usually challenging, so it takes all the necessary precautions before actually doing the project.
For more step-by-step information on how you can turn a beer keg into this featured DIY keg BBQ grill, head over to the tutorial linked below!
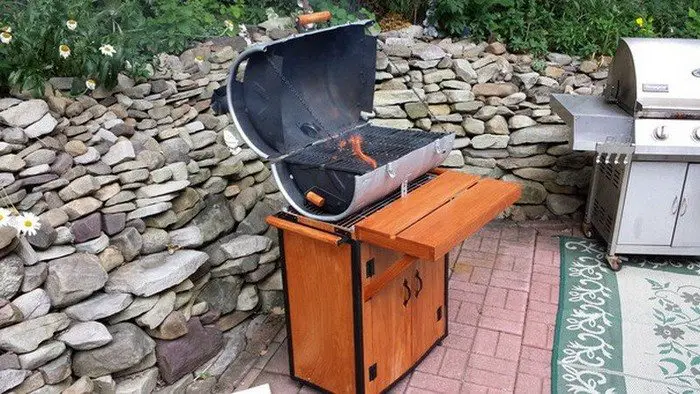
Materials
- Old Beer Keg
- Heavy-duty Steel Door Hinge
- Scrap Steel Stock
- Scrap Aluminum Plate
- Small Bolts and Washers (various)
- Store-bought Grill Grate
- Marker/Chalk
Tools
- Angle Grinder (with cutting wheel and bonded flexible abrasive wheel)
- Drill
- Manual Shear
- Files/Deburring Tools (for deburring edges, shaping wood)
- MIG Welder
- Bandsaw
- Welding Angle Magnets
- Vice Grips Pliers
Instructions
Step 1: Prepare the Beer Keg
- Safety First
- Before starting, put on your safety goggles, heavy-duty gloves, and protective clothing to keep yourself safe from sparks, metal fragments, and sharp edges.
- Depressurize the Keg
- This step is critical to avoid dangerous bursts. Place the keg upright, and slowly release any residual pressure by opening the valve. If you’re unsure how to do this, it’s best to consult a professional for help.
- Cleaning
- Once depressurized, give the keg a thorough cleaning to remove any beer residue or contaminants. Use warm water and soap, and rinse it out to make sure it’s as clean as possible.
Step 2: Cutting the Keg
- Marking
- Grab a piece of chalk or a marker, and draw a line horizontally around the keg at the midpoint. This line will guide your cut and help you create two even halves.
- Cutting
- Secure the keg in place to prevent it from rolling. Using an angle grinder with a cutting wheel, carefully follow the marked line to split the keg in half. Move slowly, letting the grinder do the work, and avoid forcing it to prevent rough or uneven edges.
Step 3: Smoothing Edges
- Deburring
- After cutting, the edges will be sharp and jagged. Use files or deburring tools to smooth out all these rough edges. This step is important to prevent accidental cuts when handling the grill, so take your time and feel for smoothness as you go.
Step 4: Adding Hinges
- Positioning the Hinge
- Take the heavy-duty steel door hinge and align it on one side where the two keg halves meet. This hinge will allow you to lift the top half like a lid.
- Attaching the Hinge
- Drill holes through the keg and use bolts and washers to attach the hinge. Make sure it’s aligned so the lid can open and close smoothly. Test the hinge a few times to confirm it operates correctly without jamming.
Step 5: Installing the Grill Grate
- Measuring for Fit
- Place the store-bought grill grate into the bottom half of the keg. It should sit comfortably within the opening. If it doesn’t fit exactly, don’t worry – we’ll make custom supports.
- Creating Supports
- Using scrap steel stock, measure and cut pieces with the bandsaw to act as supports for the grill grate. These supports will hold the grate securely in place.
- Securing the Grate
- Weld the supports to the keg’s interior using the MIG welder. Once the supports are secure, place the grill grate onto them. Ensure it sits flat and firmly in place.
Step 6: Adding Legs for Stability
- Designing Legs
- Take your scrap steel stock and measure four equal lengths that will serve as the legs. Each leg should be sturdy enough to keep the keg stable when in use.
- Attaching Legs
- Weld each leg onto the bottom of the keg, spacing them evenly around the circumference. Check that the legs are level and provide solid support. If the grill wobbles, make adjustments until it stands firmly.
Step 7: Additional Features
- Heat Shield
- To protect the lid from excessive heat, cut a piece of scrap aluminum plate to serve as a heat shield. Use manual shears to shape it to size, then weld it onto the inside of the lid. This will help shield the lid handle from intense heat.
- Handles
- For ease of use, attach handles. You can use vice grips as temporary handles or weld scrap steel stock as permanent handles onto both the lid and the sides of the grill body.
Step 8: Finishing Touches
- Check Stability
- Place your grill on a level surface to ensure it’s stable. If it wobbles, make minor adjustments to the legs as necessary.
- Final Inspection
- Double-check all welds, bolts, and fittings to confirm that everything is securely in place. Look for any loose parts or bolts that need tightening.
- Cleaning
- Use a wire brush or rag to clean off any metal shavings or debris that may have accumulated during construction. This will help prepare the grill for its first use.
Step 9: Testing
- Safety Check
- Before lighting it up, conduct a final safety inspection to confirm all components are secure and there are no loose parts.
- Test Run
- Start a small fire in the grill to test the airflow and overall functionality. Watch how the flames circulate and ensure your heat shield is working effectively. This test will also help burn off any remaining contaminants.
Now your DIY keg BBQ grill is ready for action! Enjoy grilling and the satisfaction of using a handmade setup. Thanks to ilpug for this great project.
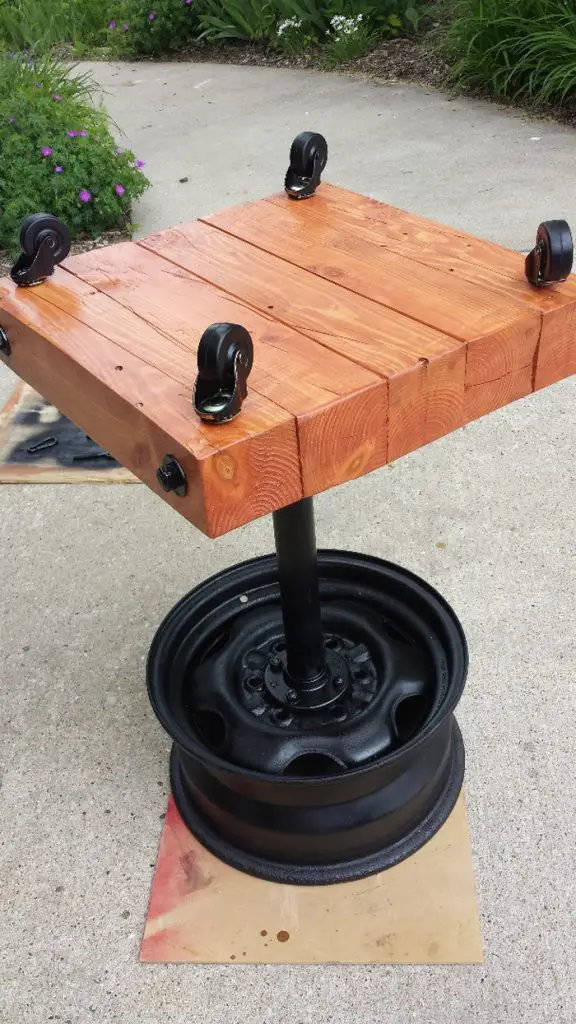
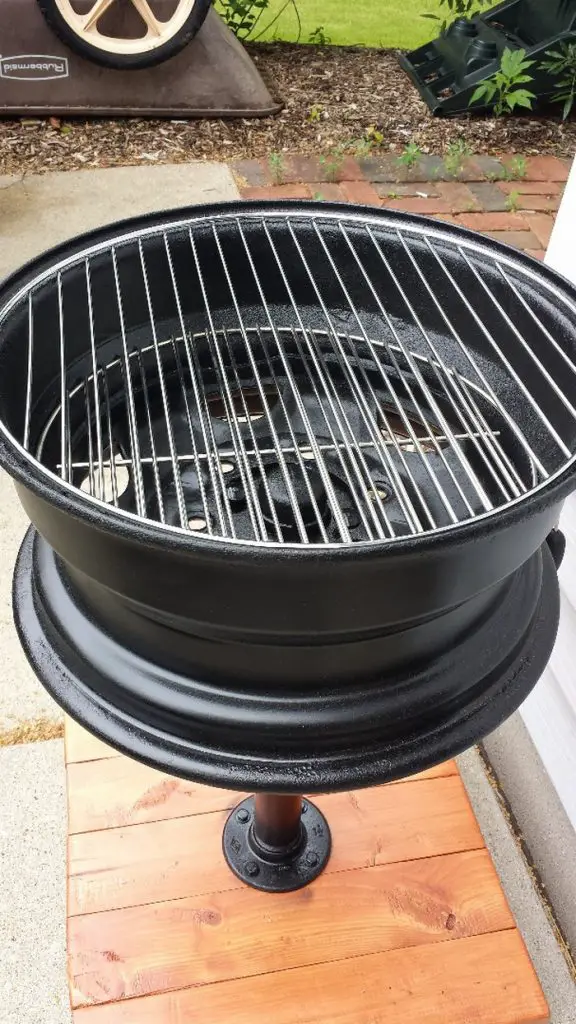
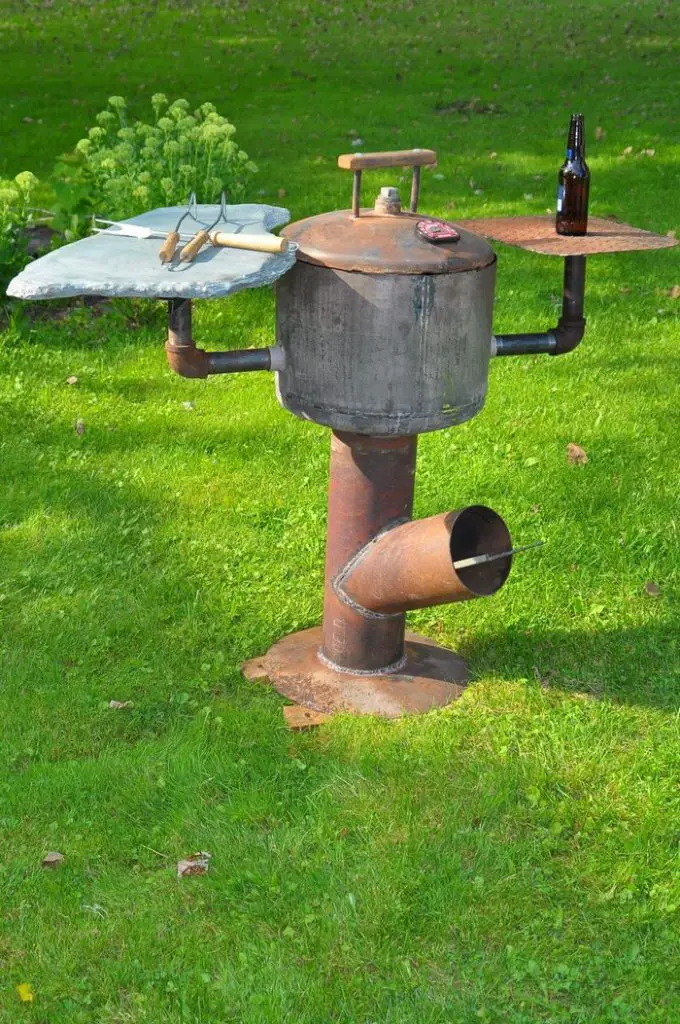
Looking to fire up some backyard fun without burning a hole in your wallet? Dive into these fantastic DIY grill ideas! Each one is crafted to be simple, affordable, and perfectly suited for a DIY enthusiast. Imagine hosting friends and family around a grill you built with your own hands – it’s a conversation starter and a proud project.
Let’s explore these unique grill designs and get inspired to create your own perfect outdoor cooking experience.
Click on any image to start lightbox display. Use your Esc key to close the lightbox.
Beer Keg BBQ Grill Station


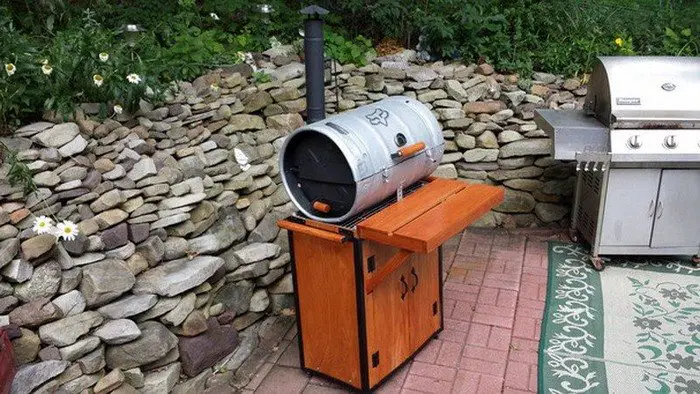
Design Variations and Customization Ideas
Creating a keg BBQ grill offers a unique opportunity to combine practicality with personal style. This DIY project not only results in a functional cooking appliance but also serves as a centerpiece for outdoor gatherings.
Below, explore various design variations and customization ideas that can help you make your keg BBQ grill uniquely yours.
- Paint and Finish
- Give your grill beer keg an eye-catching appearance with a custom paint job. Use high-temperature-resistant paint to create designs that reflect your personal style or match your outdoor décor.
- From sleek metallic finishes to vibrant patterns, the right color can transform your grill beer keg into a work of art.
- Thematic Decorations
- Thematic elements can add a fun twist to your keg BBQ grill. Whether you’re a sports fan, love retro motifs, or prefer a rustic look, you can decorate your keg to reflect those themes.
- Consider using themed decals, or custom fabrications like a logo or emblem that represents your favorite team or hobby.
- Additional Functional Features
- Add functionality to your keg BBQ grill by incorporating a built-in thermometer, side tables, or tool hooks. These features increase the usability of your grill beer keg, making grilling easier and more enjoyable.
- Custom Grilling Surfaces
- Swap out the standard grill grate for something that suits the specific cooking style you prefer. Options like cast iron grates, griddles, or even a smoking rack can be fitted to your keg BBQ grill to accommodate different types of cuisines and cooking techniques.
- Portable Designs
- For those who love to grill on the go, consider modifying your keg BBQ grill for easy transport. Adding detachable legs, wheels, and a handle can transform your stationary grill beer keg into a portable barbecue companion for camping, tailgating, and beach parties.
- Eco-Friendly Touches
- Incorporate sustainable practices into your keg BBQ grill project by using recycled materials for parts of the grill. Additionally, you can design the grill to use less charcoal or adapt it for natural gas to minimize its environmental impact.
These customization ideas not only enhance the appearance of your keg BBQ grill but also improve its functionality and adaptability to your lifestyle and preferences. With a little creativity, it can become more than just a cooking device; it can be a statement piece that reflects your personal style and grilling needs.
Safety Precautions and Necessary Equipment
Crafting your very own keg BBQ grill is a rewarding project, but it’s not without its safety challenges! From handling power tools to mastering the grilling process, ensuring your safety at every step is essential.
Whether you’re new to DIY projects or a seasoned grill enthusiast, following the right guidelines and using the best tools will make the experience not only safe but also incredibly enjoyable. Dive in to discover the must-know tips for building and using a keg BBQ grill safely and confidently!
General Safety Guidelines
Before beginning your keg BBQ grill project, familiarize yourself with the general safety practices necessary to handle tools and materials safely.
- Read All Manuals
- Before using any tool, especially power tools like angle grinders and welders, thoroughly read the manufacturer’s instructions and safety warnings.
- Work Area: Keep your work area clean and well-lit to avoid tripping hazards and other accidents. Ensure your working area is well-ventilated, especially when welding or painting.
Personal Protective Equipment (PPE)
Building your own DIY grill from a beer keg is a fantastic project that promises great results and a unique addition to your outdoor setup. But before you dive in, remember that safety should come first!
Wearing the right protective gear isn’t just a suggestion—it’s essential to prevent accidents and keep yourself safe throughout the process. From handling power tools to working with metal, let’s make sure you’re well-prepared to enjoy this project without any risks.
- Eye Protection
- Always wear safety goggles or a face shield when cutting, grinding, or welding to protect your eyes from sparks and debris.
- Hand Protection
- Use heavy-duty gloves to protect your hands. Gloves will prevent cuts, burns, and abrasions.
- Hearing Protection
- Operations like grinding and cutting can be extremely loud. Wear earplugs or earmuffs while working on your grill beer keg.
- Respiratory Protection
- When sanding, painting, or welding, use a respirator or a dust mask to avoid inhaling harmful fumes and particles.
- Protective Clothing
- Wear fire-resistant clothing when welding and avoid loose clothing that could catch on tools or equipment.

Equipment Safety
Proper handling and maintenance of tools and equipment are critical to prevent accidents when making your beer keg BBQ pit.
- Secure Equipment
- When using any power tools, ensure they are securely mounted or placed on a stable surface to prevent slipping or movement.
- Electrical Safety
- Use grounded electrical outlets and keep cords away from heat, oil, and sharp edges. Disconnect power when not in use.
Handling and Assembly Precautions
When assembling your grill beer keg, specific precautions can prevent accidents and injuries.
- Heat Safety
- Be mindful of the high temperatures involved in grilling. Allow your grill beer keg to cool down completely before attempting to move it or clean it.
- Ventilation
- Always use the grill beer keg outdoors or in a well-ventilated area to prevent carbon monoxide poisoning.
By adhering to these safety precautions and using the necessary equipment, you can safely enjoy the process of building and using your grill beer keg. Safety is the foundation of any successful DIY project, ensuring that your grilling experience is both fun and secure.
Conclusion
Building your own grill beer keg is a rewarding DIY project that not only enhances your grilling experience but also sparks conversation at any outdoor gathering. With the right tools, safety measures, and a bit of creativity, you can transform an old beer keg into a functional and stylish centerpiece.
Enjoy the satisfaction of cooking with a grill that you’ve personally crafted and customized to fit your outdoor living space.
Frequently Asked Questions
- What is a Keg BBQ Grill?
- It is a DIY project that repurposes a beer keg into a functional barbecue. By cutting the keg in half, adding a grill grate, hinges, and legs, you can create a unique outdoor cooking station. These grills are durable due to their stainless steel construction, making them ideal for outdoor grilling enthusiasts.
- Is it legal to use any beer keg for a BBQ grill?
- No, you must obtain an out-of-service keg legally. Beer kegs are the property of breweries, and it is illegal to take one without permission. Always ensure that the brewery certifies the keg as scrap before using it for your project.
- Do you need to weld to make a keg BBQ grill?
- No, while welding is a common technique used to attach hinges and legs, some DIY versions avoid welding by using bolts and clamps. This makes the project more accessible to people without welding equipment or skills.
- What safety precautions should be taken when making a keg BBQ grill?
- Safety is crucial when working with metal and tools. Always depressurize the keg before cutting and wear protective gear, including goggles, gloves, and ear protection. Additionally, ensure your workspace is well-ventilated and free from flammable materials when grinding or cutting the keg.
- How can you customize your DIY grill?
- Customizations can range from painting the exterior with high-heat resistant paint, adding a thermometer, or even integrating portable features like wheels for easy transport. Some creators also add lighting or decorative elements to make their grill a standout piece at parties.
- Customizations can range from painting the exterior with high-heat resistant paint, adding a thermometer, or even integrating portable features like wheels for easy transport. Some creators also add lighting or decorative elements to make their grill a standout piece at parties.
- How do you clean and maintain your DIY grill?
- To maintain your DIY grill, clean the grates and interior after each use to prevent grease buildup. Scrub the grates with warm water and mild soap, and remove ash from the bottom to keep airflow optimal. Regular maintenance ensures the longevity and performance of the grill.
- To maintain your DIY grill, clean the grates and interior after each use to prevent grease buildup. Scrub the grates with warm water and mild soap, and remove ash from the bottom to keep airflow optimal. Regular maintenance ensures the longevity and performance of the grill.

