Concrete pathways are great additions to your outdoor area. When done right and maintained well, these pathways are sure to last for many years. If you’re planning on building your own concrete path at home, this DIY project is for you.
Concrete pathways are great additions to your outdoor area. When done right and maintained well, these pathways are sure to last for many years. If you’re planning on building your own concrete path at home, this DIY project is for you.
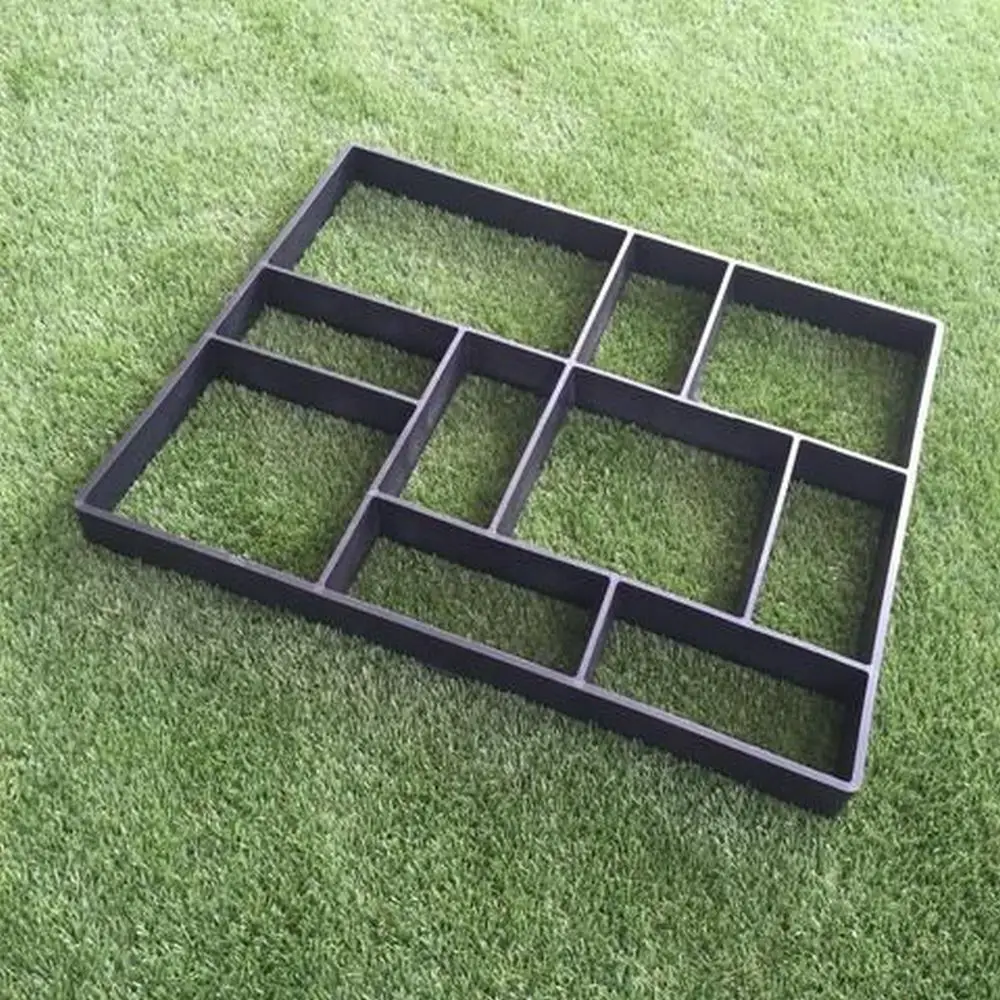
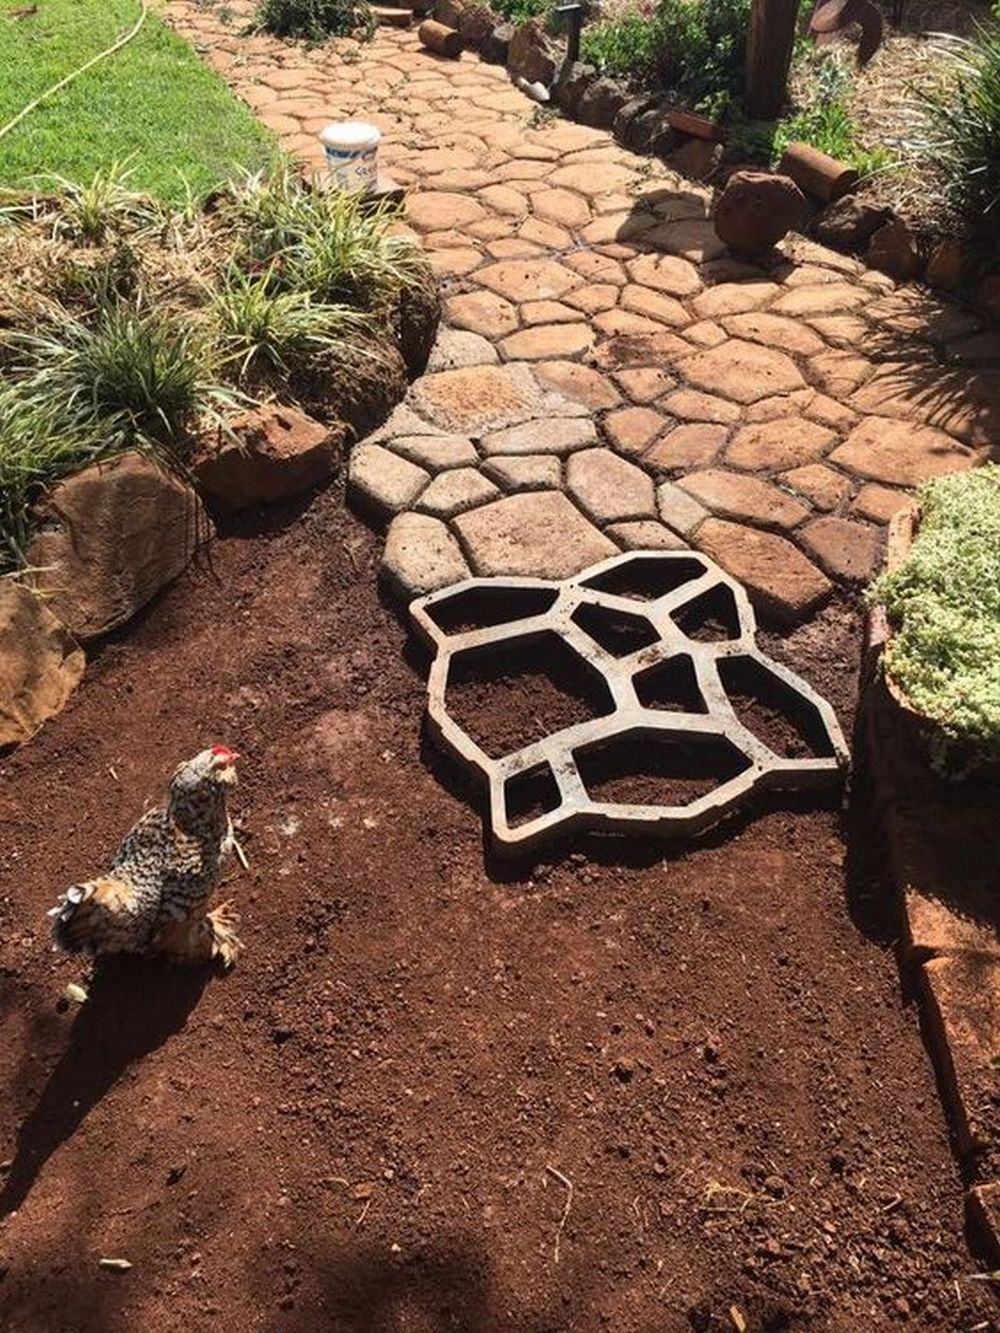
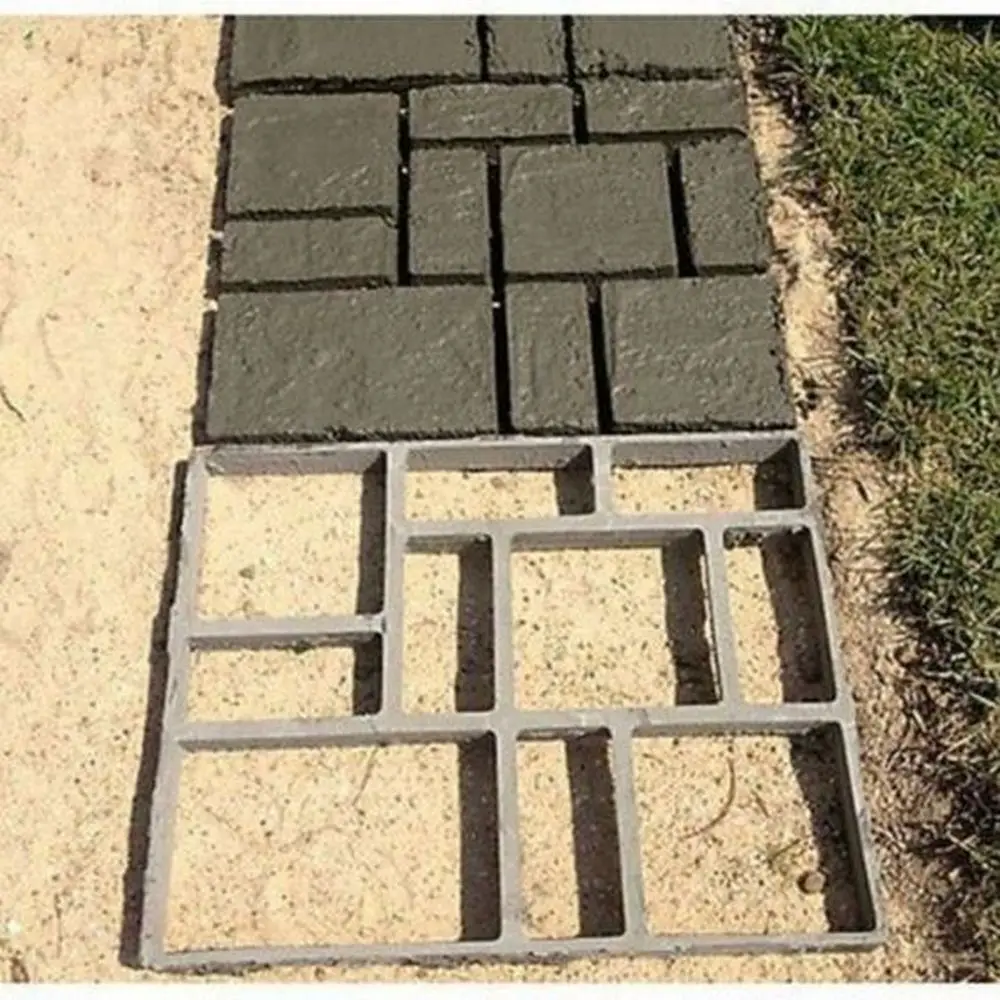
When making a concrete pathway, you’ll need a concrete path mold. There are molds sold online but most of them are flimsy and they break easily. If you want something durable and you want to customize the shape, you’re better off making your own concrete path molds.
If you have basic knowledge of welding and concrete mixing, you already have the advantage. If, however, these aren’t your strongest points, ask for help.
Contents
Making a Concrete path Mold
Materials
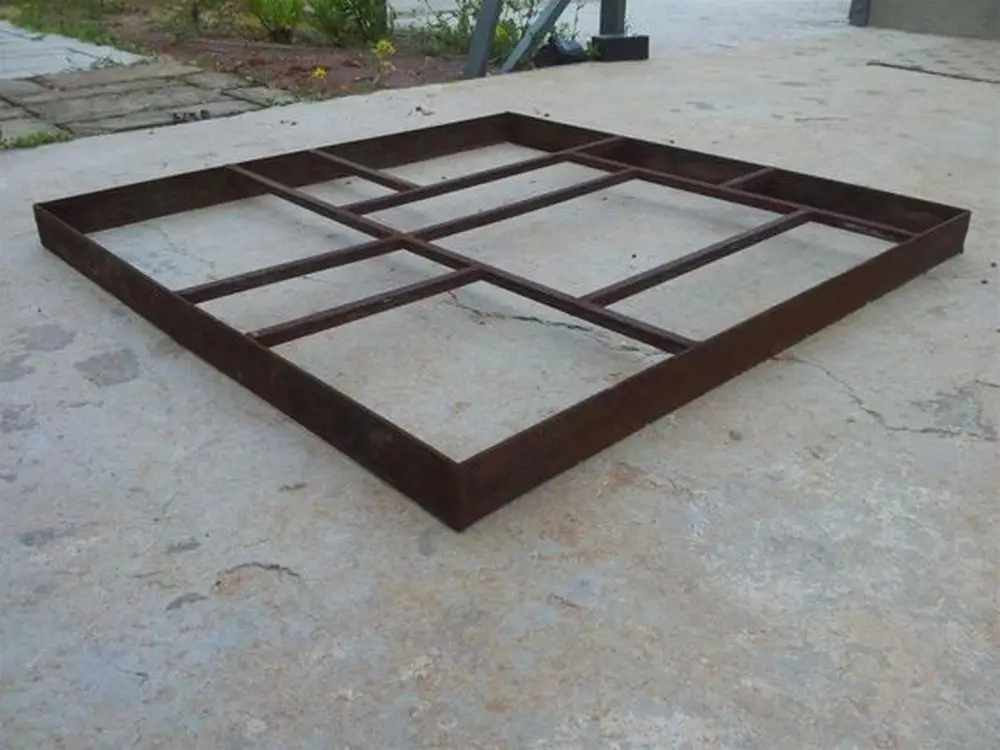
- 2400 mm X 40 mm X 2 mm flat steel bar cut into 600 mm strips
- 2000-2500 mm of 10 mm X 10 mm square steel profile
- Concrete mix (concrete, sand, fine gravel, water)
- Some string
Tools
- Welder
- Wheelbarrow
- Level
- Metal peg
- Trowel
- 90-degree cast iron clamp
Instructions
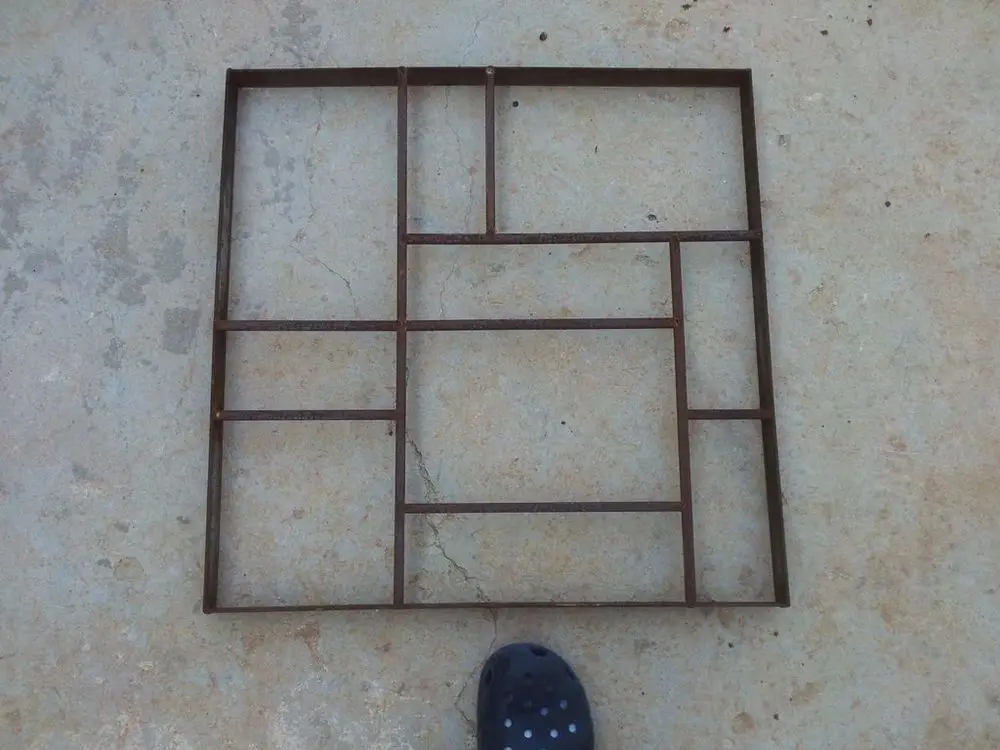
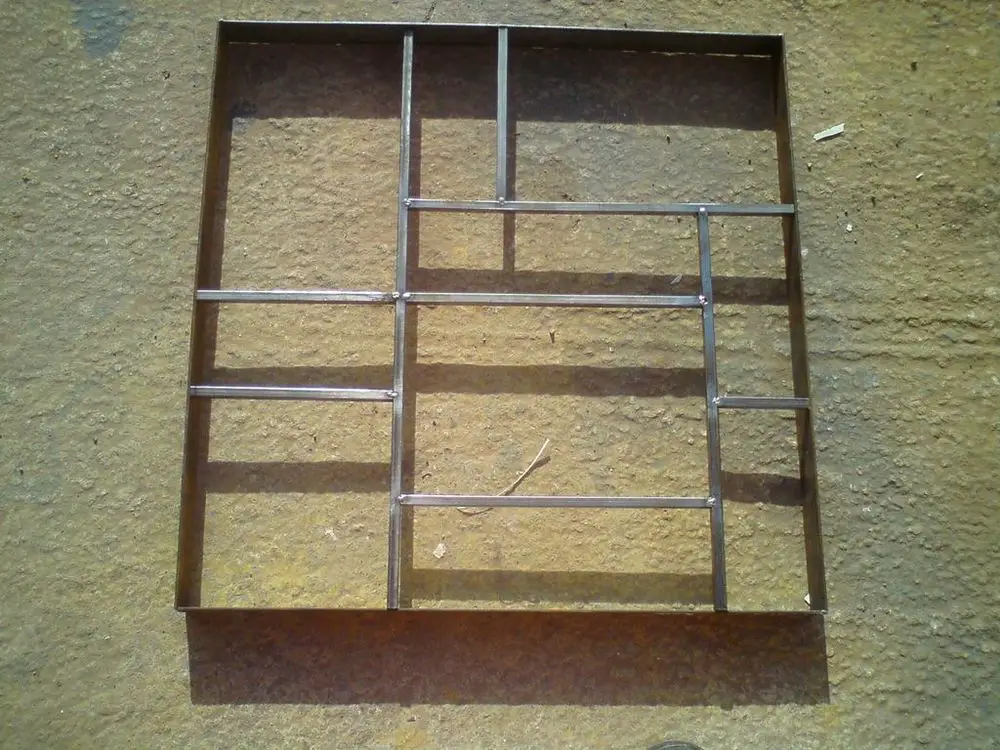
Step 1: Design Your Mold
- Lay out the 600 mm steel strips on a flat surface to form the outer frame of your mold. Decide on the shape and size of your path. Use the string to measure and adjust the spacing to ensure even dimensions.
Step 2: Cut and Prepare Steel Bars
- Using the measurements from your design, cut the square steel profile into lengths that will serve as the cross pieces for your mold. These will help reinforce the mold and maintain its shape.
Step 3: Assemble the Frame
- Position the steel strips and square profiles according to your design.
- Secure the corners and intersections using a 90-degree cast iron clamp to hold everything in place while you work.
- Weld at each joint to ensure the frame is sturdy and the pieces are firmly connected.
Step 4: Prepare the Site
- Clear the area where the path will be laid. Use the level to ensure the ground is flat and even. This step is crucial for a smooth and professional-looking path.
- Place metal pegs at the corners of the planned path area to secure the frame.
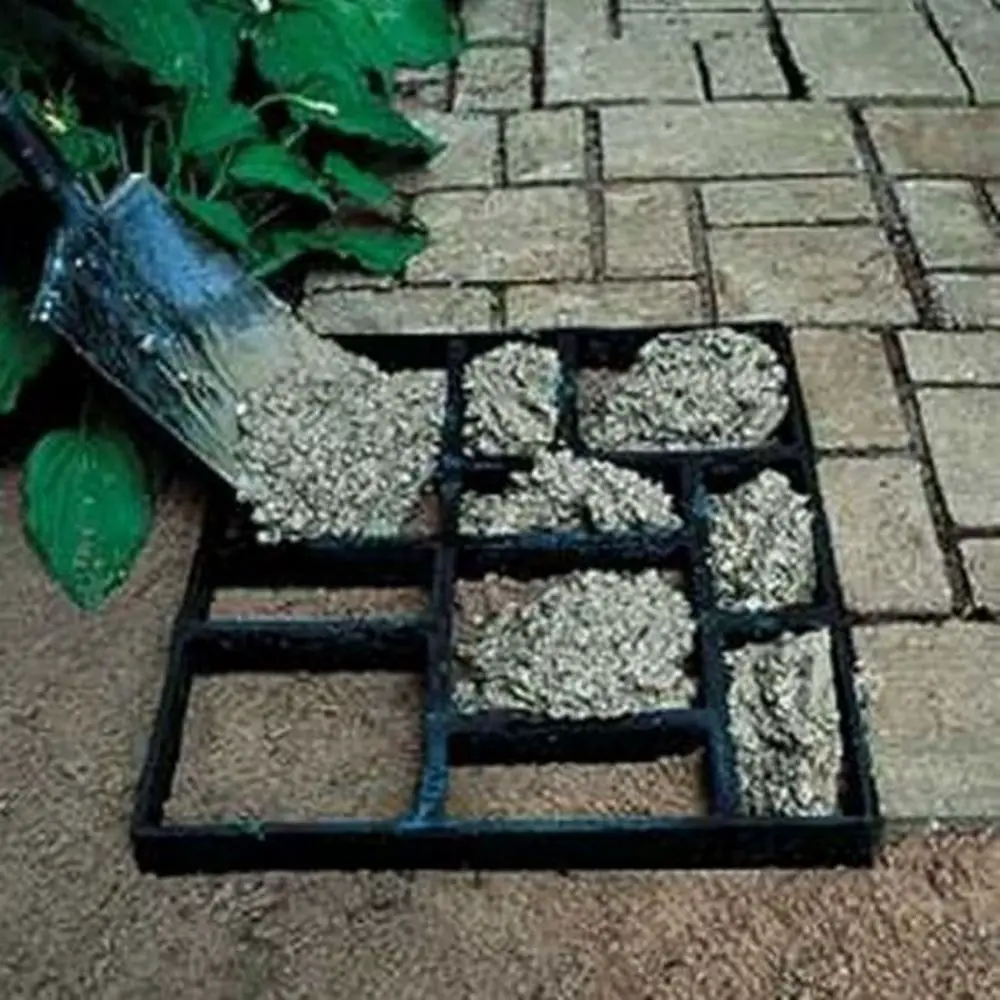
Step 5: Mix the Concrete
- In the wheelbarrow, mix the concrete, sand, fine gravel, and water according to the concrete package’s instructions. Ensure the mixture is homogenous and has the right consistency for pouring—neither too liquid nor too thick.
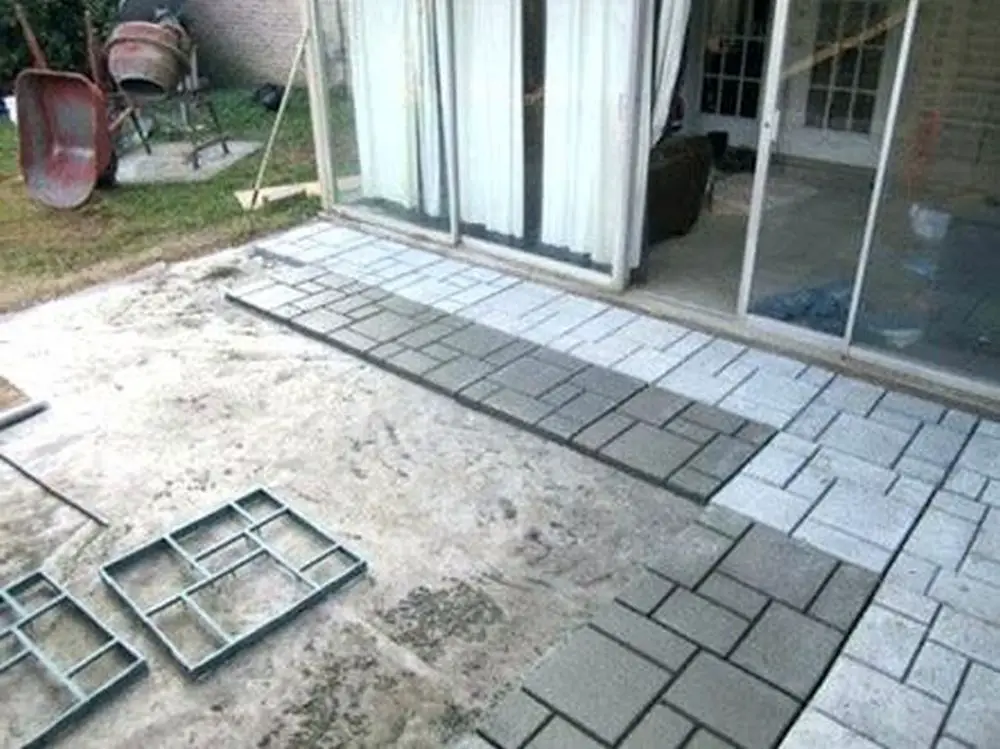
Step 6: Place the Frame and Pour Concrete
- Position your steel mold on the prepared site. Check with the level again to make sure the mold is perfectly horizontal.
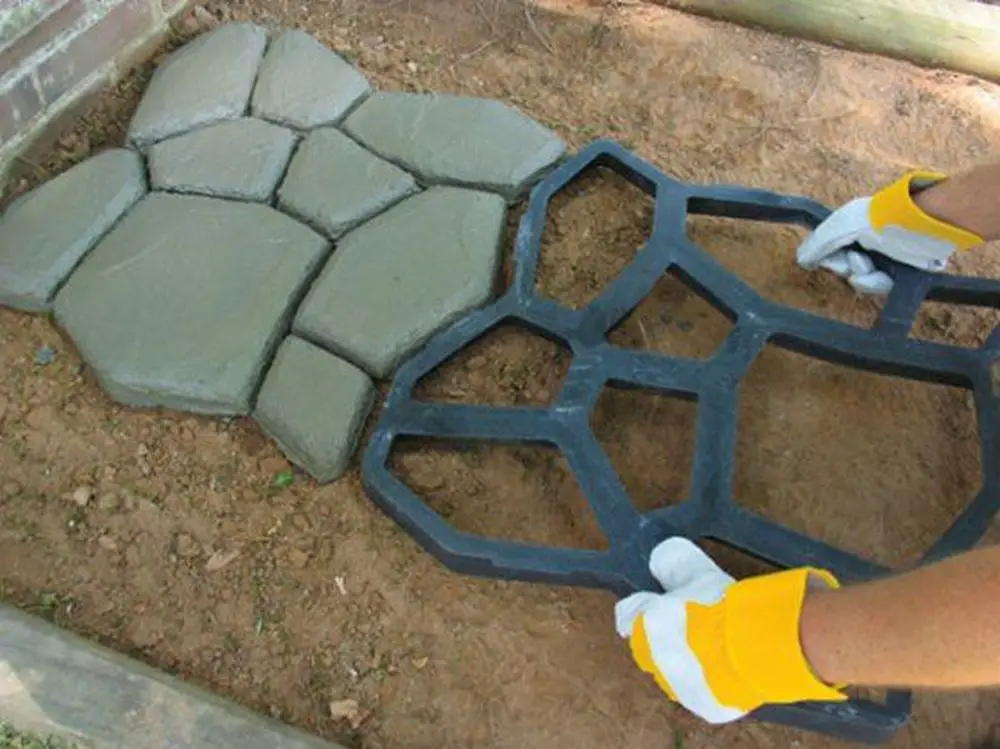
- Pour the concrete mix into the mold, using the trowel to spread it evenly. Tap the sides of the mold gently to remove any air bubbles and to make sure the concrete settles well.
Step 7: Curing
- Allow the concrete to set and cure. The time needed can vary based on weather conditions but typically takes at least 24 hours.
- Once the concrete has hardened, carefully remove the steel mold. This can be done by gently lifting the frame, ensuring not to disturb the newly formed path.
Step 8: Finishing Touches
- Smooth out any rough edges or surfaces using the trowel. If desired, you can also seal the concrete for extra protection and a polished look.
Click on any image to start the lightbox display. Use your Esc key to close the lightbox.
If you want to make your own concrete path mold, you can get the step-by-step instructions here.
Designing Your Path: Layout and Aesthetics
Creating a concrete path using a concrete path mold is an excellent way to add both functionality and visual appeal to your outdoor space. When designing the layout and aesthetics of your path, it’s essential to consider how it will integrate with your landscape and meet your practical needs.
Here’s how you can plan and execute a design that enhances your garden or yard while ensuring longevity and durability.
Choosing the Right Location
Start by selecting the optimal location for your path. Consider the most traveled routes in your yard—maybe from the back door to the garden or from the patio to the pool. A concrete path mold allows for precise placement and ensures the path integrates seamlessly with existing elements like flower beds or outdoor seating areas.
Designing the Path Layout
The layout of your path should complement the overall design of your garden. With a concrete path mold, you can easily customize the path to curve around natural features or create straight, geometric patterns in more structured landscapes. Consider the width of the path as well; wider paths can accommodate more foot traffic and make a bold design statement.
Selecting a Style with Your Concrete Path Mold
The style of the path is determined by the concrete path mold you choose. Molds come in various patterns and textures that can mimic cobblestones, bricks, or natural stone. Select a mold that aligns with the architectural style of your home and the ambiance of your garden. Using a concrete path mold not only ensures durability but also adds a professional touch to the DIY project.
Integrating Color and Decorative Elements
To further enhance the aesthetic appeal of your concrete path, consider adding color to the concrete mix or using stains after the concrete has cured. Integrating color can complement or contrast with the natural elements in your garden, adding depth and interest. Additionally, embedding decorative stones, tiles, or glass pieces into the wet concrete can create unique, personalized touches that make the path truly your own.
By thoughtfully designing your path using a concrete path mold, you can achieve both aesthetic appeal and functionality in your outdoor space. This approach allows you to craft a path that not only looks great but also stands the test of time.
Common Mistakes and Troubleshooting
Creating a concrete pathway using a concrete path mold can be a rewarding DIY project, enhancing both the functionality and appearance of your outdoor space. However, even with the right tools and intentions, mistakes can happen. Understanding common pitfalls and knowing how to address them can help ensure that your pathway project is successful from start to finish.
Incorrect Measurements and Poor Setup
- Mistake: One of the most common errors in using a concrete path mold involves inaccurate measurements and improper setup of the mold. This can lead to a path that is uneven or does not fit the intended space properly.
- Solution: Always double-check your measurements before cutting any materials and setting up the mold. Use a level to ensure that the base where the mold will be placed is flat and even. Proper preparation of the site is crucial to prevent issues during and after the concrete pouring process.
Inadequate Concrete Mixing
- Mistake: Improperly mixed concrete can compromise the durability and finish of your pathway. Too much water makes the concrete weak, while too little can make it difficult to work with and cause it to set incorrectly.
- Solution: Follow the manufacturer’s instructions for mixing concrete to ensure the right balance of water, cement, and aggregates. Mix thoroughly to achieve a uniform consistency. If you’re unsure, it’s better to add water gradually until the desired consistency is achieved.
Removing the Mold Too Early
- Mistake: Another common issue arises when the concrete path mold is removed too soon. If the concrete has not fully set, removing the mold can cause the structure to crack or collapse.
- Solution: Patience is key. Allow the concrete adequate time to cure, which typically takes at least 24 to 48 hours under normal weather conditions. Check the concrete’s hardness before attempting to remove the mold. If it’s still soft, give it more time.
Cracking After Removal
- Mistake: Cracks may appear after removing the concrete path mold, which can be due to several factors, including rapid drying of the concrete, temperature fluctuations, or physical disturbances.
- Solution: To prevent cracking, ensure that the concrete cures slowly and evenly. Cover the freshly poured concrete with a plastic sheet to retain moisture and protect it from the elements. If cracks do appear, they can often be filled with a concrete patching compound. For larger cracks, it may be necessary to pour a new section of the path.
By understanding these common issues and knowing how to fix them, you can effectively use a concrete path mold to create a beautiful and durable pathway. Troubleshooting problems quickly ensures that your project remains on track and results in a professional-looking finish.
Conclusion
Creating a concrete path mold is a practical way to customize your outdoor space with a durable and stylish pathway. With careful planning, the right materials, and a bit of patience, you can achieve a professional-looking result. Remember to follow the step-by-step instructions closely and address any issues as they arise during the process. Ultimately, your new concrete path will not only enhance the beauty of your garden but also serve as a lasting addition to your home.


