Thinking of what to give as a wedding or an anniversary gift? You can easily buy a gift from the store but giving something that you made makes the gift more meaningful. And nothing else says thoughtfully than DIY presents that you can easily customize and personalize.
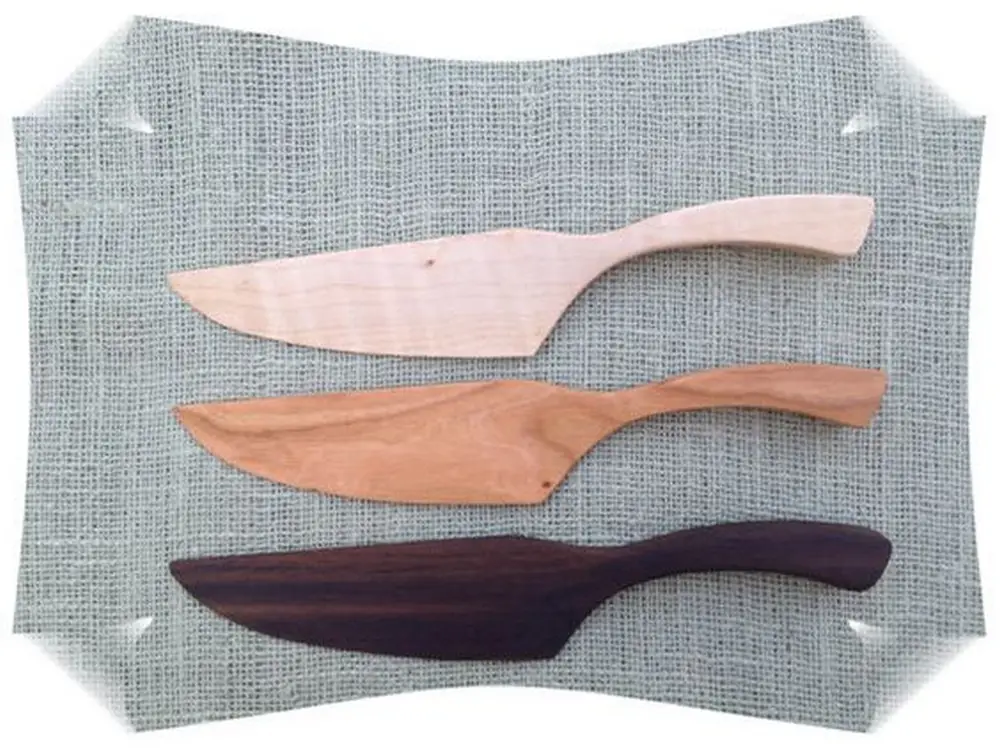
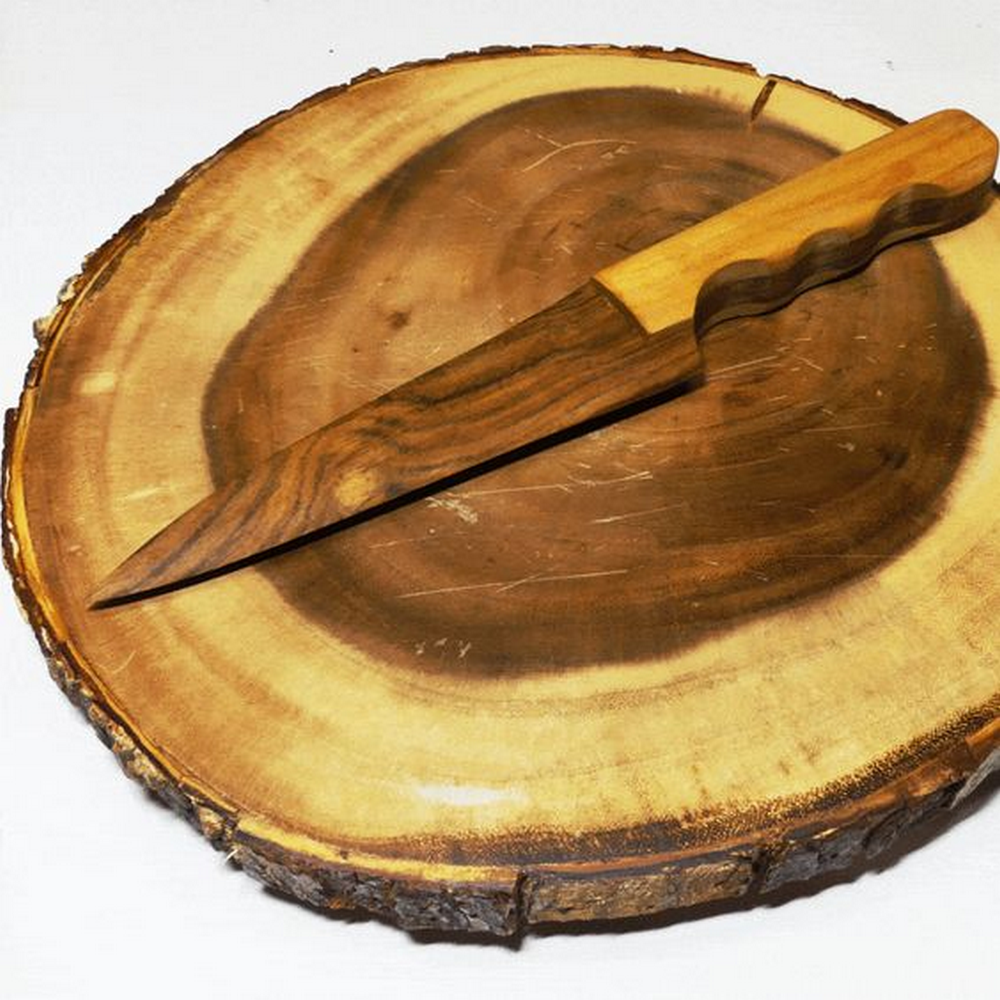
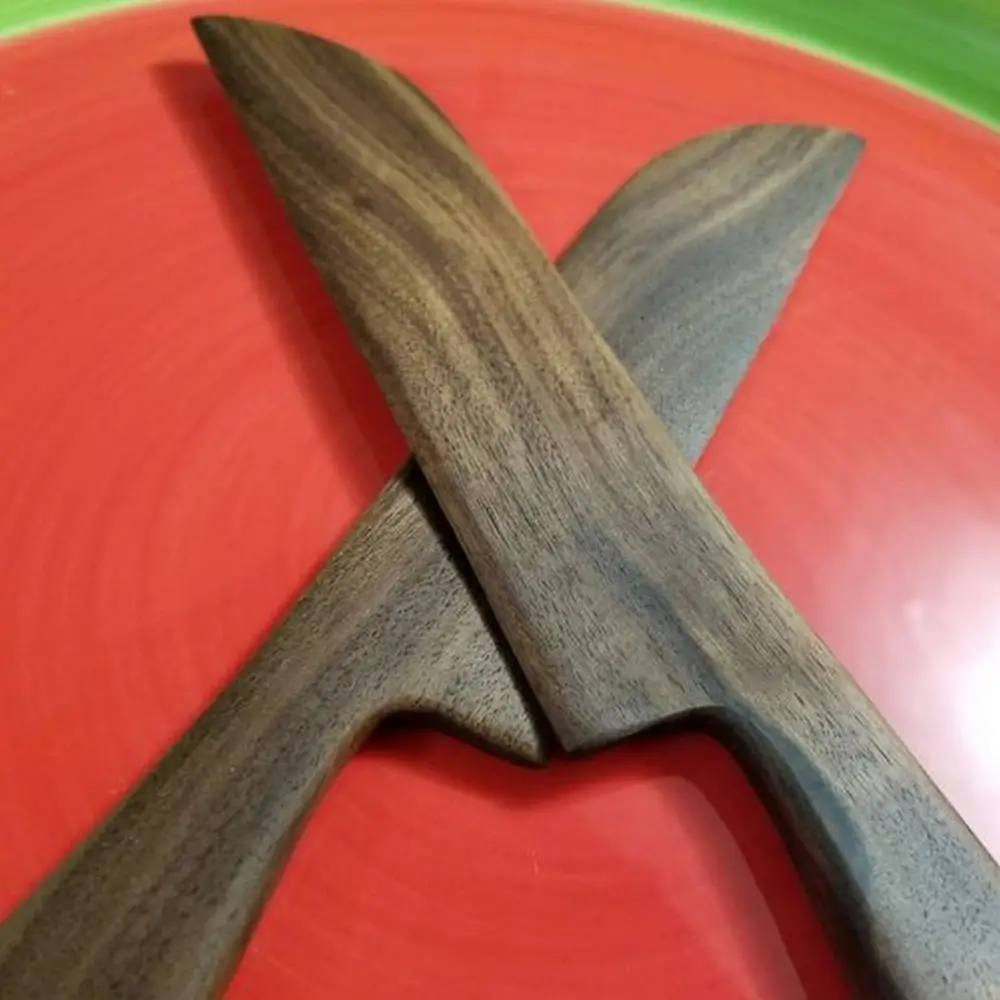
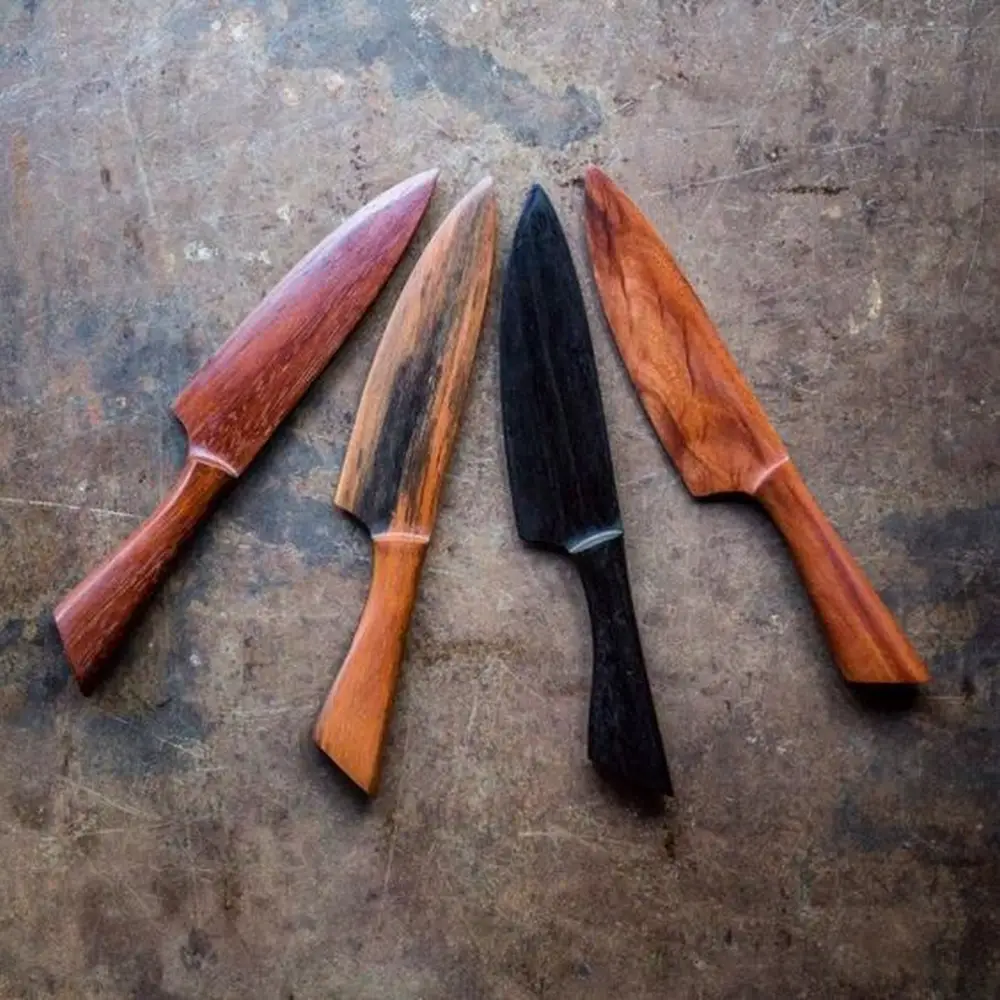
If you’re into woodworking, or if someone close to you is, this wooden cake knife is a great project. The finished product is functional and beautiful so it’s a win-win. Additionally, it’s an excellent way to showcase your woodworking skills.

You’ll only be needing scrap wood for this; the rest of the materials you probably already have. It’s pretty basic – and simple.
Contents
Making a Wooden Cake Knife
Materials:
- Two pieces of scrap wood
- Wood glue
- Finish
Tools:
- Band saw
- Belt sander
- Pencil
- Clamp
- Sanding sponges
- Drill with a drill bit
- Hack saw
- 220 grit sandpaper
Click on any image to start the lightbox display. Use your Esc key to close the lightbox.
Got scrap wood? Make a wooden cake knife! Watch this video to learn how.
Pro Strategies for a One-of-a-Kind Creation
Crafting a unique wooden cake knife can be a fulfilling and creative endeavour. With just three materials and some expert strategies, you can create a beautiful and functional knife that adds a personal touch to any special occasion. In this guide, we’ll explore the step-by-step process of making a wooden cake knife, along with pro tips to ensure success.
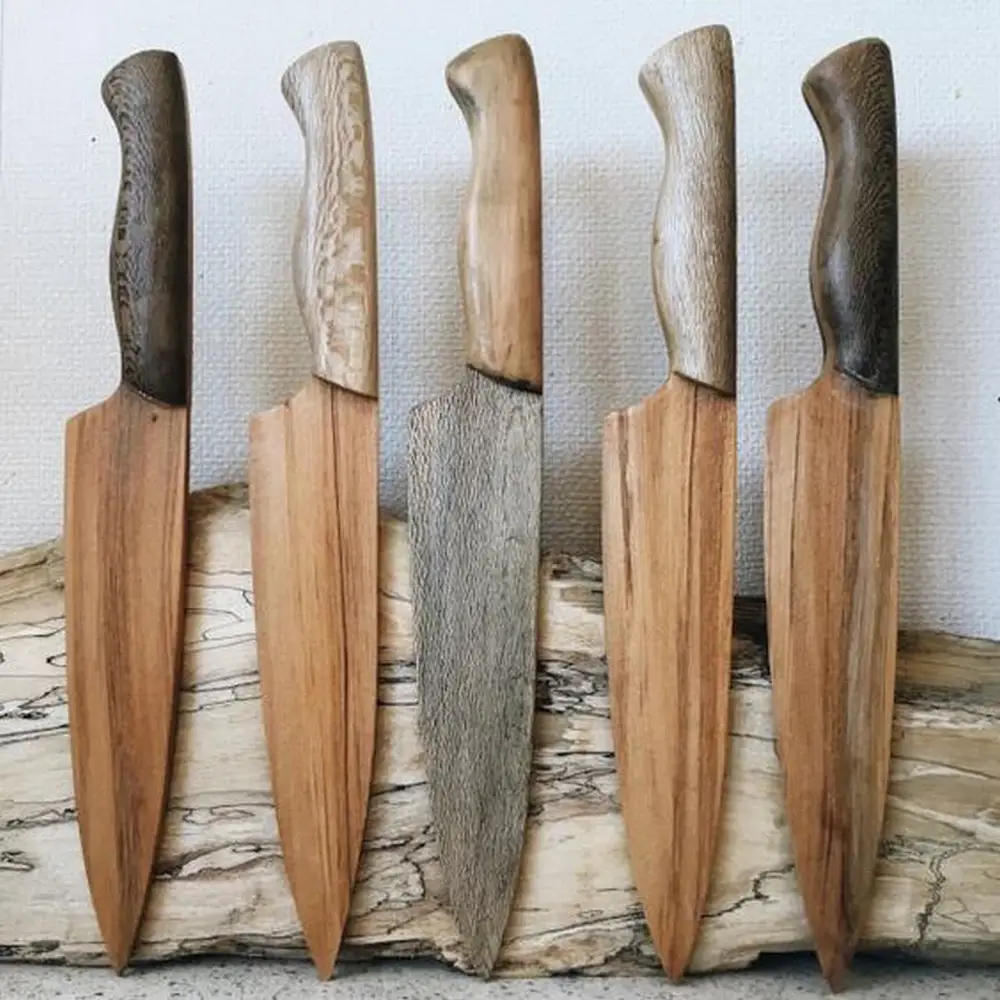
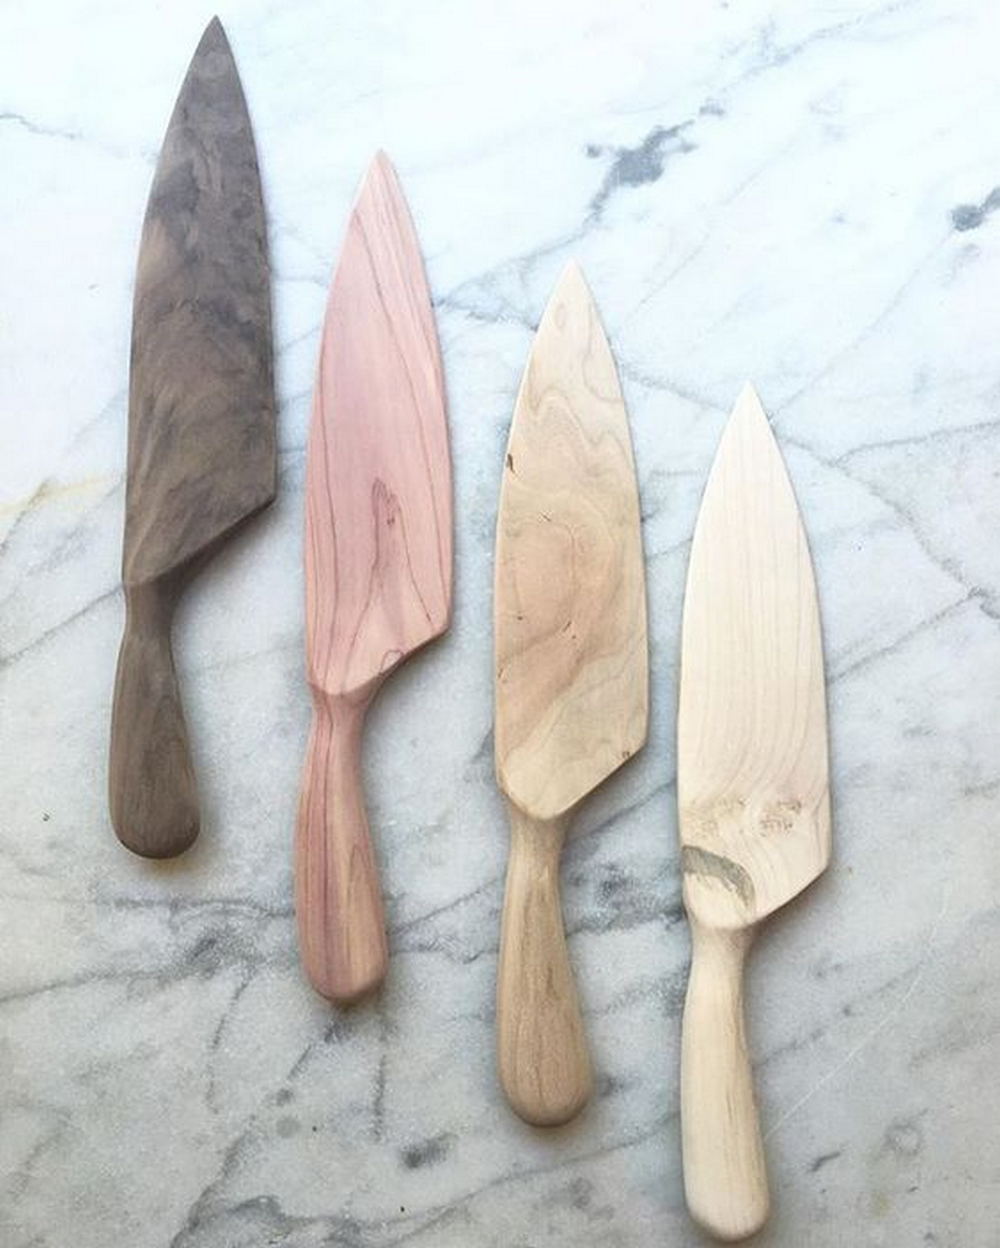
1. Choose High-Quality Wood
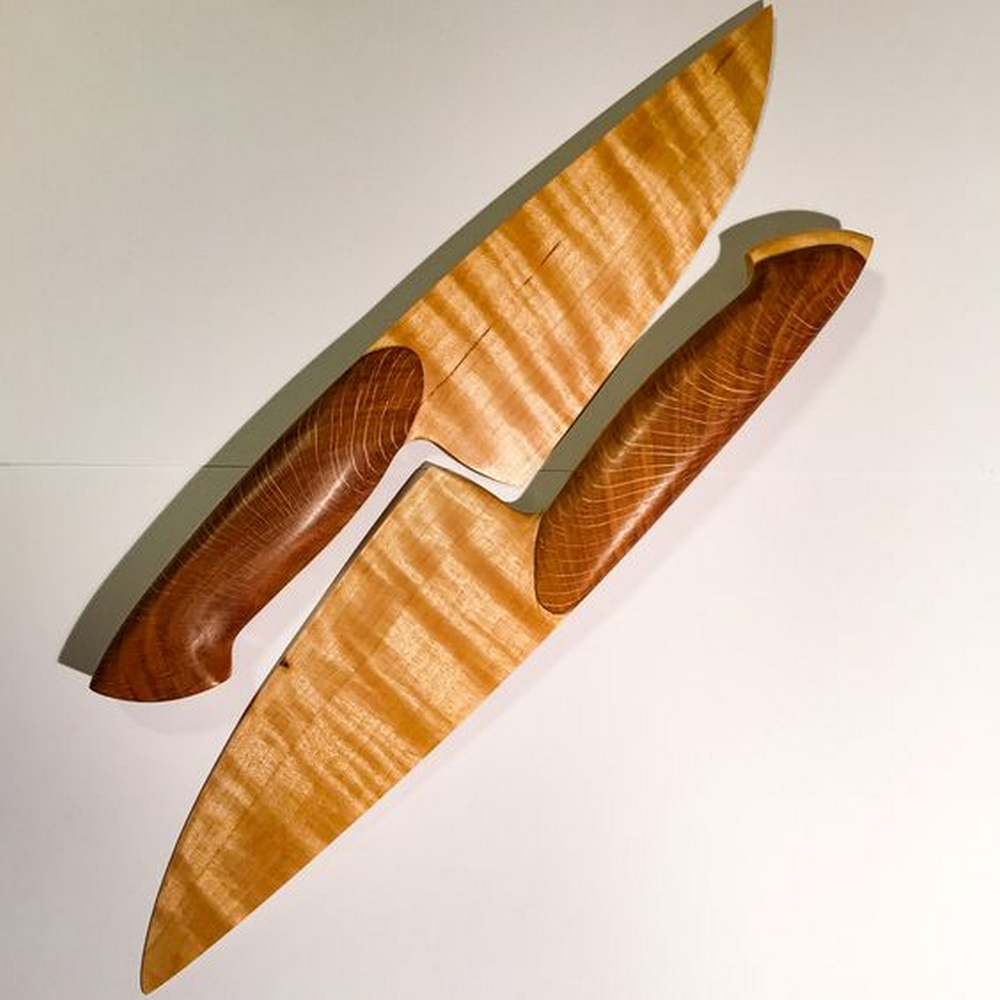
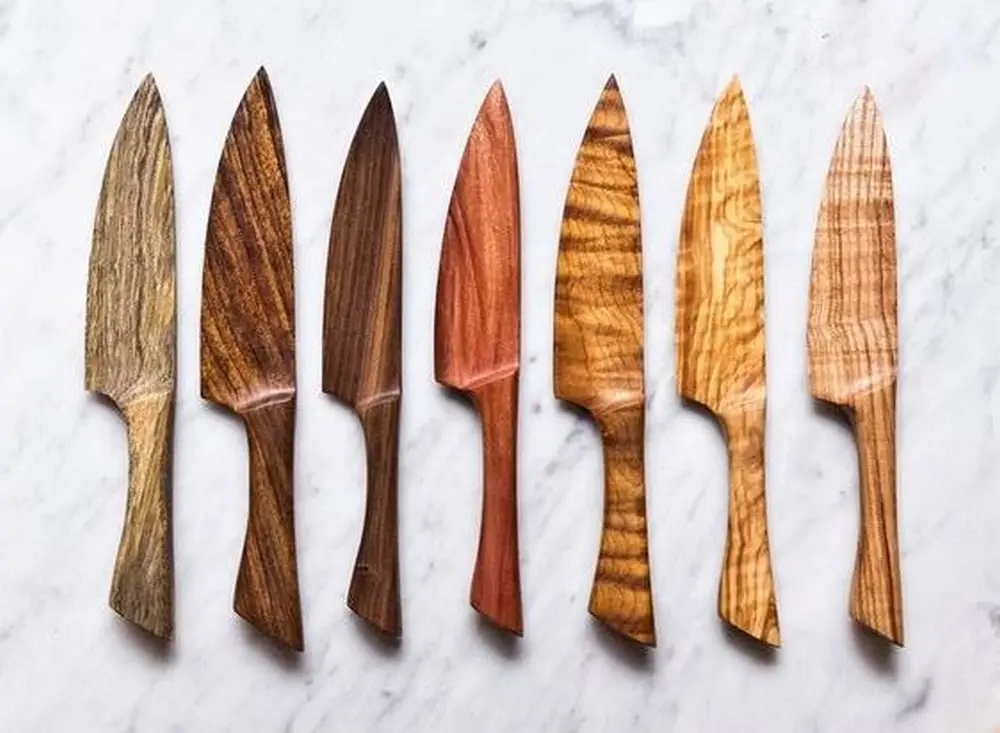
- Start by selecting a high-quality wood for your cake knife. Hardwoods like maple, walnut, or cherry are ideal choices due to their durability and attractive grain patterns.
- Look for wood that is free from knots, cracks, and other imperfections. This will ensure a smooth and uniform finish for your knife.
- Consider the size and shape of the knife you want to create, and choose a piece of wood that is large enough to accommodate your design.
2. Prepare the Wood
- Once you’ve selected your wood, it’s time to prepare it for shaping. Begin by cutting the wood to the desired length and width using a saw.
- Use a planer or sandpaper to smooth out any rough surfaces and create a uniform thickness across the entire piece of wood.
- If desired, you can also use a wood burner or engraving tool to add decorative patterns or personalization to the handle of the knife.
3. Shape the Blade
- The next step is to shape the blade of the knife. This can be done using a bandsaw, jigsaw, or hand saw, depending on your preference and the complexity of your design.
- Carefully cut out the shape of the blade, making sure to follow your design outline closely. Take your time and work slowly to achieve clean and precise cuts.
- Once the basic shape of the blade has been cut out, use a rasp, file, or sandpaper to refine the edges and smooth out any rough areas.
4. Attach the Handle
- With the blade shaped to your satisfaction, it’s time to attach the handle. Choose a piece of wood that complements the blade and provides a comfortable grip.
- Use wood glue to secure the handle to the blade, making sure to apply a generous amount of glue along the entire surface of the joint.
- Clamp the handle firmly in place and allow the glue to dry completely before proceeding.
5. Sand and Finish
- Once the glue has dried, remove any excess glue and sand the entire knife to smooth out any rough spots and achieve a uniform finish.
- Apply a food-safe finish to the knife, such as mineral oil or beeswax, to protect the wood and enhance its natural beauty. Allow the finish to dry completely before using the knife.
6. Test and Adjust
- Before using your wooden cake knife, test it out to ensure that it cuts smoothly and efficiently. Make any necessary adjustments to the blade or handle as needed to improve performance.
- Once you’re satisfied with the knife’s functionality, it’s ready to use for slicing and serving your favourite cakes and desserts.
Crafting a unique wooden cake knife is a rewarding and enjoyable project that allows you to express your creativity while creating a practical and beautiful tool. By following these pro strategies and taking your time to work carefully and precisely, you can create a one-of-a-kind knife that will be treasured for years to come.
Wrapping It Up
Crafting a unique wooden cake knife with just three materials can be a fulfilling and rewarding experience. Throughout this guide, we’ve explored the step-by-step process of creating a beautiful and functional knife that adds a personal touch to any special occasion. By following the pro strategies outlined here, you can ensure that your wooden cake knife turns out to be a one-of-a-kind masterpiece.
First and foremost, choosing high-quality wood is essential to the success of your project. Hardwoods like maple, walnut, or cherry provide durability and attractive grain patterns, resulting in a knife that is both sturdy and visually appealing. Additionally, preparing the wood properly by cutting, planing, and sanding ensures a smooth and uniform finish, setting the stage for the shaping and assembly process.
Shaping the blade of the knife requires precision and attention to detail. Whether using a bandsaw, jigsaw, or hand saw, it’s important to follow your design outline closely to achieve clean and precise cuts. Once the blade is shaped, attaching the handle securely with wood glue and clamps ensures a strong and durable bond. Sanding the entire knife and applying a food-safe finish not only enhances its natural beauty but also protects the wood from moisture and wear.
Throughout the crafting process, it’s important to take your time and work carefully to ensure the best results. Testing the knife for functionality before use allows you to make any necessary adjustments and ensures that it cuts smoothly and efficiently. Once you’re satisfied with the finished product, your wooden cake knife is ready to be used for slicing and serving your favourite cakes and desserts.
Crafting a wooden cake knife is more than just a practical project—it’s an opportunity to express your creativity and craftsmanship. Whether you’re making it for yourself or as a gift for a loved one, a handmade knife adds a personal touch to any celebration.
Frequently Asked Questions
1. What are the three materials needed to make a wooden cake knife?
To make a wooden cake knife, you’ll need high-quality wood for the blade and handle, wood glue for assembly, and a food-safe finish for protection.
2. What types of wood are suitable for making a cake knife?
Hardwoods like maple, walnut, and cherry are ideal choices for crafting a cake knife due to their durability and attractive grain patterns.
3. Do you need specialized tools to make a wooden cake knife?
While certain tools like a bandsaw or jigsaw can make the process easier, basic woodworking tools like a hand saw, sandpaper, and clamps are sufficient for crafting a wooden cake knife.
4. Is woodworking experience necessary to make a wooden cake knife?
While some woodworking experience is beneficial, even beginners can successfully craft a wooden cake knife by following step-by-step instructions and taking their time with each step.
5. Is it safe to use a wooden knife for cutting cakes?
Yes, wooden knives are safe for cutting cakes as long as they are made from food-safe materials and finished with a food-safe sealant. However, it’s essential to handle the knife carefully and avoid using excessive force when cutting.
6. How do you maintain and clean a wooden cake knife?
To maintain a wooden cake knife, hand wash it with mild soap and warm water after each use, then dry it thoroughly. Avoid soaking the knife or exposing it to excessive moisture, as this can cause the wood to warp or crack over time.
7. Can you customize the design of your wooden cake knife?
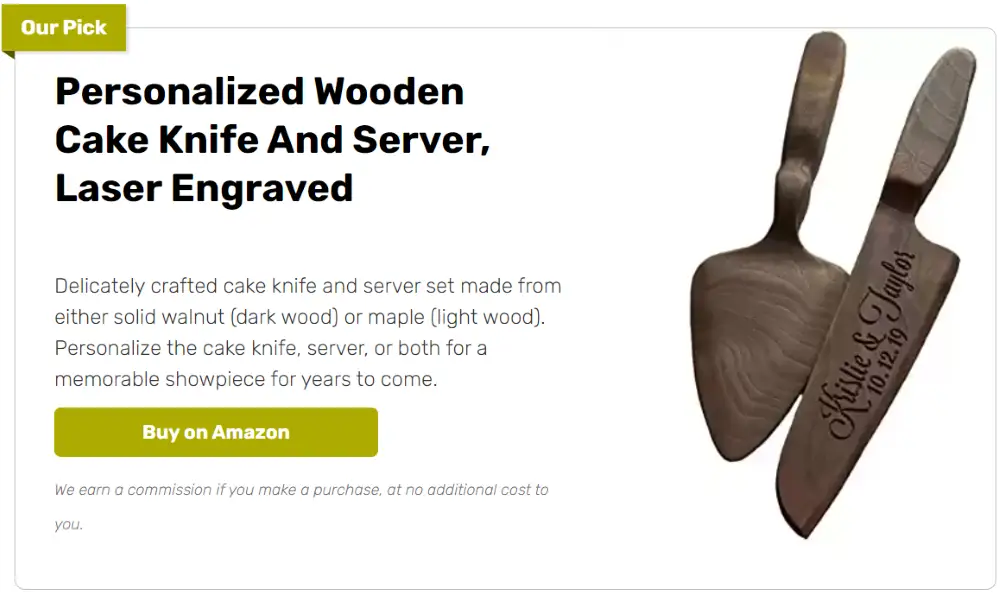
Yes, one of the benefits of making a wooden cake knife is the ability to customize the design to suit your preferences. You can choose different types of wood, shapes, and sizes to create a unique and personalized knife.
8. How long does it take to make a wooden cake knife?
The time required to make a wooden cake knife depends on factors such as your woodworking skills, the complexity of the design, and the drying time for wood glue and finish. On average, it may take several hours to complete the project from start to finish.
9. Is it necessary to apply a finish to the wooden cake knife?
Applying a food-safe finish to the wooden cake knife helps protect the wood from moisture and wear, as well as enhancing its natural beauty. While not strictly necessary, it’s recommended for longevity and durability.
10. Can you gift a wooden cake knife that you’ve made yourself?
Absolutely! A handmade wooden cake knife makes a thoughtful and unique gift for weddings, birthdays, or other special occasions. Personalizing the design adds an extra touch of sentimentality to the gift, making it even more meaningful.


