Breathe new life into old glass bottles and turn them into cute, artsy pieces for the house by building a glass bottle cutter.
Shopping for the house is a whole lot of fun until you realize how much you’ve spent. We’re all guilty of this when it comes to buying. We see something and think we “need” it so we impulsively make the purchase. But later on, we figure out we could have saved more if we recycled.
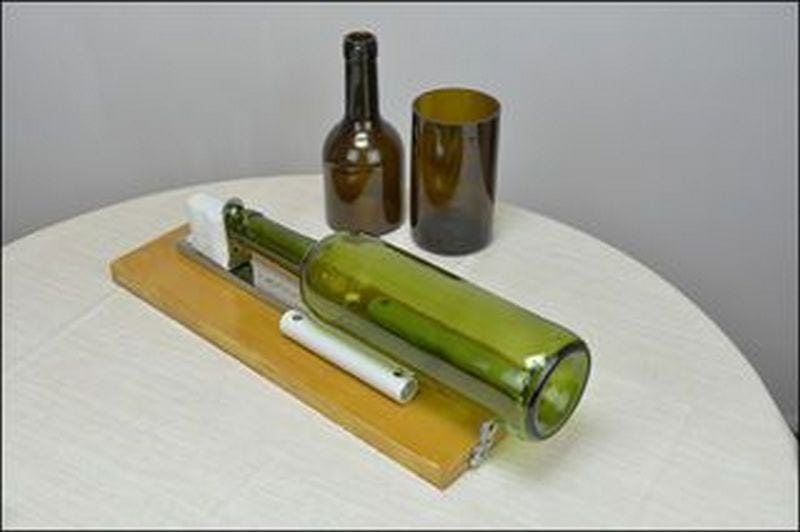
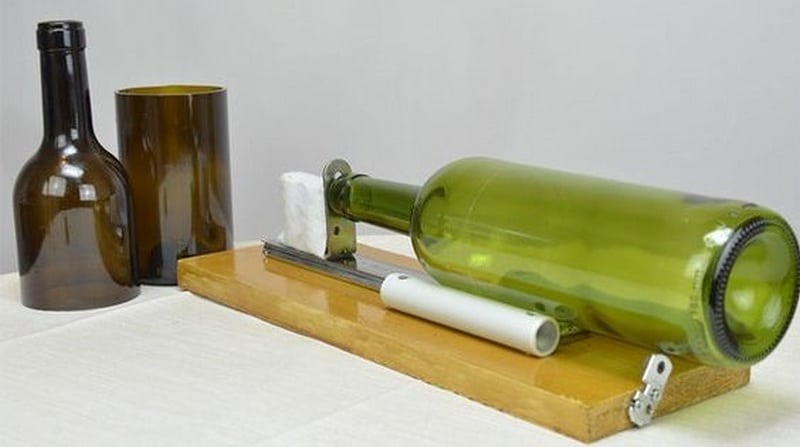
This DIY glass bottle cutter can turn empty wine bottles into excellent household pieces. You can recycle glass bottles and jars and create functional art at the same time! You can create your own glass ornaments, vases, cups, terrariums, and light fittings. The possibilities are limited only by your imagination!
Don’t just throw your old wine bottles away. With your very own glass bottle cutter, you can go as artsy as you want. Gather the things that you need and start making yours today!
Contents
Making a Glass Bottle Cutter
Materials
- A piece of wood
- Plastic pipe
- Glass cutter
- A piece of steel
- “L” shape bracket
- Neodymium magnets
- Furniture sliders or a piece of felt
- Epoxy glue
- Screws
Tools
- Pipe Cutter
- Steel ruler
- Drill with drill bits
- Sandpaper (optional)
- Mini saw
Instructions
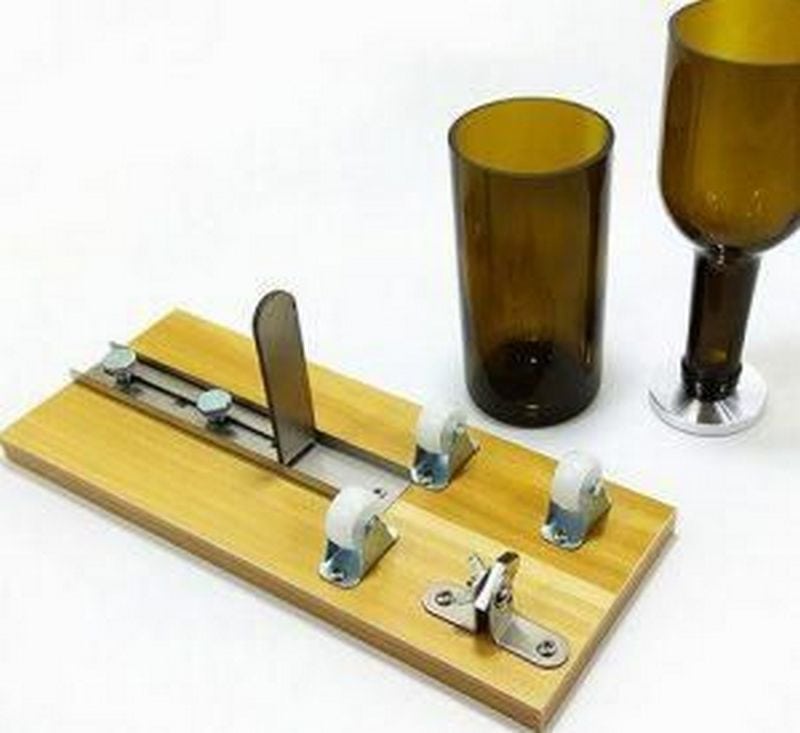
Step 1: Prepare the Base
- Cut the Wood: Use the mini saw to cut the piece of wood into a base for your cutter. A recommended size is about 12 inches long and 6 inches wide.
- Sand the Edges: If the edges are rough, use sandpaper to smooth them out to prevent splinters.
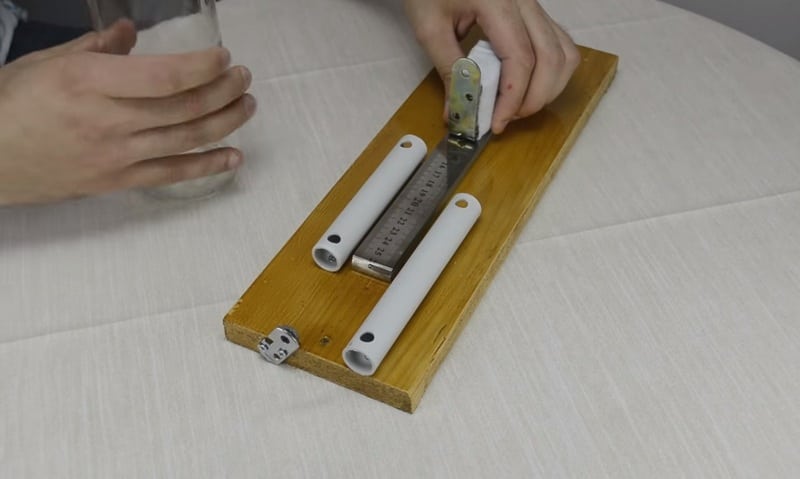
Step 2: Mount the Steel Arm
- Cut the Steel: Measure and cut a piece of steel about 8 inches long with the mini saw.
- Attach the “L” Bracket: Screw the “L” bracket to one end of the steel piece. This will hold the glass cutter.
- Mount the Arm to the Base: Center and mount the steel arm to the base using screws. Ensure it is firmly attached and can withstand pressure.
Step 3: Attach the Glass Cutter
- Position the Glass Cutter: Attach the glass cutter to the “L” bracket so that its cutting wheel just overhangs the edge of the bracket.
- Secure with Epoxy Glue: Use epoxy glue to secure the glass cutter in place, ensuring it is aligned and stable.
Step 4: Create the Rotation Track
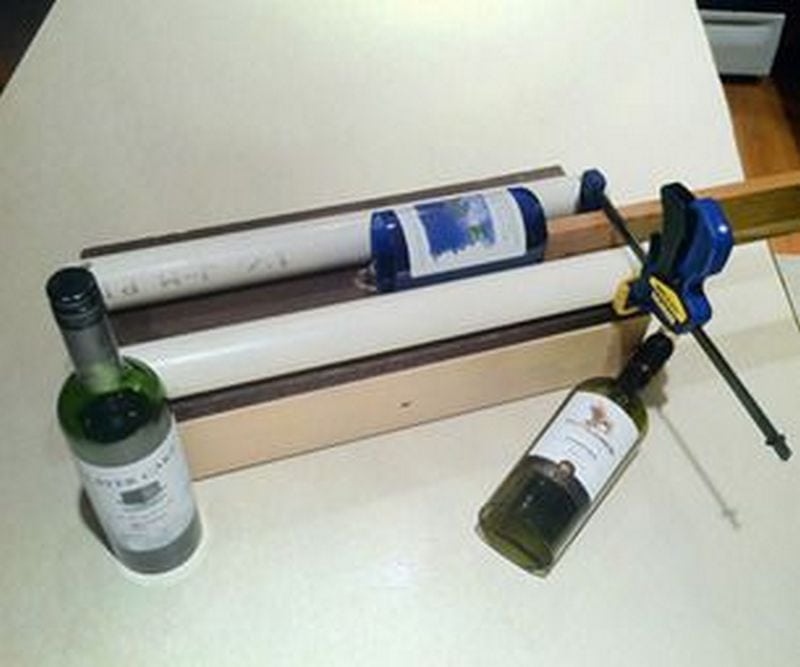
- Measure and Cut the Plastic Pipe: Use the pipe cutter to cut a length of plastic pipe slightly longer than the width of your base.
- Attach Pipe to Base: Position the pipe parallel to the steel arm and secure it to the base with screws. This will act as the track for the bottle to rotate.
Step 5: Install Magnets and Sliders
- Attach Neodymium Magnets: Place magnets on the base near the pipe. These will help to hold the bottle firmly in place during cutting.
- Fix Furniture Sliders or Felt: Attach furniture sliders or felt pieces under the base to prevent scratching your work surface.
Step 6: Assembly and Testing
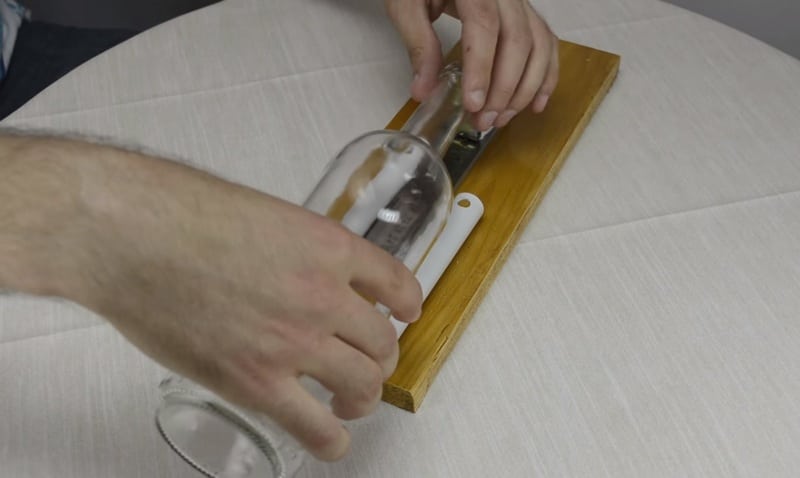
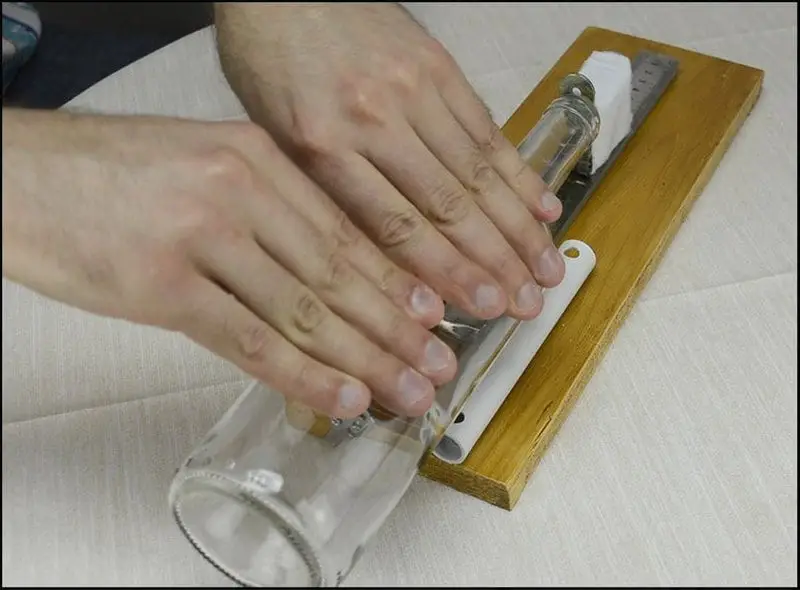
- Assemble Your Cutter: Ensure all parts are securely attached and the glass cutter is aligned correctly to cut at the desired height of the bottle.
- Test with an Old Bottle: Place a bottle on the pipe and gently rotate it against the cutter to score the glass. Adjust the cutter as necessary.
Step 7: Final Adjustments
- Fine-Tuning: Make any adjustments to ensure the cutter scores consistently around the bottle.
- Additional Sanding: Optionally, sand any additional rough edges or surfaces for a smoother finish.
Click on any image to start the lightbox display. Use your Esc key to close the lightbox.


For a visual guide, check out the video below.
Safety Tips for Handling Glass
When using a glass bottle cutter, safety should always be your top priority. Glass can easily break and cause injuries, so it’s essential to take precautions to protect yourself and those around you.
Here are essential safety tips to keep in mind while using your glass bottle cutter.
Wear Protective Gear
Always wear safety glasses to shield your eyes from flying glass shards, which can be particularly dangerous. Durable gloves should also be worn to protect your hands not only from cuts but also from potential sharp edges of the glass after cutting.
Work in a Suitable Environment
Ensure that the area where you are using the glass bottle cutter is well-lit and free of any unnecessary clutter that might cause accidents. A stable, flat surface is crucial for safely scoring and cutting glass bottles. Make sure the floor around you is clear of glass debris to prevent slips and falls.
Handle with Care
When using a glass bottle cutter, handle the glass gently. Apply a consistent pressure when scoring the glass to create a neat cut; excessive force can cause the bottle to crack unpredictably. After cutting, the edges of the glass can be extremely sharp, so handle the cut sections with care and always keep them away from children and pets.
Proper Disposal of Glass Waste
After using your glass bottle cutter, there might be leftover glass scraps or failed projects. Dispose of these glass pieces safely by wrapping them in newspaper or placing them in a cardboard box before disposal. This helps prevent injury to sanitation workers and anyone else who might handle your trash.
Emergency Preparedness
Keep a first aid kit nearby when working with your glass bottle cutter. In case of an accident, having easy access to bandages and disinfectants can help manage any minor injuries immediately.
You may enjoy using your glass bottle cutter with the lowest possible danger of damage by according to these safety advice. Beautiful, recycled glass crafts should be safe and enjoyable to make.
Troubleshooting Common Issues with Glass Bottle Cutters
Using a glass bottle cutter can be a creative and rewarding experience, but sometimes you may encounter issues that affect the quality of your cuts.
Here are some common problems you might face while using a glass bottle cutter and practical solutions to resolve them.
Uneven Cuts
If you notice that the cuts made by your glass bottle cutter are uneven, there are a few potential causes:
- Check the Cutter Wheel: Ensure that the cutting wheel is not worn out or damaged. A dull or damaged wheel can make uneven cuts.
- Stabilize the Bottle: Make sure the bottle is securely placed and doesn’t move during the cutting process. Any movement can result in an uneven score line.
Incomplete Score Lines
An incomplete score line can prevent the glass from breaking cleanly. To fix this:
- Adjust the Pressure: Apply consistent pressure while scoring. Too much or too little pressure can result in an incomplete cut.
- Repeat the Score Line: If the first score line is incomplete, carefully go over the line one more time with the glass bottle cutter without exerting excessive force.
Glass Cracking During Cutting
Cracking is a common issue when the glass is stressed improperly:
- Heat Gradually: After scoring, if you’re using heat to separate the glass, ensure it’s applied gradually. Sudden changes in temperature can cause the glass to crack.
- Even Scoring: Ensure the score line is even all around the bottle. An uneven score can lead to stress points that cause unwanted cracking.
Difficulty in Getting Clean Breaks
Sometimes, despite a perfect score line, the bottle might not break off cleanly:
- Tap Gently: After scoring with the glass bottle cutter, gently tap along the score line with a tool that can distribute a light, even force (like a rubber mallet). This can help initiate a cleaner break.
- Use Hot and Cold Water: Alternating hot and cold water along the score line can also help achieve a cleaner break. Pour hot water first, followed by cold water.
With these typical problems fixed, your glass bottle cutter will cut more smoothly and cleanly and increase your success rate. To guarantee that your do-it-yourself projects work out nicely, always take your time to prepare and treat every stage with care.
Design Ideas and Inspiration Using a Glass Bottle Cutter
Unlocking your creativity with a glass bottle cutter can transform ordinary glass bottles into stunning, functional art pieces for your home or as gifts.
Here are some inspiring ideas to get you started on your next project, showcasing the versatility and potential of upcycled glass.
Create Custom Vases
Turn old wine or liquor bottles into unique, stylish vases. You can cut the bottles at various heights to create a set of matching vases for a floral display. Enhance their appearance by painting them or wrapping them with twine or lace for a rustic look.
Decorative Candle Holders
Using your glass bottle cutter, you can make exquisite candle holders. Cut the bottom part of wine bottles and smooth the edges to create protective covers for candles. These can be great for both indoor ambiance and outdoor wind protection for candles.
DIY Drinking Glasses
Cut the tops off of sturdy bottles to make original, eco-friendly drinking glasses. Sand the edges thoroughly to ensure they are smooth and safe to use. You can further personalize them by etching designs or adding colorful rims.
Hanging Light Fixtures
Transform clear or colored glass bottles into beautiful hanging light fixtures. Cut the bottom of the bottles and insert light bulbs or LED lights inside. These pendants can add a warm, industrial touch to your kitchen or dining area.
Build a Glass Bottle Wall
For a more ambitious project, use your glass bottle cutter to cut numerous bottles, and then assemble them using a suitable adhesive to create a decorative glass bottle wall. This can serve as a stunning feature wall in your garden or patio.
Terrariums for Small Plants
Create miniature terrariums by cutting large bottles in half and filling them with soil, rocks, and small plants. These make for delightful windowsill or tabletop displays, bringing a bit of greenery into your space.
These design ideas are just the beginning of what you can achieve with a glass bottle cutter. Each project not only adds beauty and utility to your home but also promotes sustainability through upcycling. Start with these ideas, and let your creativity flow to explore even more possibilities.
Conclusion
Making your own glass bottle cutter is a fun do-it-yourself hobby that lets you turn used bottles into beautiful and useful objects. You can make many different kinds of useful things and original home décor with the correct equipment and a little imagination. Through upcycling, this project not only improves your making abilities but also promotes environmental sustainability.


