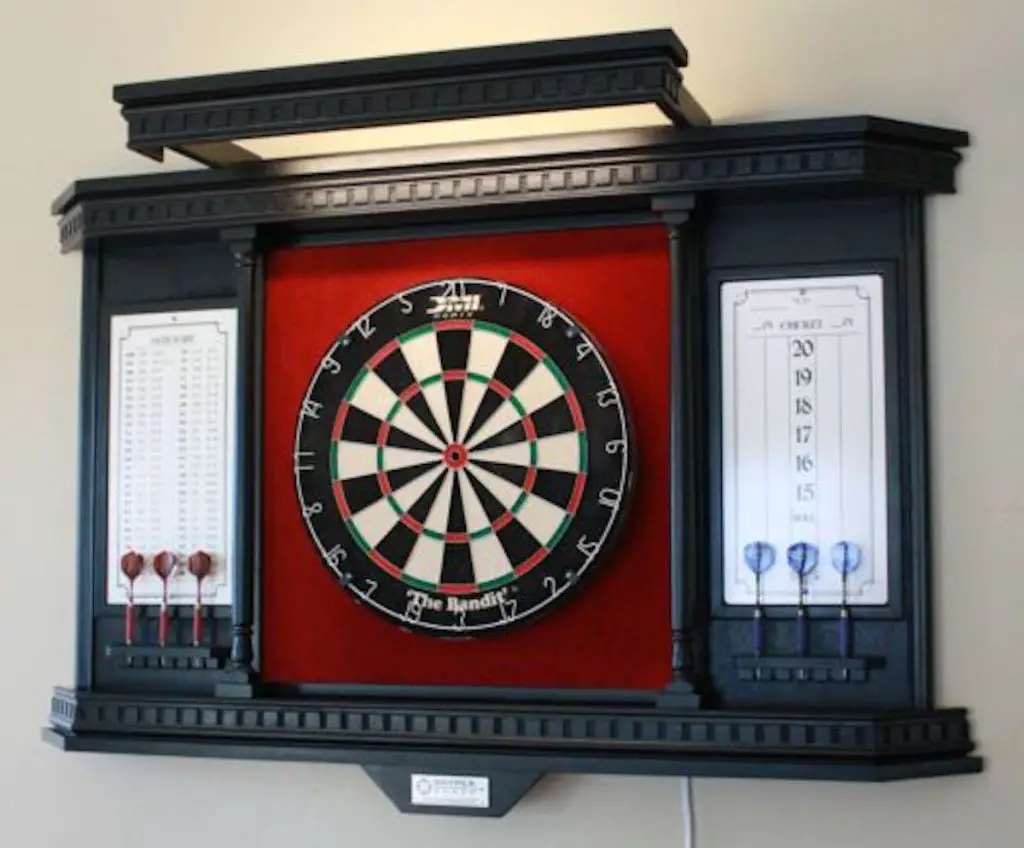
Playing darts is a fun past-time activity for many. It’s also a great way to bond with family and friends. But there isn’t always a place for it in the house. So, we thought we’d share with you a quaint, little project that’ll allow you to play the game outdoors.
By building your outdoor dartboard stand, you won’t have to take up space in the house. You also won’t have to worry about hitting things that you shouldn’t.
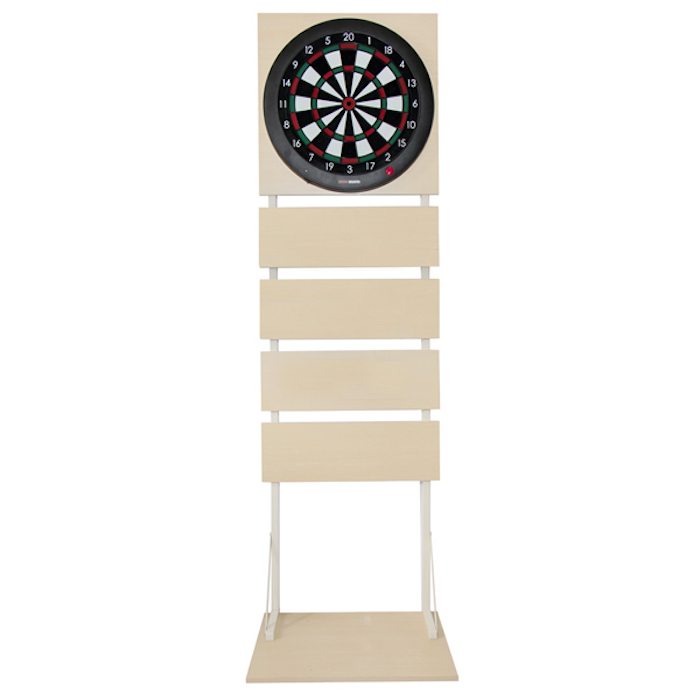
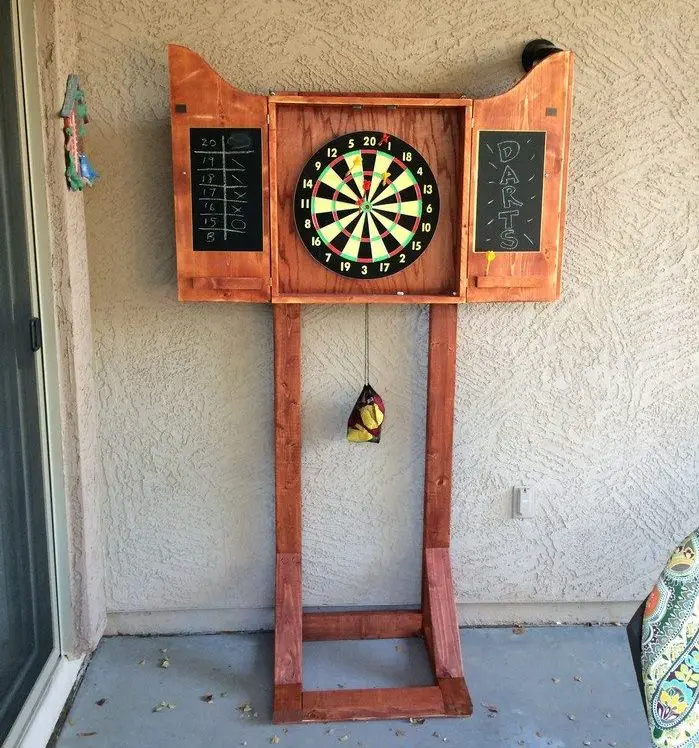
Easily build this outdoor dartboard stand according to your needs in terms of height. The good thing about this project is that it is fully mobile so you can move it anywhere you want.
You can add lockable wheels and add hooks to hang some stuff. The possibilities are endless and the only limit is your imagination.
Keen to know how to build your outdoor dartboard stand? Stick around and you’ll know how step by step!
Contents
Crafting Your Backyard Bullseye Haven
Ready to turn your backyard into the ultimate dartboard battleground? Hold onto your darts because we’ve got the scoop on the three key essentials for building a legendary outdoor dartboard stand. Let the construction games begin!
1. Lumber Lovin’ With Pressure-Treated Wood: The Backbone of Brilliance
When it comes to outdoor durability, pressure-treated wood is the best material. This lumber superhero is infused with preservatives, making it resistant to decay, insects, and unpredictable weather elements. Opt for pressure-treated wood for your outdoor dartboard stand, and you’re laying the foundation for a structure that can stand tall in the face of rain, wind, and sunshine.
Choose a sturdy wood type like cedar and redwood for a winning combination of durability and aesthetics.
2. Rust-Resistant Royalty: Galvanized Hardware to the Rescue
Your outdoor dartboard stand is only as strong as its connections, and that’s where galvanized hardware steps in. Bolts, screws, and nuts coated in zinc create a rust-resistant powerhouse, ensuring that your stand stays robust and secure. With galvanized hardware, you’re not just preventing corrosion – you’re prolonging the life of your dartboard stand in style.
Invest in stainless steel hardware for an extra layer of corrosion resistance and a sleek look.
3. Weatherproof Wonder: Sealing the Deal with Outdoor-Friendly Sealant
Protecting your outdoor dartboard stand from the elements is non-negotiable, and an outdoor-friendly sealant is your weapon of choice. This magical elixir not only shields the wood from rain, UV rays, and wind but also adds a touch of aesthetic charm. Choose a sealant designed for exterior use to ensure your stand not only lasts but looks fabulous doing it.
Opt for a clear sealant to maintain the natural beauty of the wood or go for a tinted option for a pop of colour.
4. Steel Steadfastness: Reinforce With Metal Supports
For an extra dose of sturdiness, consider adding steel supports to your outdoor dartboard stand. These can be strategically placed to reinforce key areas, providing additional stability and strength. Steel supports are the unsung heroes that ensure your stand can withstand the impact of countless bullseyes without breaking a sweat.
Pro Tip 4: Powder-coated steel not only enhances durability but also adds a sleek, finished look to your stand.
5. Plastic Fantastic: Durable and Low-Maintenance Components
In the battle against weathering, plastic components emerge as a low-maintenance ally. Consider using weather-resistant plastic for certain parts of your outdoor dartboard stand, like cup holders or scoreboards. It’s durable, won’t warp or crack, and adds a modern touch to your creation.
Choose high-density polyethylene (HDPE) for a plastic option that’s eco-friendly and resistant to moisture.
6. LED Lights: Illuminating the Night in Style
While not a traditional building material, LED lights can take your outdoor dartboard stand to the next level. Incorporate waterproof LED strips or fixtures to illuminate your dartboard during nighttime games. It’s not just about practicality – it’s about turning your stand into a dazzling centrepiece after the sun goes down.
Opt for colour-changing LEDs for a dynamic and customizable lighting experience.
7. Marine-Grade Plywood: Nautical Necessity for Extra Durability
If you’re looking for top-notch durability, marine-grade plywood is your go-to material. Designed for water-heavy environments, this plywood is bonded with waterproof glue and boasts enhanced resistance to decay and insects. Use marine-grade plywood for the surfaces of your dartboard stand, ensuring a long-lasting and water-resistant finish.
Apply a marine-grade finish to exposed edges for comprehensive protection against the elements.
8. Aluminum Extrusions: Sleek and Corrosion-Resistant Accents
For a modern and corrosion-resistant touch, consider incorporating aluminium extrusions into your outdoor dartboard stand. These sleek metal accents not only enhance the aesthetics but also add structural integrity. Aluminum is lightweight, corrosion-resistant, and can withstand the outdoor elements with ease.
Anodized aluminium provides extra protection against corrosion while offering a stylish finish.
9. Concrete Base: Unshakeable Stability
For ultimate stability, consider a concrete base for your outdoor dartboard stand. A concrete pedestal not only ensures your stand stays put but also adds an industrial-chic vibe. It’s a heavyweight solution for windy conditions and provides an unshakeable foundation for your dart-throwing endeavours.
Customize your concrete base with embedded designs or coloured aggregates for a personalized touch.
10. Recycled Plastic: Eco-Friendly Ingenuity
If sustainability is at the forefront of your building goals, consider using recycled plastic lumber for your outdoor dartboard stand. Made from recycled materials, this lumber is resistant to moisture, insects, and decay. It’s a green choice that combines durability with eco-friendly ingenuity.
Explore options like recycled high-density polyethylene (rHDPE) for a versatile and sustainable building material.
With these top-tier materials, you’re armed with the essentials to create an outdoor dartboard stand that not only withstands the elements but also takes the spotlight in your backyard. From pressure-treated wood to LED lights, each material plays a critical role in ensuring your outdoor dartboard stand stands out with durability, style, and a touch of ingenuity.
So, gather your materials, unleash your creativity, and let the dartboard dreams begin!
Spice Up Your Outdoor Dartboard Stand
Don’t settle for the ordinary – let’s jazz up that outdoor dartboard stand with these 7 sassy and utterly fabulous personalization tips. Let the dartboard glam session begin!
1. Team Spirit Fiesta: Deck it out in Your Team’s Swagger!
Are you a sports fanatic? Let your outdoor dartboard stand scream team pride! Paint it in your team’s colours, slap on the logo, and turn your dart battles into a spirited game day celebration. Your outdoor space just became the hottest fan zone in town!
2. Psychedelic Splendor: Infuse It with a Splash of Color!
Why be ordinary when you can be extraordinary? Give your dartboard stand a psychedelic makeover with vibrant, eye-popping paints. Neon greens, hot pinks, or electric blues – let your creativity run wild. It’s not just a stand; it’s a work of art that demands attention!
3. Retro Rendezvous: Take a Trip Down Memory Lane!
Embrace the nostalgia and go retro with your dartboard stand. Think vintage logos, classic patterns, and a touch of old-school charm. Your dartboard stand just turned into a time machine, and everyone’s invited to the groovy throwback party!
4. Signature Style: Monogram Magic for a Touch of Elegance!
Put your stamp on it – literally! Add your initials or a personalized monogram to your dartboard stand for a touch of elegance. It’s not just a game; it’s a sophisticated affair. Who says dartboard stands can’t have a bit of class?
5. Themed Extravaganza: Dive into a Theme Wonderland!
Transform your dartboard stand into a themed wonderland. Beach vibes, rustic chic, or even a tropical paradise – pick a theme and let your dartboard stand transport you to a different world. It’s not just a game; it’s an immersive experience!
6. LED Magic: Illuminate the Night with Neon Glory!
Turn your outdoor dartboard stand into a beacon of fun with LED lights! String them around the stand, under the board, or get creative with patterns. Nighttime dart sessions just got a glow-up, and your stand is now the star of the evening show!
7. DIY Decals: Sticker It Up with Personal Flair!
Customize your dartboard stand with DIY decals. Add your favourite quotes, funky symbols, and just some quirky designs, and let stickers speak your language. It’s not just a stand; it’s a canvas of self-expression, and your personality is the main attraction!
There you have it – 7 sass-tastic ways to sprinkle some personality onto your outdoor dartboard stand. Say goodbye to the bland and hello to the bold! Your backyard just became the hottest spot in town, and your dartboard stand? It’s not just a piece of wood; it’s a statement, a reflection of your style, and the epicentre of dartboard extravagance.
So, grab those paints, lights, and stickers – let’s turn that dartboard stand into a masterpiece that’ll have everyone talking! Game on!
DIY Dartboard Outdoor Stand Made Simple!
So, want to make a cool outdoor dartboard stand for your backyard? Check this inside scoop on a super easy DIY project that’ll have your friends and fam totally impressed. Follow along as we walk you through the steps to create a totally rad stand that’ll take your dart game to the next level.
1. Materials and Tools
- 2 6-foot of wood
- 8 16.5-inch of wood
- A dart board to mount
- Bolts and nuts to mount the dartboard
- Wood glue
- Wood screws
- Stain or paint (colour of choice)
- Hammer
- Screwdriver
- Paintbrush
- Saw (if your wood materials are not pre-cut)
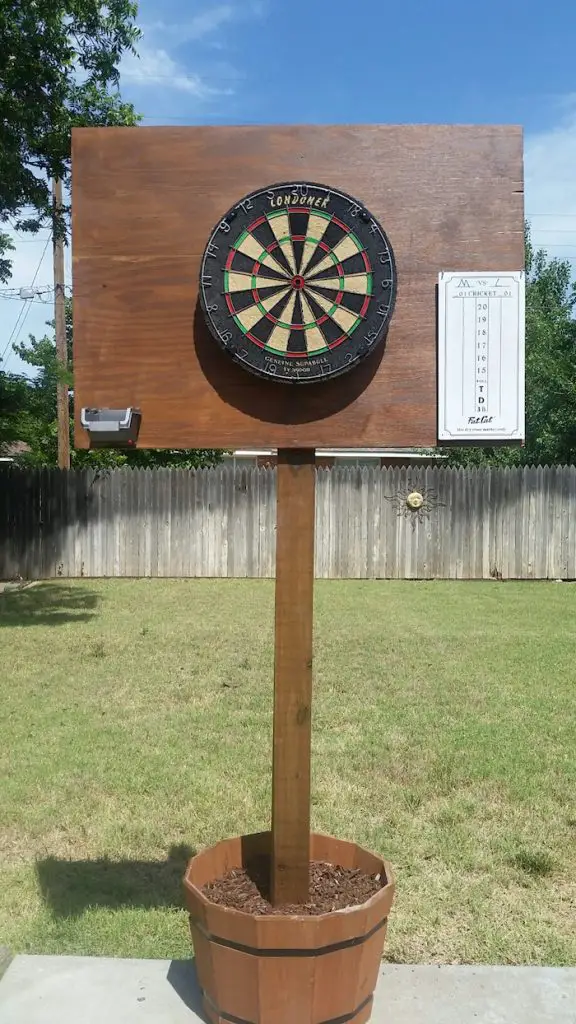
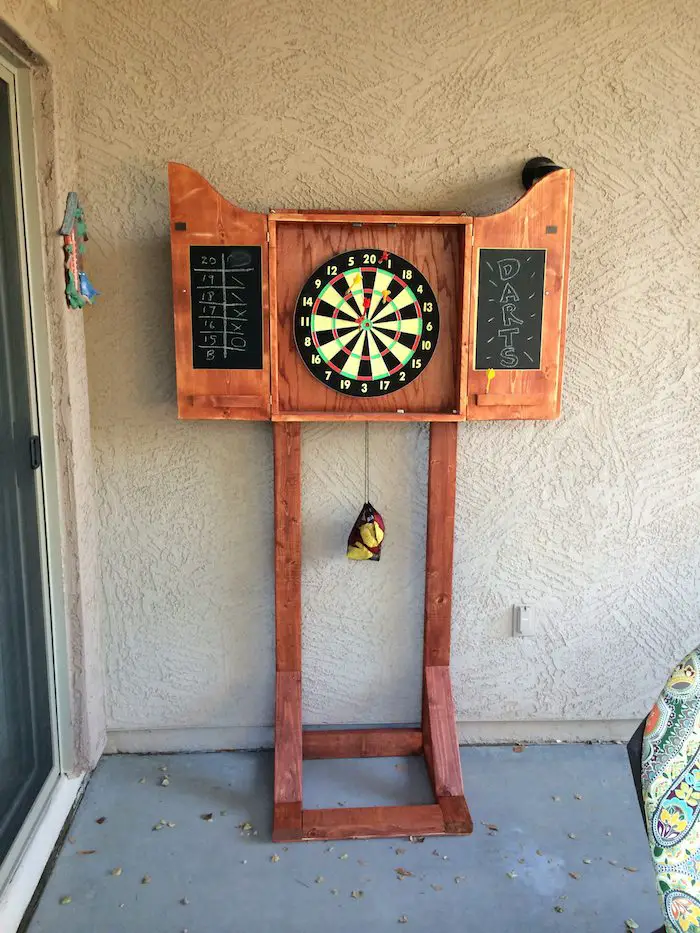
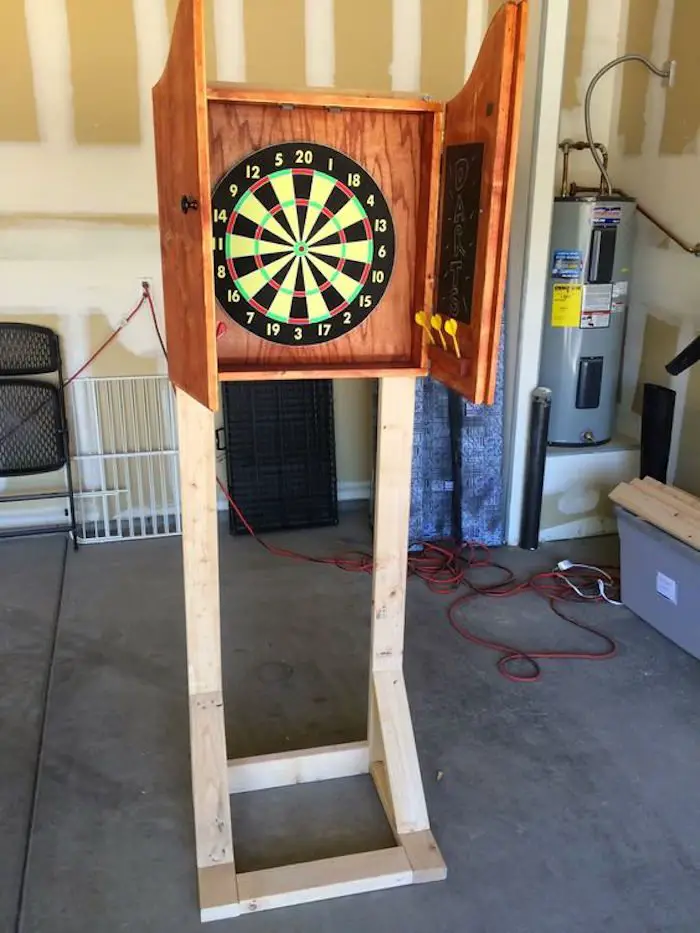
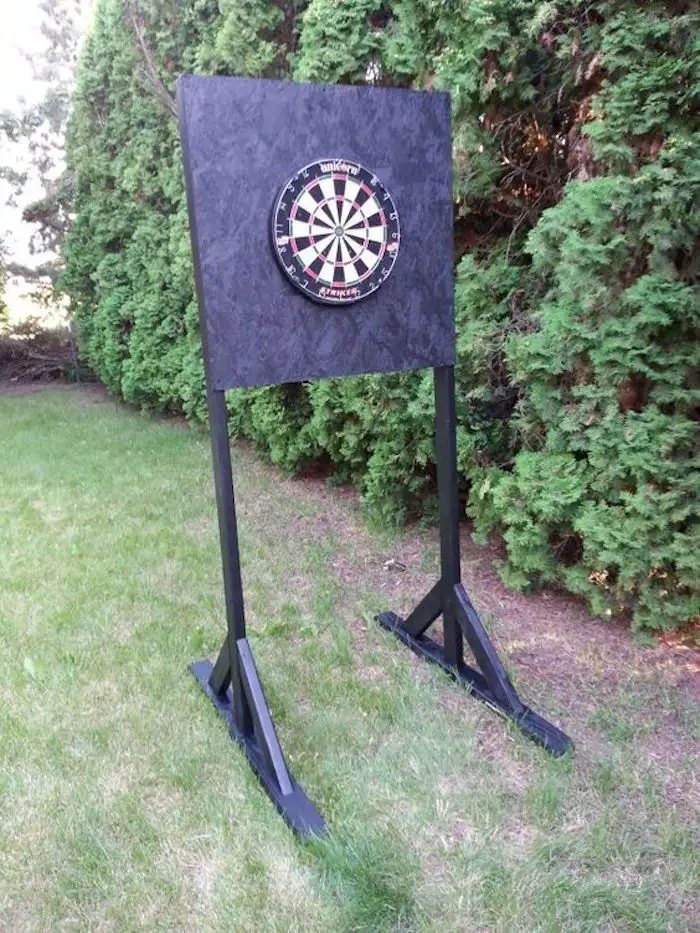
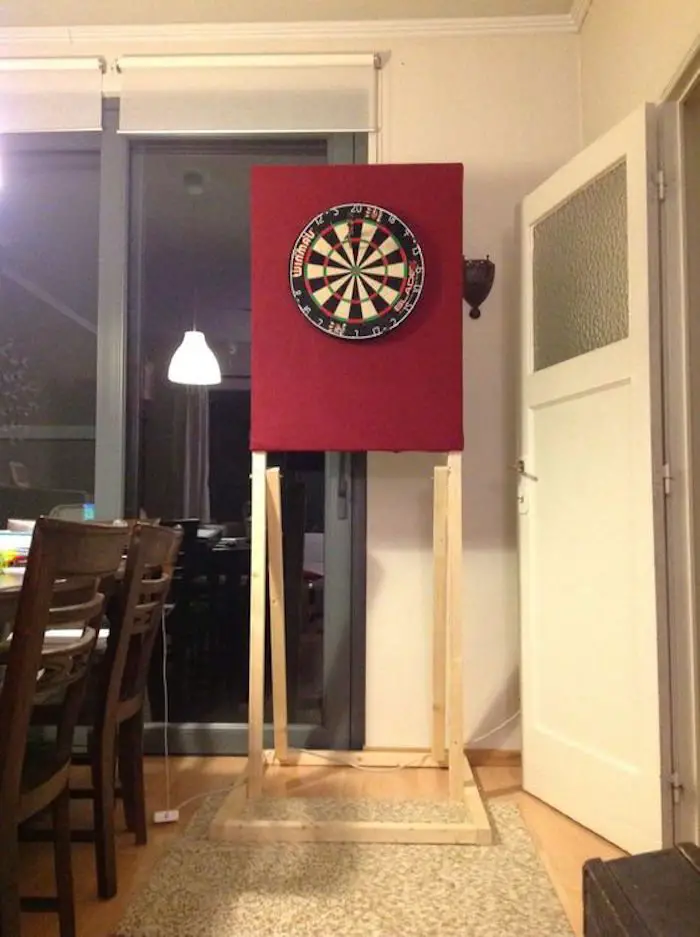
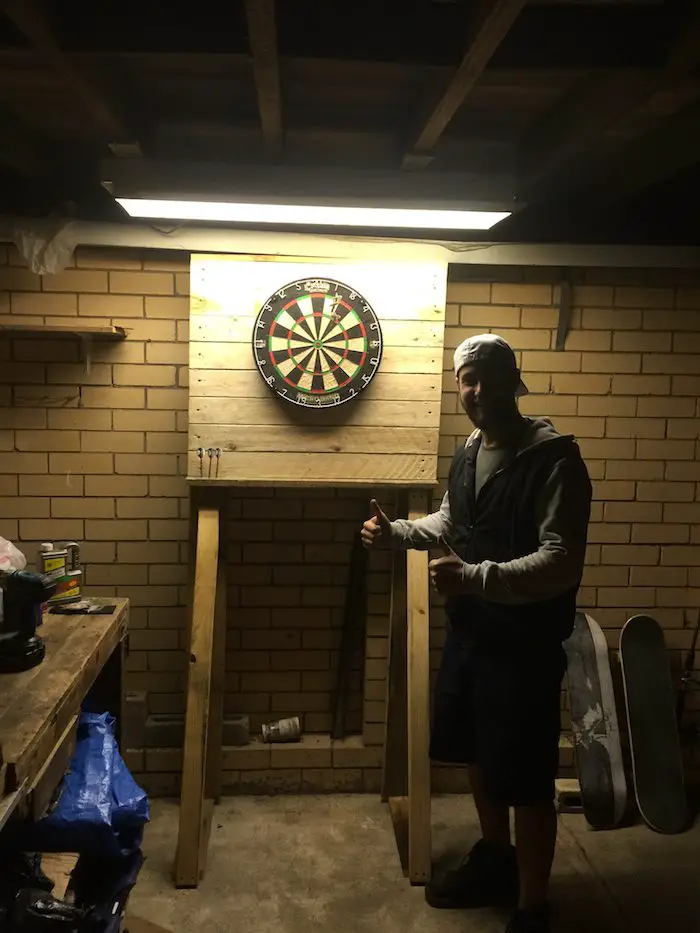
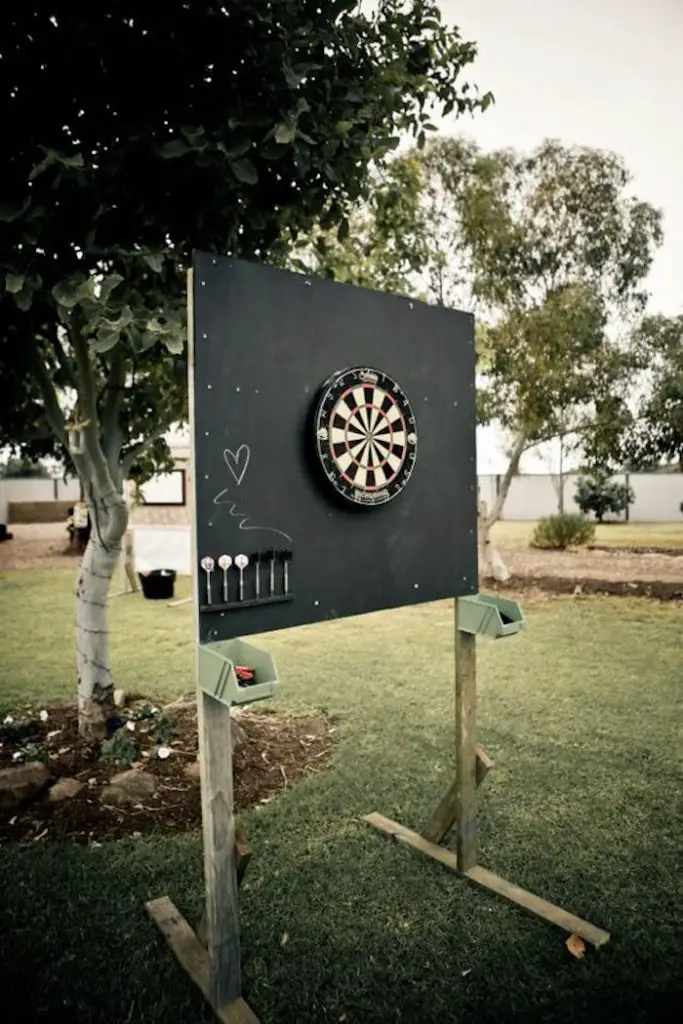
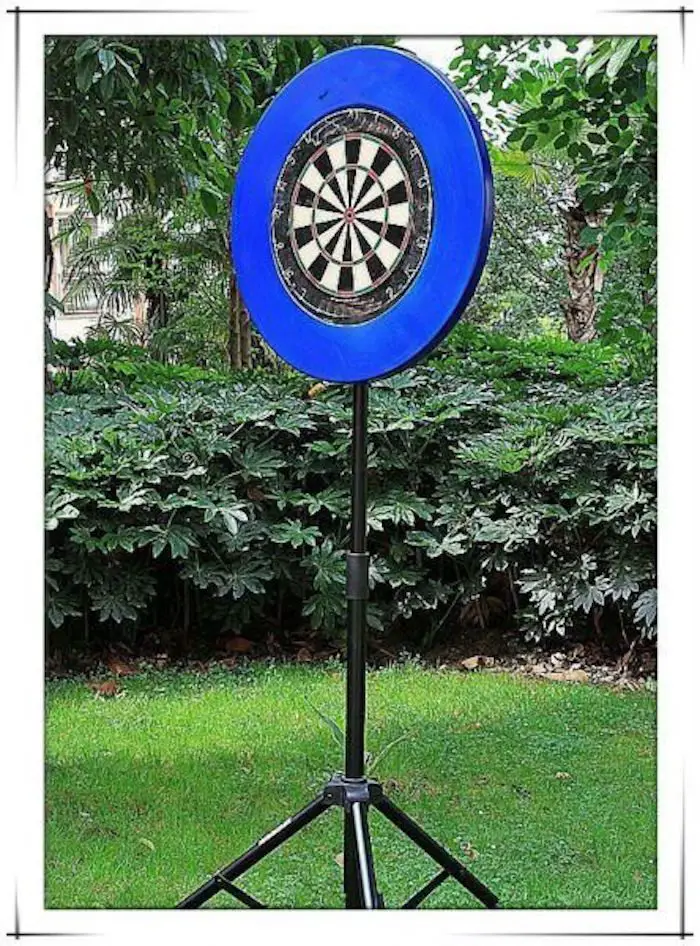
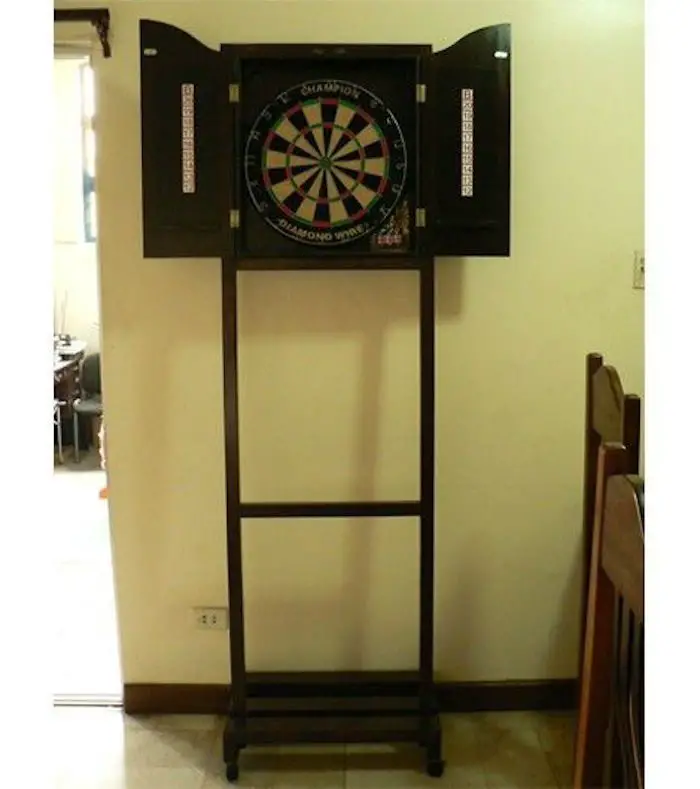
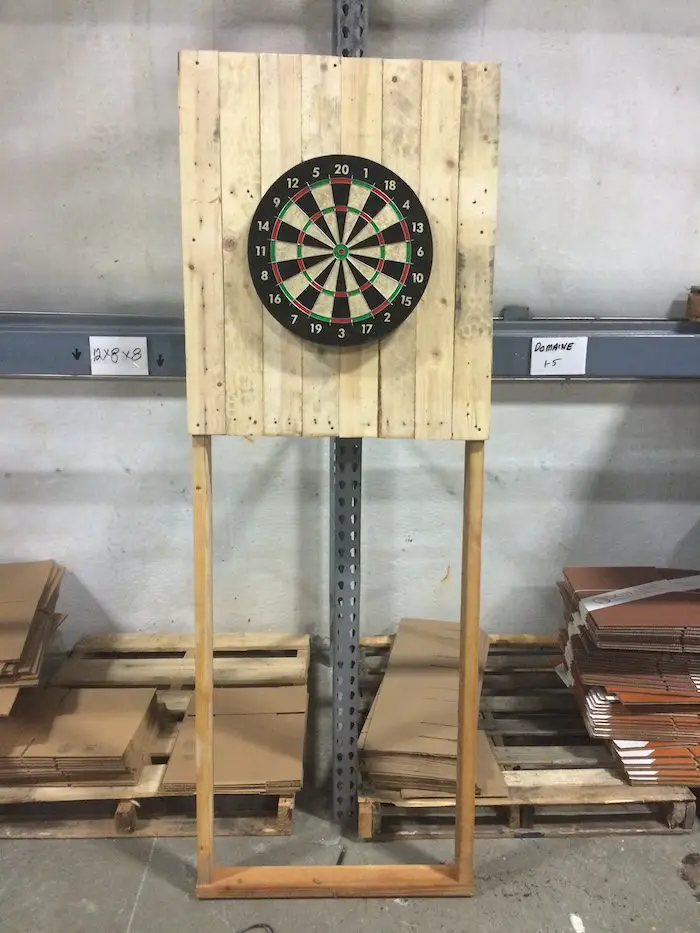
There are many ways to make this. Look at these photos for some ideas you can use to create your very own outdoor dartboard stand…
‘Click on any image to start lightbox display. Use your Esc key to close the lightbox. ?’


2. Steps
Want to build this? Find the step-by-step instructions from Timbo’s Creations…
A heartfelt thank you goes out to Timbo’s Creations for generously sharing this remarkable endeavour. Prepare to ignite your imagination and breathe life into this captivating outdoor dartboard stand project!
Building an Outdoor Dartboard Stand Like a Pro
Ready to take your dart game to the next level? Buckle up because we’re about to dive into the ultimate guide on building an outdoor dart stand that will turn your backyard into the dartboard haven of your dreams. These 10 pro tips will ensure your outdoor dart stand is a smashing success!
1. Measure Twice, Throw Once: The Precision Play
Before you unleash your inner carpenter, grab that measuring tape and channel your inner perfectionist. Precision is key when it comes to crafting an outdoor dart stand. Measure the height, width, and depth carefully to ensure your stand meets official dartboard regulations. Remember, a well-measured foundation sets the stage for a perfect dart-throwing experience.
Pro Tip 1: Optimal dartboard height is 5 feet 8 inches from the floor to the center of the bullseye. Ensure your stand achieves this for a professional touch.
2. Materials Marvel: Lumber Lovin’ and Hardware Heroes
Choosing the right materials is like selecting the perfect set of darts – it makes all the difference. Go for pressure-treated wood for durability and resistance to the elements. When it comes to hardware, galvanized screws, nuts, and bolts are your rust-resistant companions, ensuring your stand can withstand both the excitement of the game and the unpredictability of the weather.
Pro Tip 2: Use screws instead of nails for easy disassembly and reassembly if you ever decide to relocate your dartboard.
3. Level Up: The Stability Secret
Wobbly dartboard stands are a recipe for disaster. Ensure your creation stands tall and steady by investing in a levelling tool. A level ensures your stand doesn’t tilt, providing a stable surface for your dartboard. This small but mighty tool can make a world of difference in the accuracy of your throws.
Pro Tip 3: Place a thin piece of rubber or a doormat under your stand to absorb vibrations and further stabilize your setup.
4. Weatherproof Wonder: Sealing the Deal with Outdoor-Friendly Sealant
Protect your outdoor dartboard stand from the elements by giving it a weatherproof sealant makeover. This not only shields the wood from rain, sun, and wind but also adds a touch of aesthetic flair. Choose a sealant designed for outdoor use and watch your dartboard stand transform into a durable and visually stunning masterpiece.
Pro Tip 4: Reapply sealant annually to maintain the stand’s resilience against weather conditions and keep it looking fresh.
5. Aesthetic Awesomeness: Eye-Catching Designs
Why settle for a basic dartboard stand when you can have a visually striking centrepiece in your backyard? Get creative with your design – add a scoreboard, paint it in vibrant colours, and personalize it with your favourite team’s logo. Aesthetics aren’t just about looks; they enhance the overall dart-throwing experience.
Pro Tip 5: Use outdoor-friendly paint for a vibrant and long-lasting finish. Let your stand reflect your personality!
6. Perfect Placement: The Strategic Setup
Choosing the right location for your dartboard stand is as crucial as hitting the bullseye. Select a spot with ample space, away from fragile items and high-traffic areas. Consider lighting conditions – you wouldn’t want your game interrupted by shadows. Aim for a well-lit and easily accessible spot for optimum dart-throwing pleasure.
Pro Tip 6: Install outdoor lighting fixtures to ensure your dartboard is always ready for action, day or night.
7. Wind Woes: Tackling Troubles with Outdoor Elements
Outdoor dart-throwing comes with its challenges, and wind is a formidable opponent. Strategically position your dartboard stand to minimize the impact of wind. Additionally, consider adding a windbreak, like a strategically placed fence or tall plants, to create a dart-friendly microclimate. Don’t let Mother Nature spoil your game – plan accordingly!
Pro Tip 7: Invest in magnetic dartboard accessories to prevent your darts from flying away in windy conditions.
8. The Portable Perk: Creating a Moveable Masterpiece
Want to take your dartboard stand on the road or switch up your backyard layout? Make your stand easily portable by adding handles or wheels. This not only adds convenience but also opens up opportunities for impromptu dart-throwing adventures in different areas of your outdoor space.
Pro Tip 8: Attach swivel caster wheels for smooth transportation and easy maneuverability, ensuring your dartboard stand is always ready for action.
9. Safety Zone: Cushioning the Impact
Accidents happen, especially when you’re in the heat of a dart-throwing battle. Minimize the impact by adding a safety zone around your dartboard. Use rubber mats or soft materials around the stand to create a buffer zone, reducing the risk of damage or injury in case a dart veers off course.
Pro Tip 9: Invest in foam surround protectors to minimize the risk of damaging both your darts and the surroundings.
10. Maintenance Magic: Keeping Your Stand in Top Shape
Your outdoor dartboard stand, like a fine wine, gets better with age – but only if you take care of it. Perform regular maintenance checks, tighten any loose screws, and inspect the wood for signs of wear. A well-maintained dartboard stand ensures your games remain consistent, enjoyable, and free from unexpected surprises.
Pro Tip 10: Keep a maintenance checklist and schedule to ensure your stand is always in peak condition.
Armed with these pro tips, you’re now ready to embark on a journey of backyard dartboard greatness. From precision measurements to creative designs, each tip adds a layer of expertise to your endeavour.
Gather your tools, channel your inner carpenter, and let the dart-throwing extravaganza begin! May your throws be accurate, your design be eye-catching, and your outdoor space become the go-to destination for epic dart-throwing adventures. Happy building!
Creating Outdoor Fun!
Creating outdoor fun with a DIY dartboard stand offers a thrilling and customizable experience. By crafting your dartboard stand, you can tailor it to your preferences and skill level.
Follow the suggested materials, tools, steps, and extra tips so you can confidently build an outdoor dartboard stand that is not only easy to construct but also durable, stable, and ready for endless hours of dart-throwing fun.
Enjoy the excitement of playing darts in the great outdoors, engaging in friendly competitions and making lasting memories with friends and family. Whether you’re a novice or a seasoned player, the DIY approach allows you to build a stand that perfectly suits your needs.
So, grab your tools, embrace your creativity, and embark on the journey of creating outdoor fun with your very own DIY dartboard stand. Elevate your dart-throwing skills and have a blast in the fresh air!

