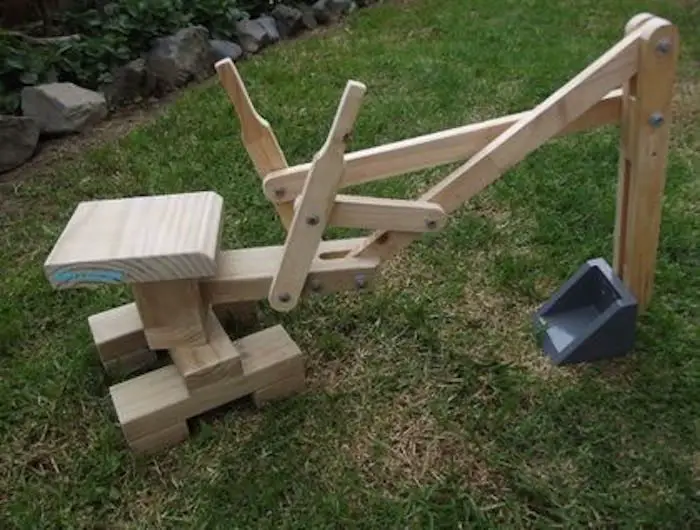
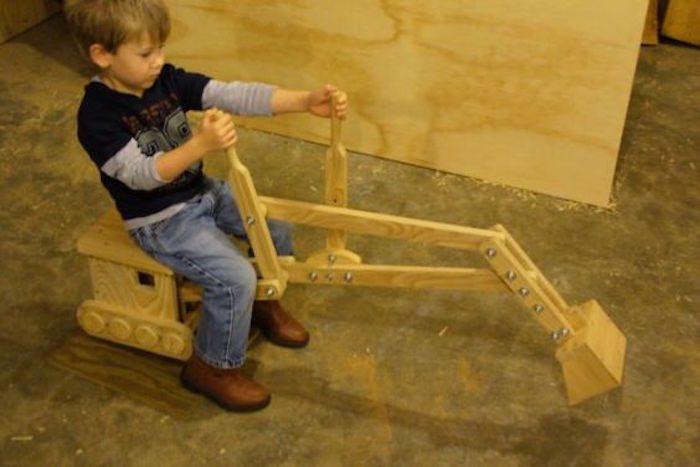
If you have a sandbox in your backyard, this little toy will make playtime more fun! Look at this great and fun idea to build for your kids – the DIY sandbox excavator.
It may seem quite a lot of woodwork to build this. But really, it’ll take about a day, or perhaps two. This could be a weekend project for you. While you’re at it, ask your child to help out even with just the most basic tasks. It will be a great bonding activity.
With only a few wooden pallets, nails, glue, and time, any parent can assemble this great toy. It’ll keep any kid entertained. If you don’t have a sandbox to use this with, maybe you can build one, too! It beats having them watch TV all day.

Let’s get some woodwork done and build something our kids can enjoy at the sandbox.
How to Make Your DIY Sandbox Excavator
You’ll need these materials:
- 1 – 2 pallets (heat treated)
- 3/4″ galvanized pipe flange
- 12″ length of 3/4″ threaded galvanized pipe
- Three 1″ L brackets
- Waterproof Wood Glue
- Cheap office chair
- Assorted lag screws and bolts
- Paint (color of choice)
- Cording (optional)
- Coil spring (optional)
And these tools:
- Wood clamps
- Circular saw
- Hand drill
- Band saw
- A set of wrenches
- Table saw
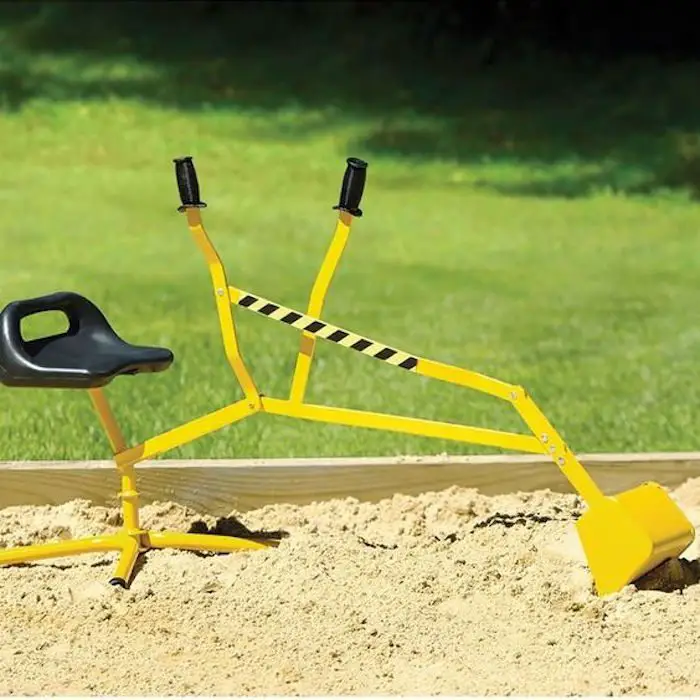
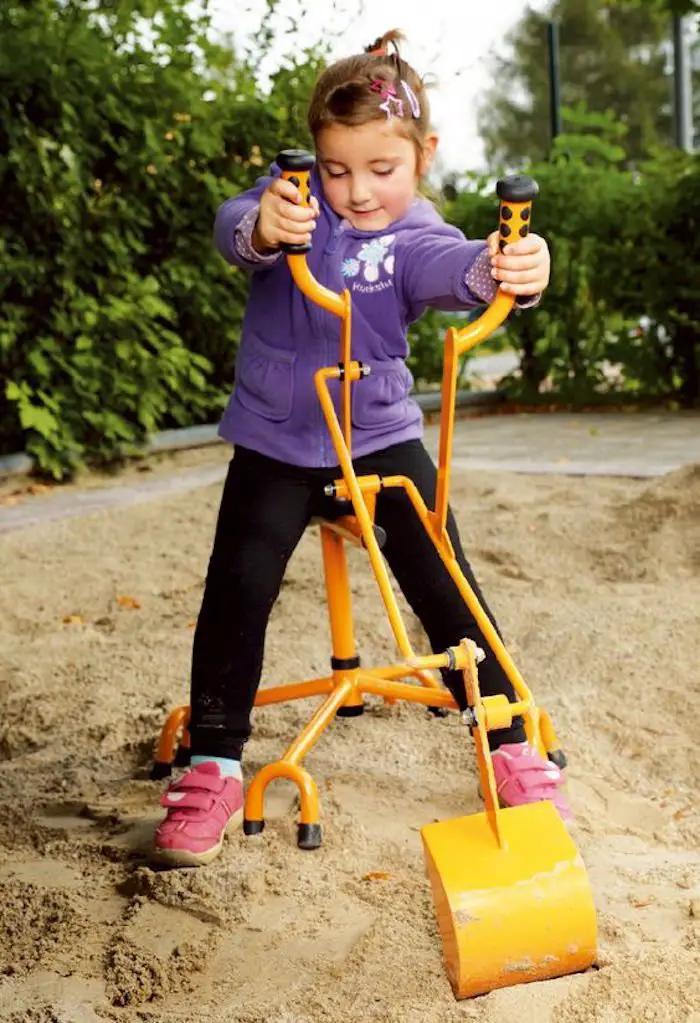
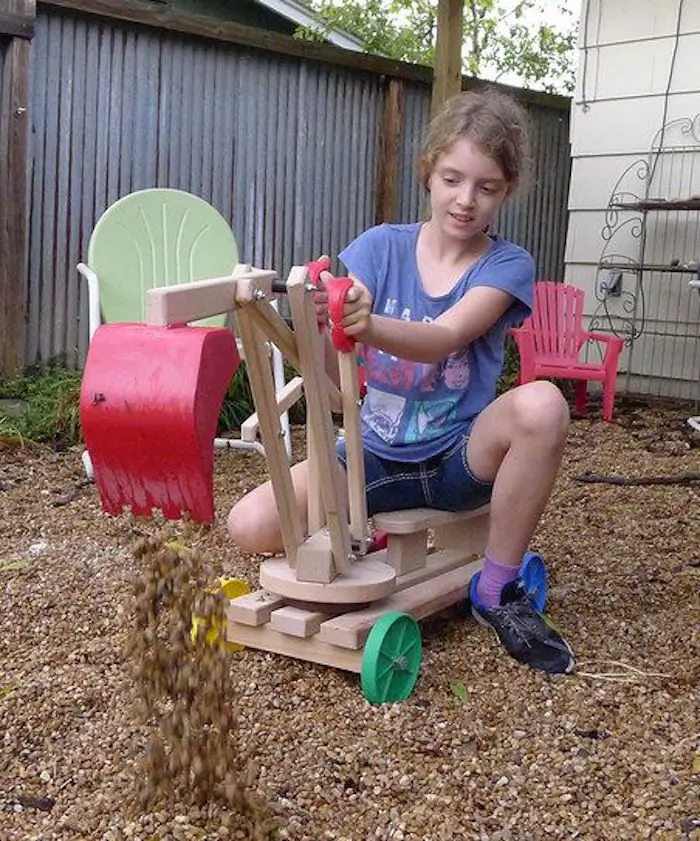
Too complicated? There are simpler designs you can follow. Check them out below…
‘Click on any image to start lightbox display. Use your Esc key to close the lightbox. ?’


Steps:
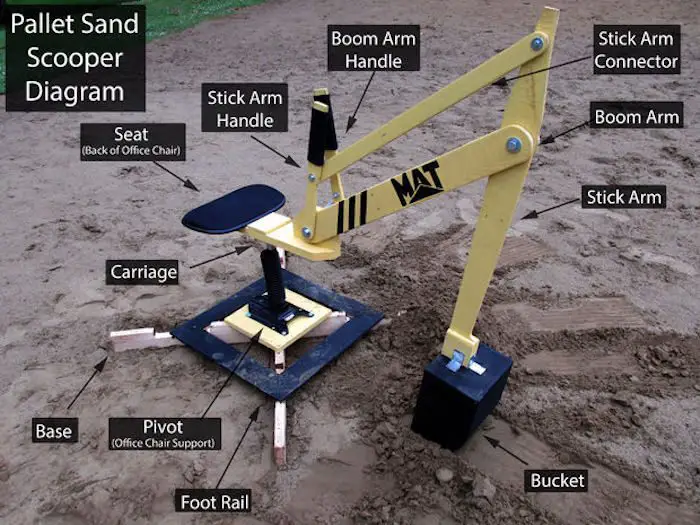
Step 1: Prepare the Pallets
Start by disassembling the pallets to extract the wooden boards. These will serve as the primary components of your sandbox excavator. Ensure that the pallet wood is clean, smooth, and free from any nails or debris.
Step 2: Construct the Excavator Arm
Next, assemble the excavator arm using the wooden boards from the pallets. Cut the boards to the desired length, ensuring that they are sturdy enough to support the weight of the excavator bucket. Attach the boards together using waterproof wood glue and reinforce the joints with screws or bolts for added strength.
Step 3: Attach the Galvanized Pipe
Secure the galvanized pipe flange to the end of the excavator arm using lag screws or bolts. Thread the 12″ length of threaded galvanized pipe into the flange to create the excavator’s pivot point. This will allow the arm to rotate smoothly as it digs and scoops in the sandbox.
Step 4: Install the Excavator Arm
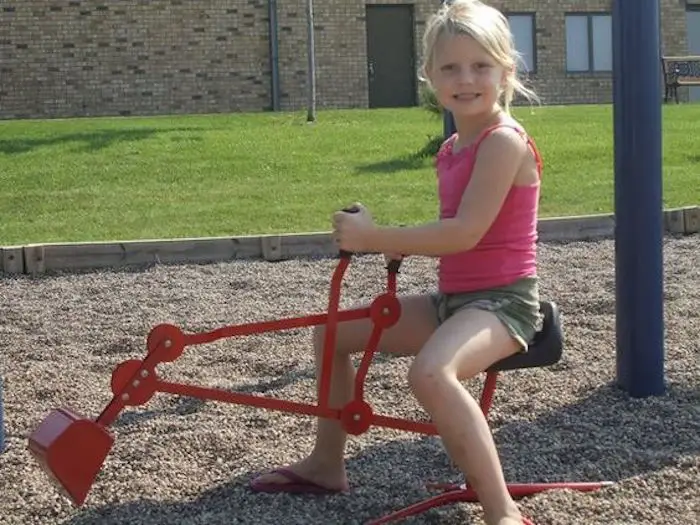
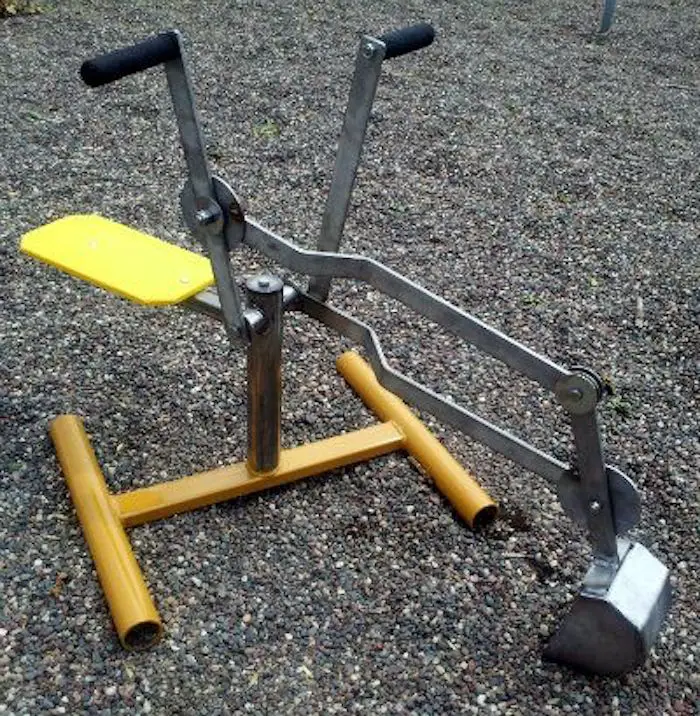
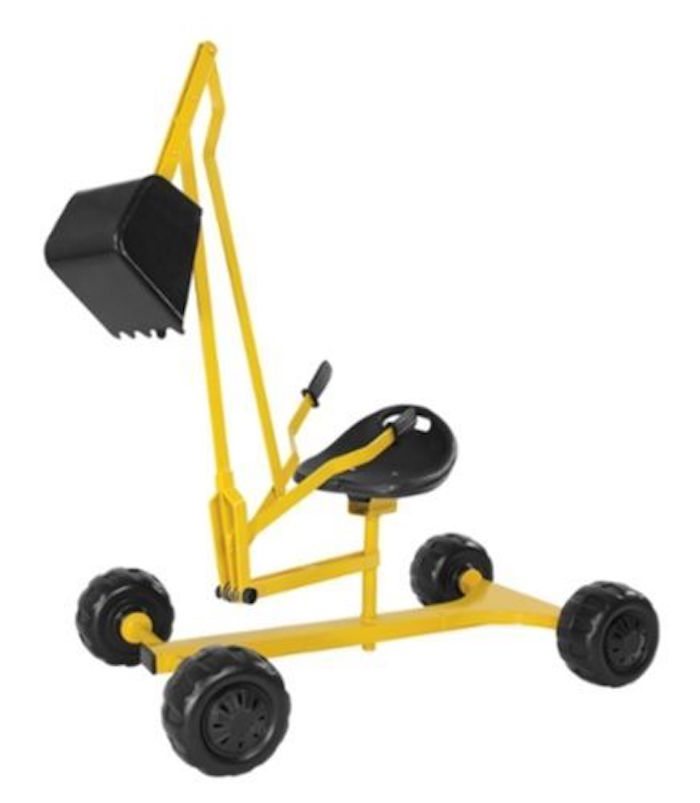
Mount the excavator arm onto the frame of the cheap office chair using L brackets. Position the arm at a height that allows for easy maneuverability and operation by young excavators. Ensure that the arm is securely attached to the chair frame to prevent any wobbling or instability during play.
Step 5: Add Optional Features
Get creative and add optional features to enhance the functionality and aesthetics of your sandbox excavator. Attach a coil spring to the excavator’s arm to simulate the hydraulic action of a real excavator. You can also incorporate cording to create realistic controls for operating the arm.
Step 6: Paint and Customize
Let your imagination run wild as you paint and customize your sandbox excavator to suit your preferences. Choose a vibrant colour scheme that will captivate young adventurers and transform the ordinary into the extraordinary. Add details such as decals, stickers, or stencilled designs to add personality to your creation.
Step 7: Test and Adjust
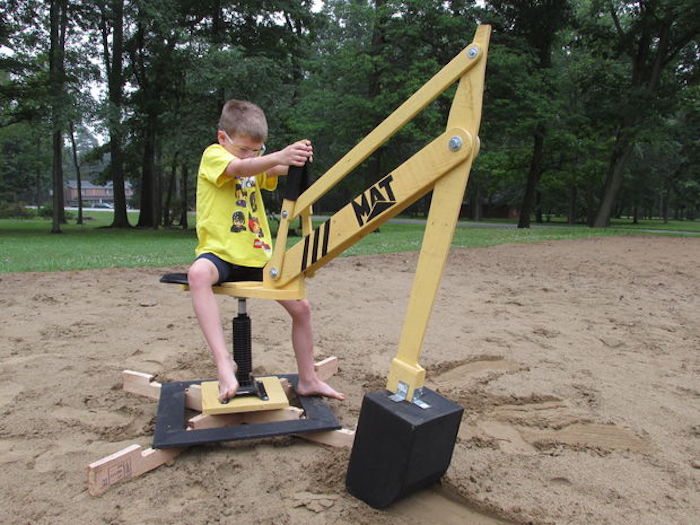
Once your sandbox excavator is assembled and painted, it’s time to put it to the test! Set up a sandbox or designated play area and watch as eager hands take control of the excavator arm. Observe how the excavator performs and make any necessary adjustments to ensure optimal functionality and safety.
Step 8: Enjoy Hours of Playtime Fun!
With your DIY sandbox excavator complete, it’s time to sit back and enjoy the fruits of your labour. Watch as children immerse themselves in imaginative play, digging, scooping, and exploring to their heart’s content. Whether it’s building sandcastles, uncovering buried treasures, or simply having a blast in the sandbox, your homemade excavator is sure to provide hours of entertainment and adventure.
Building a DIY sandbox excavator is not just a construction project—it’s an opportunity to ignite the imagination, foster creativity, and create lasting memories. By transforming simple materials into a captivating playtime experience, you’ll inspire young minds to dream big and explore the world around them.
It might take a while, but this project is definitely worth the work. Thanks to Matt Makes for sharing tips on how to make a DIY sandbox excavator.
Wrapping It Up
As we conclude our adventure in crafting a DIY sandbox excavator, it’s clear that this project is more than just a construction endeavour—it’s a gateway to boundless creativity, endless fun, and cherished memories. In just eight exhilarating steps, we’ve transformed basic materials into a captivating playtime experience that sparks the imagination and brings joy to young and old alike.
Through the process of gathering materials, constructing the excavator’s arm, and adding optional features, we’ve unleashed our inner builders and tapped into our ingenuity. We’ve embraced the challenge of problem-solving and the satisfaction of seeing our vision come to life with each screw tightened and board assembled.
As we painted and customized our sandbox excavator, we infused it with personality and character, turning it into a one-of-a-kind masterpiece that reflects our creativity and style. With vibrant colours, playful details, and optional features like coil springs and cording controls, we’ve created a truly unique playtime companion that inspires endless adventures.
Now, as we test and adjust our DIY creation, we witness the joy and excitement it brings to children as they take control of the excavator’s arm and explore the sandbox with boundless enthusiasm. We see their imaginations ignite as they dig, scoop, and discover, transforming the ordinary into the extraordinary with every movement of the arm.
And as we sit back and watch the magic unfold, we’re reminded of the power of DIY craftsmanship to create moments of connection, laughter, and pure joy. Our sandbox excavator isn’t just a toy—it’s a catalyst for adventure, a catalyst for creativity, and a catalyst for memories that will last a lifetime.
So, whether you’re a seasoned DIY enthusiast or a novice builder, I encourage you to embark on your own journey of creativity and discovery. Gather your materials, roll up your sleeves, and let your imagination run wild as you build a DIY sandbox excavator in eight fun-filled steps. The possibilities are endless, and the adventures are waiting—so what are you waiting for? Let’s get building!
Frequently Asked Questions
1. Is this project suitable for beginners?
Absolutely! Building a DIY sandbox excavator is a fun and rewarding project that can be enjoyed by beginners and experienced DIY enthusiasts alike. The step-by-step instructions provided in the guide make the process easy to follow, and the materials required are readily available at most hardware stores.
2. How long does it take to complete the project?
The time required to complete the project can vary depending on factors such as your level of experience, the complexity of the design, and the availability of materials. However, most builders can expect to finish the DIY sandbox excavator within a weekend or less, making it a perfect weekend project for the whole family to enjoy.
3. Can you customize the design of the sandbox excavator?
Absolutely! One of the great things about DIY projects is the ability to customize the design to suit your preferences and needs. You can experiment with different colours, shapes, and optional features to create a sandbox excavator that reflects your unique style and personality.
4. What age range is the sandbox excavator suitable for?
The sandbox excavator is designed for children aged 3 and above, but younger children may also enjoy playing with adult supervision. The size and complexity of the excavator arm can be adjusted to accommodate different age groups, ensuring a safe and enjoyable play experience for everyone.
5. Do you need any special tools or equipment to build the sandbox excavator?
While basic woodworking tools such as a saw, drill, hammer, and screwdriver are recommended for this project, no special equipment is required. Most of the materials can be easily cut and assembled using common household tools, making it accessible to builders of all skill levels.
6. Is the sandbox excavator safe for children to play with?
Safety is a top priority when building any DIY project, especially those intended for children. The sandbox excavator is designed with safety in mind, with smooth edges, sturdy construction, and secure fastenings to prevent accidents. However, adult supervision is always recommended, especially for younger children.
7. Can you add additional features to the sandbox excavator?
Get creative and add extra features to your sandbox excavator to enhance its functionality and play value. You can incorporate features such as a rotating excavator arm, realistic controls, or even a working bucket mechanism to make the play experience even more exciting for children.
8. Can you build multiple sandbox excavators for a larger play area?
Yes, you can build multiple sandbox excavators to create a larger play area for children to enjoy. Simply follow the same steps outlined in the guide to construct additional excavators, and arrange them in your desired configuration within the sandbox or play space. This allows multiple children to play together and encourages cooperative play and teamwork.


