We all know that the average toilet uses excessive amounts of clean water per flush. The average person flushes the toilet five times a day. If each flush uses an extra 2 gallons of water, a family of three will waste more than 800 gallons of water a month.
That makes up a large part of every household’s water consumption! Wouldn’t it be nice if we could maximize the use of this clean water before they are flushed down the bowl? A toilet tank sink makes that possible!
But how exactly does this toilet tank sink idea work? Well, you can use water that flowed from a faucet from a sink on top of it as fill water for the toilet. This way you can wash your hands with that clean water before it is used for flushing on the next toilet use. Simple as that!
Now, this step-by-step tutorial will show you just how easy it is to make your own toilet tank sink. You’ll see that the materials used here are scrap or recycled to make the whole idea inexpensive. But if you are keen on aesthetic design, you can use other better-looking materials.
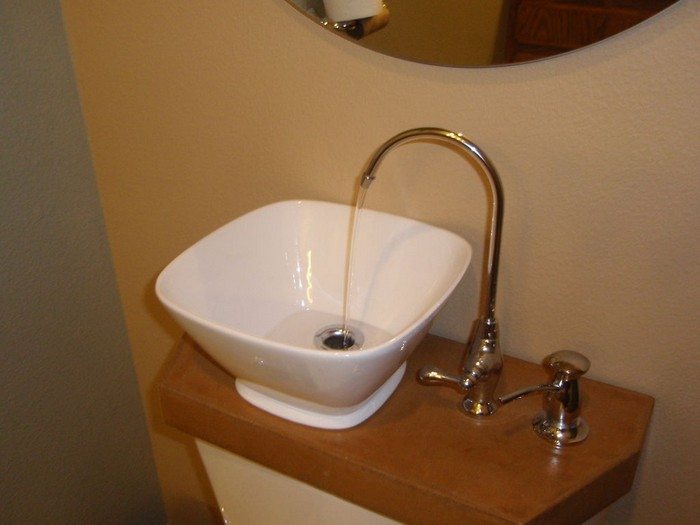
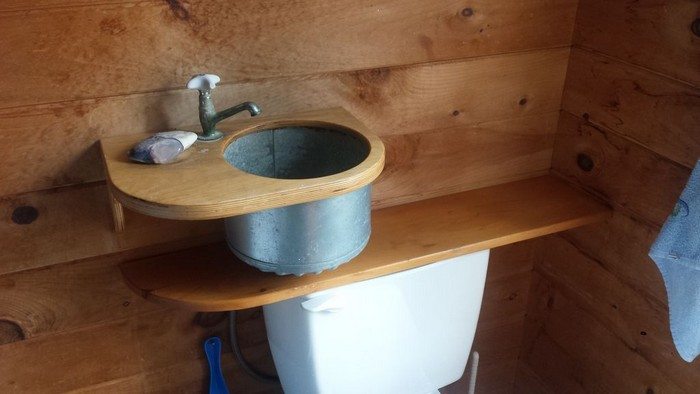
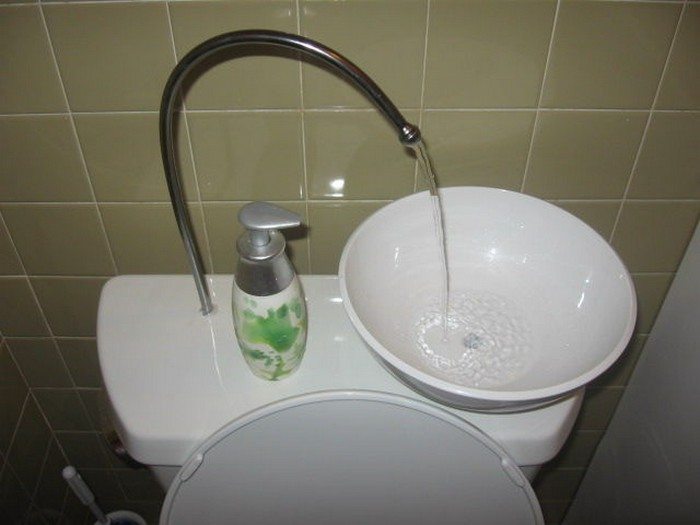
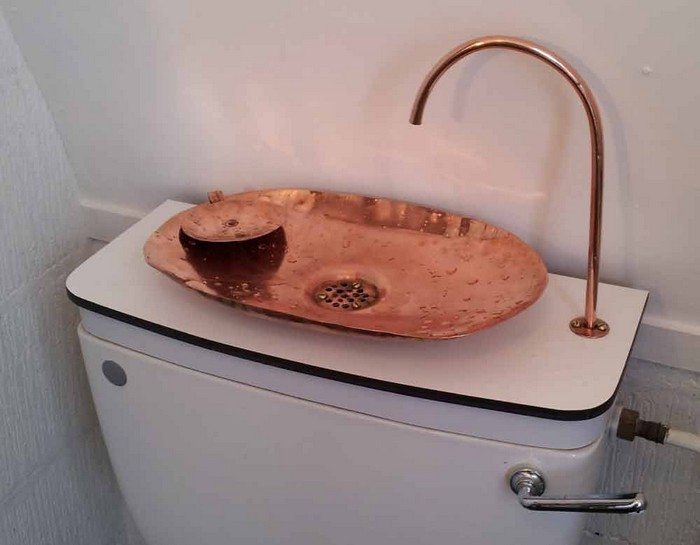
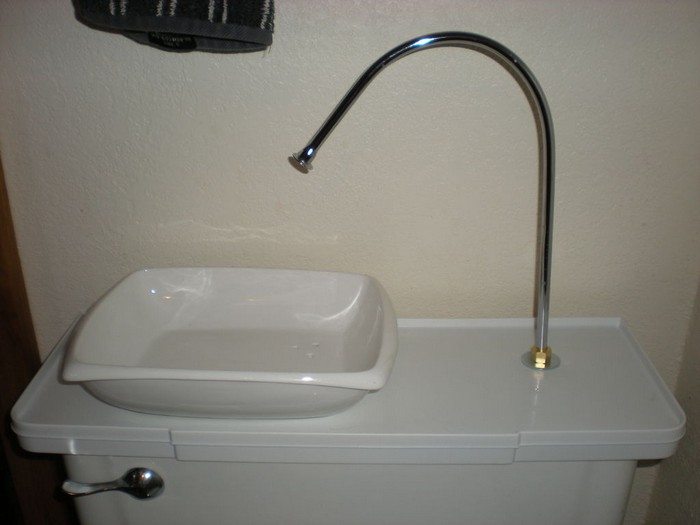
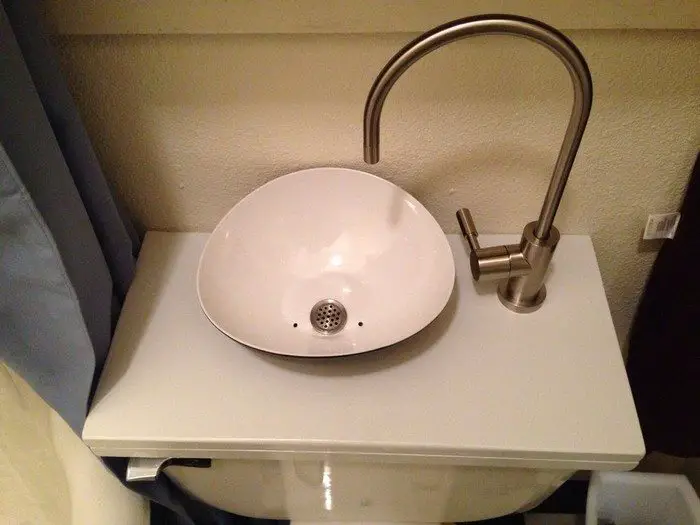
Have a look at some of the toilet tank sinks other DIY-ers have made and start reducing your water consumption by making one yourself!
Is this going to be your next home improvement project?
Click on any image to start the lightbox display. Use your Esc key to close the lightbox. ?
Contents
Building a Toilet Tank Sink
Materials
- 9×20″ Wood Sheet
- Small Plastic Funnel
- 1/2″ diameter Copper Tubing
- 8″ diameter Metal Bowl
- 4′ long, 1/8″ inside diameter Vinyl Tubing
- 4 L-Brackets
- Small Wood Screws
- Scrap Paper
- Silicone Latex Caulking Glue
- Steel Binding Wire
Tools
- Measuring Tape
- Hand Drill (with 1/2″ Spade, 1/8″ Drill Bit, and 3″ Hole Saw)
- Jigsaw
- Center Punch
- Sharpie
- X-Acto Knife
Steps
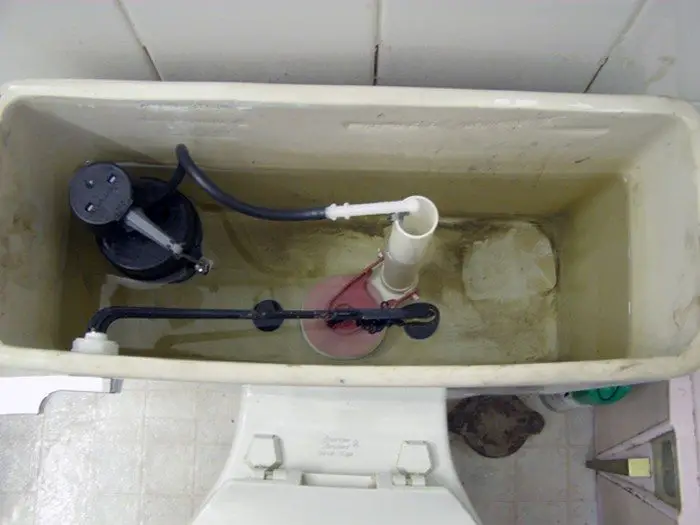
Locate parts and trace: Remove the lid from the toilet tank. Locate the overflow tube, gently remove the rubber tube going into the top of it.
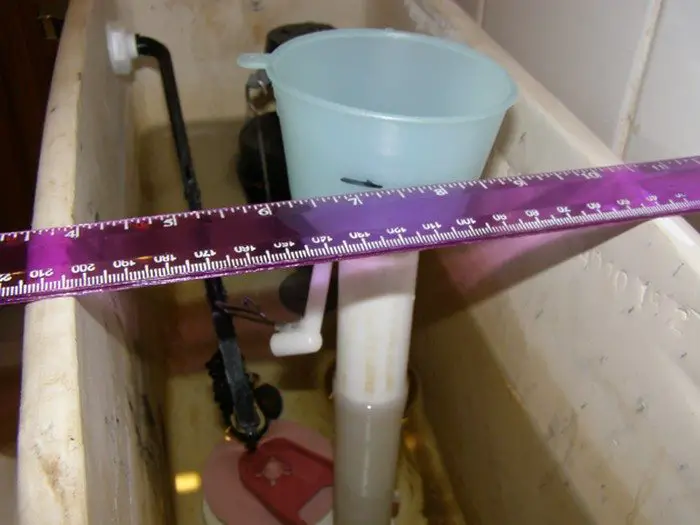
Take the small plastic funnel and stick it in the tube. Now take a straight edge and span it across the walls of the tank next to the funnel, and mark the edge on the funnel.
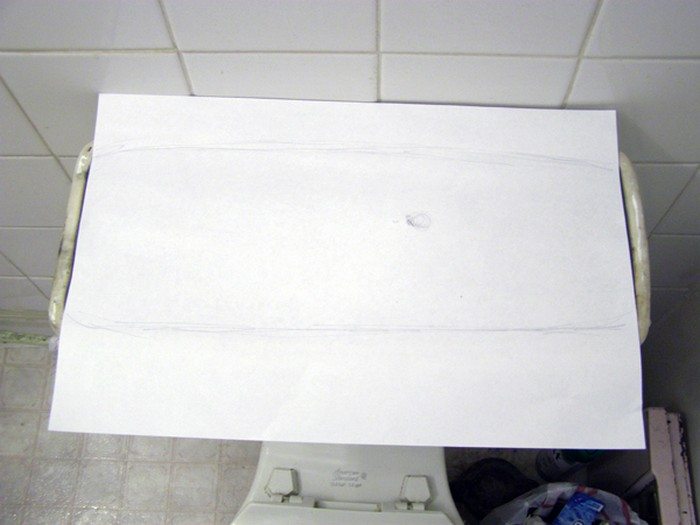
Now remove the funnel and lay a piece of paper of the tank and trace out the walls and the location of the overflow pipe in relation to them.

Next, take the lid from the tank and trace it onto the sheet wood.

Cut out the lid: Cut out the shape of the lid with a jigsaw from the wood and clean up as necessary with sandpaper. Now take the paper tracing of the tank and cut on inside wall line with scissors. Now center the tracing on the new wood lid, and take the center punch and mark the center of the overflow tube on the wood lid. Using this mark as the center drill a 3-inch diameter hole with the hole saw.
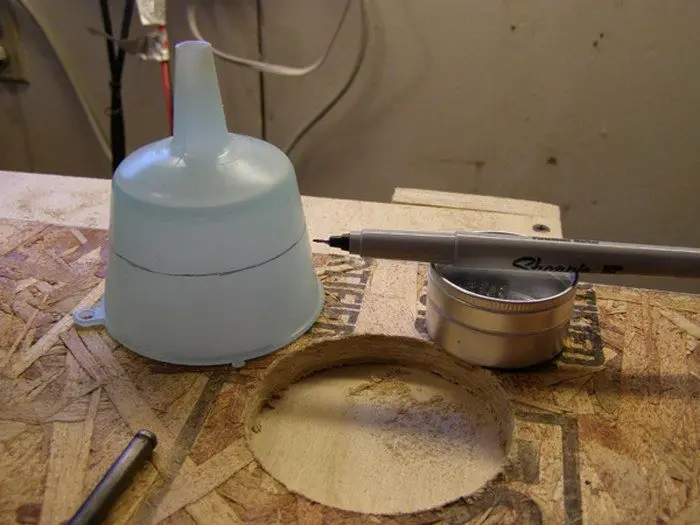
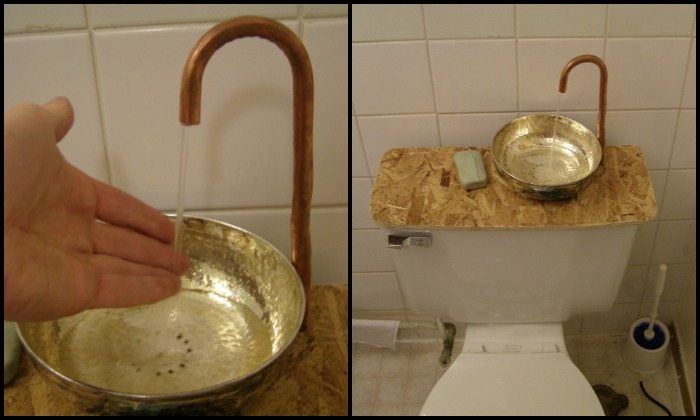
Making the sink: With a marker, extend the line on the funnel so that it goes all the way around, cut on the line with an X-Acto knife.
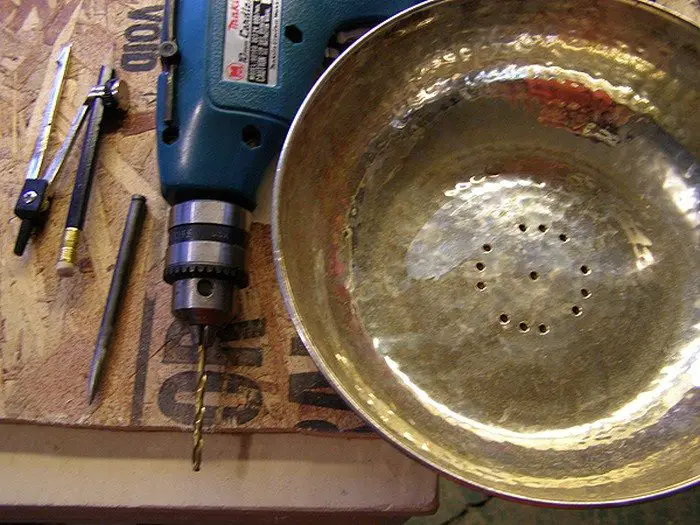
Now take the metal bowl and create drain holes in the center with a small drill bit, making sure the final drain is no bigger than the top of the freshly cut funnel.
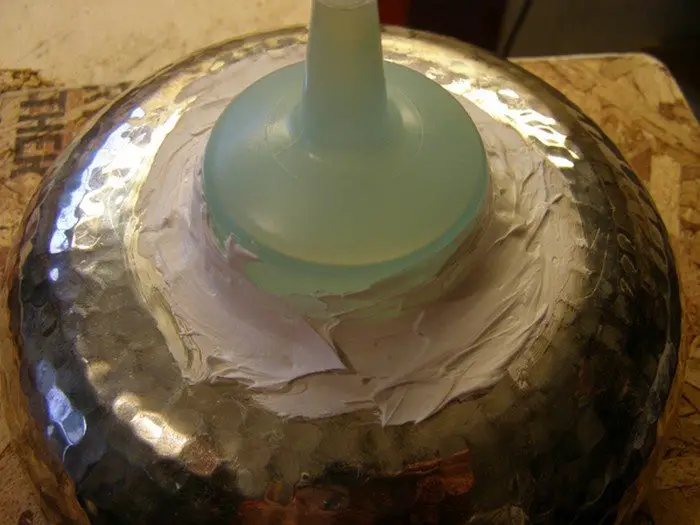
Next, place the funnel on the bottom of the metal bowl and apply liberal amounts of caulking glue on the crack between the bowl and funnel.

The faucet: Made from copper tubing bent into an upside-down “J”. To bend the tubing without kinking it, tightly wrap the wire around the section to be bent and carefully bend it with your hands, re-tightening the wire occasionally. Trim off the extra tubing with a tubing cutter.
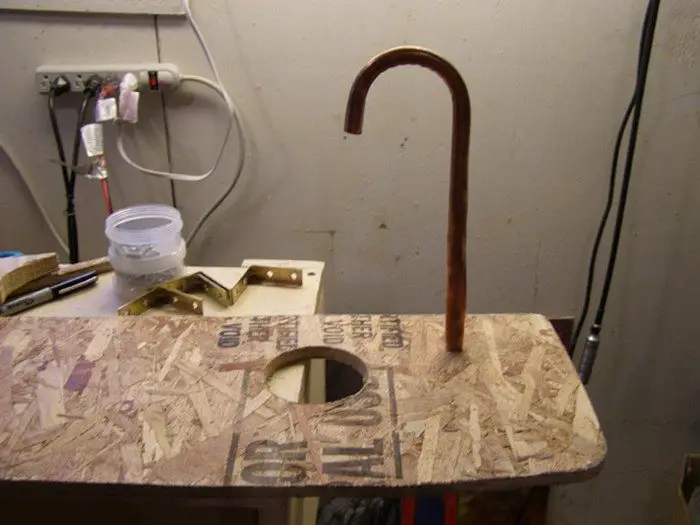
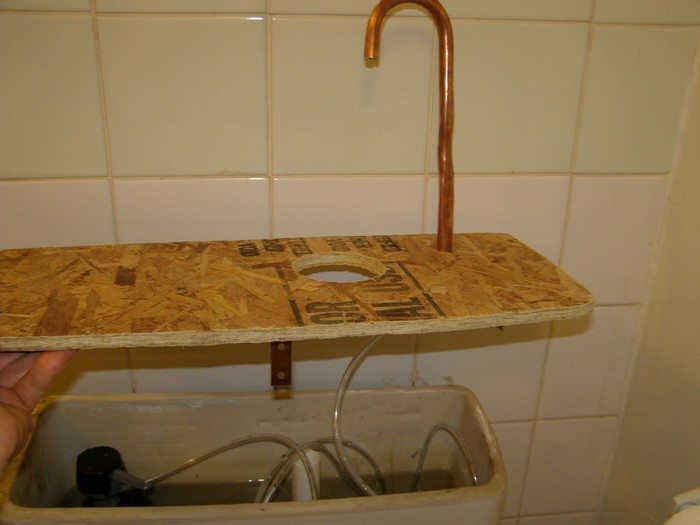
Drill a half-inch hole with a spade bit, 3 inches away from the large hole in the wood lid. Force the long end of the copper “J” into the hole, friction should hold it in place.
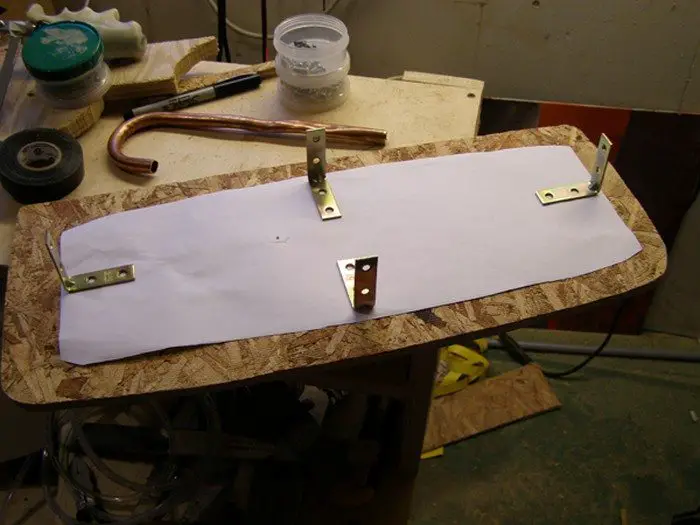
Bracket in place: To keep the wood lid from sliding around on the tank, you can attach brackets. To figure out where the brackets need to be, flip over the lid and center the paper tracing of the tank on it.
The brackets should be against the outer edge and attach with small wood screws.
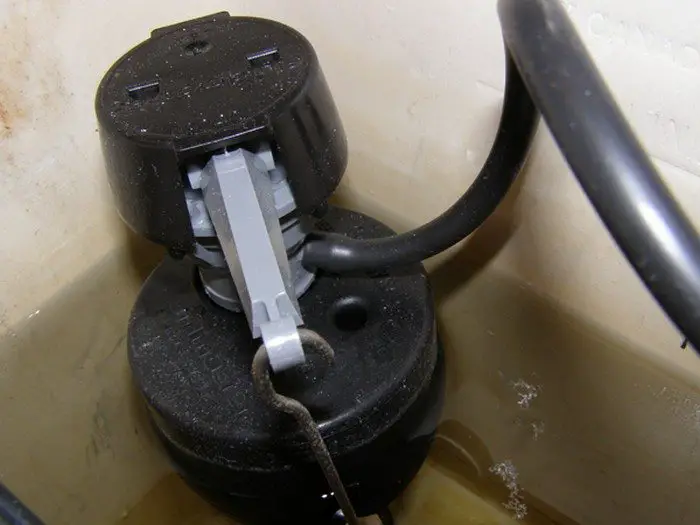
Installation: Back inside the toilet tank, locate the rubber tube that was inside the overflow tube and follow it back to the float valve, and pull it off.
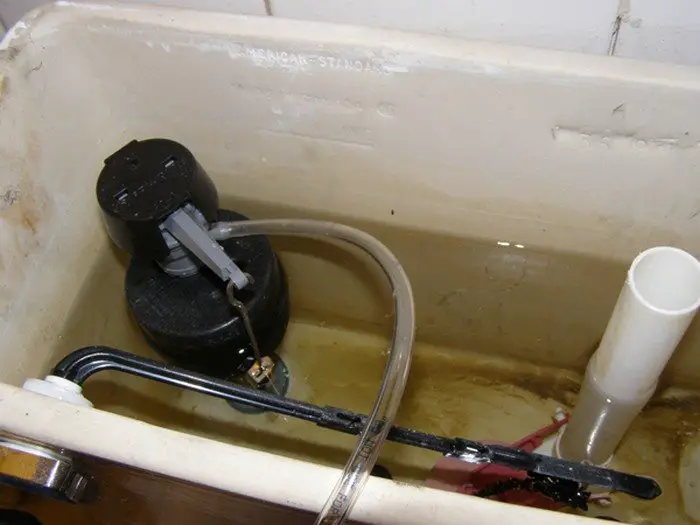
Now attach the 4-foot vinyl tubing.
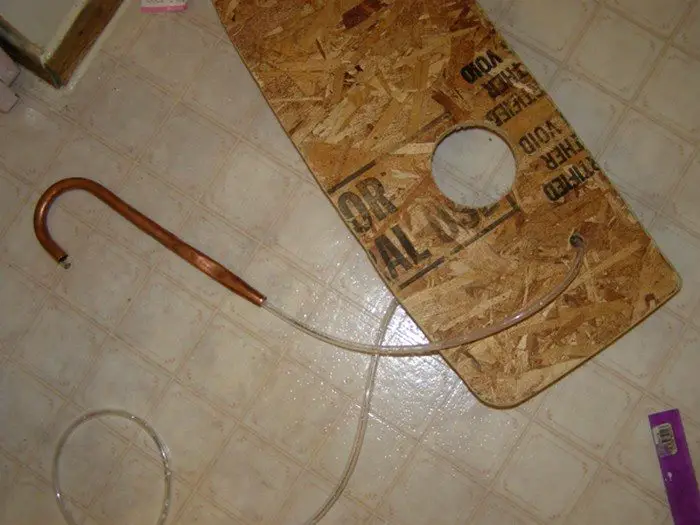
Push the other end of the vinyl tube through the bottom of the wood lid’s half-inch hole and up through the copper tube until just before it sticks out the other end of the copper tube.
Now lower the new lid onto the tank making sure the vinyl tubing does not interfere with the internal mechanisms in the tank. Take the metal bowl with the funnel attached and make sure the glue is dry.
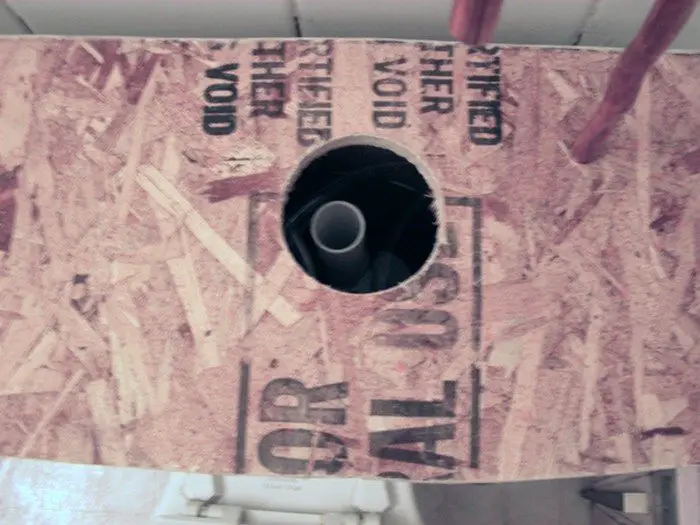
Now look down the 3-inch hole in the lid and you should see the overflow tube.
Take the bowl and funnel and lower it onto the hole, the funnel needs to go into the overflow tube.
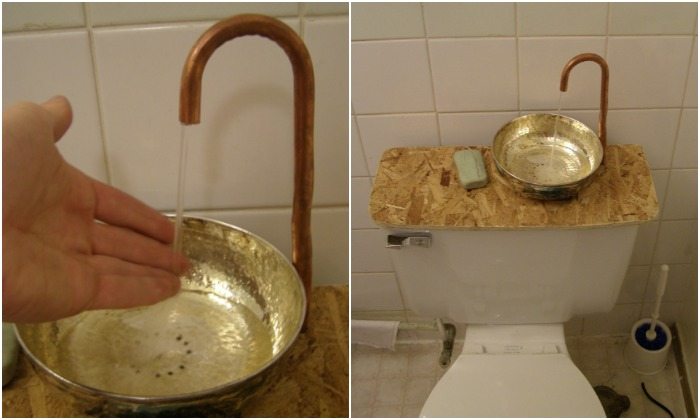
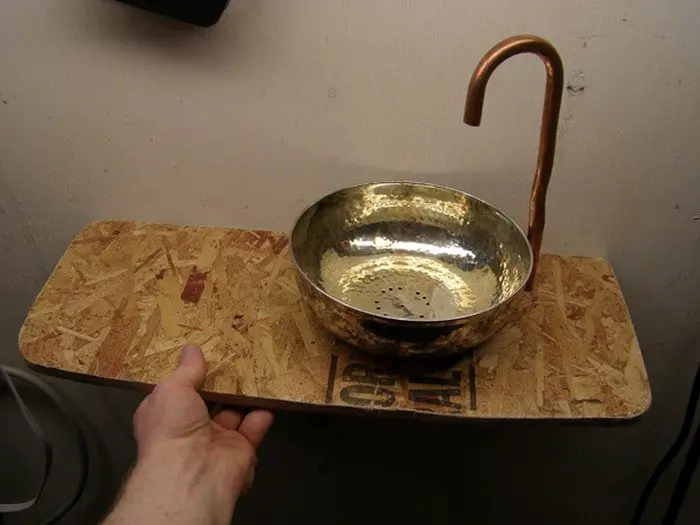
Finished: The sink is now complete. I would recommend putting some kind of waterproofing on the lid to protect the wood.
Thanks to Gregory Lavoie for this great project!
Environmental Benefits of Toilet Tank Sinks
In the quest for sustainable living, every drop of water saved counts towards a greener planet. The concept of a toilet tank sink is a brilliant innovation that merges functionality with environmental conservation. This system significantly reduces the amount of water consumed in households by repurposing water used for handwashing to flush the toilet.
Let’s delve into the environmental benefits of installing toilet tank sinks, a simple yet effective way to conserve water.
Water Conservation
The primary environmental benefit of toilet tank sinks is the substantial reduction in water usage. Considering the average person flushes the toilet five times a day, and traditional toilets use about 1.6 to 6 gallons per flush, the savings quickly add up.
Toilet tank sinks utilize the so-called ‘grey water’ from handwashing to flush toilets, ensuring that the water is used twice before being discarded. This dual-use approach can save thousands of gallons of water per household each year, making a significant dent in the household’s overall water consumption.
Reduced Environmental Impact
By reducing water consumption, toilet tank sinks also decrease the environmental impact associated with water treatment and supply. Treating and pumping water consumes energy, contributing to greenhouse gas emissions.
Using less water means less energy is required to treat and transport it, thereby reducing the household’s carbon footprint. This not only benefits the environment by conserving water and reducing energy consumption but also supports municipalities in managing water resources more effectively.
Encourages Sustainable Living Practices
Incorporating a toilet tank sink into a home is a step towards sustainable living. It serves as a daily reminder of the importance of water conservation and can inspire further eco-friendly practices within the household.
When people recognize the impact of their water usage and take steps to reduce it, they are more likely to adopt other sustainable habits, such as recycling, composting, and reducing energy consumption. Toilet tank sinks thus act as a catalyst for broader environmental stewardship.
Long-Term Benefits for Water Scarcity
Areas prone to droughts and water scarcity can particularly benefit from the adoption of toilet tank sinks. By maximizing the use of every drop of water, communities can mitigate the effects of water shortages and contribute to a more sustainable allocation of scarce water resources. This is especially crucial in regions where water conservation is not just a choice but a necessity for survival.
The environmental benefits of toilet tank sinks are clear and compelling. By significantly reducing water consumption, lowering energy use associated with water treatment, encouraging sustainable living, and offering solutions to water scarcity, toilet tank sinks represent a practical and effective way to make our homes and communities more environmentally friendly.
Comparison of DIY vs. Commercially Available Toilet Tank Sinks
The innovative concept of a toilet tank sink offers a practical solution to water conservation in the home, aligning with growing environmental concerns and the push towards more sustainable living practices. As interest in this eco-friendly option grows, individuals are faced with a choice: embark on a do-it-yourself (DIY) project or opt for a commercially available toilet tank sink.
This comparison delves into the pros and cons of each approach, helping homeowners make an informed decision that aligns with their needs, skills, and preferences.
DIY Toilet Tank Sinks
Pros:
- Cost-Effectiveness: Creating a toilet tank sink as a DIY project can be more cost-effective than purchasing a commercial model. Utilizing readily available materials, often repurposed or recycled, can significantly reduce expenses.
- Customization: A DIY toilet tank sink allows for complete customization to fit your bathroom’s specific design and space requirements. You can choose materials that match your decor, ensuring the toilet tank sink complements your home’s aesthetic.
- Personal Satisfaction: Completing a DIY project offers a sense of accomplishment and personal satisfaction. Building a toilet tank sink can be a rewarding experience, providing a tangible result of your efforts to live more sustainably.
Cons:
- Time and Effort: Constructing a toilet tank sink requires considerable time and effort. The process involves precise measurements, cutting, and assembly, which might be challenging for those without DIY experience.
- Potential for Mistakes: Without the expertise, there’s a higher risk of mistakes that could affect the functionality and appearance of the toilet tank sink. Mistakes can also lead to water leaks, which might cause damage to your bathroom.
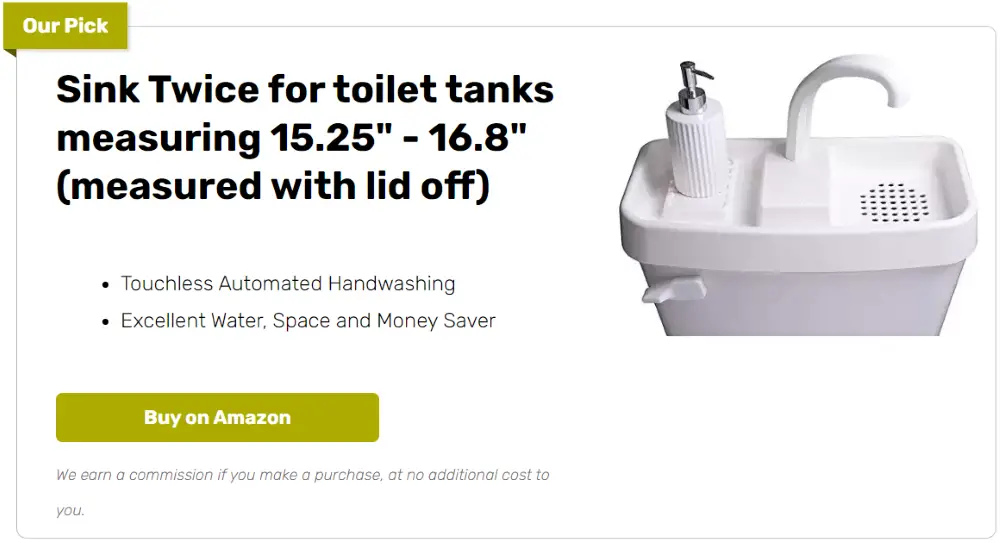
Commercially Available Toilet Tank Sinks
Pros:
- Ease of Installation: Commercially available toilet tank sinks are designed for easy installation, often with all the necessary fittings and clear instructions. This makes them a convenient option for those who prefer a straightforward setup without the complexities of a DIY project.
- Reliability and Warranty: Purchasing a commercial toilet tank sink often comes with the assurance of reliability and a warranty. Manufacturers support their products, offering replacements or repairs for any defects.
- Professional Design: Commercial toilet tank sinks are professionally designed to ensure optimal functionality and efficiency in water conservation. They are also aesthetically pleasing, with various styles to suit different bathroom decors.
Cons:
- Higher Cost: The primary downside of opting for a commercially available toilet tank sink is the higher cost. These units are more expensive than the materials for a DIY project, reflecting the research, design, and manufacturing processes involved.
- Limited Customization: While various designs are available, there’s a limitation to how much you can customize a commercial toilet tank sink. You might not find a perfect match for your bathroom’s unique design or size constraints.
Choosing between a DIY and a commercially available toilet tank sink depends on individual preferences, budget, and DIY skills. If you enjoy hands-on projects and have a specific design in mind, a DIY toilet tank sink might be the right choice for you. However, investing in a commercial model could be more beneficial if you prioritize ease of installation, reliability, and professional design.
Maintenance and Cleaning Tips
Maintaining and cleaning a toilet tank sink is essential for the fixture’s longevity and ensuring hygiene and water efficiency in your home. Given its unique design, which combines a sink with a toilet tank, there are specific considerations to keep in mind to keep it functioning optimally.
Here are some maintenance and cleaning tips for your toilet tank sink to help you maximize its benefits and maintain a clean, sustainable bathroom environment.
Regular Cleaning
Regular cleaning prevents the buildup of soap scum, limescale, and bacteria. A weekly cleaning routine for your toilet tank sink can keep it looking and functioning at its best. Use a gentle, eco-friendly cleaner to protect the finish of the sink and the toilet and maintain the quality of the water being recycled for flushing.
Pay special attention to the faucet and the bowl of the toilet tank sink. These areas are prone to accumulating germs and grime from daily use. A soft cloth or sponge and a mild cleaning solution can effectively clean these parts without causing damage.
Deep Cleaning the Tank
Every few months, it’s wise to deep clean the toilet tank to remove any sediment or bacteria that could affect the system’s efficiency. Turn off the water supply and drain the tank before cleaning. A vinegar and baking soda mixture is an effective, natural cleaning solution that can help remove tough stains and odors without harming the tank’s components.
While cleaning, inspect the interior of the tank for any signs of leaks, cracks, or wear. Early detection of these issues can prevent costly repairs down the line. Check the condition of the flapper and the fill valve to ensure they are functioning correctly.
Managing Mold and Mildew
In damp environments, mold and mildew can be a common issue. Ensure your bathroom is well-ventilated to prevent their growth in and around your toilet tank sink. A dehumidifier can also help reduce moisture levels in the air, making it less hospitable for mold and mildew to thrive.
Natural solutions like vinegar or hydrogen peroxide can effectively tackle mold and mildew. Apply the solution directly to the affected area, let it sit for a few minutes, then scrub gently with a brush or cloth. Rinse thoroughly afterward to remove any residue.
Caring for the Components
When cleaning or maintaining your toilet tank sink, handle all components gently to avoid accidental damage. The mechanisms inside the tank, including the fill valve and the float, are designed to be durable but can be damaged by rough handling.
Some parts of the toilet tank, such as the flapper or the seal under the sink bowl, may wear out over time. Regularly check these parts for wear and replace them to ensure a good seal and efficient operation.
Regular Inspection for Leaks
Check all plumbing connections associated with your toilet tank sink for signs of leaks or wear. Early detection of moisture or drips can prevent water damage and mold growth, ensuring the longevity of your bathroom fixtures and home infrastructure.
Managing Water Hardness
Hard water can lead to mineral buildup in your toilet tank sink, affecting water flow and efficiency. Consider installing a water softener to minimize lime and calcium deposits, keeping your sink and toilet operating smoothly.
Cleaning the Overflow Tube
The overflow tube in your toilet tank is crucial in preventing water from spilling over. Ensure it’s debris-free by flushing it with a strong stream of water or using a flexible brush. This maintains the effectiveness of your toilet tank sink’s water recycling feature.
Sanitizing the Sink and Faucet
Opt for vinegar or baking soda solutions to clean the sink and faucet, avoiding harsh chemicals that could harm the plumbing system or the environment. These natural cleaners can effectively remove grime and bacteria without leaving harmful residues.
Refreshing Caulk and Seals
The caulking around the sink and where it meets the toilet tank should remain intact to prevent water from leaking into unwanted areas. Check these seals periodically and apply new caulk when you notice signs of wear or peeling.
Aerating the Faucet
The aerator on your sink’s faucet can become clogged with sediment over time, affecting water pressure and cleanliness. Unscrew the aerator occasionally to clean it or replace it if it’s heavily blocked or corroded.
Avoiding Clogs
Even though your toilet tank sink is designed to handle greywater, it’s crucial to avoid disposing of solids or non-biodegradable materials that can cause clogs. Encourage household members to keep waste out of the sink to ensure smooth operation.
Checking for Rust and Corrosion
Components like brackets, screws, and the copper tubing of your faucet should be checked for signs of rust or corrosion, which could compromise the structural integrity and appearance of your toilet tank sink. Clean these parts regularly and replace them if necessary to maintain functionality and aesthetics.
Professional Check-ups
Having a professional plumber inspect your toilet tank sink and related plumbing annually can help catch issues that may not be obvious to the untrained eye, ensuring everything operates as it should.
Conclusion
Adopting a toilet tank sink is a commendable move towards sustainable living, offering water conservation benefits and a unique addition to your home’s bathroom. Its longevity and efficiency can be maximized through diligent maintenance and cleaning, ensuring it remains a valuable part of your daily water-saving practices. Incorporating these eco-friendly innovations into your home reflects a commitment to preserving our planet’s resources while enjoying the practical benefits they bring to our homes.
For more ways to transform your home, check out our design ideas for small bathrooms!