Chickens make great helpers when it comes to gardening and being self-sufficient. Your chooks do not only provide you with fresh eggs, they can also make your life in the garden easier and more productive!
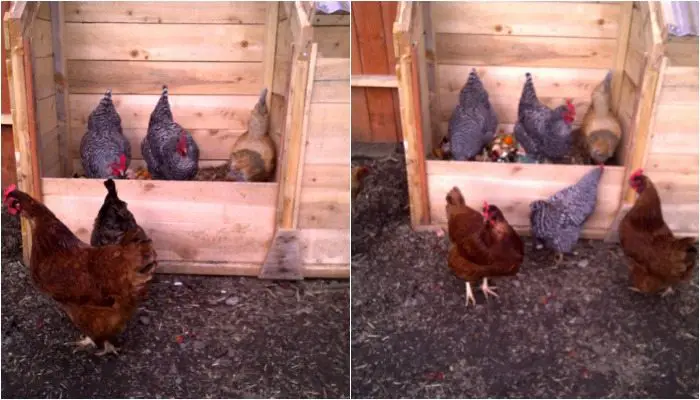
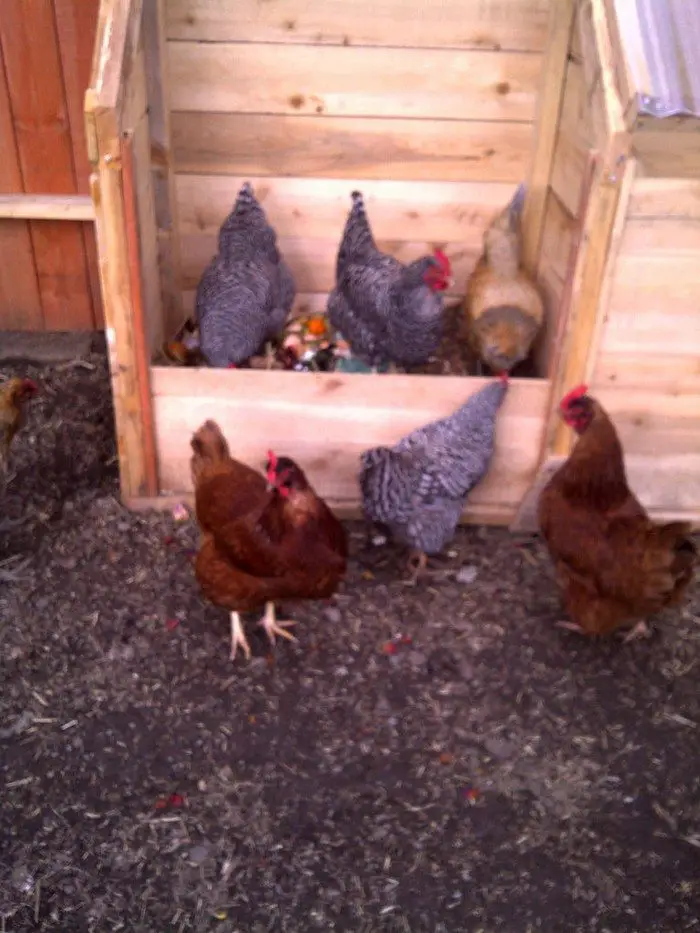
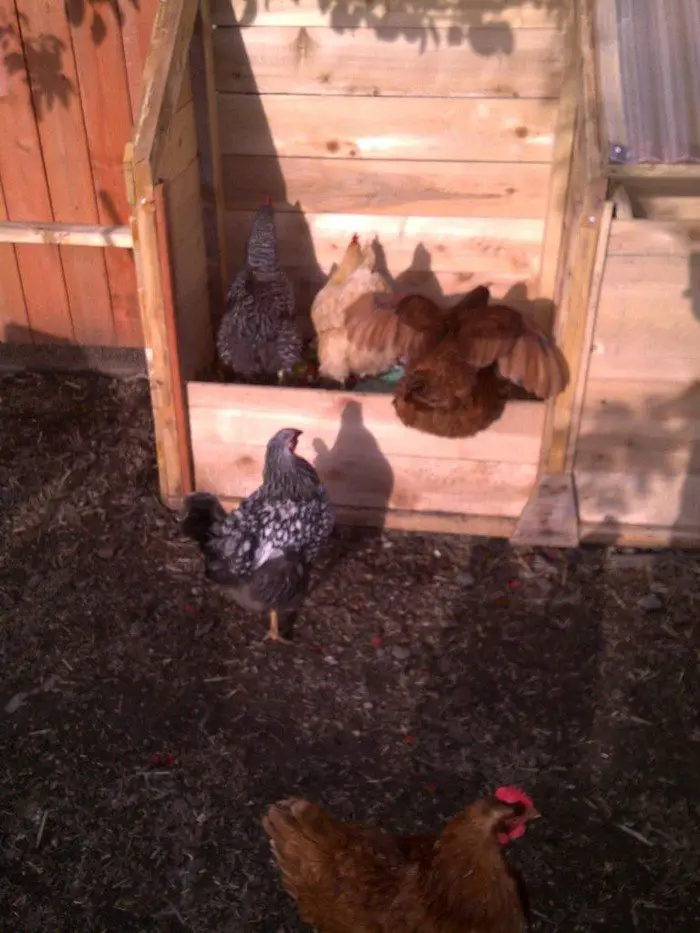
Your chickens can eat the little critters in your vegetable garden if you let them go “free range” in a DIY chicken tunnel. But that’s just one of the things they can do. What’s even better is that they can also help you in making good compost!
Now some of you might be thinking that this is asking too much from the chickens. On the contrary, they will love you if you give them this job!
You see chickens don’t like to get bored. They love to run, dig, peck and scratch all the time. They will go mad, sick even, if they don’t get busy with enough physical activity. And this is exactly what makes them perfect for the job – a good compost heap requires that it be turned at regular intervals.
That aside, there is a host of other reasons why composting with the help of your chickens is a great idea:
- You have manure instantly added to your compost heap.
- The regular turning of compost keeps the flies away.
- You can throw in food scraps and weeds into the pile, and what doesn’t get eaten by the chooks will become compost material.
- The chickens get a warm place to stay when the compost pile heats up during the winter.
- You have busy, and more importantly, happy chickens. (Happy chickens means good, fresh eggs for you!)
It’s a win-win situation – you keep the chooks entertained and healthy, and they give back with great eggs and rich compost!
Now, although composting with chickens does make the task easier, it does not come without a few things to remember and follow.
First, watch what you put in your compost pile as we know several foods are toxic to chickens. Some of these are onions, avocados, potatoes and tomatoes. Make sure to research for a complete list of foods that you cannot add to your compost pile.
Second is that you have to build a good compost bin that will work for you and your chooks. A good setup would be one where you can contain and manage the pile (because composting goes through three stages before you can use the compost). And of course, it should also be accessible to your chickens when you want them to work on your pile.
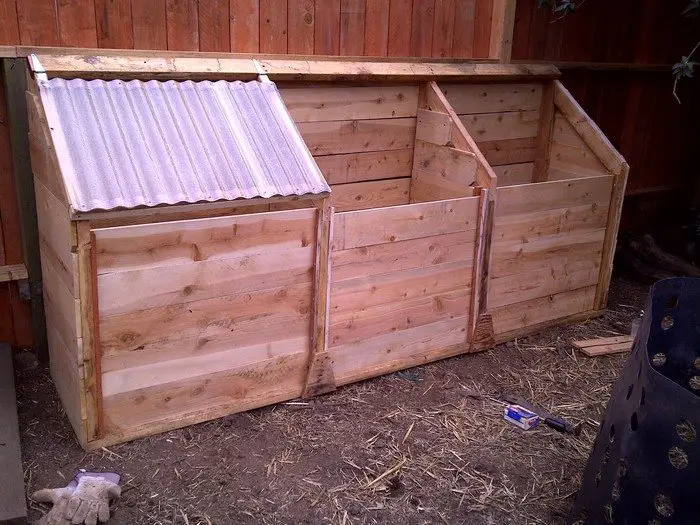
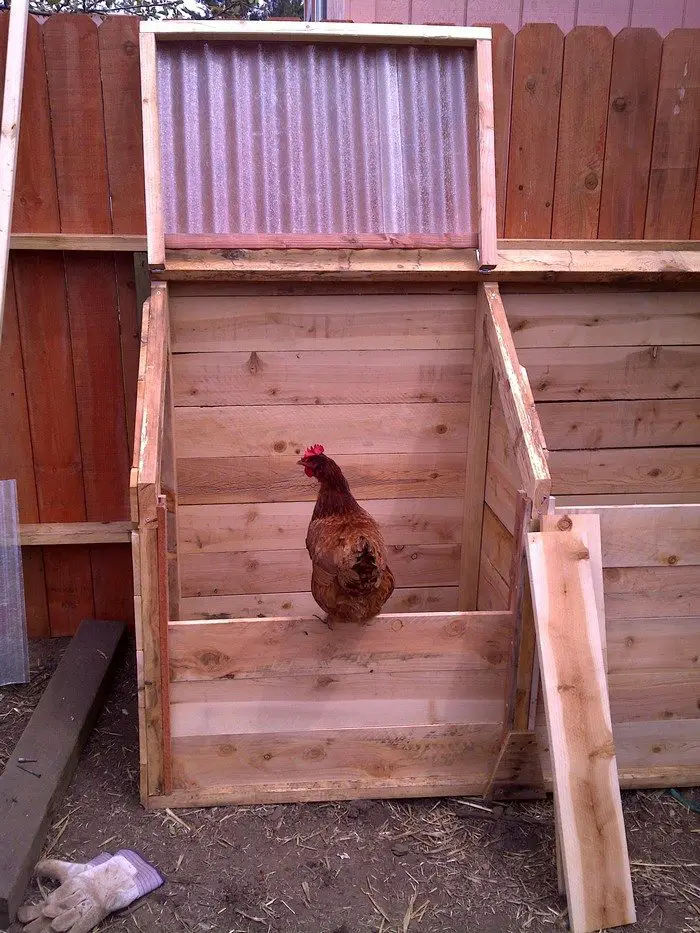
The three-stage compost bin featured here is one of the best designs you can build with this system. It includes sliding front panels that you can easily remove when it’s time for the chickens to do some mixing.
Click on any image to start lightbox display. Use your Esc key to close the lightbox.![]()
![]()






Do you want to try composting with chickens for a more productive homestead? Then start by learning how to build the three-stage compost bin through this step-by-step tutorial!
You’ll need these materials:
- 2×4 Timber
- 1×1 Timber
- 1×6 Fencing
- Strap Hinges
- Fiberglass Roofing
- Wiggle Board
- Screws and Nails
And these tools:
- Circular Saw
- Cordless Drill
- Hammer
- Level
- Tape Measure
Steps:
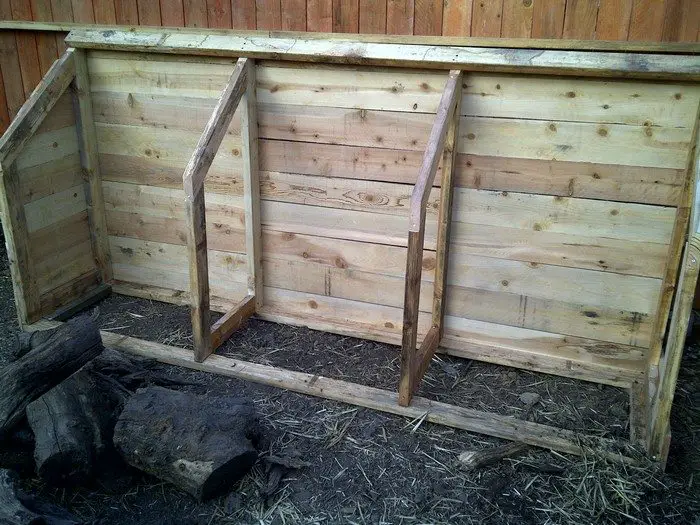

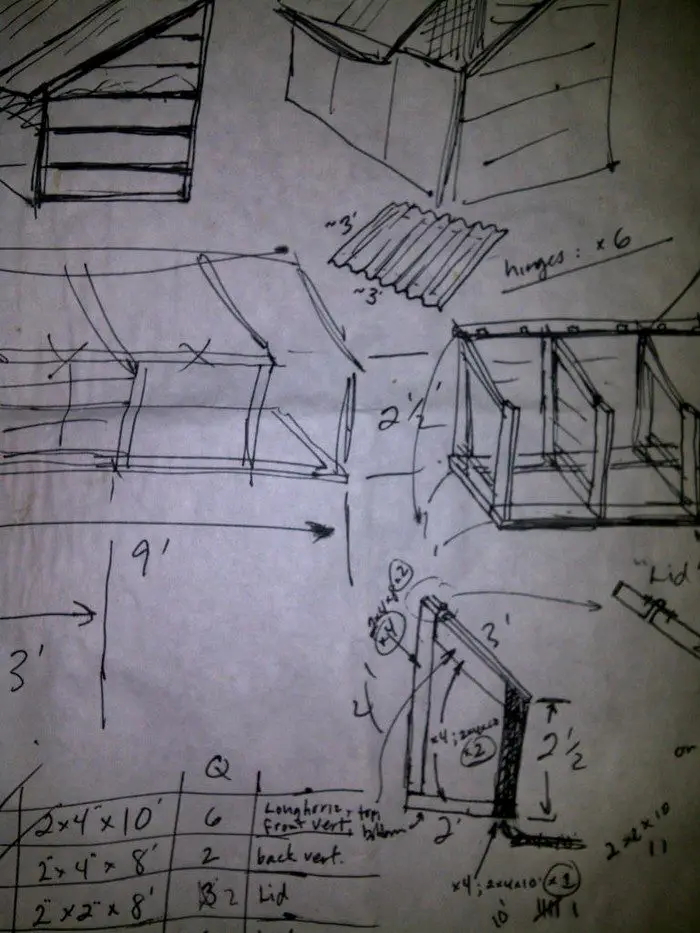
Base and verticals: Start by making a 9’x3′ rectangle made of 2×4:
Place 2 – 9′ 2x4s beside each other, and cut two 29″ 2x4s for the ends (2x4s are actually 1-1/2″ x 3-1/2″ so your small sides will be 3′ minus 7″, which is 29″). Long nails or screws.
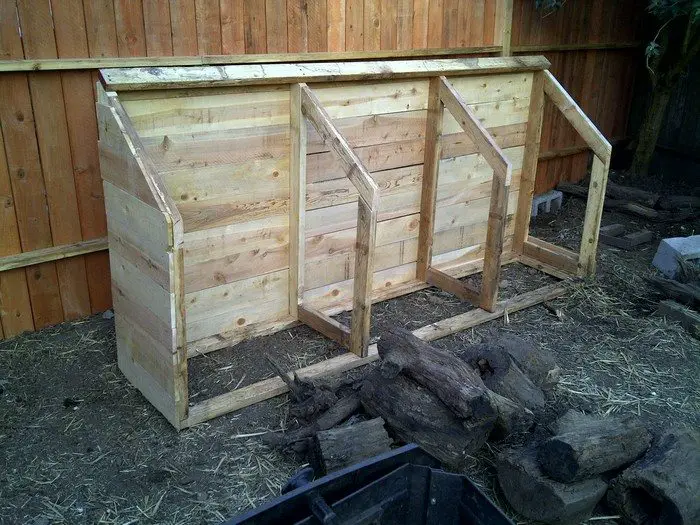

Next, make four trapezoids: mine had 3′ bases, 30″ fronts, 4′ backs, and the slanted “roof” angle ended up being… whatever it ended up being: which was pretty close to 3′ long. All I did was lay the “roof” 2×4 from the front to the back,and drew the angle with a pencil (not very precise, but adequate for backyard construction). Nail or screw the “frame” together.
Once the first trapezoid is complete, clone it thrice for a total of four (yes, you read it right- I actually said “clone it thrice.” So sue me!).
Convince the trapezoids to stick vertically to the base, 3′ apart. Ask a friend to help. A few nails and/or screws is enough. This part will still be a bit wobbly for now, and that’s okay.
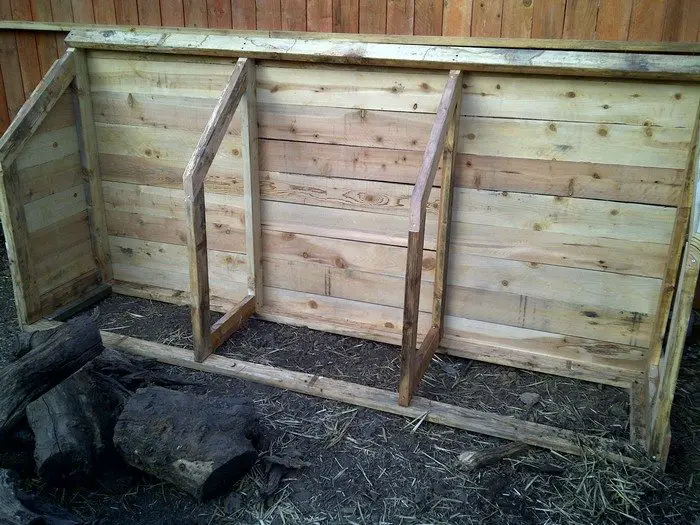

Back and sides: The cheapest 1×6 we could find was dogeared fencing: on sale because it was a bit worm-eaten, but I was able to extract enough good boards for the job from the pile of ant-farm-looking junk.
Fill in the back with fence boards. I chopped a bunch of 6′ boards in half, so each row across the back is made of a 6′ and 3′ length.
Fill in the sides with fence boards. For the angles I just held up fence bits and drew the angles with a pencil, but one could get more precise if one were so inclined.
The whole structure becomes quite sturdy once the siding is applied.
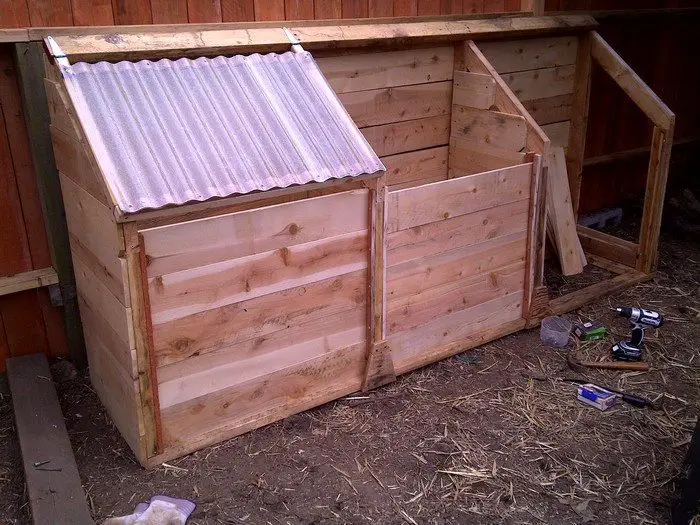

Rails and front panels: To create slots into which the the front boards can slide, Attach two parallel strips of 30″ 1×1″ to each of the 2×4’s at the front of the structure. The strips should be less than one inch apart: this will allow the boards to move but won’t let them swing out and escape.
Cut boards about 1/2″ shorter than the width of the bin, and slide them in!
This design allows boards to be removed as needed to allow a chicken (or two or seven) to do their work, regardless of how deep the compost pile happens to be.
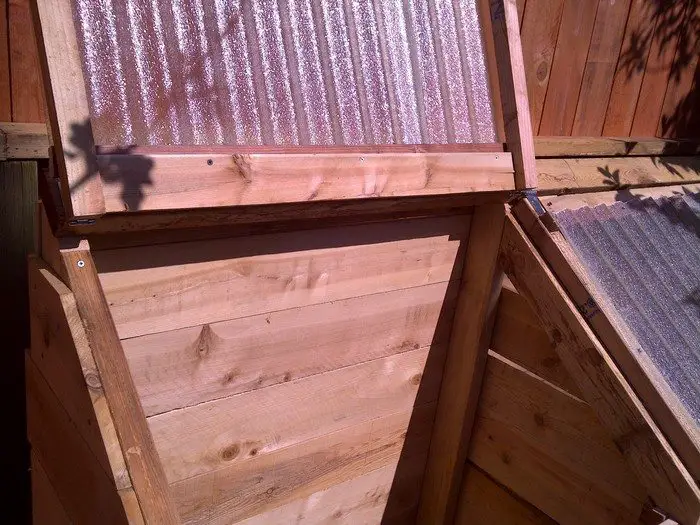

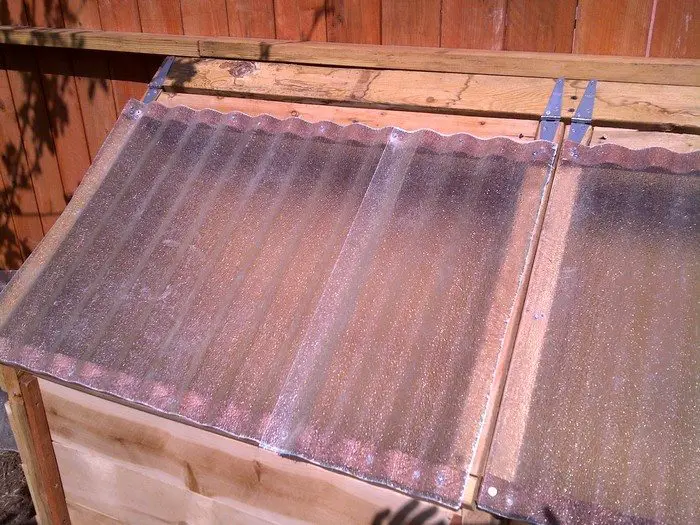
Lid/Roof: In my neck of the woods (and maybe in yours too), corrugated fiberglass roofing material is 24″ wide, and comes in 8′, 10′ and 12′ sections. The problem for this project was that the corrugations run lengthwise, so if one wants 36″ wide squares, one has to do some chopping:
Cut the 12′ panel into four pieces, each 3′ long by 2′ wide. Then cut one of the 3′ sections into 3 one-foot sections, and add a 1-foot section to each 2′ piece: that makes three 3′ roofs!


Make a “U” shape out of 2×2 that fits the size of the first bin: flush on the left side, and ending halfway onto the angled 2×4 that defines the pitch of the roof. Add an additional strip of wood to make a square out of the “U”. Slap it together with screws, and attach it to the horizontal 2×4 at the top, using strap hinges.
Cut two identical strips of wiggle-board to fit the upper and lower edges of the roof, and tap in a few short screws to hold them in place. Fit the fiberglass onto the wiggle-board, overlapping as needed to make one 3′ roof out of your 2′ and 1′ pieces. Secure all around with wood screws. If possible, use the self-tapping screws that come with their own pre-installed rubber washers, because those are extra cool and weatherproof.
Repeat for the other two lids, taking care that they all can open and close without bumping into each other.


Add compost and chickens: Manage your compost in three stages – keep the roof closed for greenhouse-effect heating, let your chickens do a whole lot of the heavy lifting, and enjoy your vastly improved compost!
Thanks to mcraghead for this great project!

