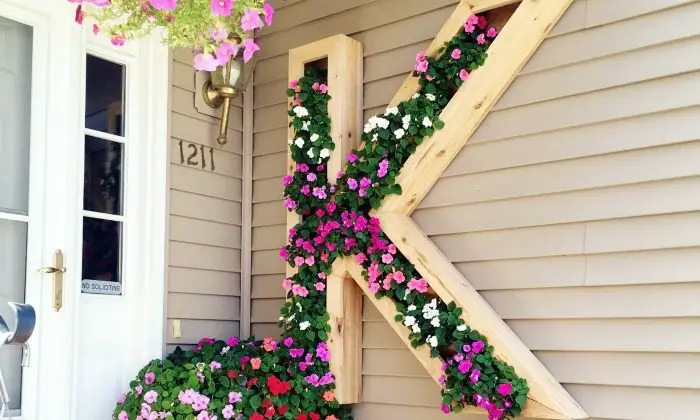
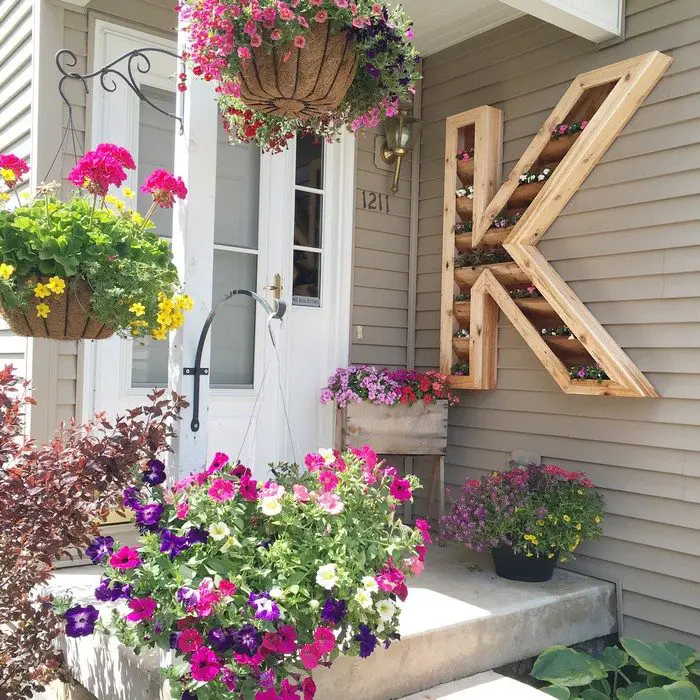
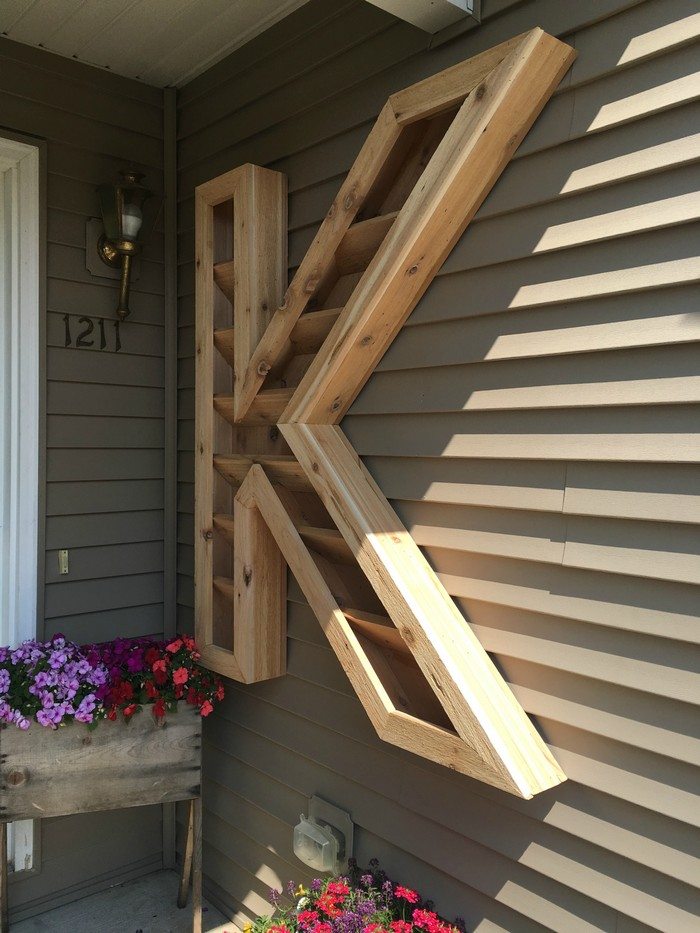
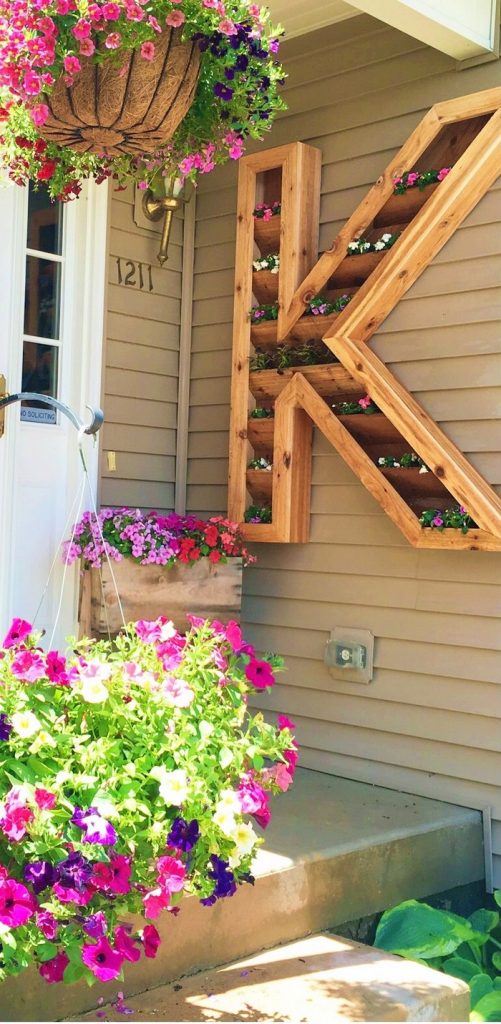
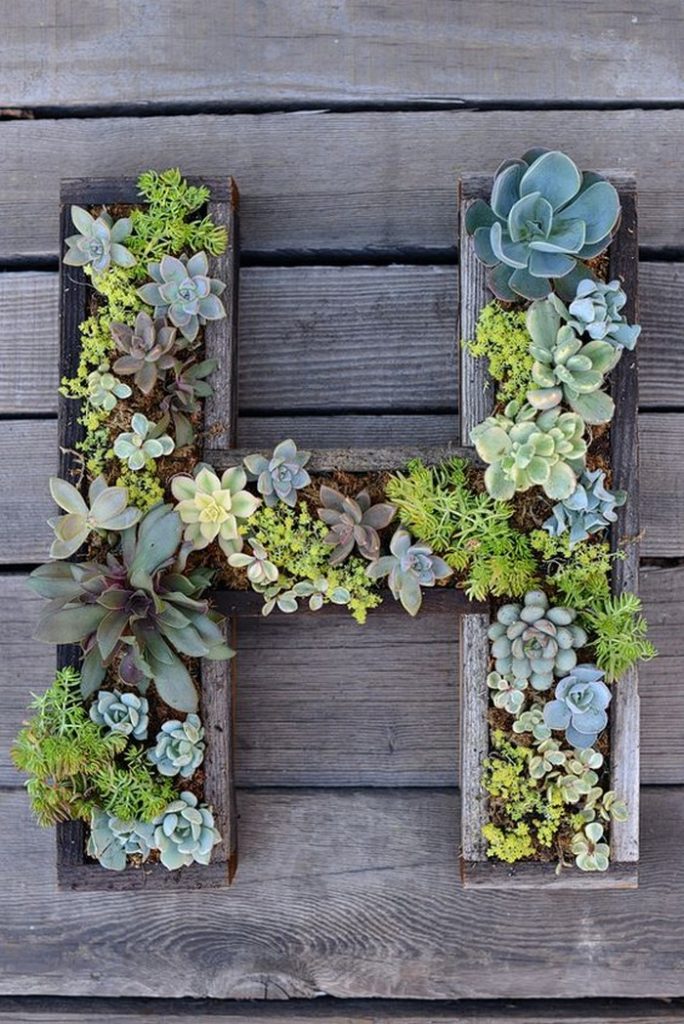
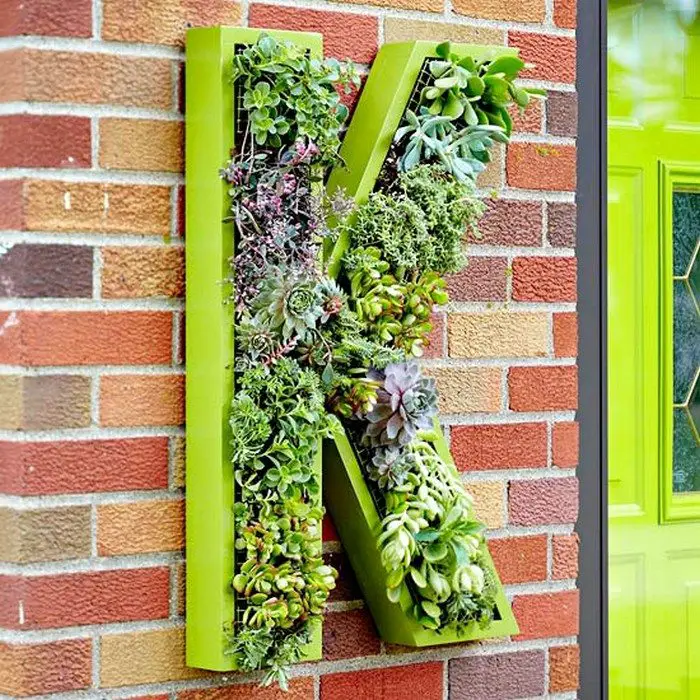
Want to give your front porch a new look? This DIY letter planter idea would surely give it a more cheerful and fresh look!
Transform your front door area from a rather dull look to a bright and happy one with this DIY letter planter. It’s easy to build and different from the usual planter that you see in homes. It’s no wonder it got so much attention when the owner-builder shared it on Instagram!
This letter planter is huge, measuring 4 ft x 4.5 ft and 5 inches deep. It can hold plenty of flowers or succulents. As the plants grew and started flowering, the better they looked!
It’s a great outdoor decor project to do, especially as fall season nears. You can add mini pumpkins and other Halloween decors to it! You can change the theme of your decor according to the season.
Think how lovely it would be when you decorate for the Christmas season. ;)
So what’s your letter going to be and is this going to be your next weekend project?
Contents
Making a Letter Planter
Materials
- 1×12 Cedar
- 1×4 Cedar
- 1×3 Cedar
- 1×6 Cedar
- 18 gauge 1-3/4″ Brad Nails
- Long Wood Screws
- Wood Glue
- Potting Mix
- Plants / Flowers
Tools
- Measuring Tape
- Compount Miter Saw
- Kreg Jig
- Nail Gun
- Drill
- Sander
Instructions
Step 1: Design and Measurements
- Plan Your Design: Decide on the letter you want to create. Sketch the letter on paper, ensuring all parts are proportional. For larger letters like a 4 ft by 4.5 ft structure, consider breaking down the design into manageable sections.
- Measure and Cut: Use a measuring tape to mark the cedar boards for cutting. You’ll need the 1×12 for the back and sides, 1×6 and 1×4 for the internal supports, and 1×3 for the decorative trim.
Step 2: Cutting the Wood
- Use the Compound Miter Saw: Carefully cut the cedar boards according to your measurements. Make sure each piece is precisely cut to fit the design of your letter.
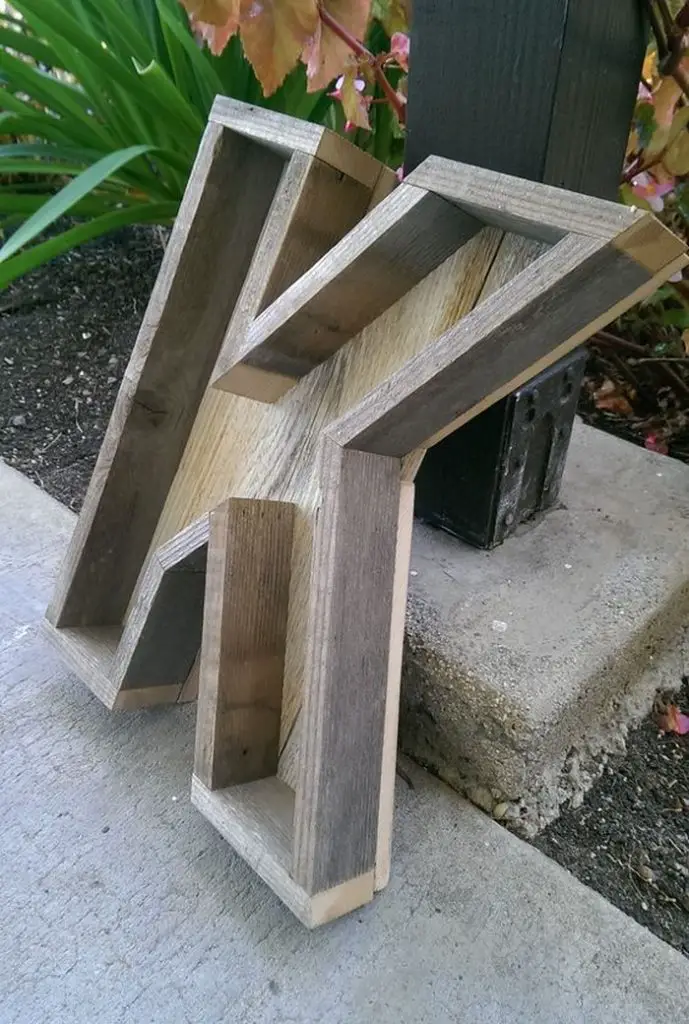
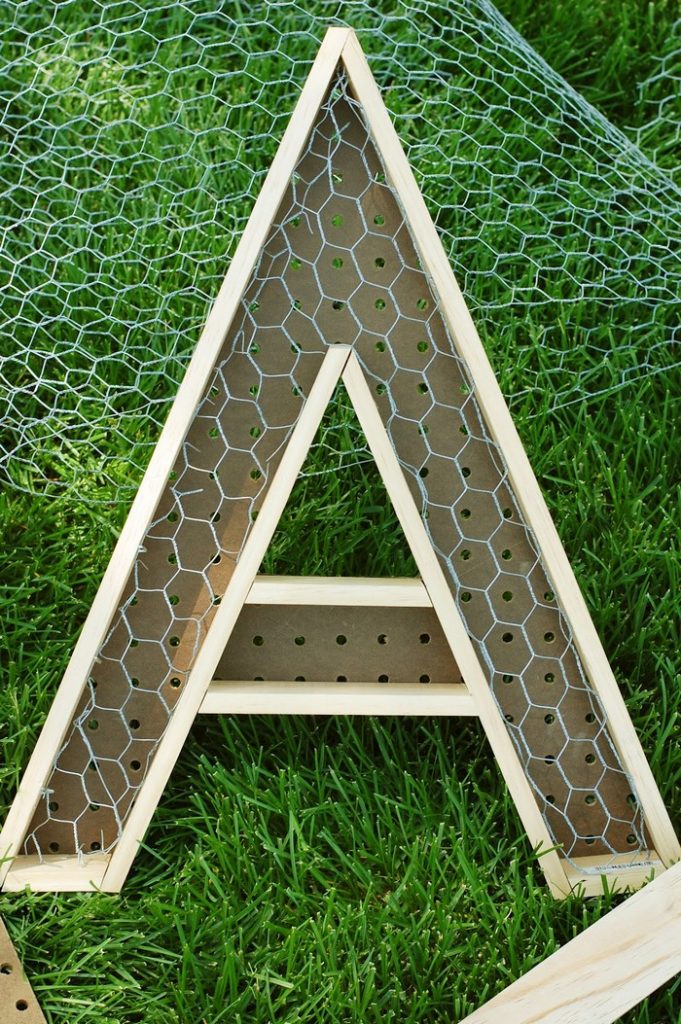
Step 3: Assemble the Frame
- Create the Frame: Start by laying out the 1×12 boards and arrange them to form the outline of your letter. Use wood glue and long wood screws to attach the joints securely.
- Add Internal Supports: Use the 1×6 and 1×4 boards to add internal supports within the frame. These supports will help stabilize the planter and bear the weight of the soil and plants. Secure these with wood glue and screws.
Step 4: Build the Letter Faces
- Construct the Front and Back Faces: If your design is freestanding, you’ll need a front and back. Use the 1×12 cedar to create these pieces, cutting them to match the outline of your frame.
- Attach the Faces: Attach the front and back pieces to the frame using the nail gun and 18 gauge 1-3/4″ brad nails. Ensure the edges are flush and secure.
Step 5: Sanding and Finishing
- Sand the Wood: Use the sander to smooth all exterior surfaces and edges. This is crucial not only for aesthetics but also to prevent splintering.
- Apply Finish or Sealant: Though cedar is naturally weather-resistant, applying a sealant or wood finish can enhance its durability and appearance.
Step 6: Adding Soil and Plants
- Line the Planter: Before adding potting mix, consider lining the planter with a gardening fabric to help contain the soil and prevent it from spilling out through gaps.
- Fill with Potting Mix: Add a high-quality potting mix into the planter up to just below the rim.
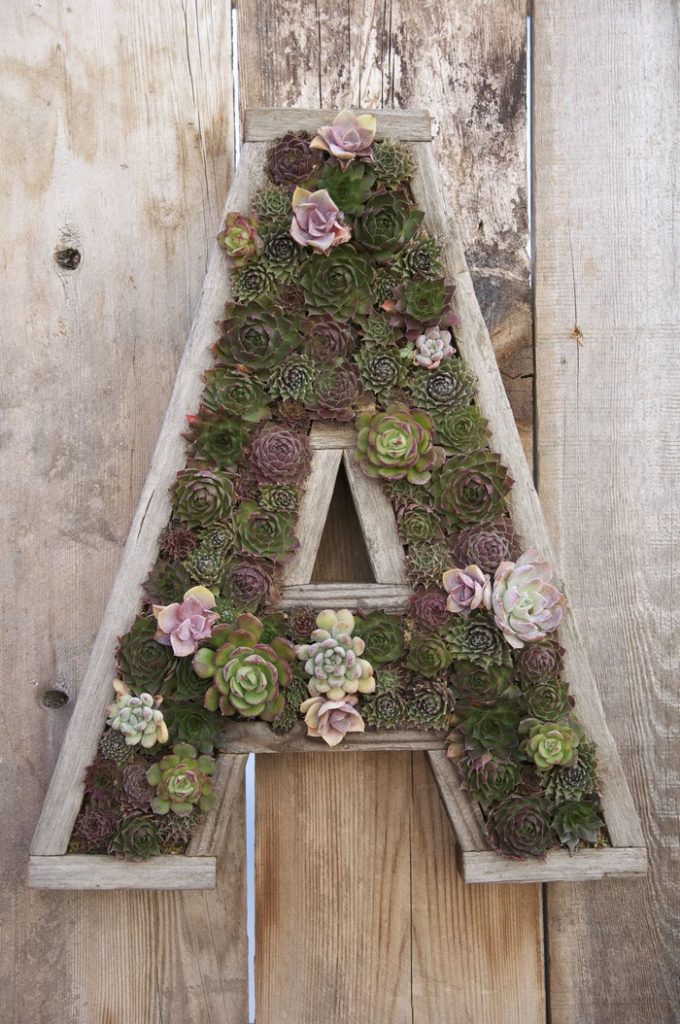
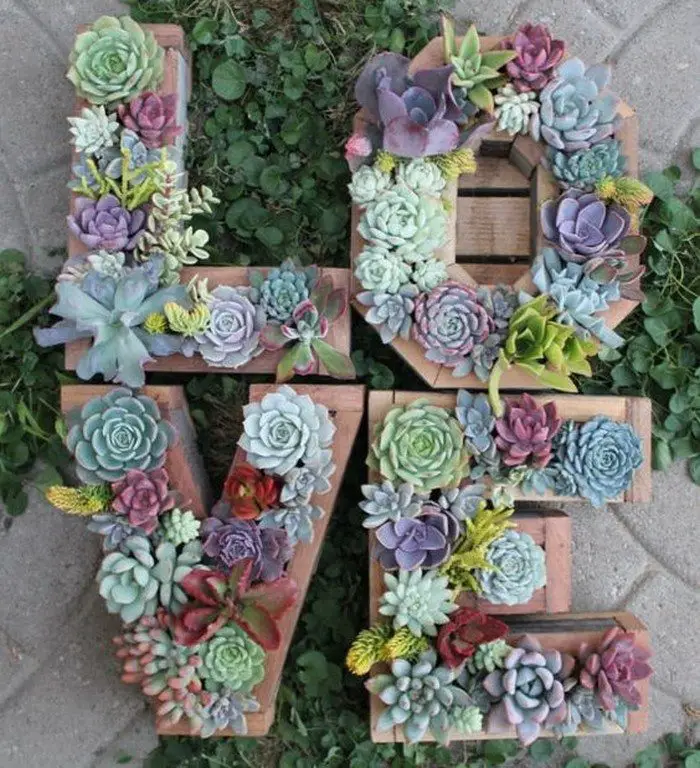
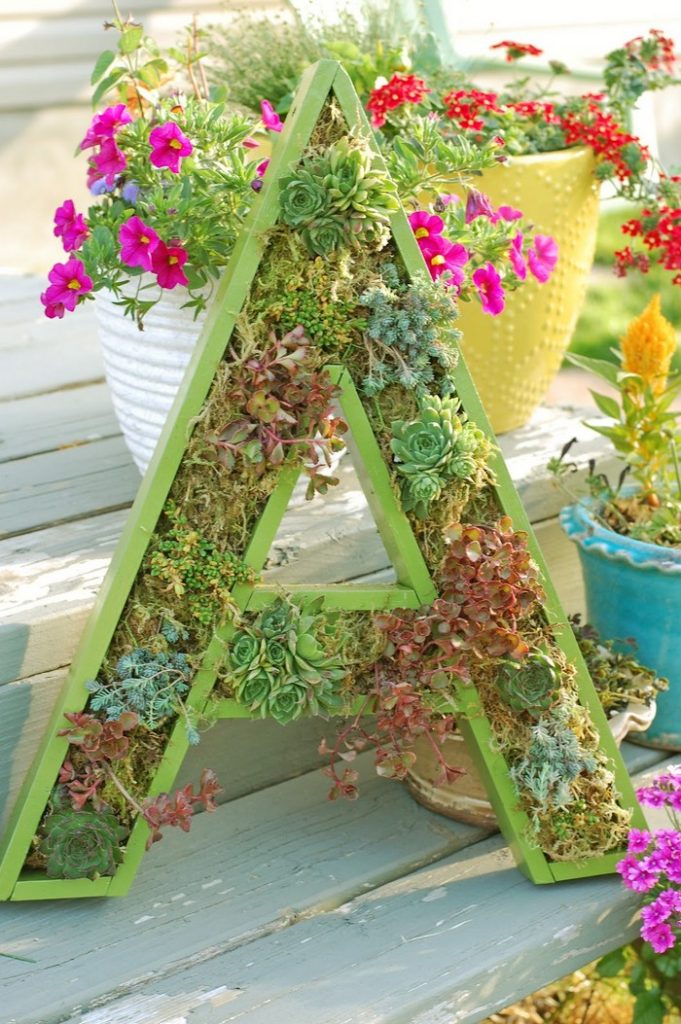
- Plant: Arrange your chosen plants or flowers within the soil. Depending on your design, you might go for a full look, so pack the plants close together to form a lush, vibrant display.
Step 7: Final Touches
- Water the Plants: Give your new plantings a generous watering to settle the soil and help them get a good start in their new home.
- Decorative Trim: If desired, use the 1×3 cedar to add a decorative trim around the edges for a more finished look.
Click on any image to start the lightbox display. Use your Esc key to close the lightbox. ?

Thanks to Ellery Designs for this great project. You can get step-by-step instructions here…
Plant Selection and Care
When choosing plants for your letter planter, it’s important to consider the environmental conditions and the overall aesthetic you aim to achieve. The right plants can transform your planter into a vibrant focal point. Here’s how to select and care for them effectively.
Selecting the Right Plants
- Consider Sun Exposure: Assess the amount of sunlight your planter will receive. Full sun plants require at least six hours of direct sunlight daily, while shade plants thrive with less than four hours. Partial sun/shade plants are flexible but prefer morning light or filtered afternoon sun.
- Choose Complementary Sizes and Textures: For a visually appealing planter, mix different plant sizes and textures. Use taller plants as a backdrop, medium-sized plants for the middle layer, and ground-cover or cascading plants at the edges.
- Color Coordination: Pick plants whose colors harmonize with each other and your home’s exterior. Seasonal colors can also influence your choices, with vibrant flowers for spring and summer, and foliage-focused plants for autumn.
Planting Your Selection
- Soil Preparation: Use a high-quality potting mix that ensures good drainage. You can amend it with compost to increase nutrient content.
- Arrangement: Place taller plants at the back of the letter or in the center if it’s viewable from all sides. Surround them with medium plants and finish with the ground-cover species around the edges.
- Spacing: Even if aiming for a full look, give plants enough space to grow based on their mature size. Overcrowding can lead to moisture and disease issues.
Ongoing Care and Maintenance
- Watering: Water needs vary among plants, but generally, the soil should be kept moist but not waterlogged. Check the soil’s moisture level before watering; over-watering can be as harmful as under-watering.
- Fertilizing: Feed your plants with a balanced, slow-release fertilizer to promote healthy growth. Follow the manufacturer’s instructions for the best results.
- Pruning and Deadheading: Regularly prune overgrown branches and deadhead flowers to encourage new growth and maintain a neat appearance.
- Pest and Disease Management: Keep an eye out for signs of pests and diseases. Treat infestations early with appropriate organic or chemical treatments, depending on your preference.
Sustainability Practices
Creating a letter planter offers a fantastic opportunity to incorporate sustainability into your gardening projects. You can minimize your environmental footprint by choosing eco-friendly materials and practices while enhancing your outdoor space. Here are some effective sustainability practices to consider.
Choose Sustainable Materials
- Reclaimed Wood: Opt for reclaimed or recycled wood instead of new lumber for your letter planter to reduce the demand for virgin timber and the environmental impact of logging.
- Eco-Friendly Sealants: Select plant-based or low-VOC (volatile organic compounds) sealants to protect the wood. These products are less harmful to the environment and healthier for both plants and people.
Use Organic and Local Soil Mixes
- Organic Potting Mix: Choose organic potting mix that is free from synthetic chemicals and fertilizers. These mixes support soil health and provide a safe environment for beneficial microbes.
- Local Sourcing: Purchase soil and compost from local suppliers to reduce carbon emissions associated with transportation and support local businesses.
Conserve Water
- Drip Irrigation: Install a drip irrigation system in your letter planter to reduce water wastage. This system delivers water directly to the roots where it’s needed most.
- Mulching: Apply a layer of organic mulch around your plants. Mulch helps retain soil moisture, reduces water evaporation, and suppresses weed growth.
Plant Choice and Placement
- Native Plants: Choose native plants for your letter planter. They are adapted to your local climate and require less water and maintenance than non-native species.
- Strategic Planting: Plant drought-resistant species in areas of the letter planter that are exposed to more sun. This strategic placement helps maximize plant health and reduces the need for frequent watering.
Recycle and Compost
- Compost Plant Waste: Instead of throwing away plant clippings and dead plants, compost them. Composting returns nutrients to the soil and reduces landfill waste.
- Planter Disposal: If you ever decide to dismantle your letter planter, consider how to reuse or recycle the materials. Wood can be repurposed for other projects or chipped into mulch.
Use Non-Toxic Paints
- Eco-Friendly Paints: Water-based paints branded low-VOC or no-VOC should be your choice if you intend to paint your letter planter. These paints are safer for the environment and your health as well as help to lower air pollution.
Promote Biodiversity
- Attract Pollinators: Add floral plants to your letter planter meant to draw bees, butterflies, and other pollinators. This benefits local biodiversity and fauna in addition to pollination.
- Integrated Pest Management (IPM): Integrated Pest Management (IPM) is the application of natural solutions to control pests instead of just depending on chemical pesticides for your letter planter, which encourages beneficial insects that target destructive pests.
Adopting these sustainability practices creates a beautiful garden feature and contributes to environmental conservation. This mindful approach enhances the longevity of your letter planter and the health of the ecosystem it supports.
Conclusion
Creating a letter planter is an engaging DIY project that transforms any outdoor space into a vibrant display of personal expression. With careful selection of materials and attention to plant care, your planter can thrive across the seasons. This project not only beautifies your environment but also offers a wonderful opportunity to practice sustainable gardening.


