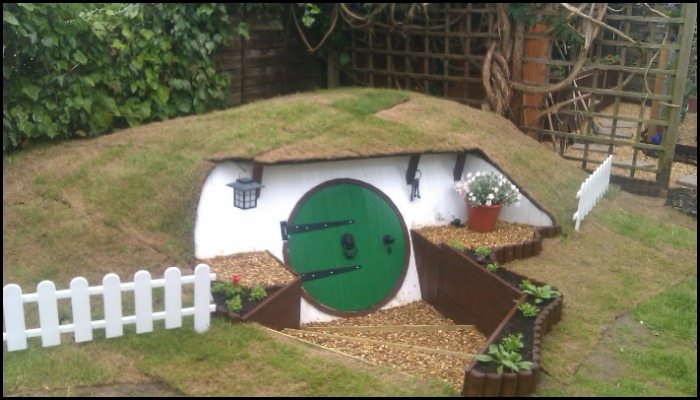
Want an out-of-this-world backyard project? Well, this one’s hard to top if you’re building one in your backyard – your very own hobbit house as your personal refuge!
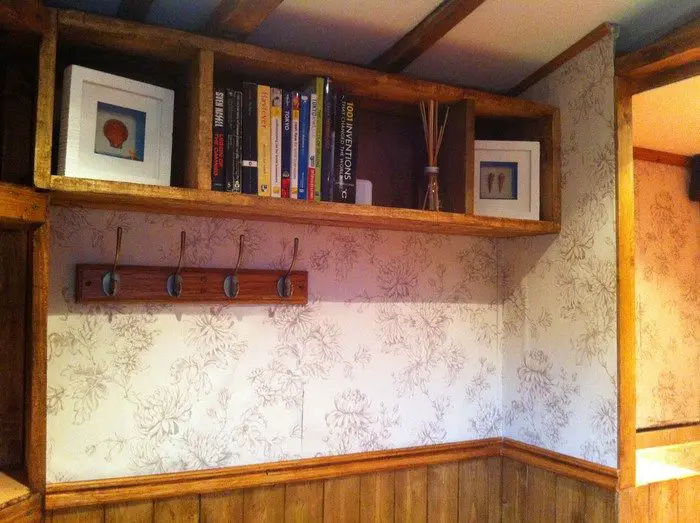
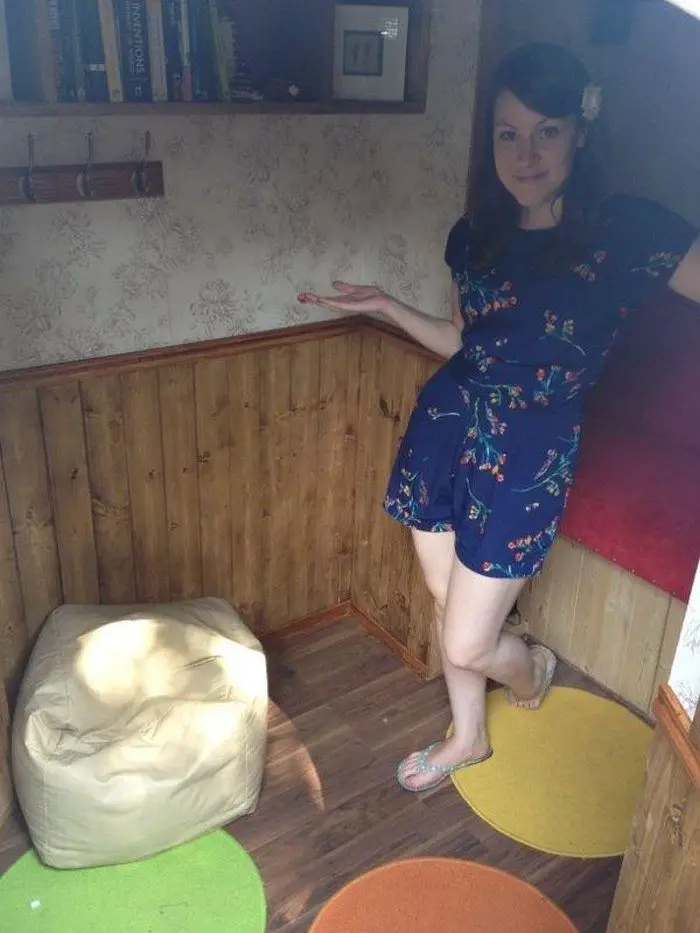
This hobbit house serves as a reading nook for its owner-builders. They also plan on installing a projector and a drop-down screen, making it a tiny tiny ‘home theater’.

If you don’t have a spare room in your house for a personal retreat then this might be ideal for you!
You might be thinking ‘How strong is this structure against bad weather?’ Quite sturdy in fact, as Owner-builder, design, and construction expert, Ashley Yeates explains it in his article:
“With the hole big enough to cater for the basic internal shape designed, we created a strong internal wooden frame which was hugely over-engineered… The corrugated iron was used to seal everything in and the panels were all seam welded from top to bottom once in position and then finished with plenty of waterproof barriers. The base concreted with waterproofer and finished with further waterproofing and finally a leveling compound so there was a lovely clean finish inside.”
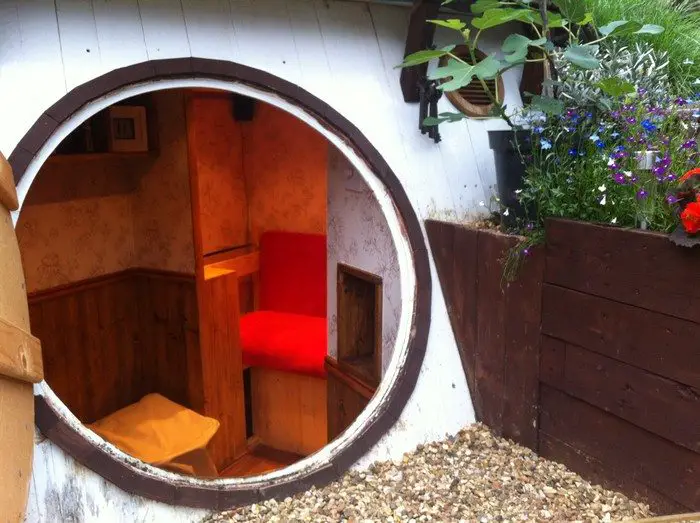
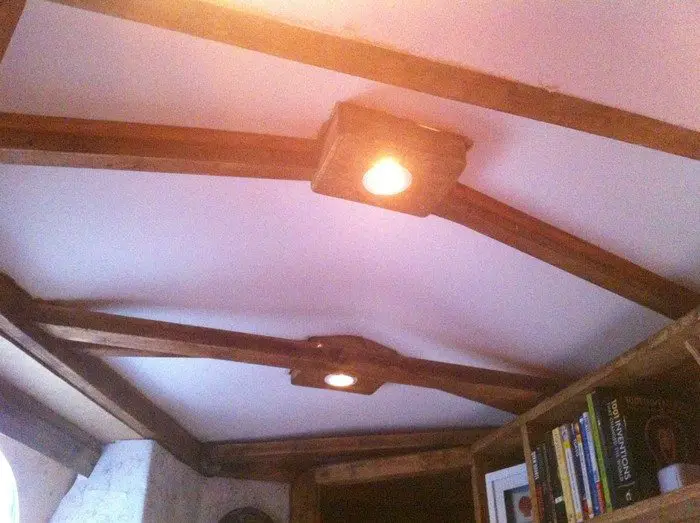
Good quality boards were also used for the roofing so that they can still mow the lawn without destroying the hobbit house!
We’re quite sure J.R.R. Tolkien fans would like, nay, to love this idea! What do you think?
Is this a DIY project you would like to tackle next in your backyard?
Contents
- 1 Building a Hobbit House
- 1.1 Materials
- 1.2 Tools
- 1.3 Instructions
- 1.4 Landscaping Ideas for a Hobbit Setting
- 1.5 Interior Decorating Tips for Small Spaces
- 1.6 Choose Multi-Functional Furniture
- 1.7 Utilize Vertical Space
- 1.8 Light and Bright Colors
- 1.9 Incorporate Mirrors
- 1.10 Opt for Streamlined Storage
- 1.11 Soft Lighting
- 1.12 Decorative Accents
- 2 Conclusion
Building a Hobbit House
Materials
- Lots of Timber
- Strong Roofing Boards
- Corrugated Iron
- Hurricane Tie
- Concrete
- Exterior Paint
- Polyurethane
- Screws and Nails
- Door And Cabinet Hinges
- Door Knob and Cabinet Pulls
Tools
- Excavator (or lots of friends to help you dig a deep hole!)
- Shovel and Trowel
- Welding Machine
- Cordless Drill
- Concrete Mixing Set
- Sander
- Nail Gun
Instructions
1. Planning and Design
- Sketch out your Hobbit house design, considering the size and interior layout. Decide on the number of rooms and their functions (e.g., sleeping area, living space).
- Determine the location in your backyard. Look for a spot that is slightly elevated to aid in drainage and prevent flooding.
2. Excavation
- Using an excavator or a group of friends, dig a hole where your Hobbit house will be located. The depth and width will depend on your design, but ensure it’s sufficient to accommodate the structure and leave room for insulation and waterproofing.
- Shape the sides to be slightly sloping for structural stability.
3. Foundation and Frame
- Pour a concrete foundation, incorporating hurricane ties and reinforcing bars to anchor the wooden frame.
- Build a robust wooden frame within the hole. Use plenty of timber to over-engineer the structure for extra strength.
4. Roof Installation
- Fit the strong roofing boards over the wooden frame. Ensure they curve to create the iconic Hobbit house dome shape.
- Secure the boards with screws and nails, using a nail gun for efficiency.
5. Weatherproofing
- Cover the roof with corrugated iron for waterproofing. Weld the seams from top to bottom to seal gaps.
- Apply a waterproof barrier over the iron. Add another layer of concrete mixed with a waterproofer on the base and walls for added moisture resistance.
6. External Finishing
- Apply exterior paint to the outer surfaces for additional weather protection and aesthetic appeal.
- Finish the external surfaces with a coat of polyurethane to seal the paint and provide a durable finish.
7. Interior Setup
- Install internal walls as designed, using timber and drywall. Use the cordless drill for screwing hinges on doors and cabinet pulls.
- Sand all wooden surfaces inside to prepare for interior paint or stains.
8. Doors and Windows
- Install door frames and window casings. Attach hinges to the doors and secure them with screws.
- Fit the door knob and cabinet pulls, adjusting for ease of use and alignment.
9. Final Touches
- Fit out the interior with furniture and decorations that match the Hobbit theme. Consider rustic, wood-based furniture and earthy tones.
- Landscape the area around the Hobbit house entrance with plants, stones, and perhaps a path leading to the main house.
10. Inspection and Celebration
- Inspect the structure for any areas that may need additional sealing or reinforcement.
- Once everything is deemed safe and complete, celebrate your new Hobbit house—a perfect backyard retreat!
Click on any image to start the lightbox display. Use your Esc key to close the lightbox.![]()


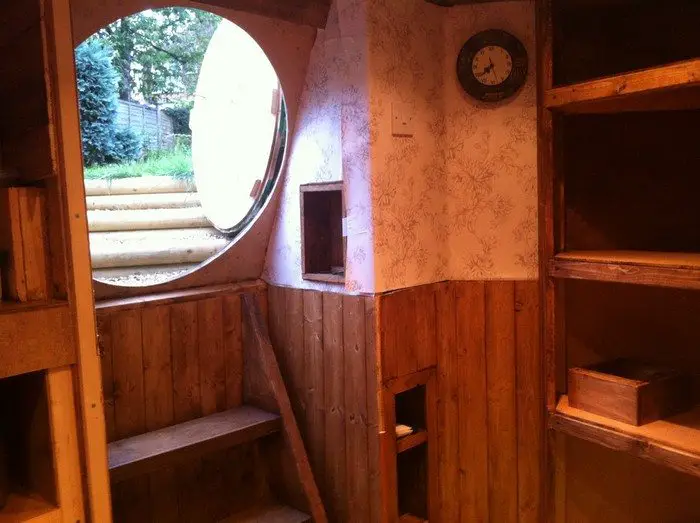
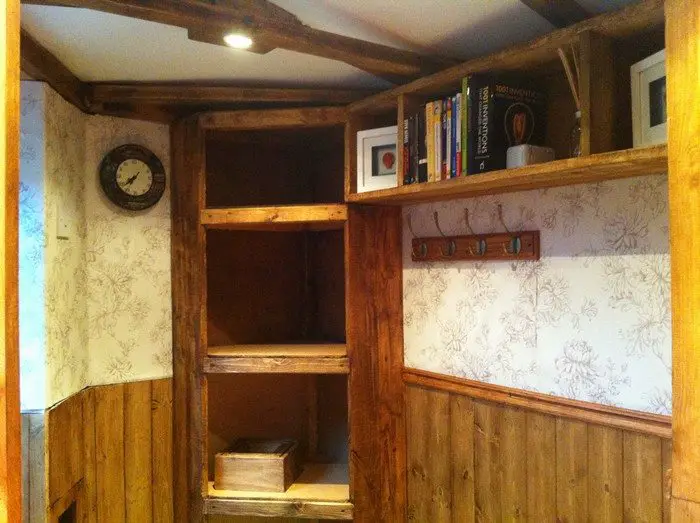

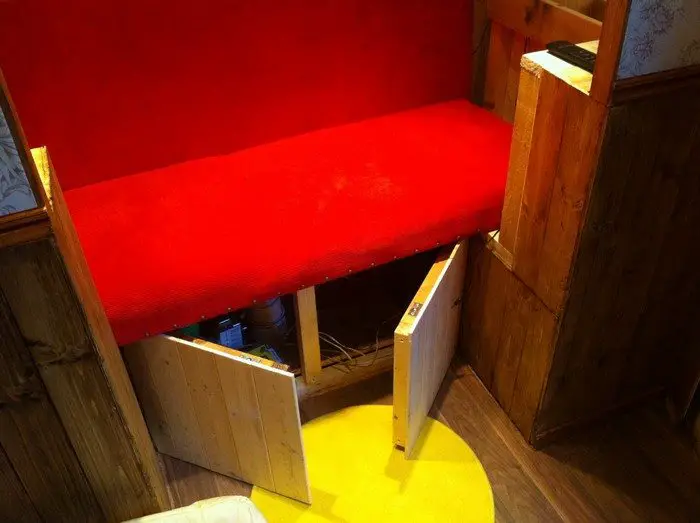

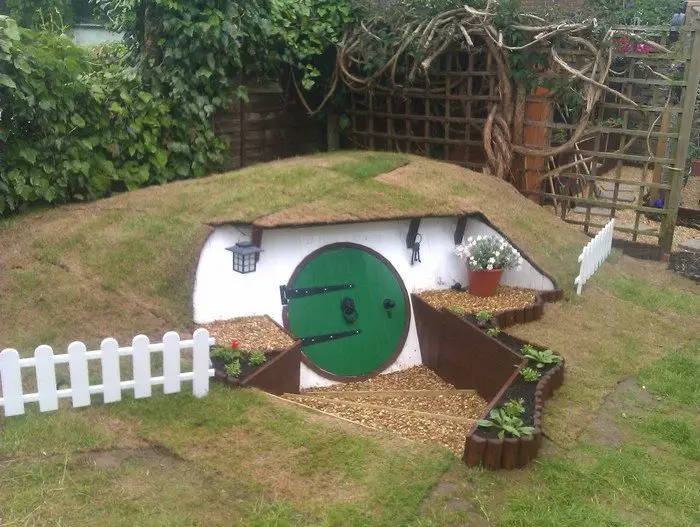
Thanks to Ashley Yeates for this great project. You can get step-by-step instructions here…
Landscaping Ideas for a Hobbit Setting
Creating a landscape that complements a Hobbit house involves blending natural elements with whimsical touches to capture the enchanting aesthetic of a Middle-Earth setting. The goal is to make the surroundings feel as if they’ve sprung from the pages of a Tolkien novel, providing a seamless transition from fantasy to reality. Here are some landscaping ideas designed to enhance your Hobbit house setting:
Native Plant Selection
Choose plants native to your area to ensure they thrive and require less maintenance. Opt for lush greenery, ferns, and moss to cover the ground around the Hobbit house, mimicking the lush landscapes of the Shire. Incorporating flowering plants like foxgloves, hollyhocks, and lavender adds color and variety, attracting pollinators and adding a layer of practical beauty.
Rustic Stone Pathways
Install pathways made from flagstone or cobblestone to lead up to and around the Hobbit house. These rustic materials blend well with the natural environment and create a charming, old-world feel. Ensure the paths are slightly irregular to maintain an organic, worn look, as if they’ve been naturally worn down over time.
Gentle Water Features
Incorporate a small, babbling brook or a simple water fountain made from natural stone. The sound of moving water adds a tranquil atmosphere and helps in creating a serene escape. If space allows, a small pond can serve as a habitat for fish and aquatic plants, enhancing the biodiversity of your garden.
Shaded Seating Areas
Designate areas under the shade of trees or with strategically placed pergolas covered in climbing vines for rest and contemplation. Furnish these spots with rustic wooden benches or stone seats. These areas are perfect for enjoying the outdoors and can be adorned with outdoor cushions for added comfort.
Hidden Nooks and Fairy Lights
Create hidden nooks within the garden by using dense plantings or small structures like arbors. These can serve as secret retreats or reading spots. Enhance these spaces with fairy lights strung through the branches or around the frames to provide a magical ambiance during the evening hours.
Vegetable and Herb Gardens
Emulate the self-sustaining lifestyle of Hobbits by incorporating vegetable patches and herb gardens. These not only provide fresh produce but also contribute to the rustic charm of the setting. Raised beds or bordered plots can keep the garden organized and manageable.
Natural Privacy Screens
Use tall bushes and hedges to form natural boundaries around the property. These elements provide privacy and protection from the wind, while also enhancing the secluded feel of a Hobbit home. Choose species that are evergreen to ensure year-round coverage.
By integrating these elements, your landscape will not only complement your Hobbit house but also turn your backyard into a picturesque slice of Middle-Earth, inviting relaxation and sparking imagination.
Interior Decorating Tips for Small Spaces
Like a Hobbit house, decorating the inside of a small place calls for careful thought to maximize the little space while yet keeping it appealing and useful. The goal is to design a warm, inviting space that makes most use of practicality without compromising flair. These ideas for small apartments’ interior design help:
Choose Multi-Functional Furniture
Choose furniture that will boost utility and conserve space by serving several uses. Great selections are a sofa that transforms into a bed, expandable tables, and benches with built-in storage. These elements let you fit the space to several purposes without cluttering it.
Utilize Vertical Space
Install tall, thin cabinets and shelves up to the ceiling to maximize the vertical space at hand. This strategy not only offers more storage but also pulls the eye upward, giving the area more apparent size. Great for conserving floor space are also wall-mounted desks and fold-down tables.
Light and Bright Colors
Light hues will help the space seem airy and open. Reflecting light and accentuating the natural, earthy vibe of a Hobbit house would call for pale greens, soft yellows, and warm beigues. For accents, choose stronger colors to provide depth and interest without overwhelming the space.
Incorporate Mirrors
Use mirrors strategically to create the illusion of more space. Placing a large mirror on one wall or smaller mirrors across a space can reflect light and visually expand the area. This trick is especially effective in making tight spaces feel larger and more open.
Opt for Streamlined Storage
Choose streamlined, built-in storage solutions to keep clutter out of sight. Built-in bookcases, hidden cabinets, and recessed shelves maintain a clean line and make the most of every inch. Ensure every item has a designated place to help keep the space organized and tidy.
Soft Lighting
Install soft, layered lighting to create a warm and welcoming atmosphere. Use a combination of overhead lights, table lamps, and wall sconces to provide adjustable lighting options. Soft, diffused light fixtures can make the space feel comfortable and spacious.
Decorative Accents
Select decorative accents that reflect the storybook theme of a Hobbit house without crowding the space. Choose a few favorite items like pottery, woven tapestries, or rustic wood carvings to add character. Keep decorative items to a minimum to avoid a cluttered look.
These ideas will help you turn a little interior into a wonderful, useful living area that seems both large and comfortable. This method guarantees efficient use of every square inch and preserves an aesthetic fit for a Hobbit house by means of which.
Conclusion
Building a Hobbit house provides a unique, enchanting retreat that blends creativity with functionality. This whimsical project not only enhances your backyard’s aesthetic but also offers a cozy, personalized space for relaxation and entertainment. With careful planning and thoughtful design, your Hobbit house can become a cherished part of your home landscape.


