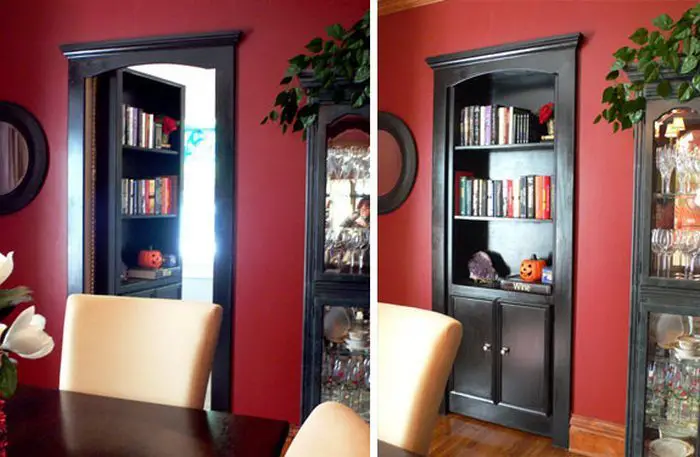
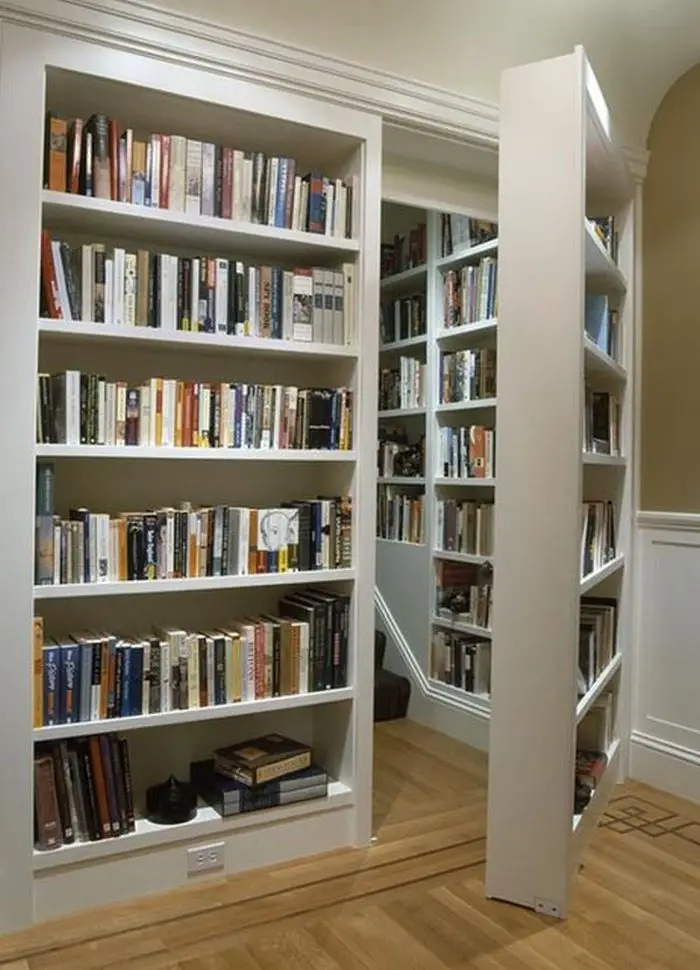
When is a door not a door? When you turn it into a bookshelf for extra storage space with a secret space behind it! How do you create that storage space? By turning a bookcase into a secret door.
Wouldn’t it be nice to have a secret room? Unfortunately not all of us has that spare room we can turn into a hidden retreat. But that doesn’t mean you can’t have a secret place in your house. This project shows you how you can turn an ordinary closet into a secret storage area.
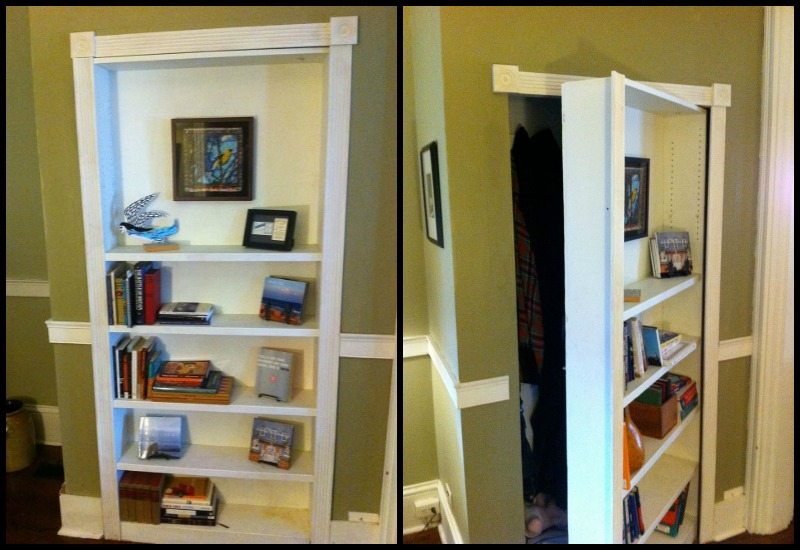
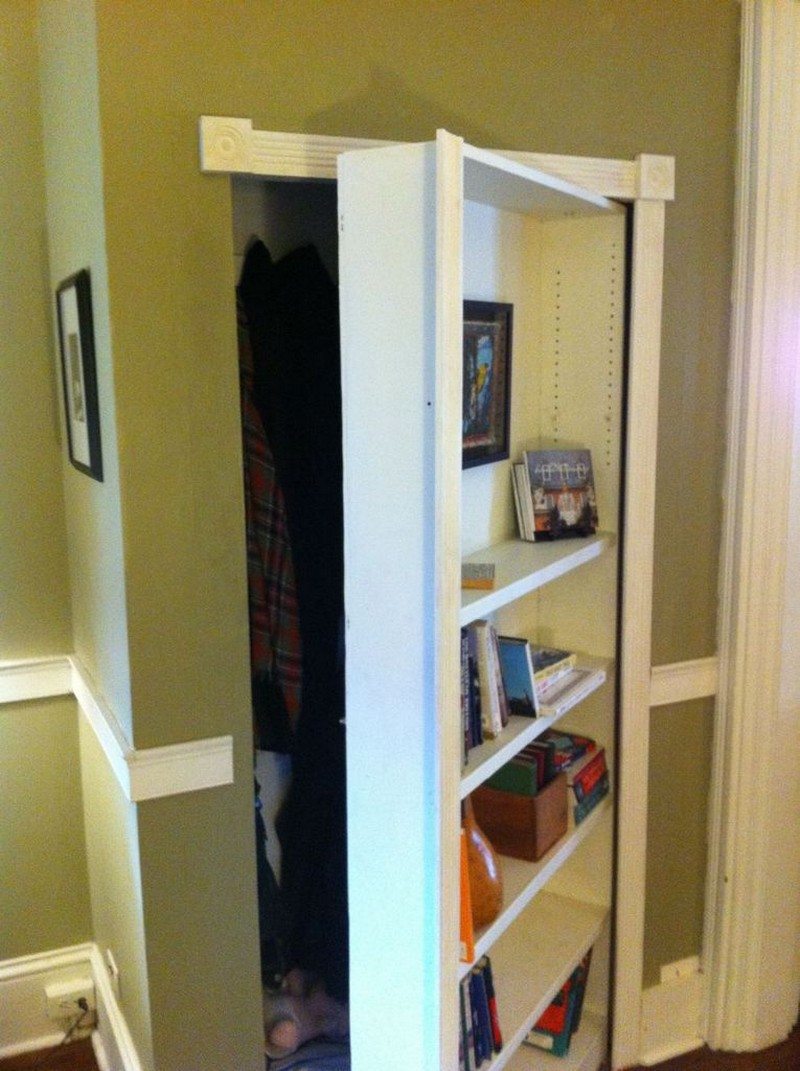
You can turn your closet into a secret space by turning its door into a bookshelf. You can use this hidden space for storage. And if there’s enough room, you can turn it into a personal retreat, or use it as a panic room. And the bookshelf door still functions like any other bookshelf, able to hold your book collection.
The best part is that you don’t have to spend a lot of money to build this project. Everything is customized and made from inexpensive materials you can easily buy in your local hardware store.
If you have a secret room from turning your bookcase into a secret door, what would you use it for?
Click on any image to start lightbox display. Use your Esc key to close the lightbox. 8-)

Contents
Turning a Bookcase into a Secret Door
Materials
- Sheet of 3/4″ Smooth Plywood
- Sheet of 1/2 Plywood
- Lazy Susan Bearing
- Long Bolt and Washers – for top pivot point
- Misc. trim /spacer wood
- 6-inch Rubber Wheel
- Screws
- Wood Glue
- Trim to match house
- Gate Latch
- Fishing String/Line
- Brass Hinge
- Special Book – for secret opener
Tools
- Measuring Tape
- Electric Drill/Screw Driver
- Table Saw
Steps
Unfortunately, I don’t have many pictures of the build so I’ll explain it the best I can. :)
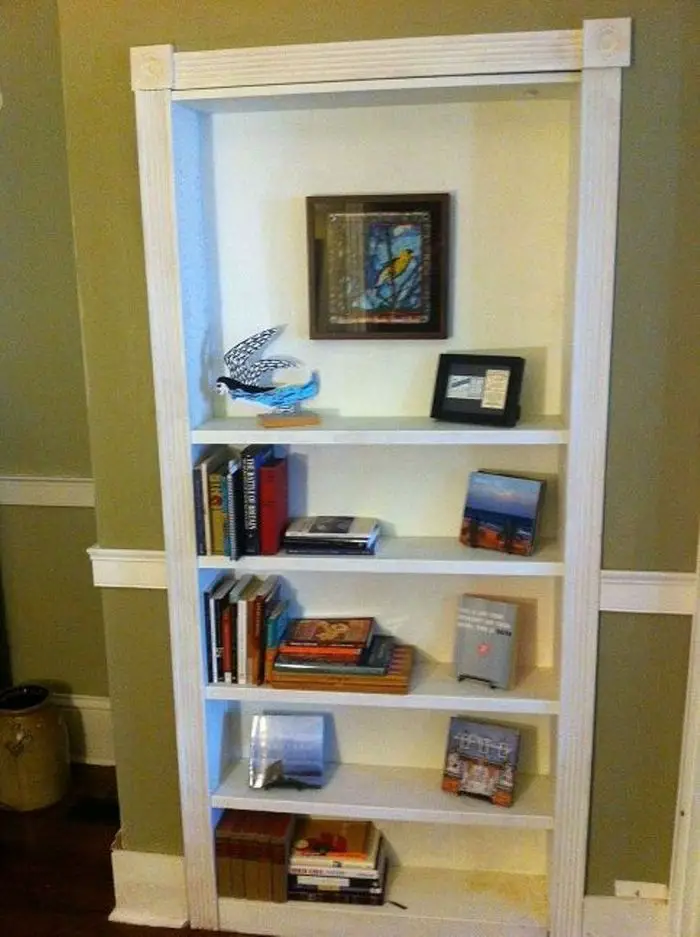
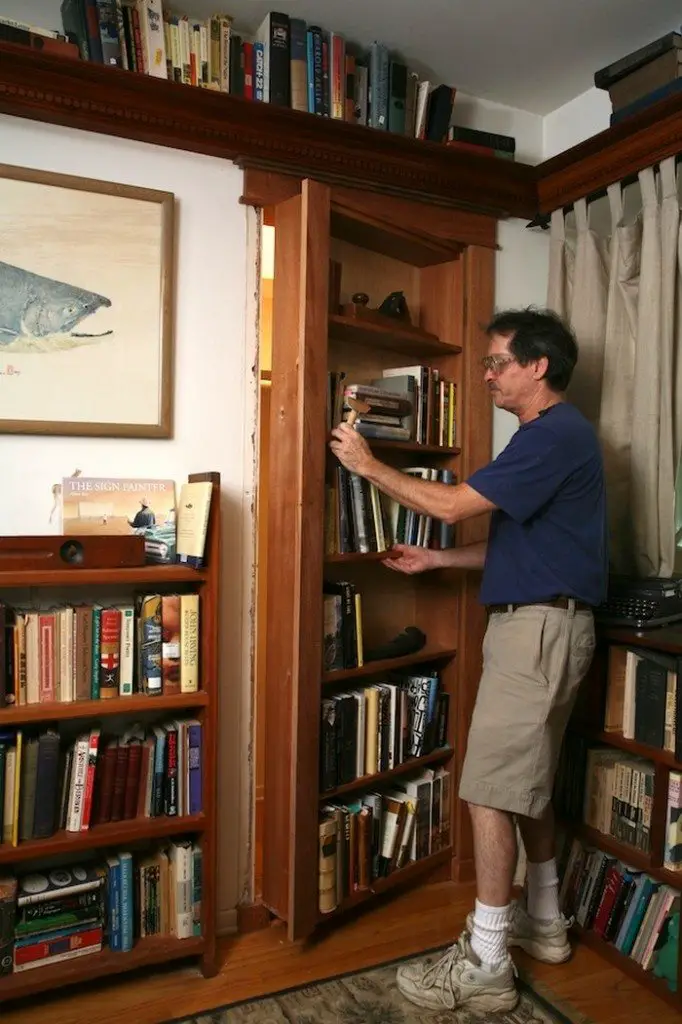
I begin by making a door frame to the exact measurements of my brothers closet. The dimensions of the finished door came out to be 34″ wide, 77″ tall and 8″ deep. I assume if you are building this project you have enough wood working skills to make a bookshelf and your sizing will vary so I won’t go into detail about that.
The door is a solid bookcase made from 3/4 smooth plywood and 1/2″ regular plywood for the back. Glued and screwed on all sides. There are five attached shelves and adjustable shelf holes drilled at the top. I made a template to help drill the holes all the correct width and height.
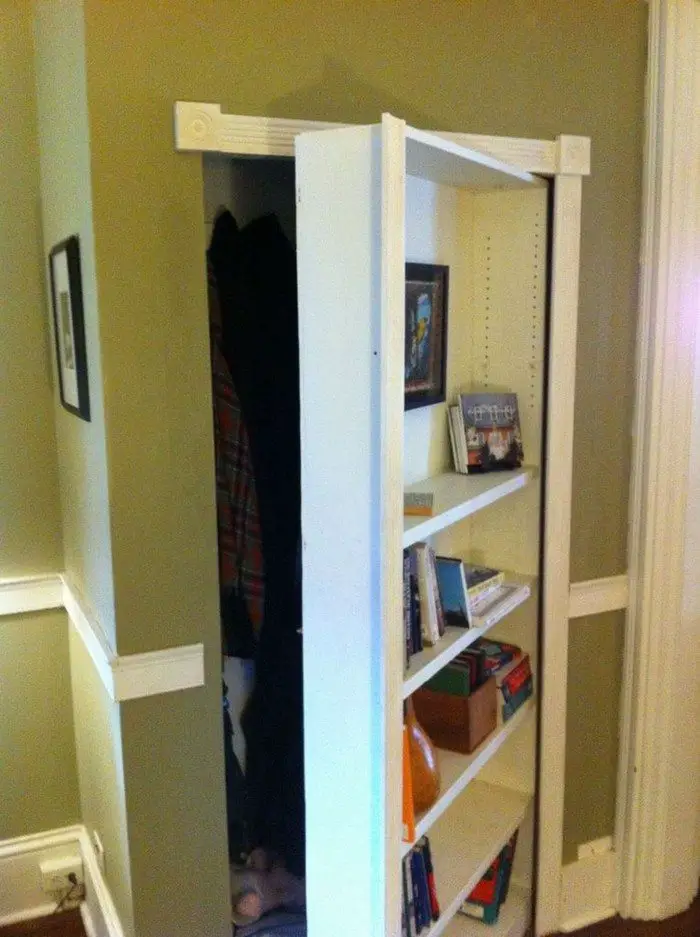
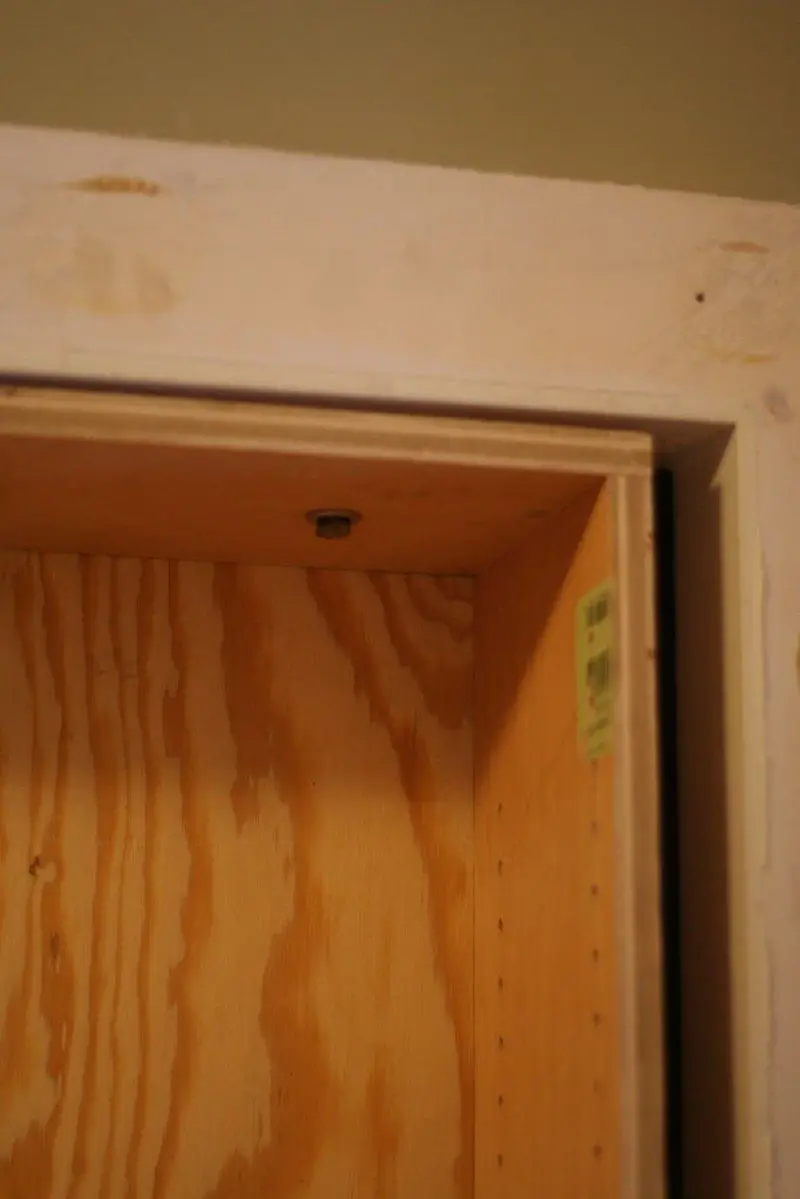
One of the hardest parts was the hinge point. I used a lazy susan on some 2×4 blocks for the bottom and a long bolt for the top. It took a lot of measuring and testing to get it centered right. Adequate spacing was needed on the hinge side to just barely clear the door frame and still be covered by trim.

Most commercial doors have steel frames and don’t need caster wheels. Due to the weight of the shelves and contents we added a 6 inch rubber wheel, installed a little bit high and hidden with fake books. It does not hit the floor.

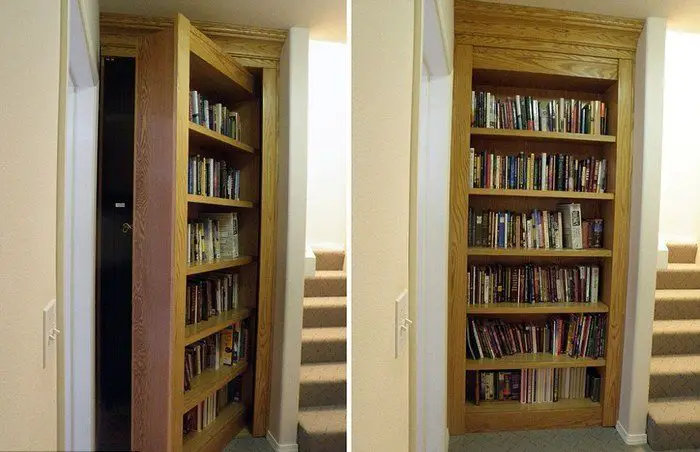
Installation involved removing the closet door and trim. Screwing in some wood blocks to the inside wall that would accept the top hinge bolt.
Once the door was in place, I tested the opening many times and then secured the base with 4″ screws.
The latch bolt was installed to the interior door frame matching the latch height. A fishing line was secured and run through the back of the door and connected to the secret book opener. Hindsight note: Double or triple knot that fishing line or it might come off and your door is stuck closed.
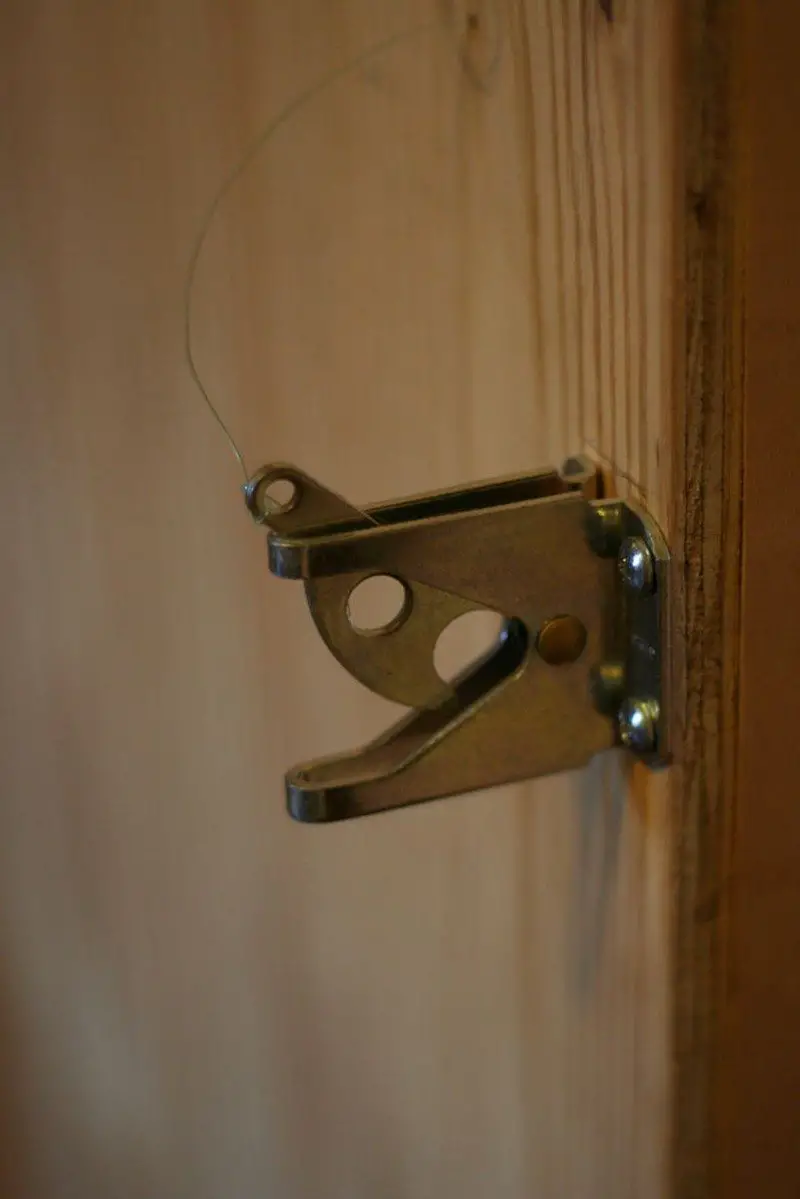
The secret door opening book was a really nice touch supplied by my brother. I glued the pages together to make a solid area for attaching a small brass hinge and fishing line to pull open the latch.

My brother finished painting and loading with books and decorations.


I think it turned out really nice and I’m told it’s a great conversation piece when company comes over and he puts their coats away.

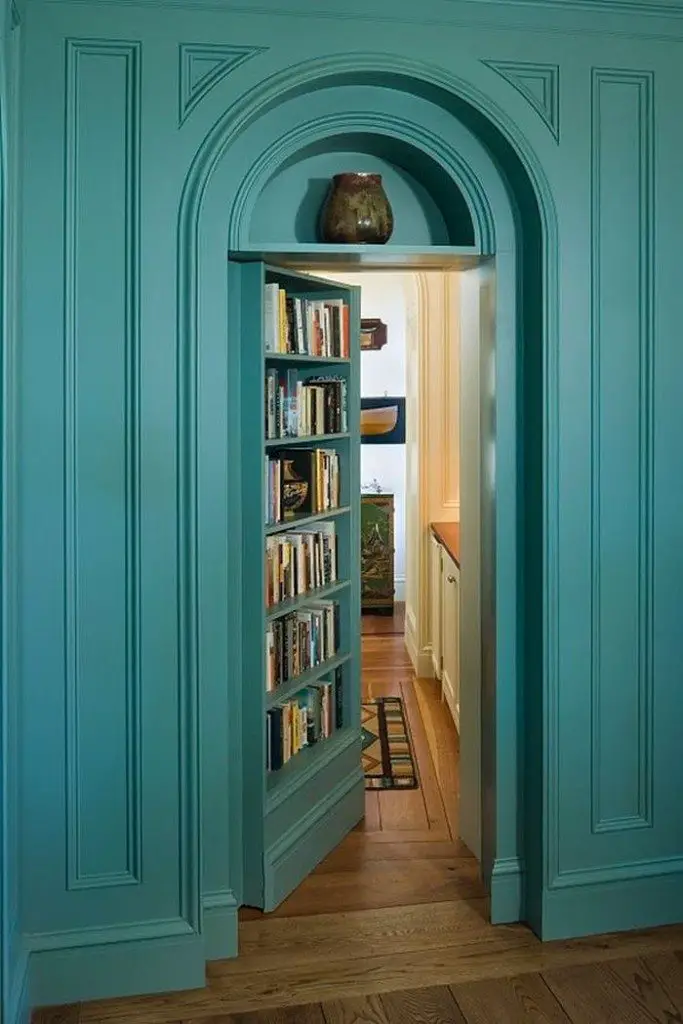
A closet for guests’ coats, pantry or a personal retreat – there are several options for your secret room while providing an extra bookcase or display shelf for your home.
But this project is perfect for those who have plenty of confidential and treasured belongings that needs good hiding. If you plan to transform your room into this purpose, then this would have to be a secret project!
The secret book is a good latch idea. Can you think of any other item for it?
Thanks to Stryker for this great project.
Advanced Security Features
Integrating advanced security features into your bookcase-turned-secret-door project not only enhances its functionality but also adds an extra layer of protection and privacy. Whether you’re concealing a personal retreat or safeguarding valuable belongings, the right security measures can make your secret space both impregnable and inconspicuous. Below, we delve into various advanced security features that can be seamlessly incorporated into your bookcase into a secret door design, ensuring your hidden haven remains both accessible to you and elusive to others.
Biometric Locks
Biometric locks stand at the forefront of securing a bookcase into a secret door. By requiring a fingerprint, facial recognition, or retina scan for entry, they offer a highly personalized level of security. This technology ensures that only registered users can operate the bookcase into a secret door, significantly reducing the risk of unauthorized access. Moreover, biometric locks blend well with the bookcase’s framework, maintaining the door’s covert nature.
Keypad Entry Systems
A keypad entry system provides a customizable and secure access method to your bookcase into a secret door. With the ability to set unique codes, you can control who has access to the secret space behind the bookcase. This system can be discreetly integrated into the bookcase design, ensuring the keypad is hidden from plain view yet easily accessible to those who know its location.
Hidden Surveillance
Incorporating hidden surveillance cameras near or within the bookcase into a secret door can add an extra security layer. These cameras can be motion-activated, recording any activity near the secret door. The footage can be invaluable for monitoring access attempts and can be streamed live to your smartphone or stored for later viewing. This feature is especially useful for keeping an eye on your hidden space when you’re away from home.
Automated Alert Systems
Automated alert systems complement the security of a bookcase into a secret door by sending notifications to your phone or security service if an unauthorized entry attempt is detected. This could be triggered by motion sensors or the opening of the bookcase without the correct authentication. Such systems ensure immediate awareness of any security breaches, allowing for quick response.
Structural Reinforcements
Beyond technological features, reinforcing the structural integrity of your bookcase into a secret door can prevent forced entry. This might involve using stronger materials for the bookcase and the door mechanism or adding additional locks and deadbolts that are hidden from view but add a significant barrier to entry.
By integrating these advanced security features into your bookcase into a secret door project, you ensure that your hidden space is not only ingeniously concealed but also fortified against unauthorized access. Whether you opt for cutting-edge technology like biometric locks and hidden surveillance or prefer structural reinforcements and keypad entry systems, the right combination of features can turn your bookcase into a secret door into a secure gateway to your private retreat.
Legal and Safety Considerations of Turning a Bookcase into a Secret Door
Creating a bookcase into a secret door is an intriguing project that adds an element of mystery and privacy to your home. However, it’s essential to consider the legal and safety aspects of constructing such a feature. Ensuring compliance with local building codes, maintaining structural integrity, and ensuring the space is safe and accessible in emergencies are paramount. This section outlines the crucial legal and safety considerations you must address when integrating a bookcase into a secret door in your home.
Compliance with Building Codes
Before embarking on the transformation of a bookcase into a secret door, it’s critical to familiarize yourself with local building codes and regulations. These laws vary by location and can influence various aspects of your project, including structural changes, electrical wiring, and ventilation. Failure to comply could result in fines, required removal of the bookcase into a secret door, or difficulties in selling your home in the future. It may be necessary to obtain a permit before starting construction to ensure all modifications are legally sanctioned and documented.
Structural Integrity
Maintaining the structural integrity of your home is crucial when installing a bookcase into a secret door. The addition should not compromise the building’s overall stability. This consideration is particularly vital if the bookcase into a secret door leads to a renovated space, such as a basement or attic. Consulting with a structural engineer can help ensure that your project does not negatively impact your home’s framework or safety.
Emergency Egress: A Closer Look
The excitement of integrating a bookcase into a secret door in your home brings with it the responsibility of ensuring everyone’s safety. Over the excitement however, you might recreate a funny sitcom moment where guests enter your secret space and locked themselves in. While it may seem funny, it can lead to an bad situation.
When turning a bookcase into a secret door into your home, it’s vital to plan an escape strategy that allows occupants to evacuate right away and safely. Imagine a scenario where the unexpected happens; how would someone inside the secret room get out?
One simple way is to add an easily activated release mechanism, a feature that could be discreetly integrated yet easily reachable in urgent situations. It is additionally, ensuring that the bookcase into a secret door that cannot accidentally lock from the inside is essential. This prevention avoids the nightmarish scenario where one finds themselves trapped in a moment of crisis. The focus should always be on creating a secure environment that marries the allure of secrecy with the non-negotiable requirements of safety.
Enhancing Fire Safety in Hidden Spaces
Incorporating a bookcase into a secret door into your dwelling introduces an element of the extraordinary into the everyday. Yet, with this innovation comes the need to prioritize fire safety, a concern that’s as paramount as the design itself. The hidden space behind your bookcase, regardless of its use, should adhere to stringent fire safety standards. This involves more than just following guidelines; it’s about ensuring peace of mind.
Attaching smoke detectors to your secret space is a big step, one that save so many lives beofre you can realize it. For enhanced protection, consider the installation of a sprinkler system, which is especially vital if the secret room houses electrical gadgets or items that could easily ignite. Remember, the charm of your bookcase into a hidden door should never compromise safety.
I should also add, the choice of materials for both the bookcase and the secret door deserves thoughtful selection. Opt for materials that are not just aesthetically pleasing but also fire-resistant. These materials can significantly slow the spread of flames, buying precious time for evacuation. Fire safety in the context of a bookcase into a secret door isn’t just about meeting legal requirements; it’s about weaving safety into the fabric of your home’s hidden marvels.
In both emergency egress and fire safety considerations, the goal is clear: to seamlessly blend the enchanting allure of a bookcase into a secret door with the practical imperatives of safety. By doing so, you create not just a secret space but a haven where the thrill of secrecy coexists with the assurance of well-being.
Accessibility
Consideration for individuals with disabilities or mobility issues is essential when installing a bookcase into a secret door. The design should accommodate everyone, ensuring that the mechanism to reveal the hidden door is accessible and that the entrance/exit is wide enough to allow for the passage of wheelchairs or other mobility aids if necessary.
While the idea of creating a bookcase into a secret door is filled with excitement and creativity, it’s imperative to approach the project with a thorough understanding of the legal and safety implications. By ensuring compliance with building codes, maintaining structural integrity, and considering emergency egress, fire safety, and accessibility, you can turn your bookcase into a secret door without compromising on safety or legality. This careful planning will ensure that your secret space is not only a hidden gem but also a safe and lawful addition to your home.
Conclusion
Turning a bookcase into a secret door is an innovative project that blends whimsy and practicality, transforming ordinary spaces into realms of mystery and utility. It underscores the importance of balancing creativity with safety and regulatory compliance, ensuring that the allure of secrecy never compromises the well-being of occupants. This endeavor not only enriches your living space with a distinctive feature but also serves as a testament to the power of imaginative design in elevating everyday environments.
We have more interesting bookcase projects. Check out our Tetris bookcase next!


