Thinking about growing your own food right in your front yard? Although it may appear enticing, it’s likely not the right decision, as the suboptimal location could present challenges to your dreams.
But what if your front yard is the only space you have for growing your own produce? Well, this tiered garden bed is a great solution for you! It can even enhance the look of your front yard.
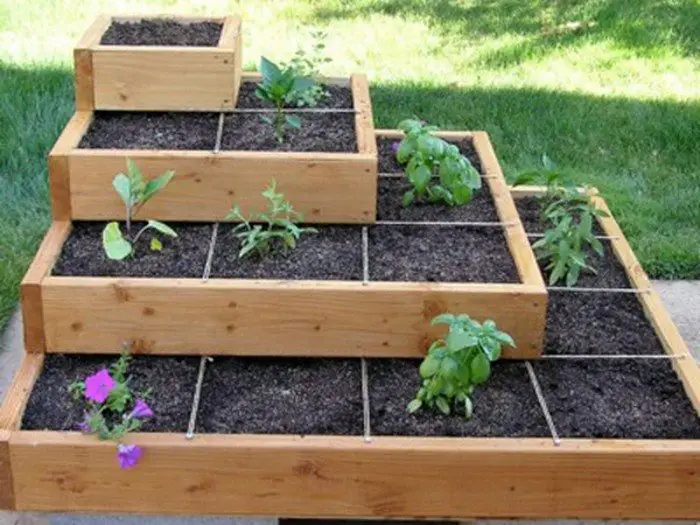
Tiered garden beds are a great option, no matter what the size of your outdoor space. They are an easy way to add colour, dimension, and variety to your landscaping.
By introducing a tiered garden bed to your front yard, you not only embrace sustainability and self-sufficiency but also create a welcoming and distinctive feature that makes a statement about your commitment to both beauty and functionality.
It’s a win-win solution that harmoniously marries form and function, turning your front yard into a true showcase of your gardening prowess and creativity.
In a transformed front yard, you not only create a green oasis that nurtures both body and soul but show an enduring testament to your dedication to the art of gardening, where every tier tells a story of growth, beauty, and the boundless possibilities of horticultural creativity.
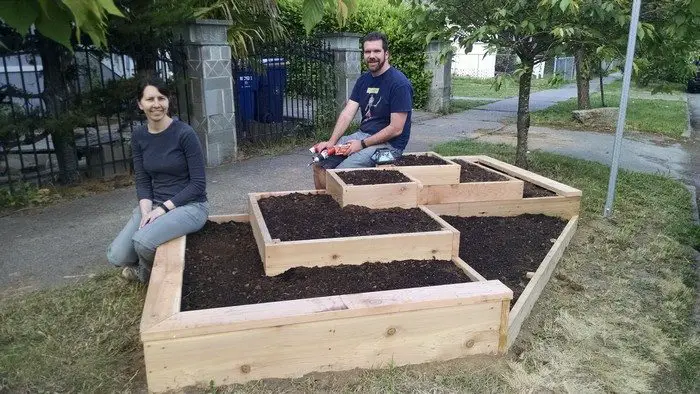
Though the story of this beautiful garden bed involved setting it up on the front parking strip of the house of the DIY-ers (which is prohibited in many cities or towns), the idea is nevertheless a clever one. What’s even better is that it’s easy to make and it doesn’t cost a lot.
Tiered garden beds present a wonderful choice, irrespective of your outdoor space’s size. They provide a straightforward means to introduce colour, depth and a diverse array of plants into your landscaping scheme.
The planning and care invested in this project will result in a harmonious fusion of beauty and function at the front of your home. It stands as a dynamic testament to your dedication to sustainability, self-reliance, and the craft of gardening, extending a warm invitation to both neighbours and visitors to admire the remarkable conversion of your front yard into a verdant, welcoming, and fruitful sanctuary.
Do you know anyone else who could use this idea?
Contents
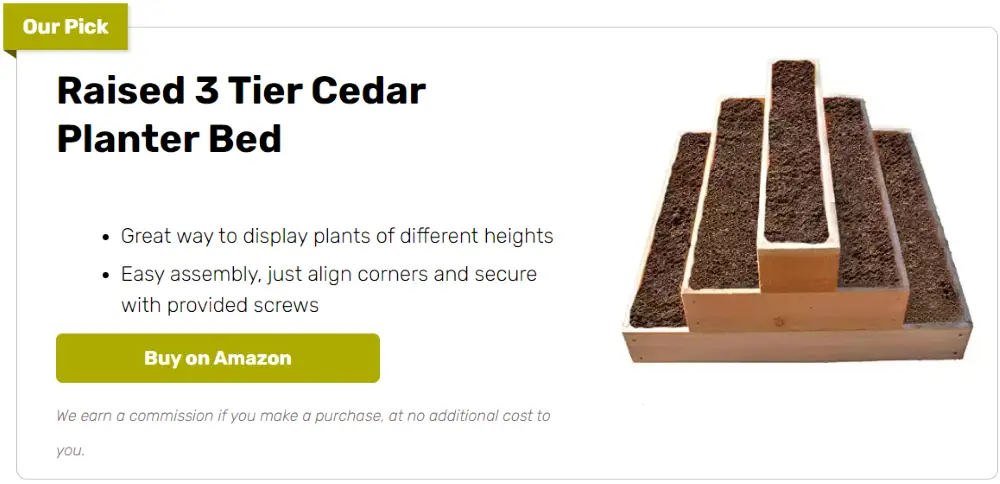
How to Make a Tiered Garden Bed
If you’re looking to add a touch of elegance and organization to your garden while maximizing your planting space, creating a tiered garden bed is a practical choice. Tiered garden beds not only provide an attractive visual appeal to your outdoor space but also make gardening more accessible and efficient.
Whether you’re an experienced gardener or embarking on your journey to develop a green thumb, this guide will carefully lead you through each step, assisting you in the endeavour to convert your outdoor area into a flourishing, multi-tiered haven that combines both aesthetics and productivity.
So, gather your materials and tools, and get started on crafting a garden that’s as functional as it is visually stunning.
Materials
- String
- Lawn Pins
- Cedar Boards
- 4×4 Timber Posts
- Thin Cardboard
- Soil and Compost
- Solar Post-Topper
- Tomato Cages
- Plants
Tools
- Measuring Tape
- Shovel
- Table Saw
- Cordless Drill
Click on any image to start lightbox display. Use your Esc key to close the lightbox.![]()
Steps
Step 1: Choose Your Location
Select a suitable location for your tiered garden bed. Ensure it receives adequate sunlight and is easily accessible for planting and maintenance.
Step 2: Plan the Design
Determine the size and shape of your tiered garden bed. Sketch out your design on paper to visualize the layout. Consider the dimensions and number of tiers you want for your garden bed.
Step 3: Measure and Mark
Use your measuring tape and string to mark the outlines of your tiered garden bed on the ground. Ensure the dimensions match your planned design.
Step 4: Dig the Foundation
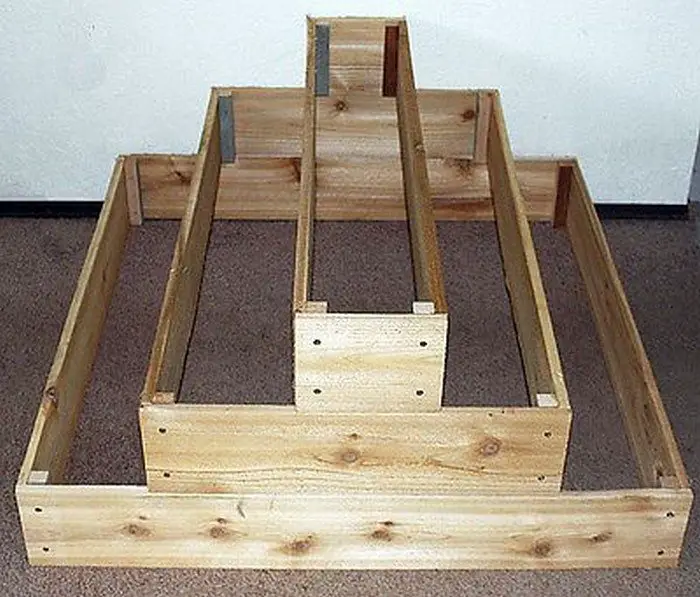
With your shovel, dig trenches for the 4×4 timber posts at the corners of your tiered garden bed. Make sure the posts are level and firmly anchored in the ground. These posts will serve as support for your cedar boards.
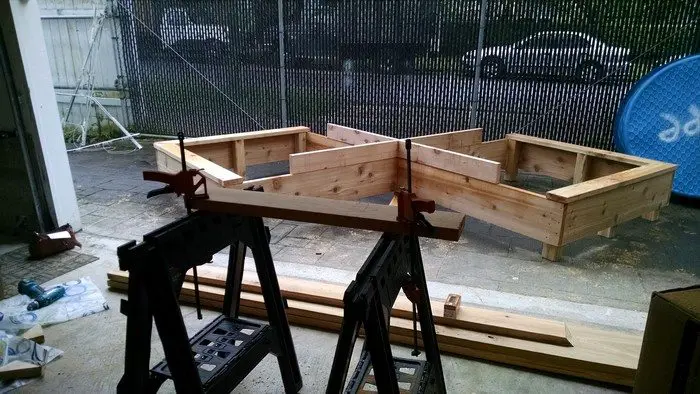
Step 5: Cut Cedar Boards
Using a table saw, cut your cedar boards to the desired lengths for each tier. Ensure that the lengths match your design and that the boards are level.
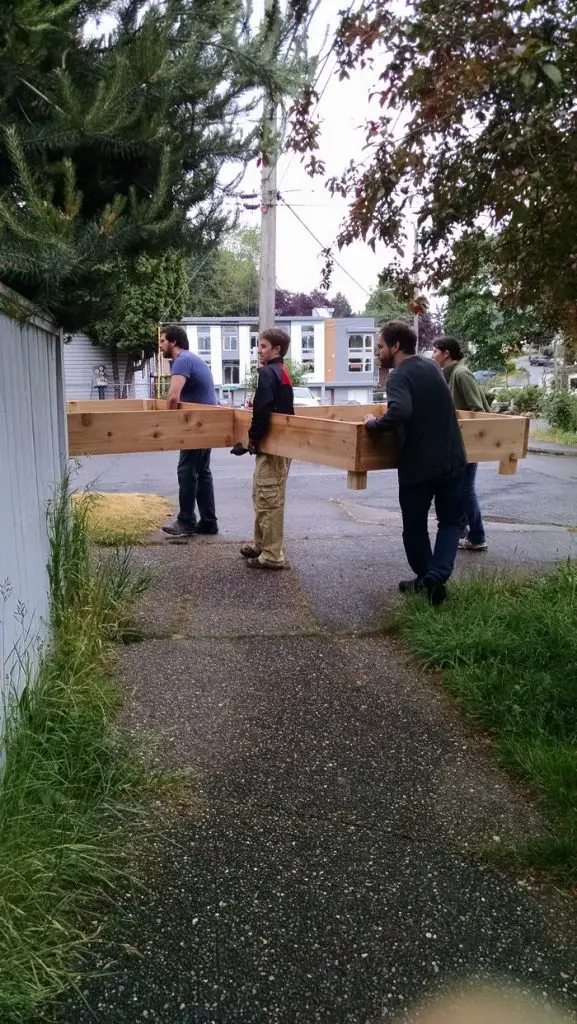
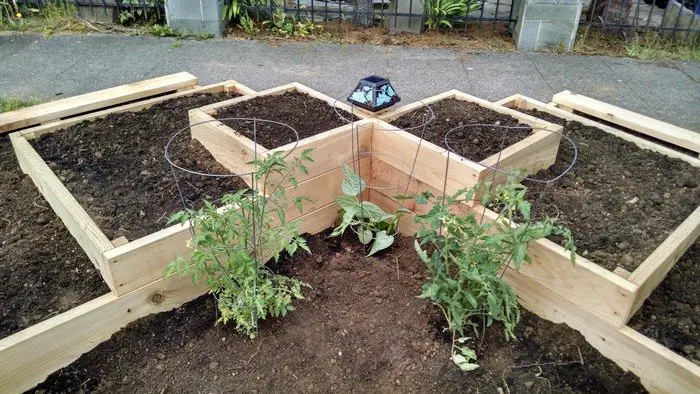
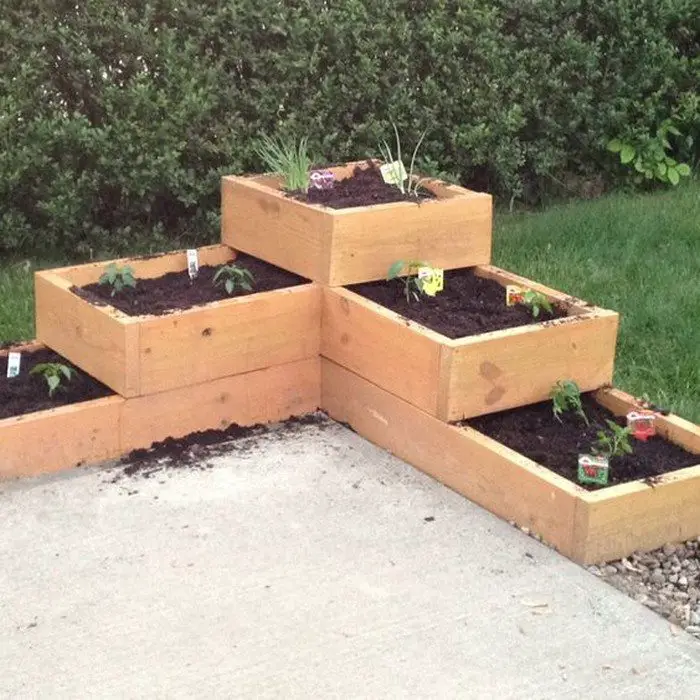
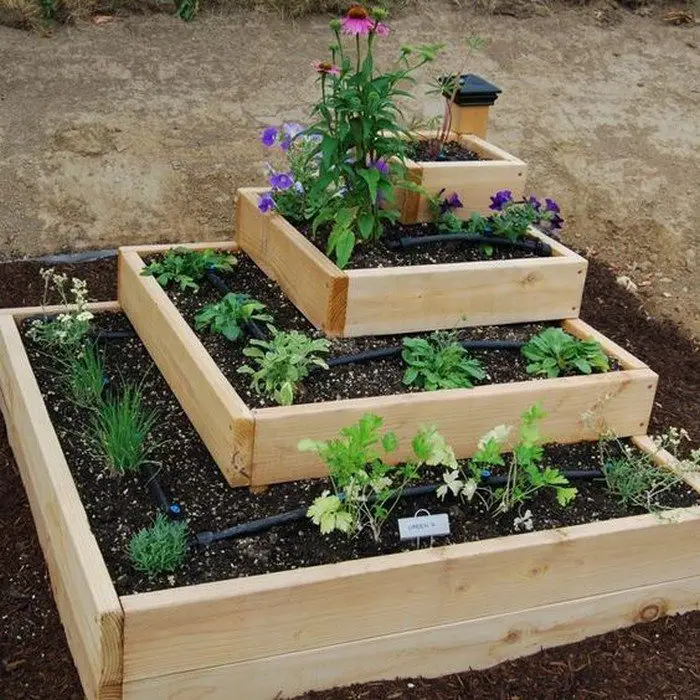
Step 6: Assemble the Tiers
Attach the cedar boards to the 4×4 timber posts using your cordless drill. Make sure each tier is level and secure.
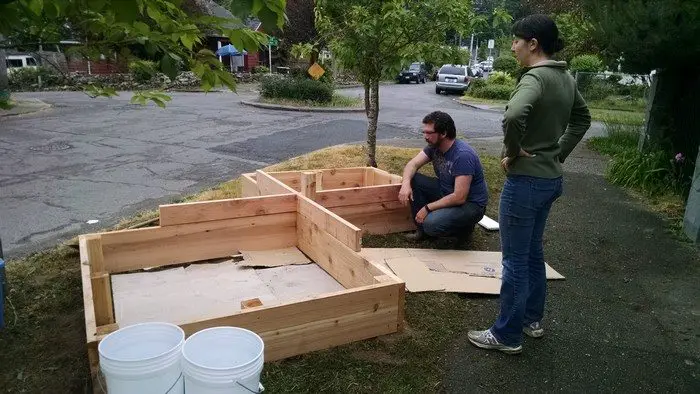
Step 7: Add a Cardboard Layer
Line the inside of each tier with thin cardboard. This will help prevent weeds from growing up through the soil.
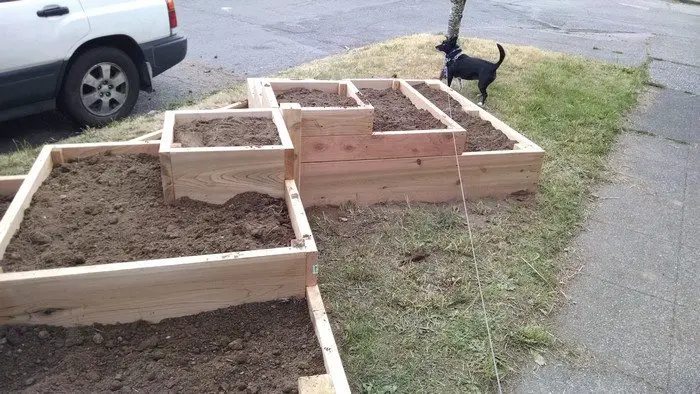
Step 8: Fill With Soil and Compost
Fill each tier with a mixture of soil and compost, leaving enough space for your plants to grow. Ensure the soil is evenly distributed and well-compacted.
Step 9: Plant Your Garden
Plant your desired vegetables or herbs in each tier. You can use tomato cages to support climbing plants.
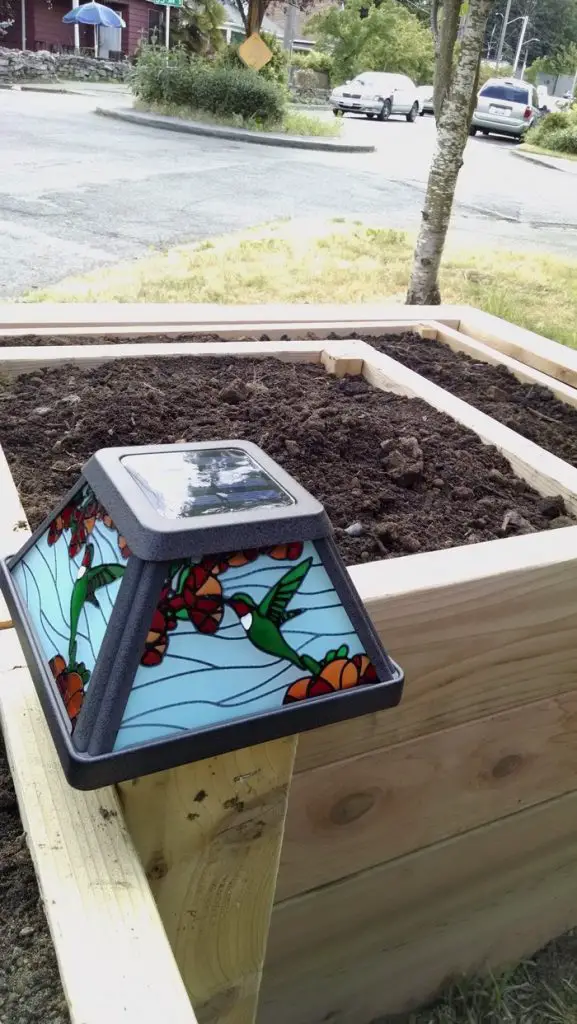
Step 10: Install Solar Post-Toppers
If desired, add solar post-toppers to the 4×4 timber posts for decorative lighting and ambience in your garden.
Step 11: Secure With Lawn Pins
To keep the cardboard in place and prevent erosion, use lawn pins to secure it to the tiers.
Step 12: Maintain and Water
Regularly water and maintain your tiered garden bed as needed to ensure healthy plant growth.
With these steps, you can create a beautiful and functional tiered garden bed using the listed materials and tools. Enjoy your garden’s new design and the bountiful harvest it will provide.
Thanks to mczefram for sharing invaluable insights into the tiered garden bed blueprint.
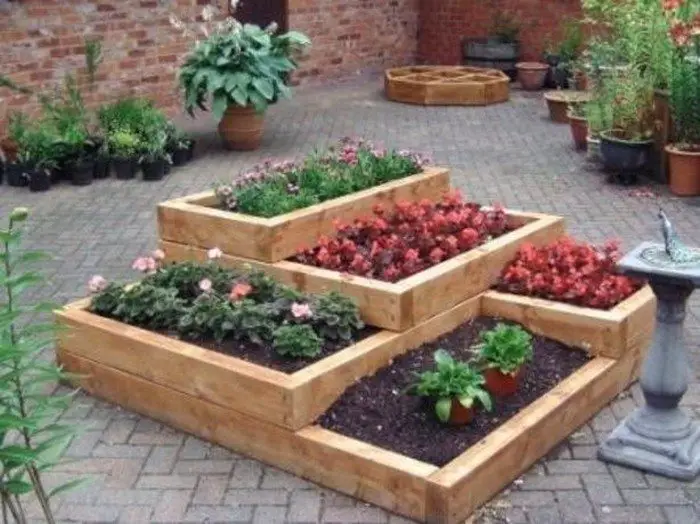
Choosing the Right Plants for Each Tier
When planning a tiered garden bed, selecting the right plants for each tier is crucial to achieving a thriving and visually appealing garden. Different levels in a tiered garden bed can offer varied microclimates, which affect how plants grow. Understanding these conditions allows you to strategically place plants based on their specific needs and your aesthetic goals.
Consider Sunlight and Shade
The top tier of your tiered garden bed typically receives the most sunlight, making it ideal for plants that thrive in full sun. Vegetables like tomatoes, peppers, and eggplants, along with sun-loving herbs such as basil and thyme, will do well here. Flowers that bask in the sun, such as marigolds and zinnias, can also be planted to add color and attract pollinators.
The middle tier may receive partial sun, making it suitable for plants that prefer a bit of shade during the hottest parts of the day. This tier is perfect for growing leafy greens like spinach and swiss chard, as well as herbs such as cilantro and parsley that might bolt if exposed to too much heat.
The lowest tier is often the shadiest, ideal for plants that thrive in cooler, less intense light conditions. Shade-loving plants such as lettuce, hostas, and ferns can be excellent choices for this area. This tier is also great for cultivating root vegetables like carrots and beets, which benefit from the cooler soil temperatures.
Assess Water Drainage and Retention
Water tends to flow downwards in a tiered garden bed, meaning the lower tiers are more likely to retain moisture. This setup requires careful consideration of plant water needs. Moisture-loving plants are best placed in the bottom tier, where they can benefit from the accumulated water. Such plants include impatiens, coleus, and certain perennial flowers.
Conversely, plants that require well-drained soil and less frequent watering should be placed on the upper tiers. Succulents, lavender, and other drought-resistant plants will thrive in these conditions, as the elevated position allows for better drainage and prevents root rot.
Maximize Pollination and Growth Synergy
Placing complementary plants near each other can help enhance growth and pollination. For example, taller plants on the top tier can provide necessary shade for more sensitive plants below. Similarly, climbing plants like cucumbers or pole beans can be placed on the lower or middle tiers, where they can grow upwards towards the sunlight, using the structure of the tiered garden bed for support.
Decorative Considerations
While the functionality of plant placement is important, aesthetics also play a significant role in planning your tiered garden bed. Consider the overall look of your garden when it’s in full bloom. Use the varying heights of the tiers to create a dynamic visual effect. Incorporate different textures, colors, and plant heights to design a tiered garden bed that’s not only productive but also beautiful.
Plant Rotation and Seasonal Changes
To maintain soil health and prevent pest buildup, practice crop rotation in your tiered garden bed. This involves changing the types of plants in each tier annually. Also, consider seasonal changes; some plants might be ideal for spring and summer, while others could be better suited for fall.
Choosing the right plants for each tier requires an understanding of how different species interact with their environment. By carefully selecting and positioning your plants, you can create a tiered garden bed that is both a productive food source and a stunning feature in your landscape.
Summary
Climb to new heights of gardening excellence with this step-by-step guide on creating an ingenious tiered garden bed. This transformative project lets you maximize your planting space, elevate your garden’s visual appeal, and make gardening more efficient.
Whether you’re a seasoned gardener or a novice, the instructions will empower you to craft a multi-level oasis of beauty and productivity. Ascend to greater gardening heights as you explore the art of building a tiered garden bed.
For more gardening solutions, check out our garden cloche guide!