Many of us have misplaced or lost screwdrivers at some point in time. It’s more frustrating because something needs fixing and you go through the added trouble of locating your screwdriver.
Well, here’s a clever storage solution for screwdrivers for you…
This DIY storage idea is a straightforward project that doesn’t require a saw, a drill, nails, and screws. By using light wood material such as balsa wood, you can make your own screwdriver organizer with just an X-acto knife and your screwdrivers.
Contents
Advantages of Having a Screwdriver Organizer
1. Organization and Accessibility: One of the primary advantages of building a screwdriver organizer is that it helps you keep your tools organized and easily accessible. Instead of rummaging through drawers or toolboxes to find the right screwdriver, you can have them neatly arranged and readily available whenever needed.
2. Time-saving: With a well-organized screwdriver organizer, you can save valuable time by quickly locating the right tool for the job. This efficiency is particularly beneficial in busy workshop environments or during time-sensitive projects where every minute counts.
3. Reduced Clutter: By providing designated storage space for your screwdrivers, a screwdriver organizer helps reduce clutter in your workspace. Keeping your tools neatly arranged not only makes it easier to find what you need but also creates a cleaner and more organized work environment.
4. Prevention of Damage: Storing screwdrivers in a dedicated organizer helps prevent damage to the tools. When left loose in a toolbox or drawer, screwdrivers can become scratched, bent, or damaged from contact with other tools. By keeping them securely in place, you can prolong the lifespan of your screwdrivers and maintain their functionality.
5. Enhanced Safety: Proper tool organization contributes to a safer work environment by reducing the risk of accidents and injuries. With screwdrivers neatly arranged and stored away when not in use, there is less chance of tripping over or accidentally stepping on them, minimizing the risk of cuts, punctures, or falls.
6. Customization: Building your own screwdriver organizer allows you to customize it according to your specific needs and preferences. You can tailor the organizer’s size, layout, and features to accommodate the types and number of screwdrivers you use most frequently, ensuring optimal organization and efficiency.
7. Cost-effectiveness: DIY screwdriver organizers are often more cost-effective than purchasing pre-made organizers from stores. By using simple materials and tools, you can create a functional organizer at a fraction of the cost, saving money while still enjoying the benefits of improved tool organization.
8. Skill Development: Building a screwdriver organizer provides an opportunity to develop your woodworking skills and craftsmanship. Whether you’re a novice DIY enthusiast or an experienced woodworker, the process of measuring, cutting, and assembling the organizer allows you to hone your skills and gain satisfaction from completing a practical project.
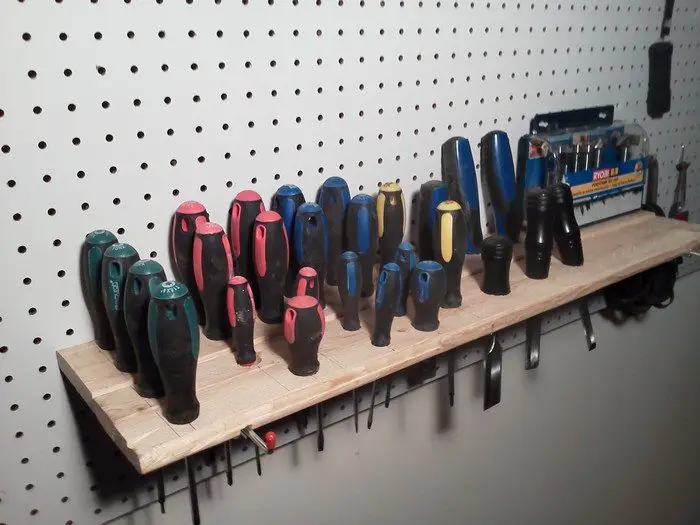
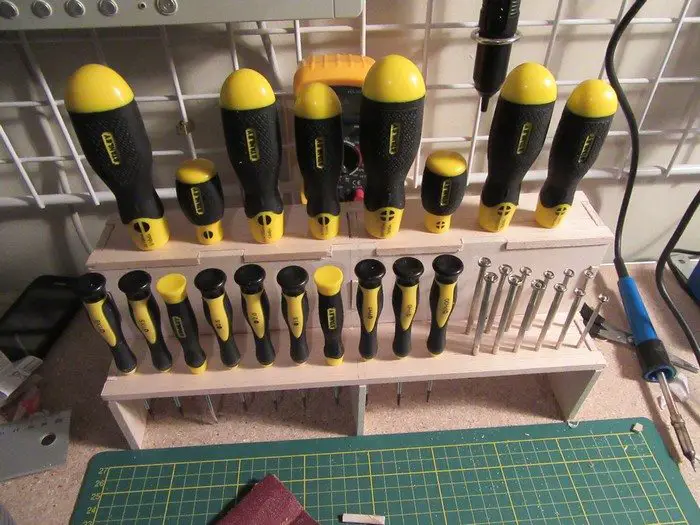
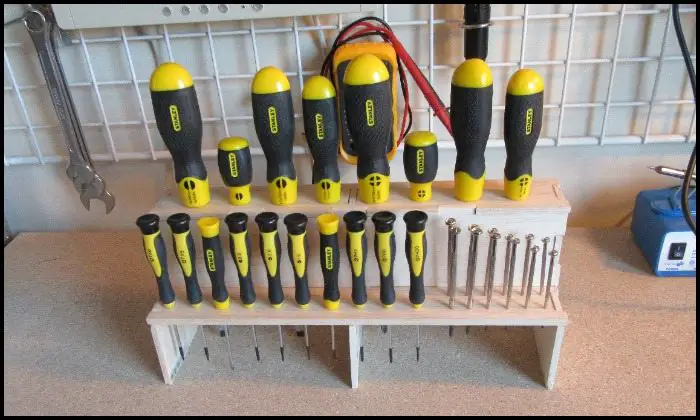
Whether you are a woodworker or just someone who loves tinkering or making crafts, this screwdriver holder is a great item to have near your workbench. It’s compact, sturdy, and most importantly, easy access to! At one glance you can check if one is missing! ;)
Do you need an organizer for your screwdriver set? Follow the step-by-step instructions below to make one!
Click on any image to start the lightbox display. Use your Esc key to close the lightbox. ?

How to Build Your Screwdriver Organizer
Materials:
- 2 panes of Balsa Wood
- Wood Glue
- Sandpaper (220 grit)
- Varnish
Tools:
- Square
- X-acto Knife
- Paintbrush
- Your Screwdriver Set
Steps:

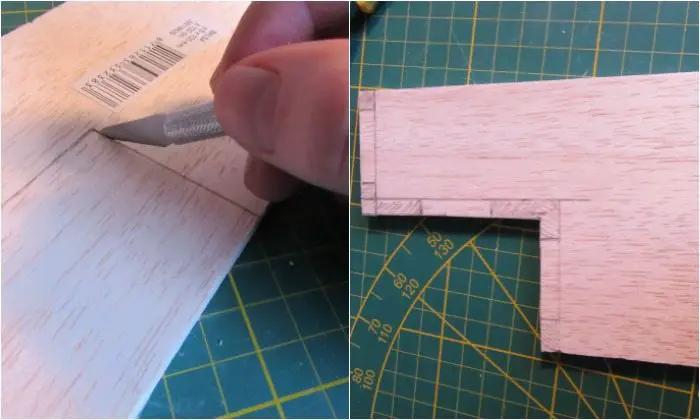
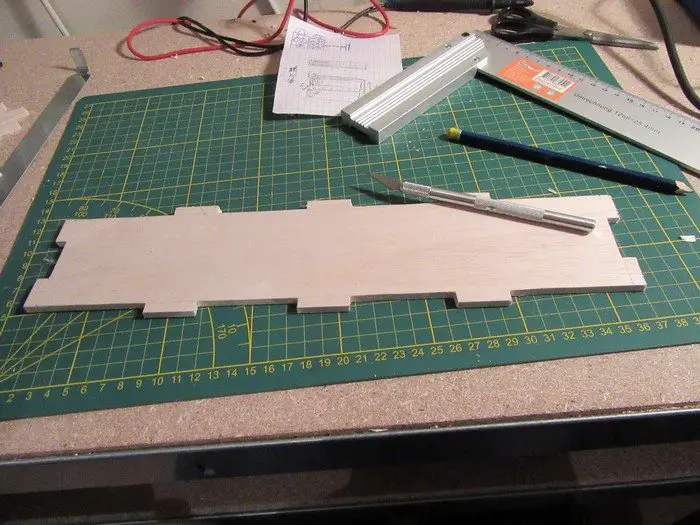
1. Drawing plans and making the first cut: I drew a very basic plan to work from.
When designing your own version (which you will probably need to do), keep in mind the heights of the side panels. They must be at least the height of the screwdriver shaft.
Some general tips:
- Draw before cutting: mark the sections that need to be cut to avoid any mistakes.
- Before every step, think “what could I possibly screw up now?” (Adam Savage wisdom)
- Always cut away from any fingertips or other delicate body parts.
Most important:
- Be patient: you’ll notice cutting parallel with the wood fibre goes a lot smoother than perpendicular cuts. You should keep this in mind when laying out the patterns.
- When you put too much pressure on your knife, you’ll compress the wood and make the cut look ugly. It would make further cuts harder.
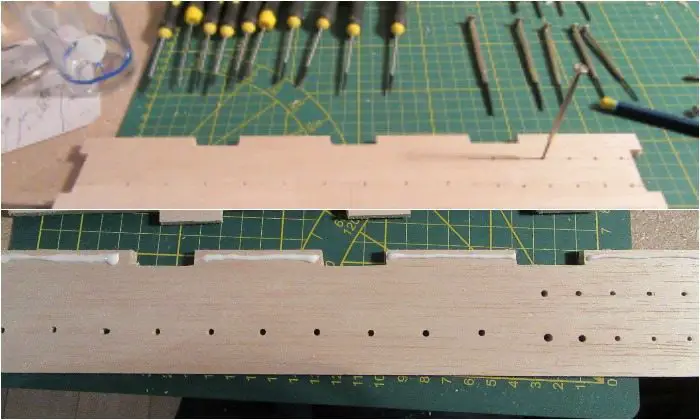
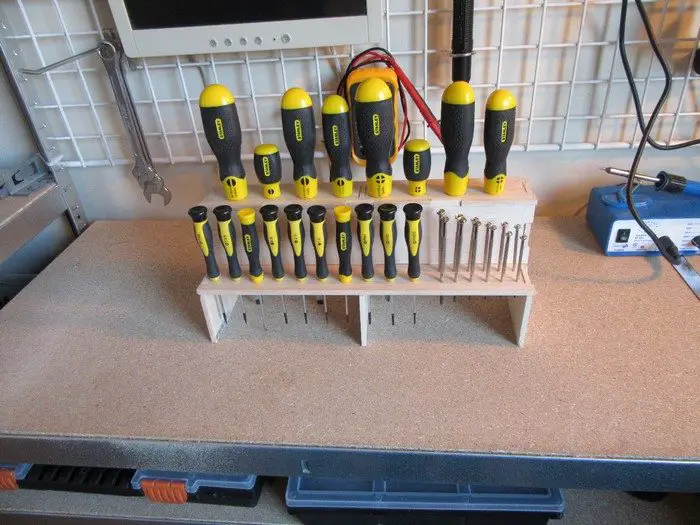
2. Line-up and making the holes: Place your tools in a logical order and mark the holes on the board.
Start making the holes with a small screwdriver and build up to the desired hole size. (I couldn’t resist putting it together without the glue).
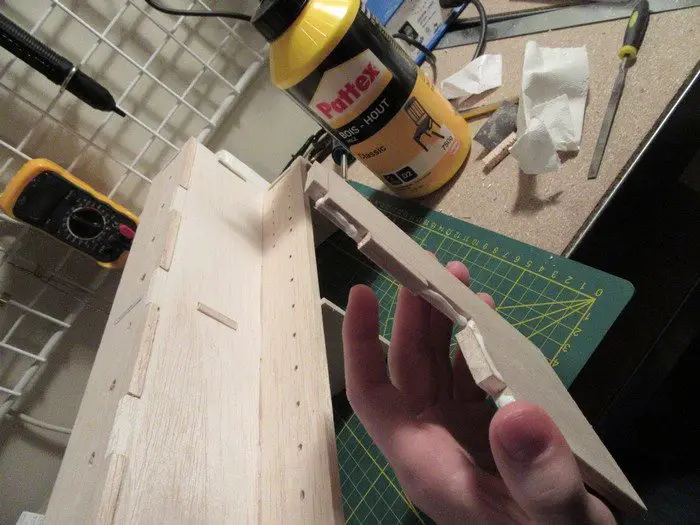
3. Glue and varnish: Sand the pieces (pencil lines and splinters at the holes). Make sure the wood is semi-dust free for gluing. Glue every plane that makes contact with another, wipe off any excess glue.
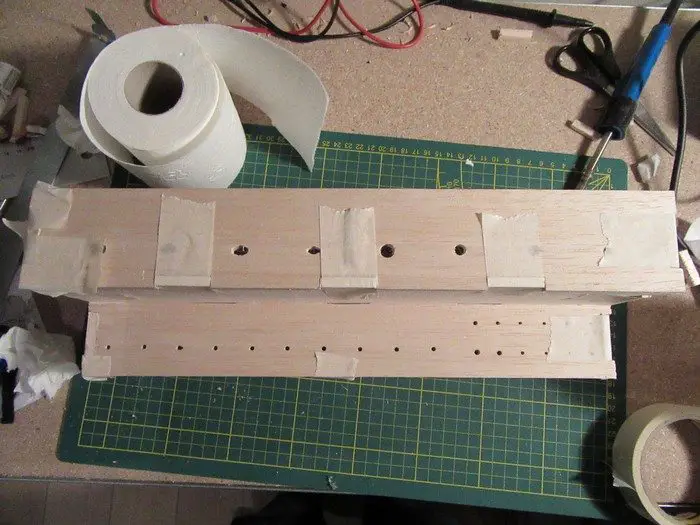
Use painter’s tape to put some pressure on the joints.
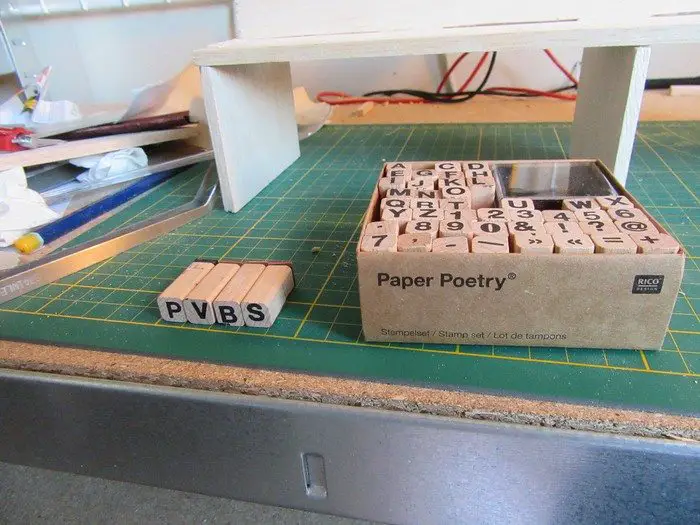
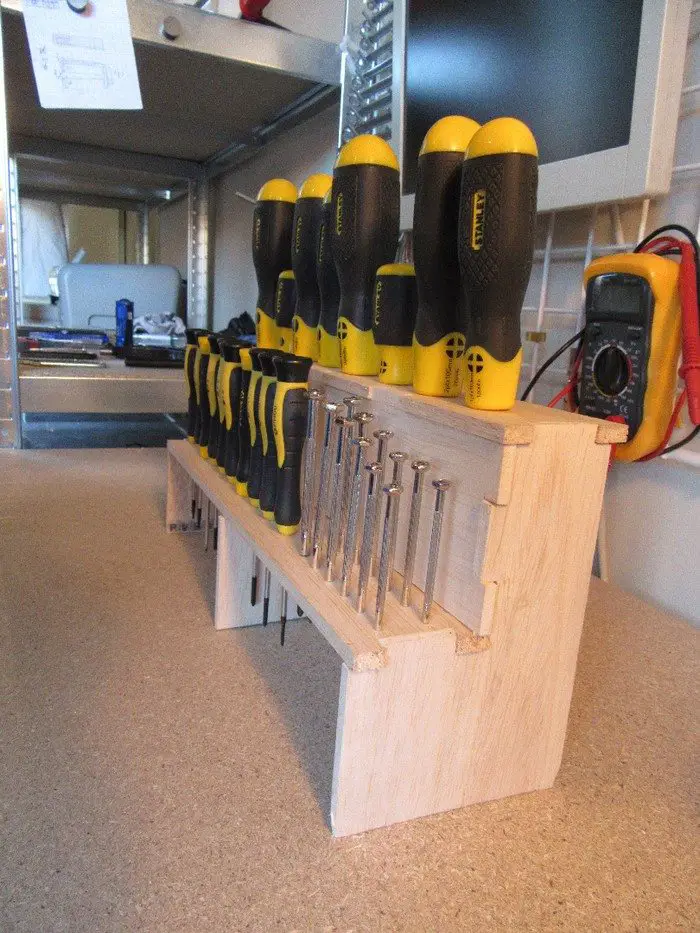
Let dry for 24 hours, personalize (optional) and varnish. Let dry again.
Congratulations! You’ve got yourself a screwdriver organizer. Enjoy!
Thanks to PVBS for sharing tips and strategies on how to make a screwdriver organizer!
Maintaining Your Screwdriver Organizer
1. Regular Inspection: Periodically inspect your screwdriver organizer for signs of wear, damage, or loosening of screws and joints. Address any issues promptly to prevent further damage and ensure the organizer remains sturdy and functional.
2. Cleaning: Keep your screwdriver organizer clean and free of dust, debris, or spilled liquids that can accumulate over time. Regularly wipe down the organizer with a damp cloth or mild cleaning solution to maintain its appearance and prevent buildup that could affect tool storage.
3. Adjustments: As your tool collection evolves or your storage needs change, consider making adjustments to your screwdriver organizer to accommodate new screwdrivers or reorganize existing ones. Adding or repositioning dividers, shelves, or compartments can help optimize storage space and ensure efficient tool organization.
4. Preventive Maintenance: Apply a protective finish or sealant to wooden organizers to help protect them from moisture, humidity, and wear. Consider adding padding or cushioning to compartments to prevent scratches or damage to the screwdrivers.
5. Secure Installation: If mounting your screwdriver organizer to a wall or workbench, ensure it is securely fastened to prevent it from shifting or falling over. Use appropriate hardware and mounting techniques to ensure stability and safety.
6. Regular Use: Utilize your screwdriver organizer regularly to keep your tools organized and easily accessible. Encourage others in your household or workshop to return screwdrivers to their designated slots after use to maintain organization and prevent misplaced tools.
7. Periodic Maintenance: Schedule periodic maintenance tasks, such as tightening screws, lubricating hinges, or replacing worn components, to keep your screwdriver organizer in optimal condition. By addressing minor issues proactively, you can prevent larger problems and extend the lifespan of your organizer.
8. Storage Environment: Store your screwdriver organizer in a dry, well-ventilated area away from direct sunlight, extreme temperatures, or moisture, which can degrade materials and affect the organizer’s durability over time. Consider using protective covers or storage containers to shield the organizer from dust and debris when not in use.
By following these maintenance tips, you can ensure that your screwdriver organizer remains in excellent condition, providing reliable tool storage and organization for years to come.
Ensuring safety while working on a screwdriver organizer project is paramount to prevent accidents and injuries. Here’s an in-depth guide to safety precautions for building a screwdriver organizer:
1. Personal Protective Equipment (PPE)
Wear safety glasses or goggles to protect your eyes from flying debris, wood chips, or dust particles generated during cutting, drilling, or sanding. Use work gloves to shield your hands from sharp edges, splinters, and potential injuries while handling tools, materials, or fasteners. If using power tools, wear ear protection, such as earmuffs or earplugs, to reduce the risk of hearing damage from loud noise.
2. Workspace Safety
Prepare a clean, well-lit, and properly ventilated workspace for the project. Clear any clutter, obstructions, or hazards to create a safe working environment. Ensure adequate space around your work area to move freely and safely operate tools and equipment without restrictions. Keep the work area organized and free from tripping hazards, such as loose wires, tools, or materials scattered on the floor.
3. Tool Safety
Familiarize yourself with the proper use and handling of all tools and equipment required for the project. Read and follow the manufacturer’s instructions and safety guidelines for each tool. Ensure that cutting tools, such as saws, drills, or utility knives, are sharp and in good working condition to prevent kickback, binding, or accidents during use.
Use tools for their intended purpose only and avoid improvising or modifying them in unsafe ways that could compromise their functionality or safety.
4. Material Handling
Select high-quality, sturdy materials for constructing the screwdriver organizer. Choose materials that are appropriate for the intended use and capable of supporting the weight of the screwdrivers without bending or breaking. Inspect all materials for defects, damage, or irregularities before use. Discard any materials that appear compromised or unsafe to prevent accidents or structural failures during assembly or use.
5. Cutting and Drilling Safety
Exercise caution when using cutting tools, such as saws or drills, to trim or shape materials. Keep your hands and fingers clear of the cutting path and use guides or clamps to secure workpieces firmly in place. Always cut or drill away from your body and maintain a stable footing to prevent slips or falls. Use appropriate cutting techniques and apply consistent pressure to achieve clean and accurate cuts or holes.
6. Fastening Safety
Take care when fastening components together using screws, nails, or adhesives. Use the correct size and type of fasteners recommended for the materials and application to ensure secure and reliable connections. Use clamps, vices, or other holding devices to stabilize workpieces during assembly to prevent movement or shifting that could cause misalignment or accidents.
7. Electrical Safety
If using power tools or equipment, such as drills or sanders, follow electrical safety practices to prevent shocks or electrocution. Inspect power cords, plugs, and outlets for any signs of damage or wear, and replace them if necessary. Use ground fault circuit interrupters (GFCIs) for added protection when working with electrical tools in wet or damp environments to minimize the risk of electrical hazards.
8. Cleanup and Maintenance
After completing the screwdriver organizer project, clean up your workspace and properly store all tools, materials, and equipment. Dispose of any waste or debris in designated containers and sweep or vacuum the area to remove dust and particles.
Regularly inspect the screwdriver organizer for signs of wear, damage, or instability, and perform any necessary repairs or maintenance to keep it in safe and functional condition for long-term use.
By following these safety precautions, you can minimize the risk of accidents and injuries while building a screwdriver organizer, ensuring a safe and successful DIY project.
The Wrap Up
Building a screwdriver organizer is not just a practical DIY project but also an opportunity to enhance organization, efficiency, and safety in your workspace. By following the steps outlined in this guide and implementing the safety precautions and tips provided, you can create a custom organizer tailored to your needs while ensuring a safe and enjoyable woodworking experience.
A well-organized workspace not only boosts productivity but also minimizes the risk of accidents and injuries by reducing clutter, improving tool accessibility, and enhancing overall workflow efficiency. With the right tools, materials, and techniques, you can construct a durable and functional screwdriver organizer that will serve you well for years to come.
Remember to prioritize safety at all times during the construction process. Wear appropriate personal protective equipment, such as safety glasses, gloves, and ear protection, and follow proper handling procedures for all tools and equipment. Take your time, work methodically, and double-check measurements and cuts to avoid mistakes that could compromise the integrity of the organizer or result in injury.
Once your screwdriver organizer is complete, take pride in your accomplishment and enjoy the benefits of a well-organized workspace. With your tools neatly arranged and easily accessible, you’ll be able to tackle projects with confidence and efficiency, knowing that everything you need is right at your fingertips.
Frequently Asked Questions
1. Can you customize the size and design of the screwdriver organizer to fit your specific needs?
Yes, absolutely! One of the advantages of building your own screwdriver organizer is the ability to customize it according to your preferences and workspace requirements. You can adjust the dimensions, layout, and features of the organizer to accommodate your collection of screwdrivers and other tools.
2. What type of wood is best for building a screwdriver organizer?
The choice of wood depends on factors such as durability, aesthetics, and budget. Hardwoods like oak, maple, or birch are popular choices due to their strength and attractive grain patterns. However, softer woods like pine or cedar may also be suitable, especially for beginners or those on a budget.
3. Do you need to finish or seal the wood after building the screwdriver organizer?
Applying a finish or sealer to the wood of your screwdriver organizer is an optional but beneficial step in the construction process. A finish can bring out the natural beauty of the wood, enhancing its grain and colour. It adds a professional touch to your project, giving it a polished and refined look that enhances the overall aesthetic appeal of your screwdriver organizer.
Wood is susceptible to damage from moisture, spills, and stains, which can lead to warping, discolouration, or deterioration over time. A finish or sealer creates a protective barrier that seals the pores of the wood, preventing moisture penetration and reducing the risk of damage from spills or stains.
4. Can you add additional features to the screwdriver organizer, such as magnetic strips or storage compartments?
Absolutely! Feel free to customize the screwdriver organizer with additional features that suit your needs. Magnetic strips can be added to hold metal tools securely in place, while storage compartments or drawers can provide convenient storage for small parts, accessories, or other tools.
5. How can you ensure that the screwdriver organizer is securely mounted to your workbench or wall?
Depending on the design of your organizer, you may choose to mount it directly to your workbench or wall using screws, brackets, or mounting hardware. Make sure to use appropriate fasteners and anchors suitable for the mounting surface and weight of the organizer to ensure a secure and stable installation.
6. What should you do if you encounter difficulties or challenges during the construction process?
Don’t hesitate to seek help or advice if you encounter difficulties or challenges while building the screwdriver organizer. Reach out to experienced woodworkers, consult online resources and tutorials, or consider taking a woodworking class to improve your skills and overcome obstacles effectively. Remember, practice makes perfect, and every project is an opportunity to learn and grow as a woodworker.
Building a screwdriver organizer is a rewarding and practical woodworking project that can enhance organization, efficiency, and safety in your workspace. With careful planning, attention to detail, and a commitment to safety, you can create a custom organizer that meets your specific needs and complements your woodworking skills.


