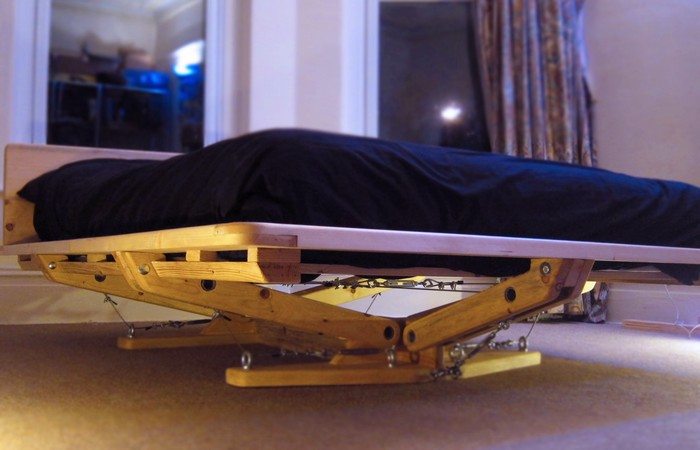
They are a novel twist to an age-old basic design idea – and they look absolutely fantastic. Floating beds are an eye-catching focal point in any bedroom. Most often associated with modern interior design, they can be a fresh addition to your home, no matter what your style.
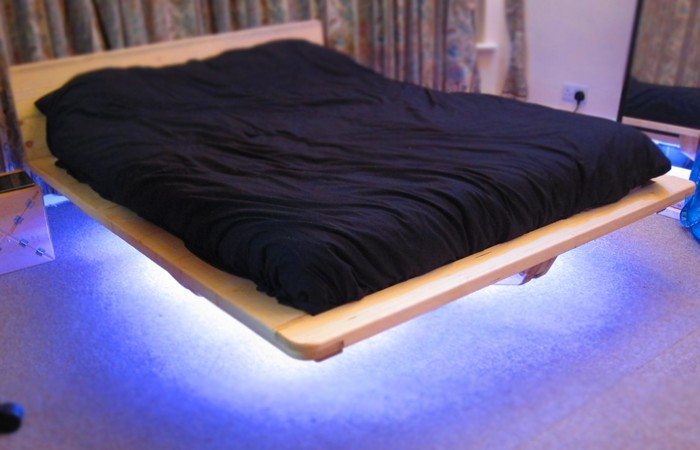
These beds are a design innovation on the classic platform-type bed, most often with added underlighting. The idea is to make it seem as if the bed is floating.
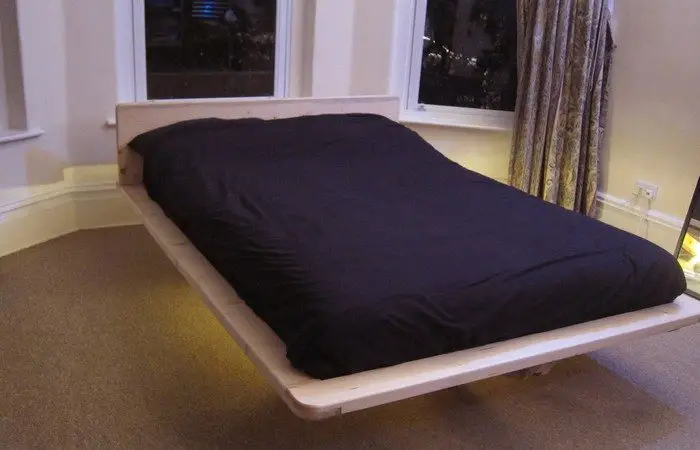
But it isn’t just a ‘cool’ furniture item for the bedroom! It is also a bed that can make your room appear more spacious since it doesn’t have the standard four legs at the corners or a solid block of drawers under it. Installing LED strip lighting also adds to making the room look less cramped (and makes your DIY bed even cooler). :)

Want to know more about this awesome floating bed? Keep reading for the step-by-step tutorial!
Click on any image to start the lightbox display. Use your Esc key to close the lightbox.![]()

Building a Floating Bed
Materials
- 7 x 2400mm Scaffold Board
- 1 x 1800mm Scaffold Board
- 69x18mm Whitewood Timber (for the slats)
- Wire Rope
- 8 x Eye Bolts
- 9 x Turnbuckles
- Lots of Wire Rope Grips and Thimbles
- Electrical Tape
- 8 x M10 30mm Bolts
- 10 x M10 100mm Bolts/Nuts
- 4 x M10 130mm Bolts/Nuts
- Wood Screws
- Wood Glue
- Oil/Stain/Varnish
Tools
- Saws (table/mitre/circular/jigsaw/hand)
- Router (with various bits)
- Drill (with various bits and holesaw cutters)
- Sander
- Chisels
- Screwdrivers
- Hammers
- Wire Rope Cutters and Pliers
- Socket Set/Spanners
- Clamps
- Measuring Tapes
- Squares
- Spirit Level
Instructions
Design: I started with this idea of creating a bed that appeared to float from certain angles. After sometime sketching out different concepts on how this could be achieved, I moved into CAD to detail the design. From this CAD model I then created a series of drawing for each component that I would produce from the scaffolding boards of my floating bed. The dimension of standard scaff boards were kept in mind and used to constrain the dimensions of parts.
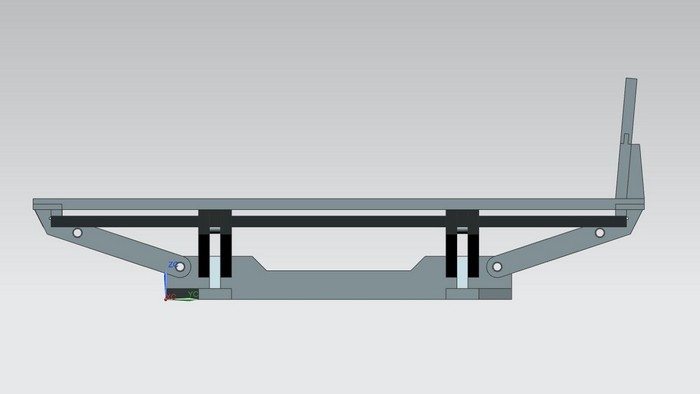
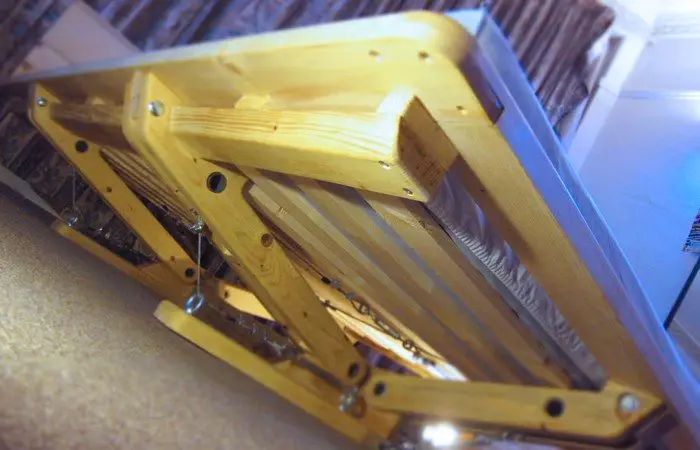
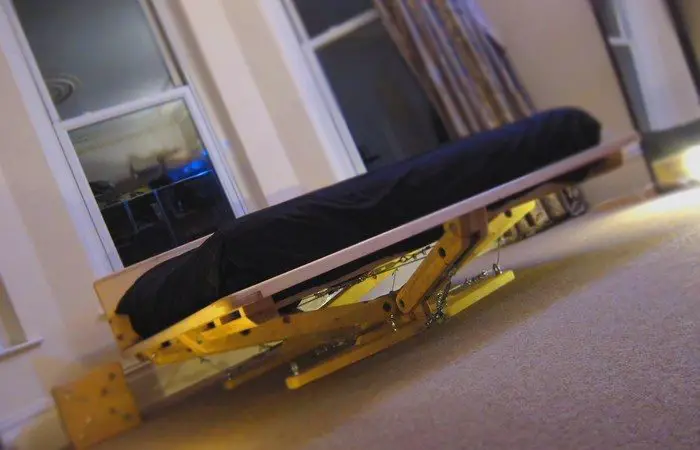
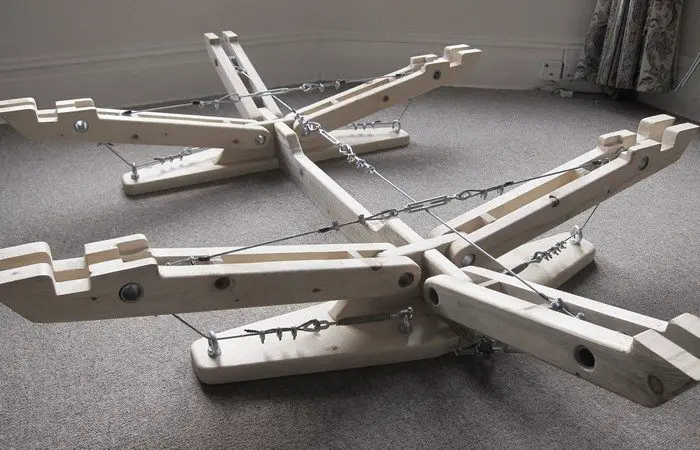
The arms are pin jointed rather than fixed to reduce the stresses in that area of the floating bed design. Using a pin joint means they are essentially free to rotate and so are free of moment stresses when you load the end of the arms, now the joint mainly has to deal with compression loading. To prevent the arms from rotating, cable is rigged between the opposite arms which goes into tension when the arms are loaded. And with just 4mm cable having a min breaking load of ~1000kg the structure should remain solid. Think of a boom/tower crane – same principles. If fixed at the base the arms would want to bend!
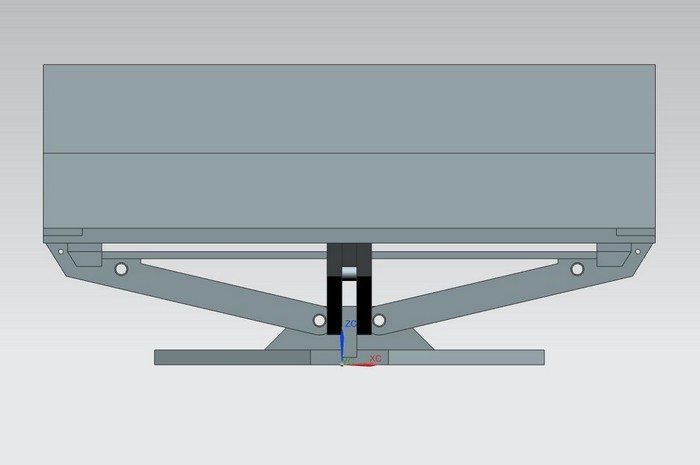
The CAD design is almost the same as what I ended up building but as you can expect there were minor changes that needed to be made along the way.. I’ve not had time to update the CAD floating bed model, but if you choose to use my drawings they’ll be a good start.
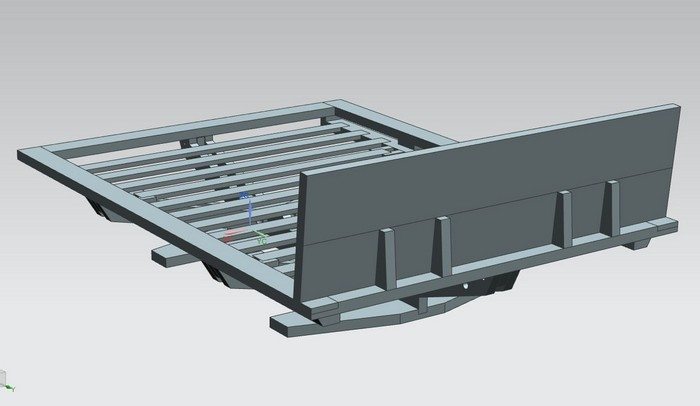
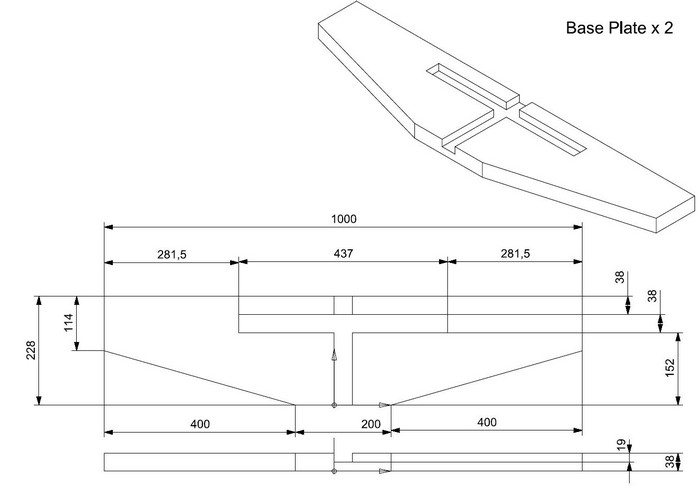
Shown is one of the floating bed drawings I created, the rest can be downloaded in pdf. format here:

With the design sorted, it was time to start building! I’ve given a summary of the steps I took and the photos should help, but essential you just need to create the parts specified in the drawings.
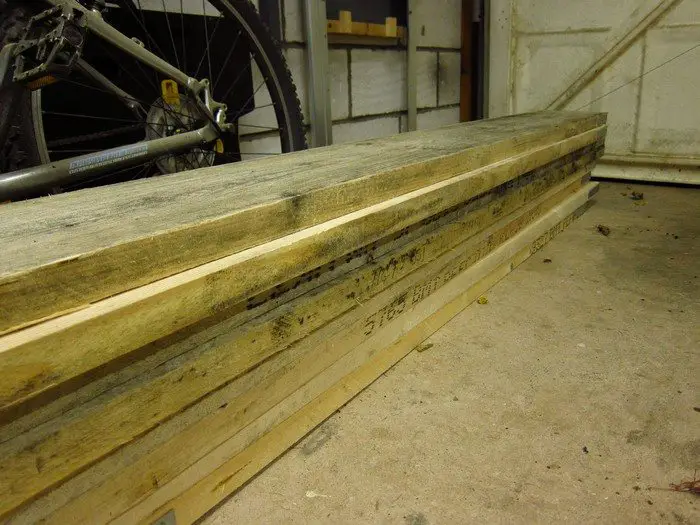
Prep: The floating bed will be made from 8 scaffolding planks (7 – 2400mm and 1 – 1800mm long). You can regularly pick them up cheap from reclamation/wood recycling yards, which helps keep the costs down.
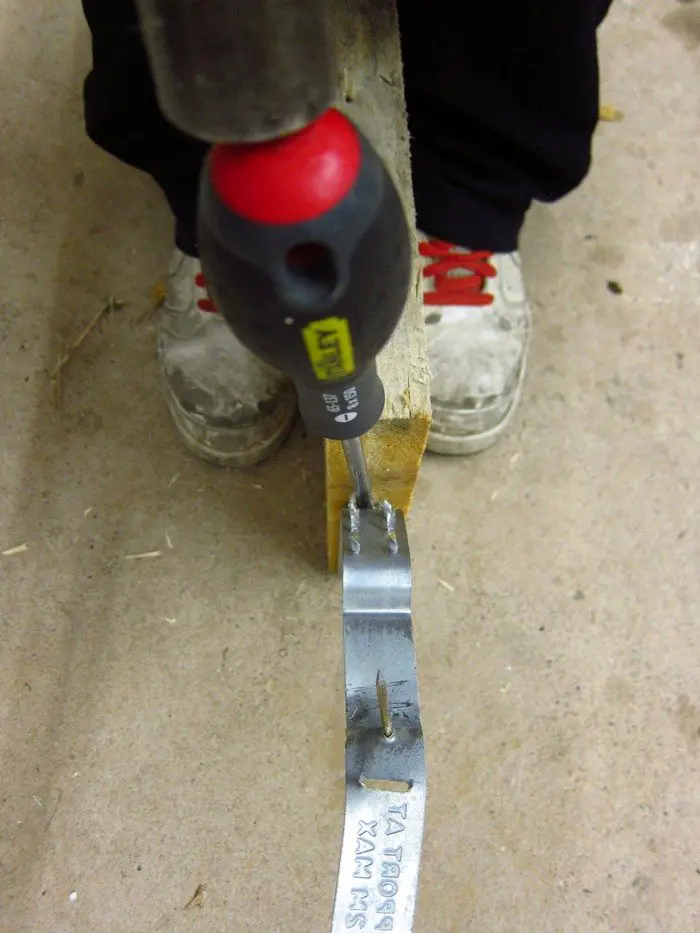
I started by prepping the scaffolding boards; removing the metalwork from the ends and giving them a bit of a tidy up.

To make them easier to work with, I next cut them down to the lengths of the individual components. You can see from the included image how the 8 planks split out into the parts.
Base: The floating bed base consists of 5 parts that you need to cut out; 2x base plates, 2x base supports and the spine.
Base Plate
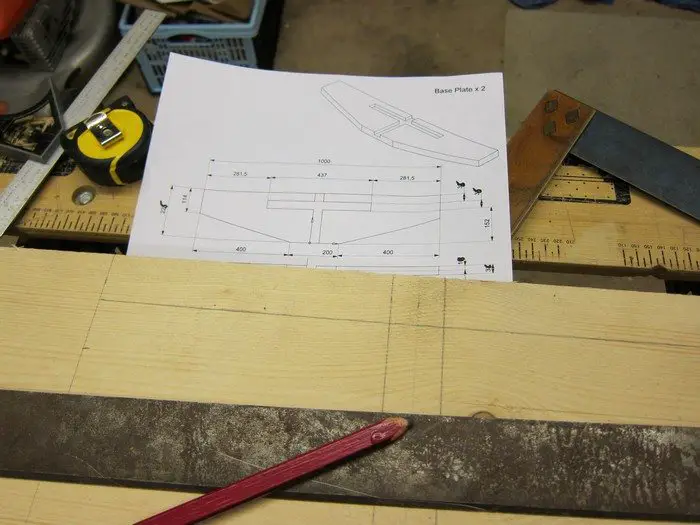 Mark out the part using the dimensions from the drawing
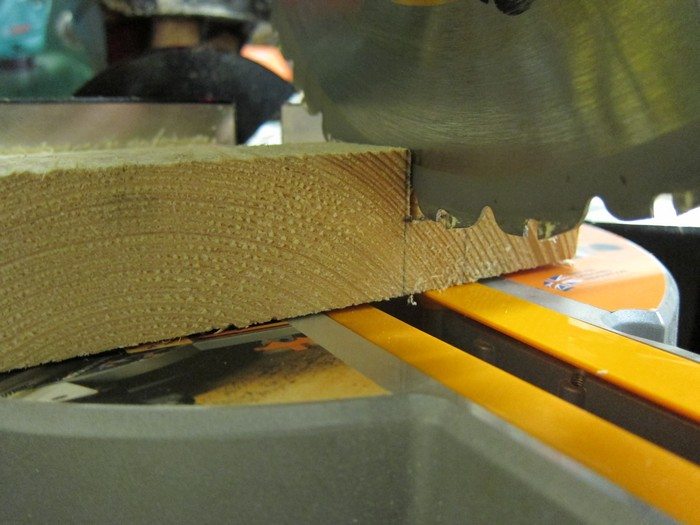
For the recess across the width of the part, I first used a mitre saw with the depth stop engaged (set slightly short of the required depth) and made several cuts to remove the majority of the material. I then used a router to finish up the cut to the correct depth.
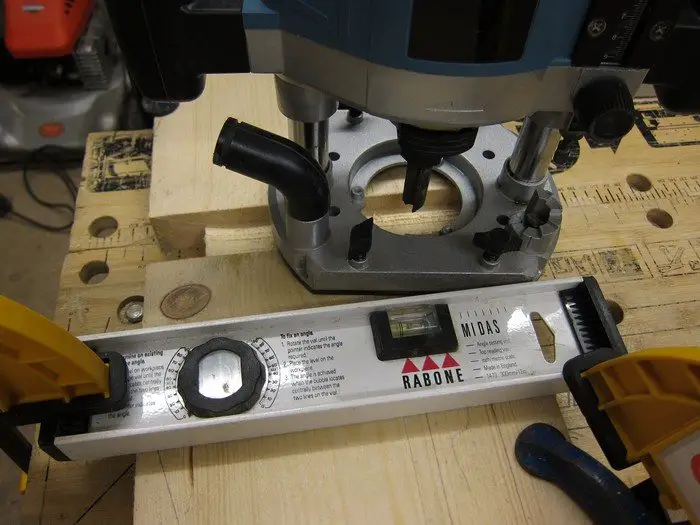
For the other recess cut I had to use the router for the full cut. This meant having to do multiple passes, each taking off slightly more material. The corners were squared off with a chisel.
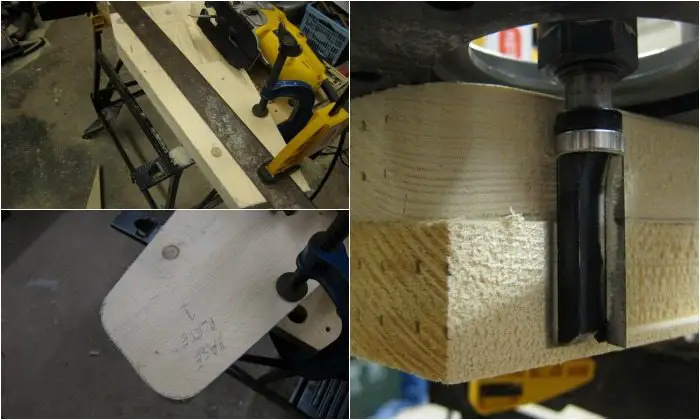
I then used a jigsaw to round the ends of the 1st base plate for my floating bed. And then used a router with a profiling bit to copy it on the 2nd one.
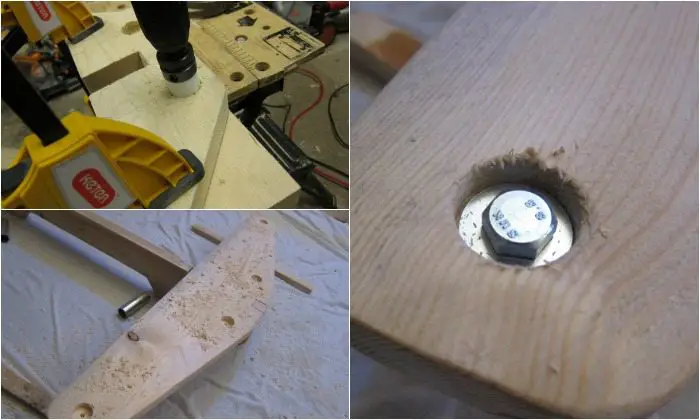
Holes for the eye bolts were then drilled with the underside recessed to allow the nut to sit sub-flush.
Continued Page 2…