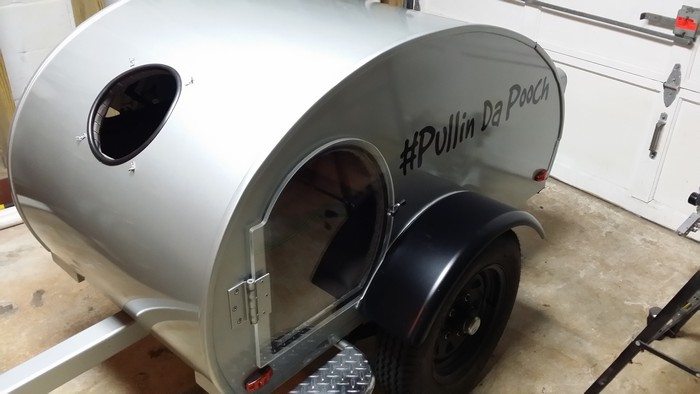
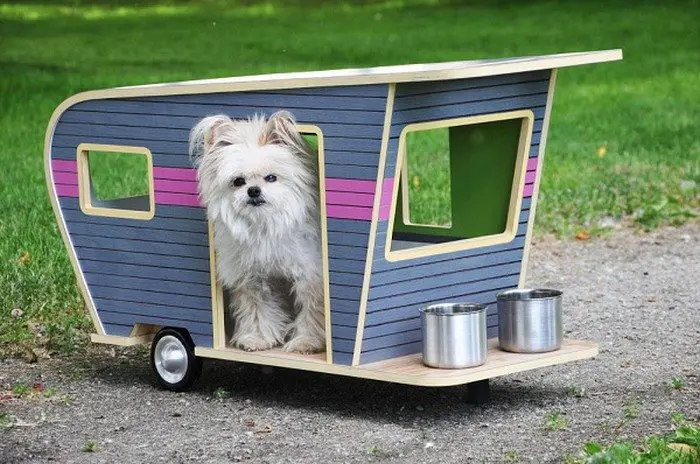
Want to take your pet dog with you on your outdoor adventures? If you usually travel by motorcycle, then you can build your dog a mini pet camper like this DIY-er’s project!
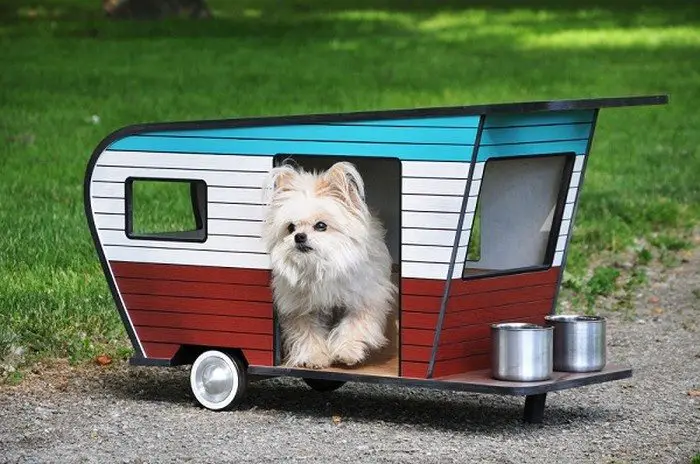
This DIY mini pet camper is a great way to bring your furry friend with you for some outdoor fun (or for taking him/her to the vet). It’s well-built, comfortable for the dog, and safe!
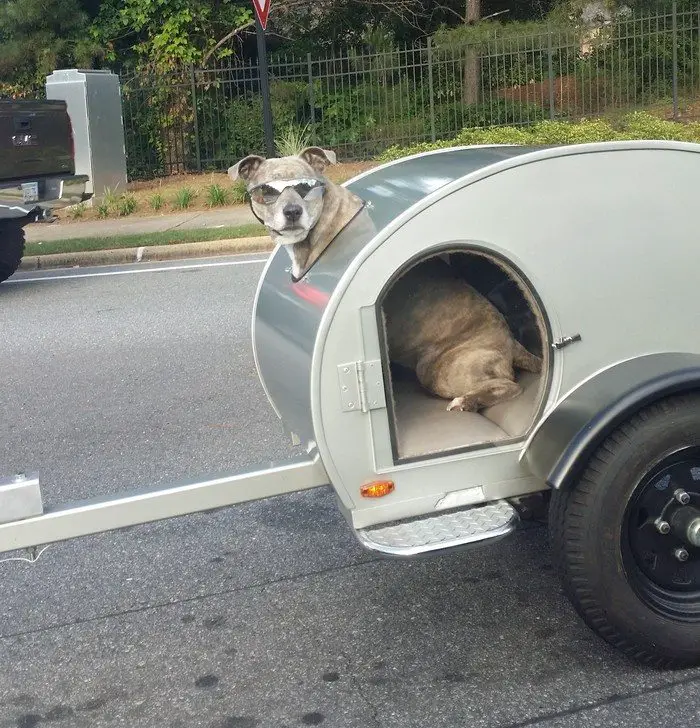
The owner’s motorcycle is equipped with a temperature gauge that shows both the interior and the outside temperature. He also installed a camera at the back of his motorcycle so that he can check on his pet now and then.
While this DIY project requires a CNC router machine and some really hard work, it’s a project worth doing for our lovely furbabies.
Do you have a pet dog who you think will love this idea? :)
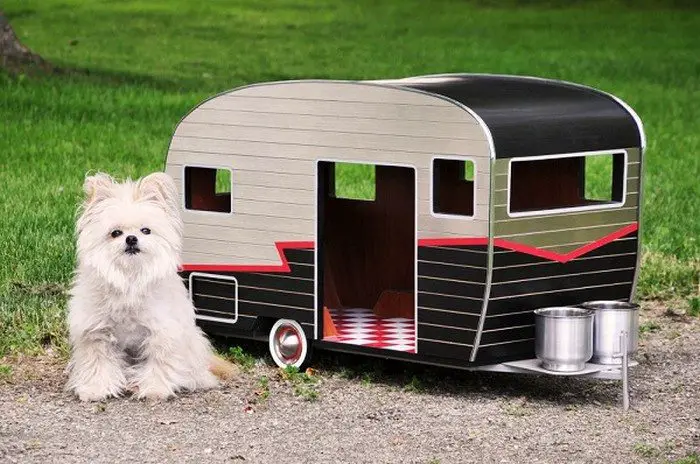
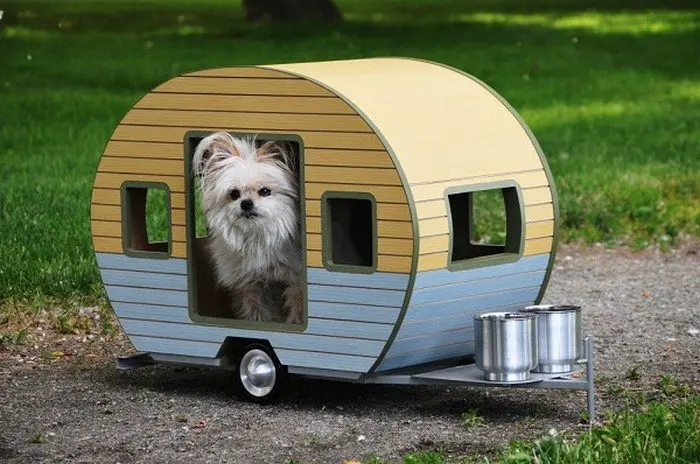
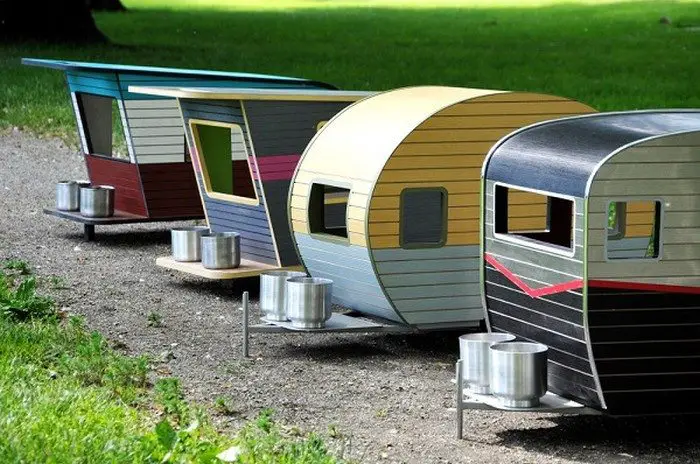
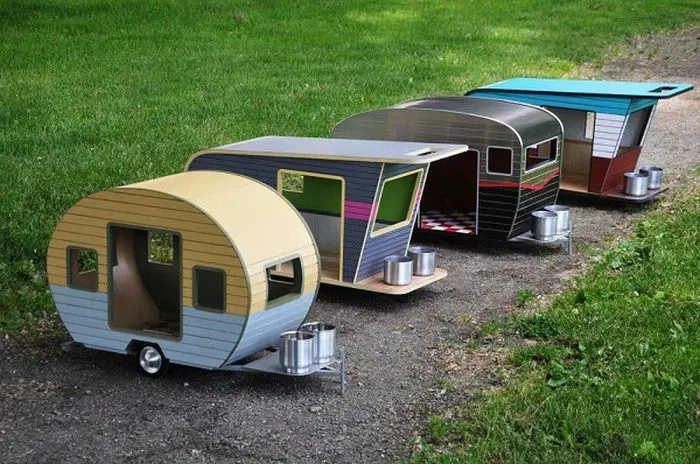
See our album below for the mini dog camper houses which your pet might also like!
Contents
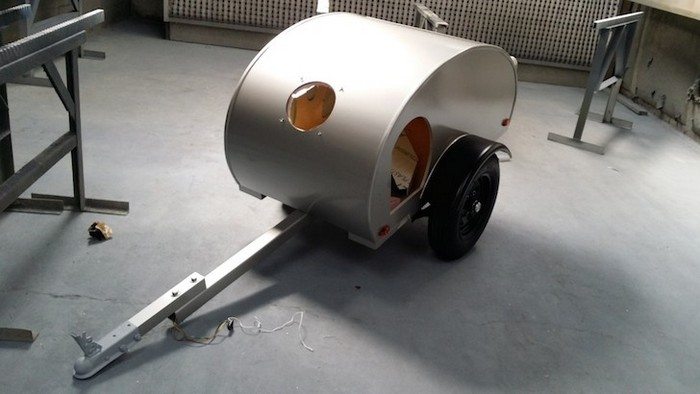
Building a Mini Pet Camper
Materials
- 1/2″ Birch Wood
- 3/4″ Plywood
- 3/8″ Plywood
- 2×6 Timber
- Wood Glue
- Wood Screws
- Axle and Wheels
- Nuts and Bolts
- Brakes
- Signal Lights
- LEXAN Rain Cover
- Spray Foam
- 2″ Foam
- Vinyl Cover
- Paint
- Automotive Carpet
- Spray Adhesive
Tools
- Measuring Tape
- CNC Router
- Staple Gun
- Cordless Drill
- Jigsaw
Instruction
Step 1: Design Planning
- Sketch your mini dog camper design, considering the size of your pet and the intended use (e.g., travel or outdoor adventures). Include dimensions for the base, walls, roof, door, and internal compartments.
Step 2: Cutting the Materials
- Use the CNC router to cut the 1/2″ birch wood and plywood pieces according to your design. The 3/4″ plywood will serve as the base for added strength, while the 1/2″ and 3/8″ plywood will be used for the walls and roof.
- Cut the 2×6 timber to create the frame for the camper, ensuring it fits the base dimensions.
Step 3: Assembling the Frame
- Assemble the timber frame using wood screws and glue. This frame will support the camper’s walls and roof.
- Attach the plywood base to the frame with wood screws and wood glue for a secure foundation.
Step 4: Walls and Roof
- Attach the cut pieces for the walls to the frame using wood screws and glue. Ensure that there are openings for the door and windows.
- Fit the roof pieces together and secure them to the top of the walls, creating a snug fit.
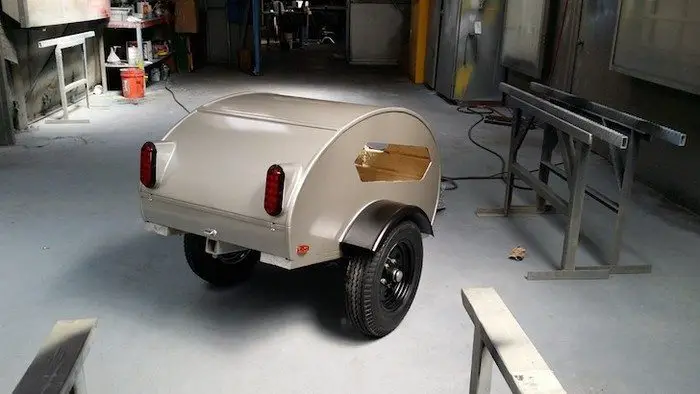
Step 5: Sanding and Painting
- Sand the exterior and interior surfaces to remove any rough edges or splinters. Apply a coat of paint to protect the wood and give your camper a personalized look.
Step 6: Installing the Door and Windows
- Cut out the door and window spaces if you haven’t already. Use the jigsaw for precise cuts.
- Install the LEXAN rain cover as windows to allow light in and keep the elements out. Secure them in place with wood screws and a waterproof sealant.
- Hang the door using hinges and secure it with a latch.
Step 7: Insulation and Interior Lining
- Spray foam insulation inside the walls to warm your pet during cooler travels.
- Line the interior walls and floor with automotive carpet for comfort, using spray adhesive to secure it in place.
- Install 2″ foam padding for the sleeping area, covering it with vinyl for easy cleaning.
Step 8: Adding Wheels and Axle
- Attach the axle and wheels to the bottom of the camper. Ensure the axle is centred and securely fastened with nuts and bolts.
- Install brakes and signal lights according to your vehicle’s towing requirements, ensuring safety during transport.
Step 9: Final Touches
- Add any final decorations or functional elements, like internal compartments for storage or external hooks for leashes.
- Test all lights and brakes to ensure they are working correctly.
Safety Features for Pet Campers
Travelling with pets introduces unique challenges and responsibilities, especially when bringing them along in a mini pet camper. You want your small friend to always be safe throughout your road adventures.
Below, we explore essential safety features that should be integrated into every mini pet camper to provide peace of mind and a secure environment for pets on the move.
Ventilation System
Adequate airflow is crucial in a mini pet camper to maintain a comfortable and safe temperature for pets. Installing adjustable ventilation openings or a small, battery-operated fan can help circulate air, reducing the risk of overheating and ensuring your pet can breathe easily during their travels.
Secure Locking Mechanisms
To prevent accidental escapes or the door swinging open while on the move, secure locking mechanisms are a must-have feature for any mini pet camper. You want the best locks to shut the door, including ones sold by Yale or similar brands.
Non-toxic Materials
The choice of materials in the construction of a mini pet camper plays a significant role in ensuring pet safety. Using non-toxic, pet-safe paints and finishes is essential to avoid potential health risks if pets chew or lick the surfaces of their camper.
Smooth Interior Surfaces
To prevent injuries, the interior of the mini pet camper should be free from sharp edges or rough surfaces. Smooth finishes and rounded corners can help protect pets from scratches and bumps as they move around inside their cozy retreat.
Emergency Exit
In the unlikely event of an emergency, having an accessible emergency exit in the mini pet camper can be a lifesaver. This feature ensures that pets can be quickly and safely removed from the camper.
Stable and Secure Attachment
Ensuring the mini pet camper is stably and securely attached to the vehicle is crucial for safety during travel. A reliable attachment system prevents the camper from detaching or wobbling, offering a smooth ride for the pet.
Temperature Regulation
Considering temperature regulation features, such as insulated walls and temperature monitoring devices, can help keep the mini pet camper at a comfortable climate regardless of external weather conditions. This is particularly important for protecting pets from extreme temperatures.
Interior Lighting
Adequate interior lighting within the mini pet camper comforts pets during nighttime travel. It allows owners to check on their pets easily without opening the door and potentially letting them escape.
Reflective Markings
Adding reflective markings or lights to the exterior of the mini pet camper enhances visibility to other drivers, especially during evening or early morning travels, contributing to overall safety on the road.
Incorporating these safety features into the design and construction of a mini pet camper ensures that our beloved pets enjoy their adventures as much as we do, all while staying safe and comfortable.
Click on any image to start the lightbox display. Use your Esc key to close the lightbox.![]()


Maintenance and Care for Your Mini Pet Camper
Maintaining and caring for your mini pet camper is essential to ensure its longevity and to provide a safe, clean environment for your pet during your adventures together. Regular maintenance not only preserves the aesthetic appeal of the camper but also prevents minor issues from becoming major problems down the line.
Here’s a comprehensive guide to keeping your mini pet camper in shape.
Regular Cleaning
A clean mini pet camper isn’t just about looks; it’s about ensuring a healthy and comfortable environment for your furry companion. Tackle the interior with cleaners that are safe for pets, targeting odors and bacteria to keep the space fresh without compromising your pet’s health. When it comes to the exterior, a soft wash maintains its appearance and safeguards the camper’s finish against weathering.
Check and Repair Seals
The seals on your mini pet camper’s windows and doors are unsung heroes, keeping moisture out and warmth in. Monitoring these seals for wear or damage that could let in water or cold air is essential. Promptly repairing or replacing compromised seals is critical to maintaining a cozy and dry interior for your pet’s adventures.
Ventilation System Maintenance
A well-ventilated mini pet camper is essential for your pet’s comfort and safety, providing a steady fresh air flow. Make it a routine to inspect and clean the vents and fans, ensuring they’re free from dust or debris that could hinder their operation. Properly maintained ventilation keeps the camper fresh and lets your pet breathe easily, no matter where your travels take you.
Wheel and Axle Inspection
The mobility of your mini pet camper hinges on the health of its wheels and axle system. It’s crucial to keep them in prime condition for the road. Checking the air pressure of your pet camper tires should be second nature before taking off, helping you know if the wheel and axle are in working condition.
Don’t forget about the axle; a little lubrication goes a long way in ensuring smooth travel. These steps are your first defence against unexpected issues interrupting your adventures.
Brake and Signal Light Checks
Your mini pet camper’s safety features, like brakes and signal lights, are vital for secure transport. You want your mini camper to stop immediately when you step on the brakes to keep you and your furry friend safe. Regularly test these systems, making a special note to do so before any trip. This ensures you remain visible to other drivers and can safely stop or turn whenever necessary.
Interior Comfort Updates
The inside of your mini pet camper isn’t just another space; it’s your pet’s home away from home. Regularly assess the bedding, keeping it clean and comfortable for your furry friend. Toys and other comfort items should also be checked for wear and tear, replacing anything that’s no longer safe or enjoyable. Creating a cozy interior makes every journey more enjoyable for your pet.
Protecting Against Pests
No one likes uninvited guests, especially of the pest variety, which can threaten your pet’s health. Keep your mini pet camper free from these intruders by conducting routine checks for any signs of infestation. Employ natural repellents and maintain a strict cleanliness regime, especially ensuring there’s no leftover food to attract pests. These preventive measures help ensure your mini pet camper remains a safe and pleasant space for your pet.
Seasonal Preparation
If you’re using your mini pet camper in various climates, prepare it for the changing seasons. This might include adding extra insulation for cold weather or ensuring the camper is well-ventilated and shaded for hot conditions.
Storage and Covering
Store your mini pet camper in a protected area to shield it from the elements when not in use. A cover can also help protect the camper from dust, moisture, and sunlight, extending its life and maintaining its appearance.
Regular maintenance and care of your mini pet camper ensure a pleasant and safe environment for your pet and protect your investment, ensuring many years of happy travels together.
Conclusion
Building a mini pet camper is a fulfilling project that combines creativity with practical skills, resulting in a safe and comfortable travel haven for your beloved pet. By focusing on essential features such as safety, comfort, and maintenance, you ensure that your pet enjoys every adventure as much as you do. Ultimately, a well-crafted mini pet camper strengthens the bond between you and your pet, making every trip an opportunity for new memories together.
We have more ways to improve your pet’s quality of life. Check out our guide on turning a suitcase into a pet bed!


