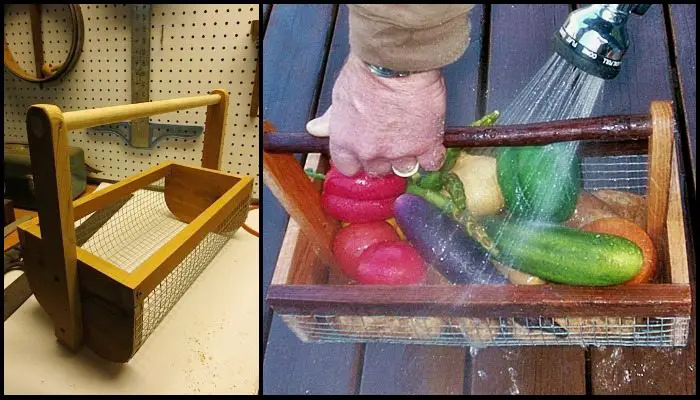
If you are growing various vegetables on your property, then a veggie hod is a necessity among your gardening equipment. And you can easily make one yourself!
A vegetable hod is a simple but very handy gardening item that makes it easier to harvest and bring produce to the kitchen!
You can make a veggie hod using excess timber and wire mesh if you have any from previous DIY projects. Take note that it’s important to use timber like cedar for this project since the purpose of this hod is to easily carry all harvest at once and wash them right in the veggie hod before bringing them inside the house. Some timbers simply won’t stand up to being constantly damp.
Think you need a vegetable hod for your garden? You can do this as your weekend project!
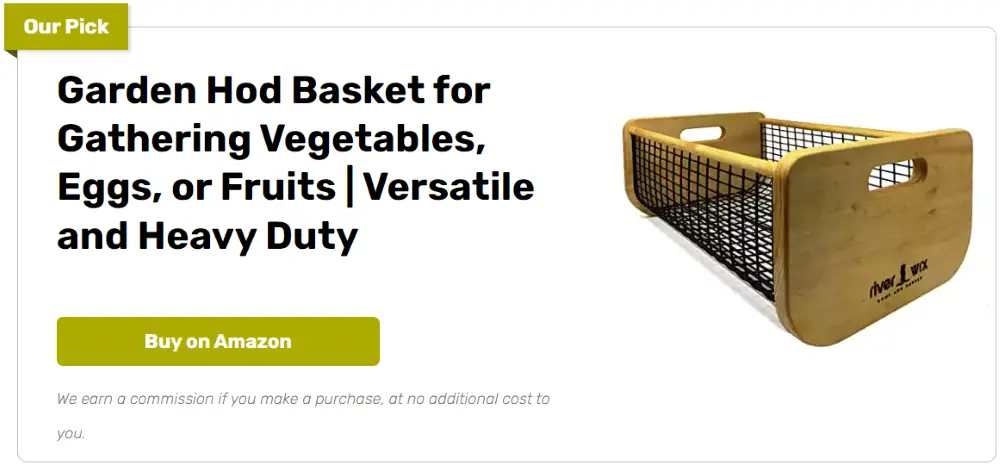
And while you’re at it, why not make a few more to give as gifts to your vegetable-growing friends? Have a look at a few DIY veggie hod samples we’ve collected for your inspiration below. :)
Contents
Crafting a Vegetable Hod
Materials
- 1″X 6″ Cedar 3′ long
- 1/2″ Wire Mesh 16″X 16″
- 3/4″ Dowel
- Carpenters Wood Glue
- Nails
- Staples
- 1 ½” Wood Screws
Tools
- Sander
- Circular Saw
- Jigsaw
- Wire Cutter
- Staple Gun
- Brad Nailer
- Drill
Instructions
Step 1: Cut the Wood
- Measure and Mark: Measure and mark your cedar boards according to the desired dimensions of the hod. You’ll need two pieces for the sides, two for the ends, and one for the handle support.
- Cutting: Using the circular saw, cut the cedar boards to the marked measurements.
Step 2: Assemble the Frame
- Layout: Arrange the side and end pieces to form a rectangular box frame.
- Drilling: Pre-drill holes to prevent the wood from splitting.
- Screwing: Use the wood screws to assemble the frame securely.
Step 3: Sand the Wood
- Sanding: Smooth all edges and surfaces of the wooden frame using the sander to prevent any rough spots that could snag or damage the vegetables.
Step 4: Attach the Wire Mesh
- Cutting Mesh: Measure and cut the wire mesh with wire cutters to fit the bottom and sides of the frame.
- Attaching: Lay the mesh over the frame and secure it with the staple gun. Ensure the mesh is tight and evenly attached.
Step 5: Install the Handle
- Handle Cutting: Use the jigsaw to cut the dowel to the desired length for the handle.
- Attaching Handle: Drill holes at the ends of the handle and corresponding places on the frame. Use nails or screws to secure the handle in place.
Step 6: Final Assembly
- Glue: Apply carpenter’s glue at all joints to strengthen the connection.
- Nailing: Use the brad nailer for additional security on the joints, ensuring everything is tight and aligned.
Step 7: Finishing Touches
- Inspect and Touch-up: Check the entire hod for any sharp edges or loose wires. Use additional sanding or staples as needed.
- Optional Finish: Apply a sealant or wood stain to protect the cedar from weather elements, especially if you’ll use the hod outdoors.
Click on any image to start the lightbox display. Use your Esc key to close the lightbox.![]()
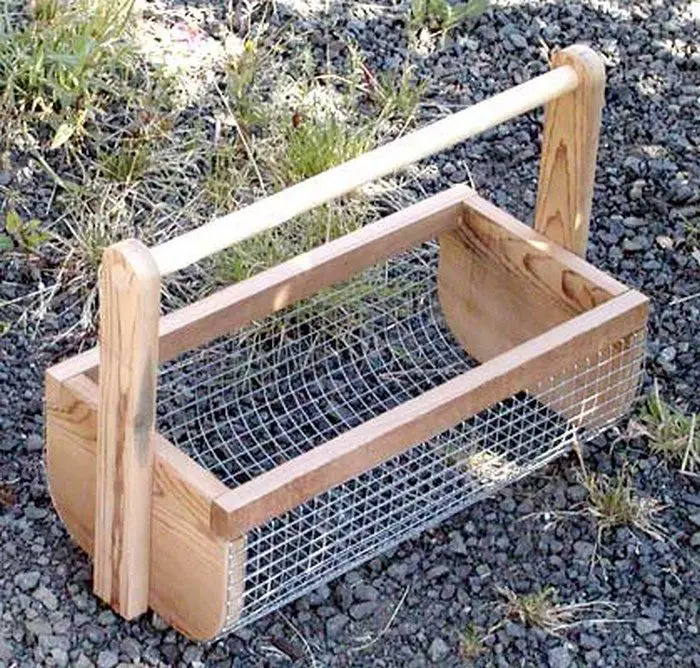
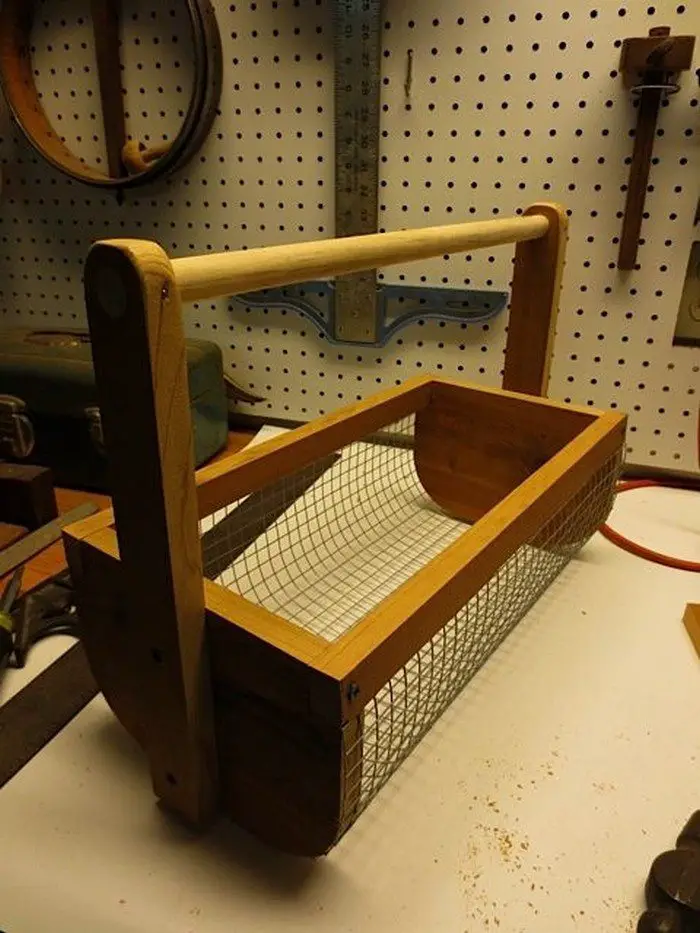
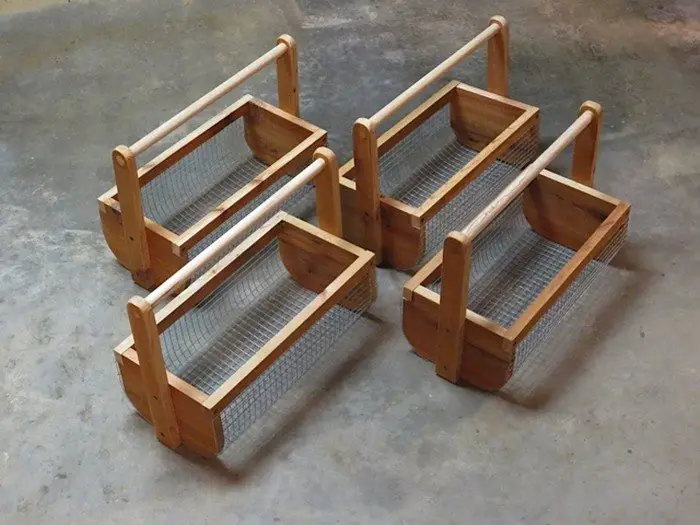
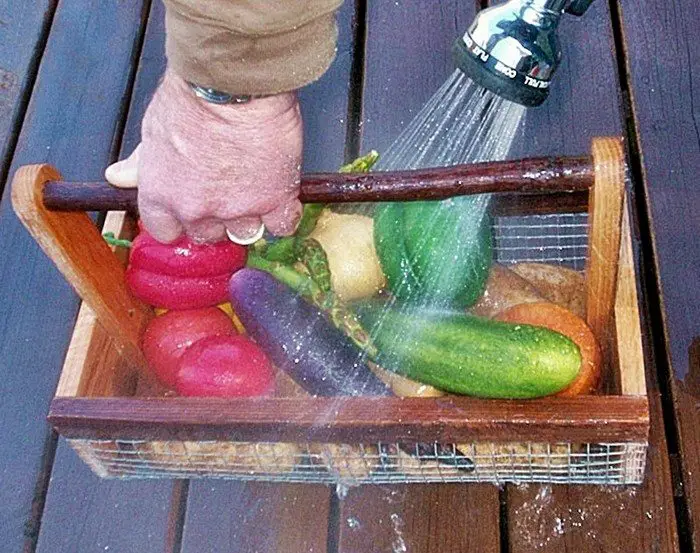
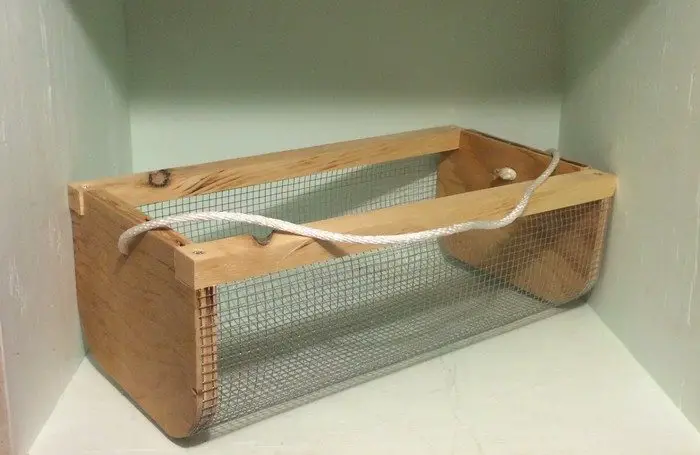
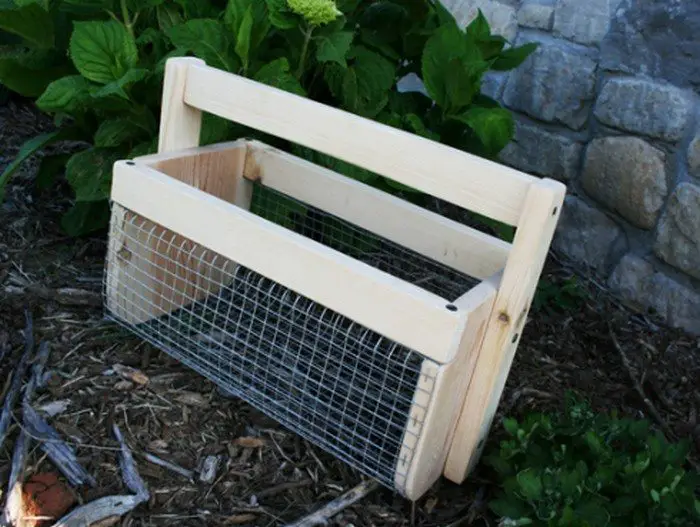
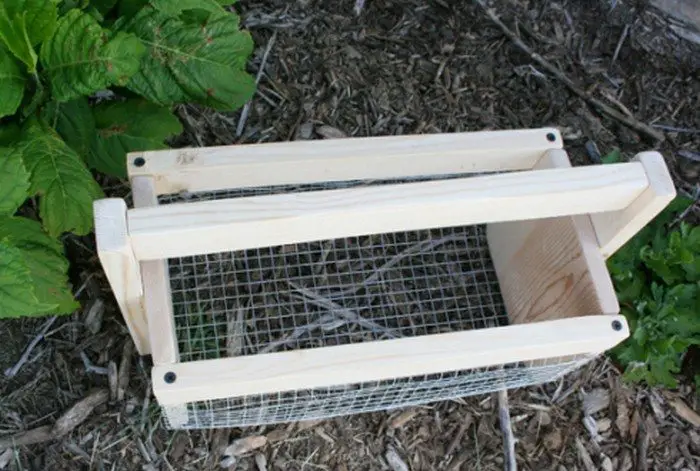
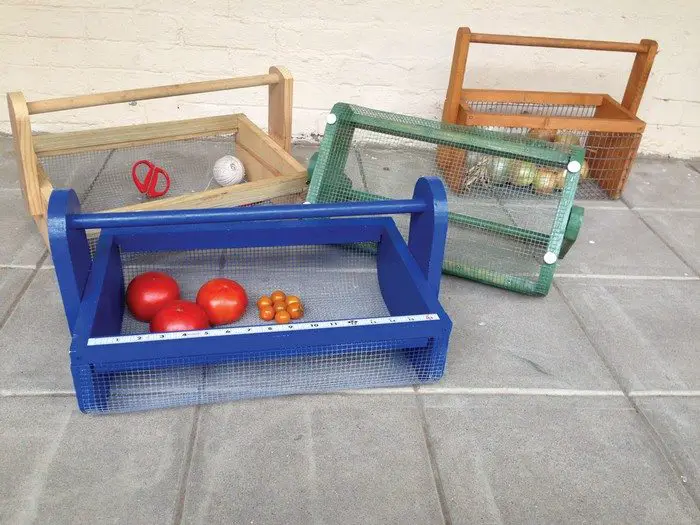
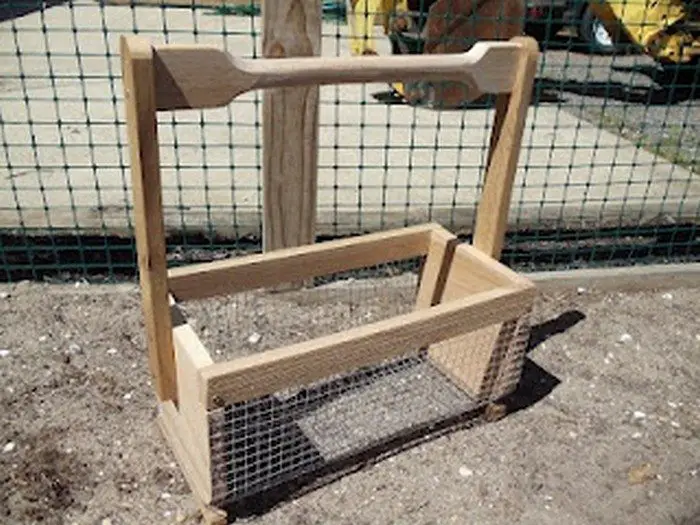
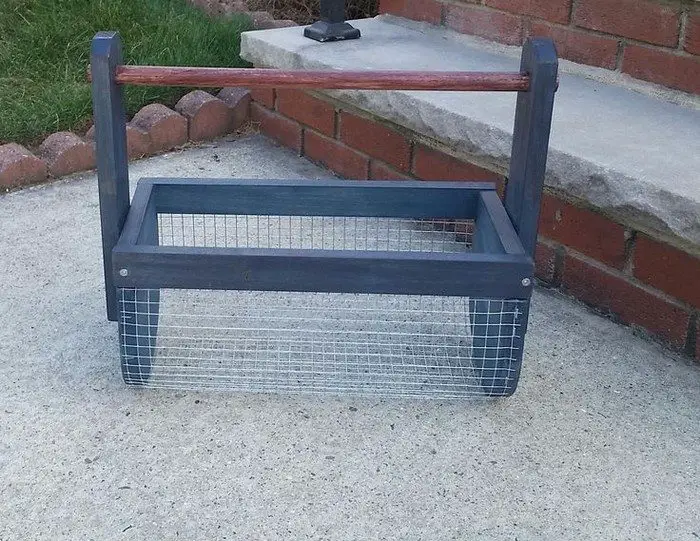

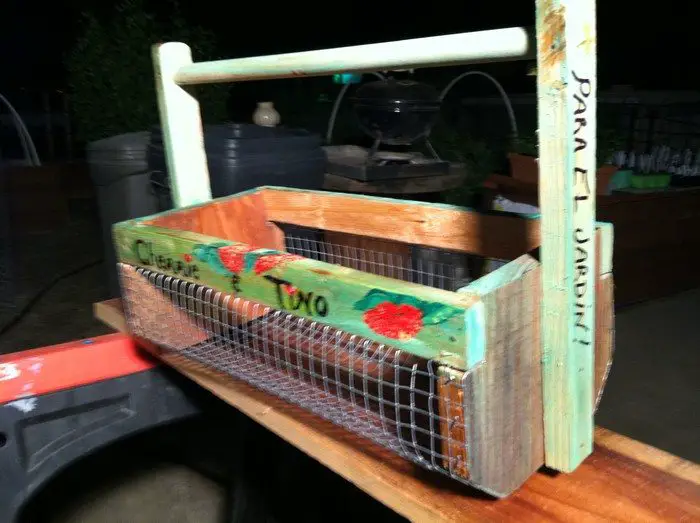
You can get more step-by-step instructions from Nancy over at Nancy on the Home Front…
Customizing Your Vegetable Hod
Creating your own vegetable hod gives you the freedom to personalize this practical garden tool. Whether it’s through aesthetic enhancements or functional tweaks, customizing your hod ensures it not only meets your gardening needs but also reflects your style.
Here are some ideas to help you make your veggie hod truly your own.
Choose Your Color
Painting your vegetable hod can transform its appearance dramatically. Select a color that complements your garden’s theme or choose bright, cheerful colors to make your hod stand out. Using outdoor paint will help protect the wood from moisture and UV rays, ensuring your color stays vibrant longer.
Add Decorative Elements
Consider adding decorative carvings or patterns to the sides of your vegetable hod. This could be anything from simple geometric designs to more elaborate nature-inspired carvings like leaves or vines. These enhancements not only personalize your hod but also can turn it into a display piece when not in use.
Ergonomic Handle Design
Adjust the handle of your vegetable hod for better comfort and efficiency. You might want to wrap the handle with soft grip tape or cloth, especially if you’re carrying heavy loads. Another option is to adjust the handle’s shape or length based on your height and preference, making it easier and more comfortable to carry.
Make It Multi-functional
Customize your vegetable hod to serve multiple purposes. Add dividers inside the hod to keep different types of produce separate. Alternatively, you can create a lid that doubles as a seat or a tool tray, enhancing the functionality of your vegetable hod when you’re out in the garden.
Protective Coatings
To extend the life of your vegetable hod, apply a protective sealant that guards against weather and wear. This not only preserves the look of your hod but also its structural integrity. Choose a sealant that’s safe for food contact if you plan to carry edible harvests in your hod.
Adding personal touches to your hod not only improves its usefulness but also makes it distinctly yours, representing your gardening preferences and sense of style. Your vegetable hod can also be a wonderful gift for other gardeners with these unique embellishments.
Choosing the Right Materials for Your Vegetable Hod
Selecting the right materials is crucial when building a veggie hod, as it directly affects the durability, functionality, and appearance of your gardening tool.
Here’s a guide to help you choose the best materials that will ensure your veggie hod is both practical and long-lasting.
Wood Selection
- Cedar: Cedar is a popular choice due to its natural resistance to rot and pests, making it ideal for outdoor use. Its lightweight nature makes it easy to carry around the garden.
- Pine: Pine is a cost-effective alternative that is also lightweight. However, it requires a protective finish to withstand moisture and decay.
- Hardwoods: Options like oak and maple provide durability and strength. These woods are heavier, which makes them less prone to tipping over but also harder to carry.
Metal Components
- Aluminum: Lightweight and rust-resistant, aluminum is great for the frame. It’s perfect for those who prefer a lighter tool.
- Stainless Steel: Known for its strength and resistance to rust, stainless steel is ideal for the mesh part of the hod. It ensures that your tool can handle heavy loads without bending or breaking.
Fastening Materials
- Wood Screws: These provide a strong hold and are ideal for constructing the frame securely. Choosing stainless steel screws can prevent rust.
- Nails: Suitable for areas that don’t bear much load. Galvanized nails are recommended to prevent rusting.
Adhesives
- Wood Glue: Select a high-quality, waterproof wood glue for additional bonding strength between wooden parts, ensuring stability and longevity.
Finishes
- Sealants: A good sealant will protect your wood from moisture and UV damage. Choose a non-toxic sealant if you plan to use your tool for harvesting edible plants.
- Paints: If you want to add color, use exterior-grade paint that can withstand the elements. Make sure it’s safe for use around plants and food crops.
Building a vegetable hod that not only looks fantastic but also withstands the demands of your garden labor will improve your gardening experience with each use if you carefully choose the appropriate materials for each component.
Versatile Uses of Your Vegetable Hod Beyond Harvesting
A vegetable hod is a fantastic tool for gardeners, designed primarily for harvesting and washing produce. However, its utility doesn’t stop at the garden’s edge. With a bit of creativity, your veggie hod can serve multiple purposes around your home and yard, making it a versatile addition to your everyday tools.
Decorative Display
- Seasonal Decor: Transform your vegetable hod into a stunning centerpiece for seasonal decorations. Fill it with pine cones, gourds, or holiday ornaments during festive seasons.
- Planter: Use your vegetable hod as a rustic planter for flowers or herbs. It’s particularly striking when hung on a porch or placed by your front door, adding a charming, country touch to your home.
Home Organization
- Storage Solution: Employ the hod for storage in the mudroom or entryway. It’s perfect for holding gardening gloves, tools, or even umbrellas.
- Magazine and Book Holder: Place it in your living room or study to keep reading materials in an easily accessible, neatly organized spot.
Outdoor Utility
- Picnic Basket: The sturdy build and handle make the hod an ideal choice for a picnic basket. It’s easy to carry and can hold all your picnic essentials, from food to utensils.
- Tool Carrier: Use it to transport and organize tools while working on larger garden projects or home improvement tasks. Its durable construction ensures it can handle heavier items without issue.
Entertainment Accessories
- Party Server: Line your hod with a decorative napkin or cloth and use it to serve bread, snacks, or drinks at garden parties or barbecues.
- Ice Bucket: Fill your hod with ice to chill beverages during outdoor gatherings. It’s a practical and visually appealing way to keep drinks cold.
By exploring these alternative uses, your vegetable hod becomes more than just a gardening implement; it transforms into a multi-functional tool that enhances your lifestyle, both indoors and out.
Conclusion
Building your own vegetable hod is a rewarding DIY project that enhances your gardening efficiency and adds a personal touch to your outdoor activities. With the right materials and a bit of creativity, it can serve multiple purposes beyond just harvesting, from home decor to practical storage solutions. Embrace the versatility of this classic tool and enjoy the satisfaction of crafting something uniquely useful and enduring.
We have more vegetable storage solutions. Check out our vegetable bin cupboard guide!


