Owning a dog can be expensive, but pampering them doesn’t have to add to that expense! If you want a fabulous bed for your best mate, you only need is to turn old chair into a dog bed.
By repurposing an old chair your dog bed can have a beautiful bed of its own!
It’s an easy repurposing/upcycling project, requiring only some quick modifications and refurbishing.
You can save or even avoid spending at all if you choose to use materials you already have at home. For example, you might have some scrap wood or plywood that you can use for the bed legs or headboard. You can also use your old bed sheet stuffed with old clothes as the mattress.
If your dog is always trying to share your bed (or in our case, the children’s beds), appeal to his or her territorial instinct and give them a fabulous bed of their own at a very low cost?
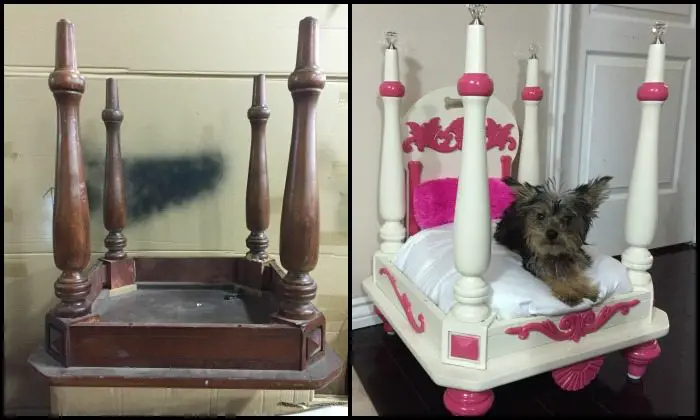
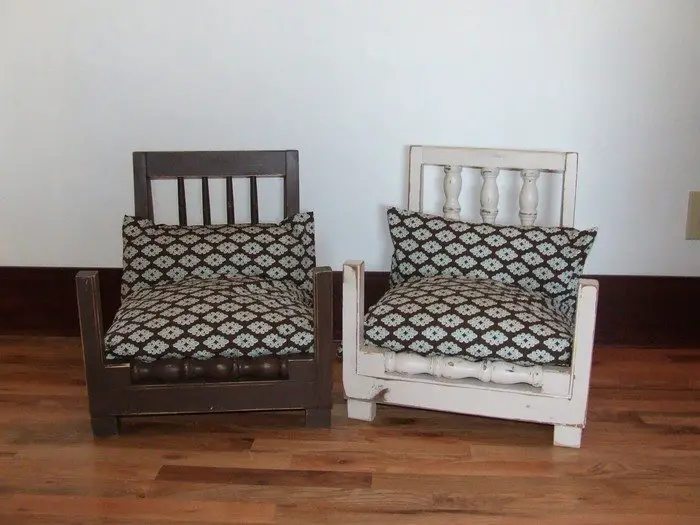
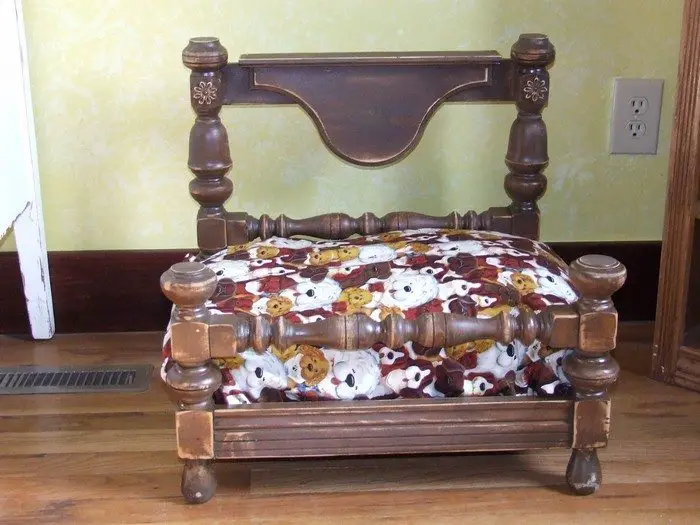
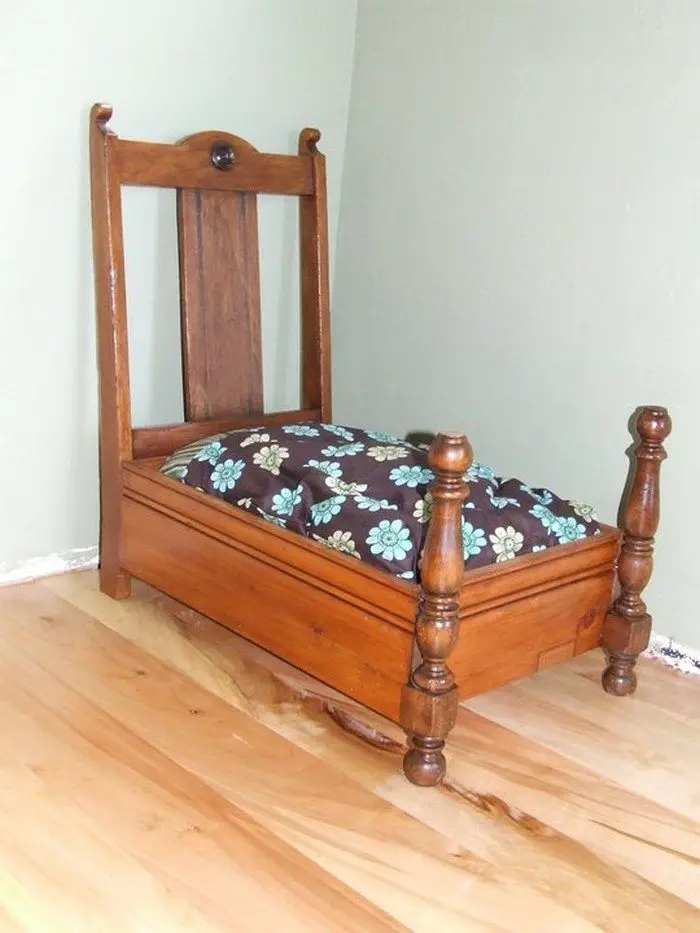
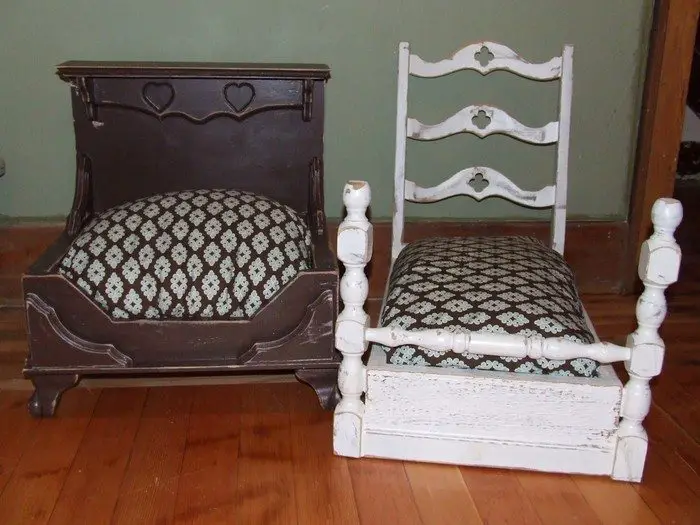
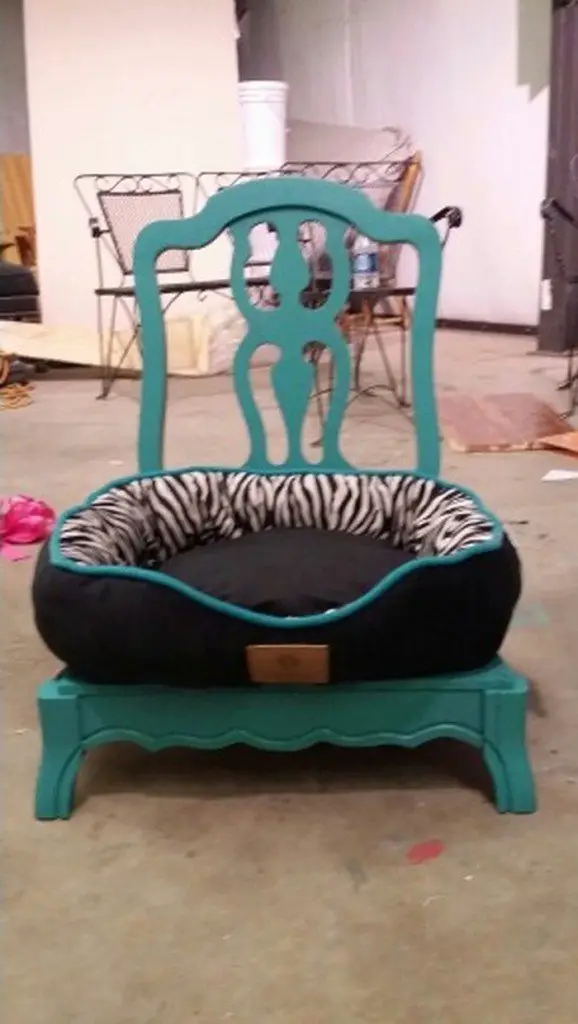
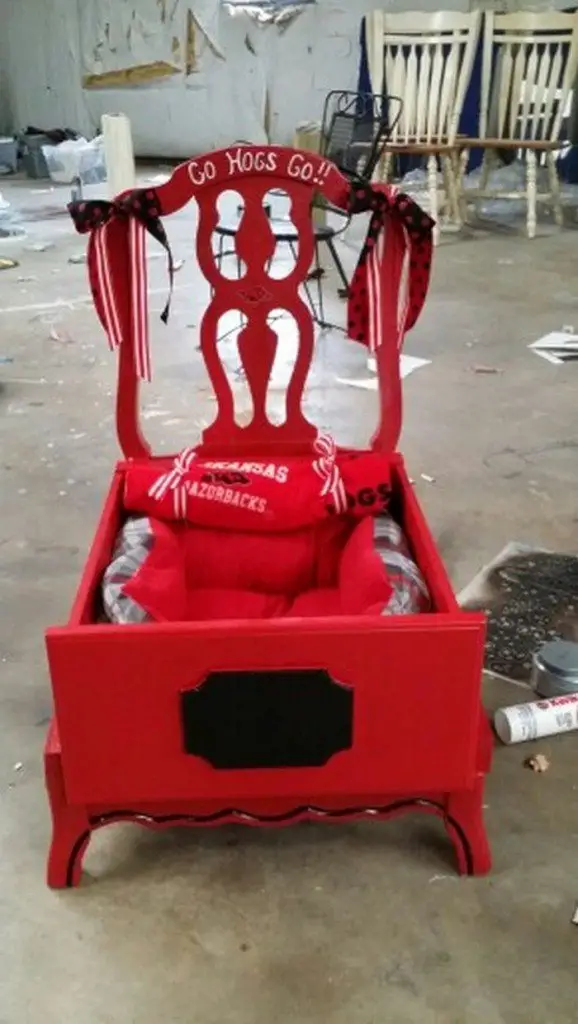
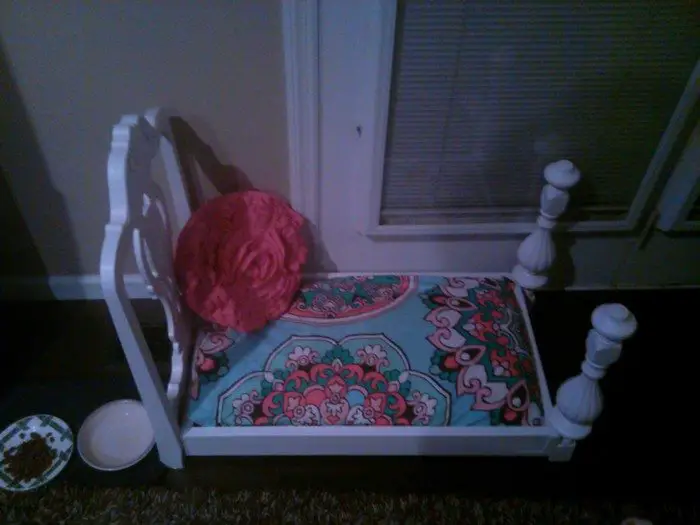
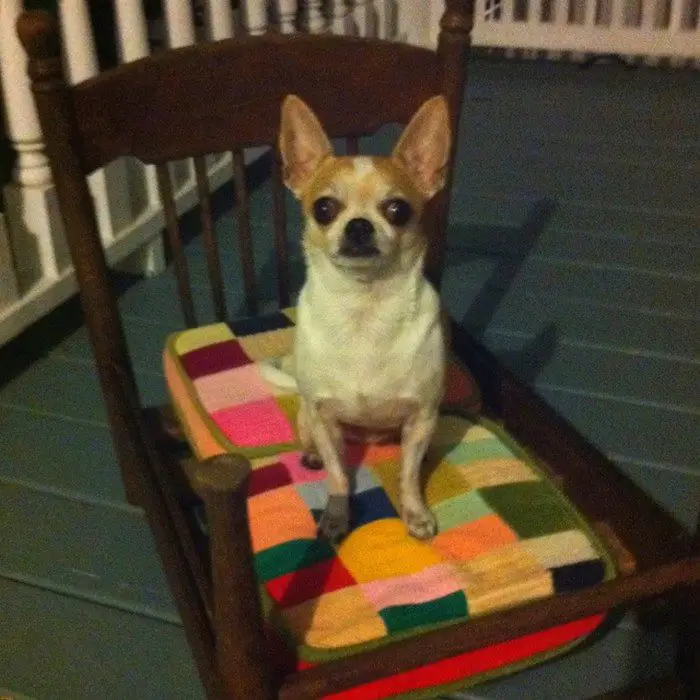
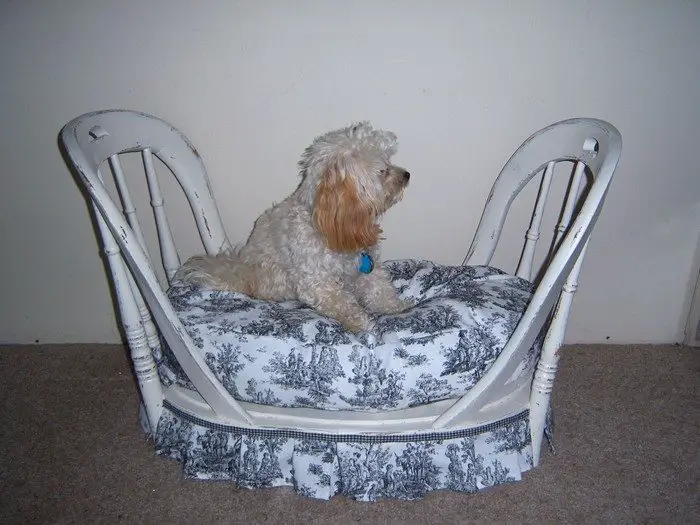
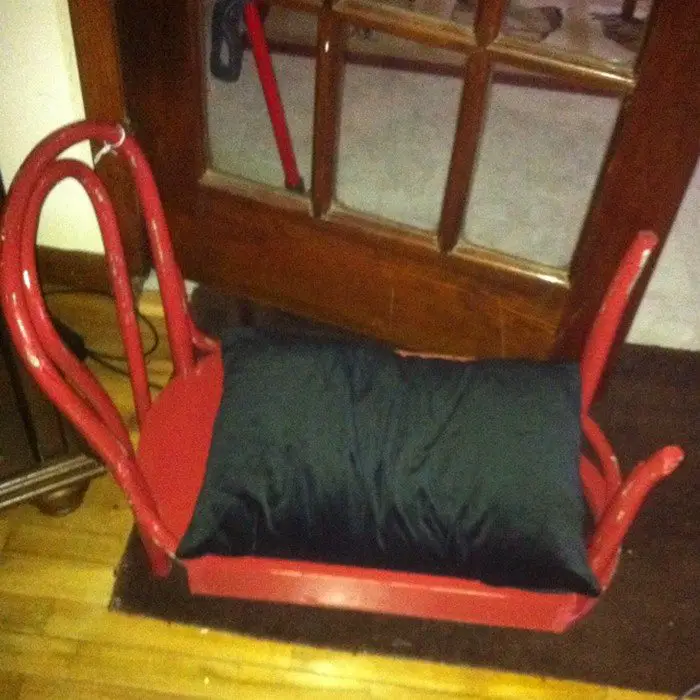
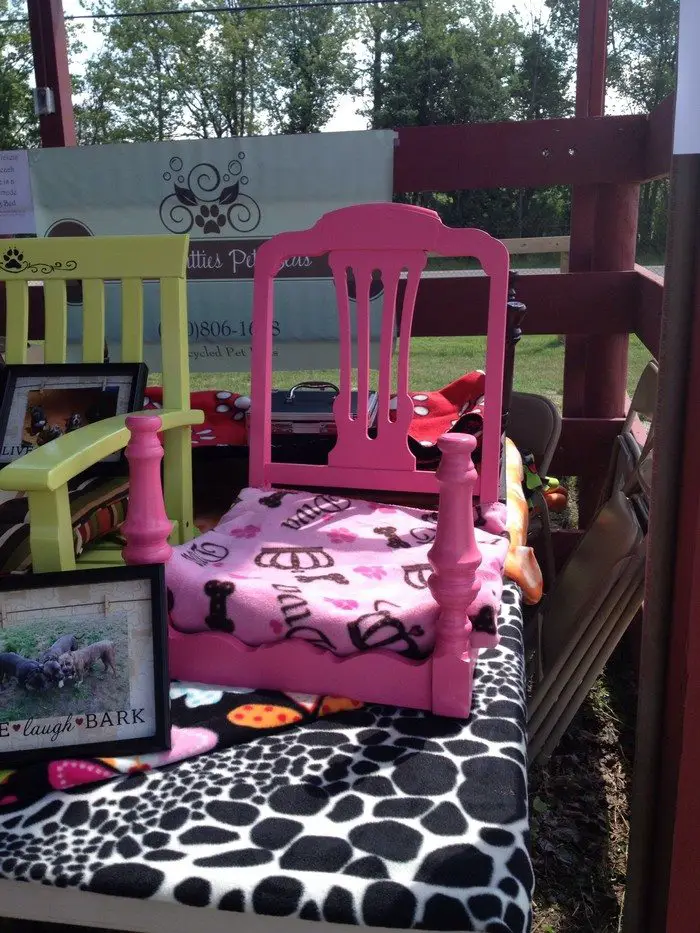
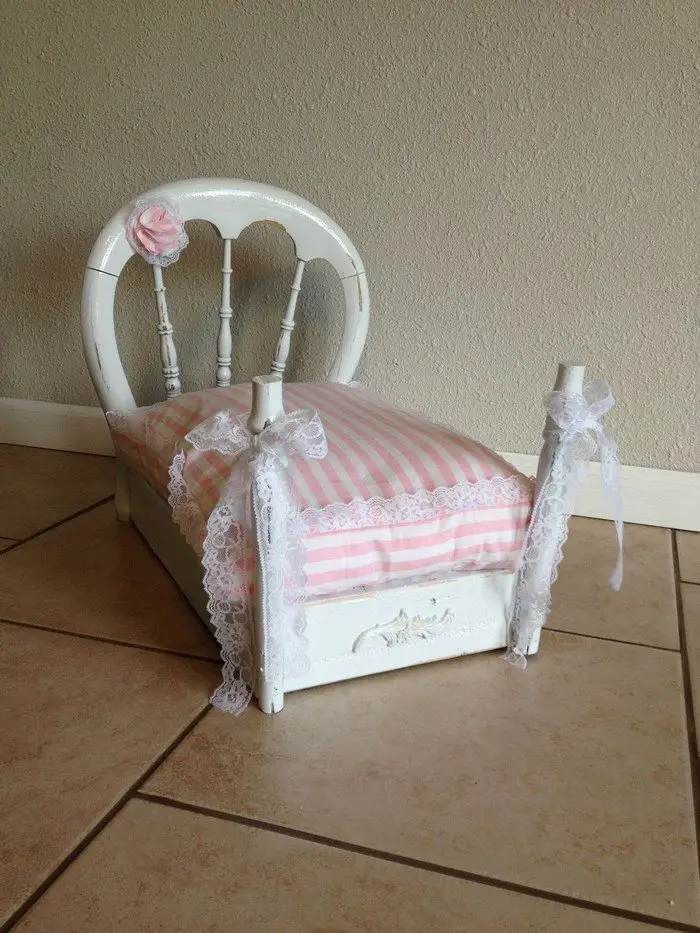
Be inspired by some great examples of turning an old chair into a dog bed by viewing our gallery below. You can also learn how the featured dog bed was made by heading over to CupsThePups’ page. :)
Hmm… do you think cats will love this idea, too?
Contents
How to Turn An Old Chair Into a Dog Bed
Materials
- 4 pcs Bun Feet Furniture Legs
- Plywood
- Sandpaper
- Spray Paint (white and rose pink)
- Carpenter’s Tape
- Plastic Cover
- Wood Glue
- Various Accessories (decoration)
[adinserter block=”11″]
Tools
- Drill
- Dremel Tool
- Wood Clamps
Instructions
Step 1: Preparing the Chair
- Start by thoroughly cleaning your old chair. Remove any existing cushions or fabric.
- Use the sandpaper to smooth out all surfaces of the chair, especially any rough edges or splinters. This makes it safe for your pet and prepares it for painting.
Step 2: Modifying the Structure
- If the chair has a back, consider whether to keep it for style or remove it for easier access. If removing, carefully detach with a Dremel tool.
- Measure and cut a piece of plywood to create a solid base for the seat. This base should fit snugly where the seat cushion originally lay.
Step 3: Attaching the Legs
- Turn the chair upside down. Screw the bun feet furniture legs into each corner of the chair using the drill. Ensure they are tightly secured for stability.
Step 4: Securing the Plywood Base
- Place the plywood base into the seat area of the chair.
- Use wood clamps to hold the plywood in place. Apply wood glue around the edges to secure it to the chair frame. Allow the glue to dry according to the instructions on the glue bottle.
Step 5: Painting
- Once the glue has dried, cover the areas you don’t want to paint with carpenter’s tape.
- Apply a coat of white spray paint as the base coat. Let it dry completely.
- Add a second coat if necessary, then follow up with details or designs in rose pink, or use the rose pink to paint specific parts like the legs or the rim.
Step 6: Adding Comfort Features
- Cut a piece of foam or use an old cushion that fits into the plywood base for comfort.
- Cover the foam with a decorative fabric or an old bed sheet. Secure it beneath the plywood using a staple gun or additional wood glue.
Step 7: Finishing Touches
- Add various accessories like pillows, name tags, or toys to personalize the dog bed.
- Consider adding a plastic cover under the fabric for waterproofing, especially if your pet spends time outdoors.
Step 8: Final Inspection
- Check all parts for any sharp edges or loose components.
- Ensure everything is smooth and securely attached.
Click on any image to start lightbox display. Use your Esc key to close the lightbox.![]()
You can find more step-by-step instructions here…
Choosing the Right Chair for Your Dog Bed Project
When transforming an old chair into a dog bed, selecting the right chair is crucial. The chair you choose will serve as the foundation for your pet’s new sleeping space, so it should be both functional and aesthetically pleasing.
Here’s how to ensure the old chair you pick is perfect for conversion into a dog bed.
Evaluate the Size
The size of the old chair is important because it needs to accommodate your dog comfortably. Measure your dog from nose to tail and add a few inches to determine the ideal size of the chair. For larger dogs, a bigger chair like an armchair might be necessary, while smaller dogs can cozy up in something as simple as a child’s chair.
Check the Material
Old chairs made from solid wood are typically the best candidates for converting an old chair into a dog bed due to their durability and ease of modification. Metal chairs can also be used but consider the comfort and warmth of the material. Upholstered chairs offer built-in padding but ensure the fabric is not so worn that it will tear easily.
Assess the Condition
The overall condition of the old chair must be good enough that it won’t collapse under the weight of your pet. Check for stability; the chair should not wobble or have broken parts unless you are capable of fixing these issues. Avoid chairs with extensive damage as they might require more effort and resources than they’re worth.
Consider the Design
The design of the old chair should lend itself to a conversion of an old chair into a dog bed. Chairs with a wide, deep seating area are ideal. If the chair has armrests, make sure they do not obstruct your dog from easily accessing the bed. Chairs with higher backs can be great for dogs that like to lean against something while they sleep.
Think About Ease of Cleaning
Since you are turning an old chair into a dog bed, it will need regular cleaning. Consider how easy it is to disassemble or reach different parts of the chair for a thorough clean. Wood and metal chairs are typically easier to maintain compared to upholstered chairs, which may harbor more dirt and pet hair.
By carefully selecting the right old chair, you can create a comfortable, stylish, and durable dog bed that your pet will love. Ensure the chair matches the size and comfort needs of your dog while also considering your ability to modify and maintain it.
Customization Ideas for an Old Chair Dog Bed
Transforming an old chair into a dog bed offers a unique opportunity to unleash your creativity while providing a comfortable space for your pet. With a variety of customization options, you can tailor the dog bed to fit your dog’s needs and your home’s décor.
Here are some inspiring ideas to help you turn an old chair into a dog bed that stands out.
Choose a Theme
Start by deciding on a theme that reflects your dog’s personality or matches your home’s style. Whether it’s nautical, floral, rustic, or modern, a cohesive theme will guide your choices in colors and decorations for the old chair turned into a dog bed. This thematic approach not only adds a fun element to the project but also helps integrate the dog bed seamlessly into your living space.
Select the Color Scheme
Paint is a simple and effective way to dramatically change the appearance of the old chair into a dog bed. Consider using non-toxic paint to ensure it’s safe for your pet. You could paint the entire chair one solid color or use multiple colors to highlight different parts of the chair, such as the legs or the backrest. Stenciling is another great way to add patterns and character to the dog bed.
Add Comfortable and Stylish Fabrics
The choice of fabric can transform the comfort and look of the old chair into a dog bed. Opt for durable and washable materials that can withstand regular cleaning. You can upholster the seat of the chair or add a removable cushion that fits into the seating area. Mix and match fabrics to create a visually appealing dog bed, or use a single fabric for a sleek, unified look.
Incorporate Personalized Touches
Personalizing the old chair into a dog bed can make it extra special for your pet. Consider adding your dog’s name using paint, embroidery, or even a small hanging sign on the chair. You could also decorate the dog bed with symbols or motifs that represent your pet’s personality, like bones, paw prints, or favorite toys.
Enhance Functionality
Incorporate elements that enhance the functionality of the old chair into a dog bed. For instance, adding storage for dog toys and supplies can be both practical and stylish. Consider modifying the under-seat area or the back of the chair to include pockets or small drawers.
Focus on Safety
As you customize the old chair into a dog bed, ensure all additions and modifications are secure and pet-friendly. Avoid small decorations that could be choking hazards and ensure all fabrics and materials are secured to prevent any accidental ingestion.
By exploring these customization ideas, you can transform an old chair into a dog bed that is not only comfortable and functional but also a true reflection of your style and love for your pet. This project is a wonderful way to provide your furry friend with a unique spot that they can truly call their own.
Conclusion
Transforming an old chair into a dog bed is a creative and cost-effective way to provide your pet with a cozy and stylish resting place. This DIY project allows you to customize a unique sleeping area that reflects both your aesthetic and your dog’s comfort needs. Ultimately, repurposing an old chair into a dog bed not only recycles unused furniture but also enhances your home with a functional piece filled with personal charm.