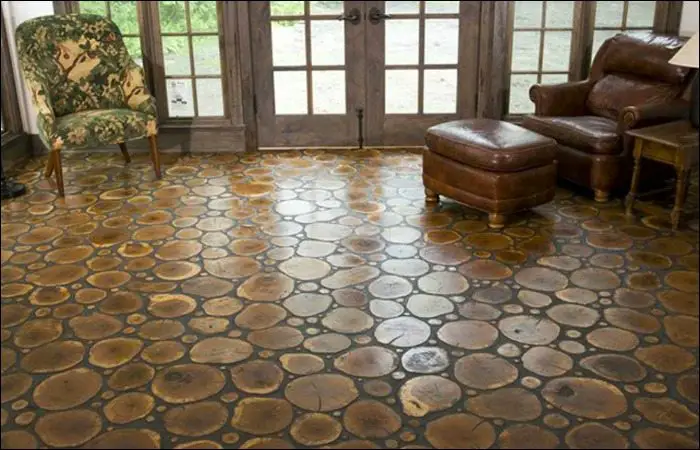
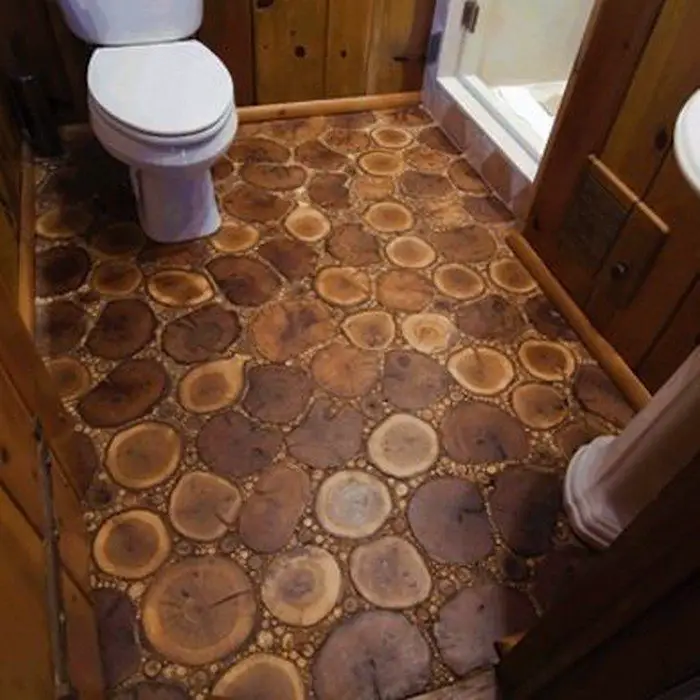
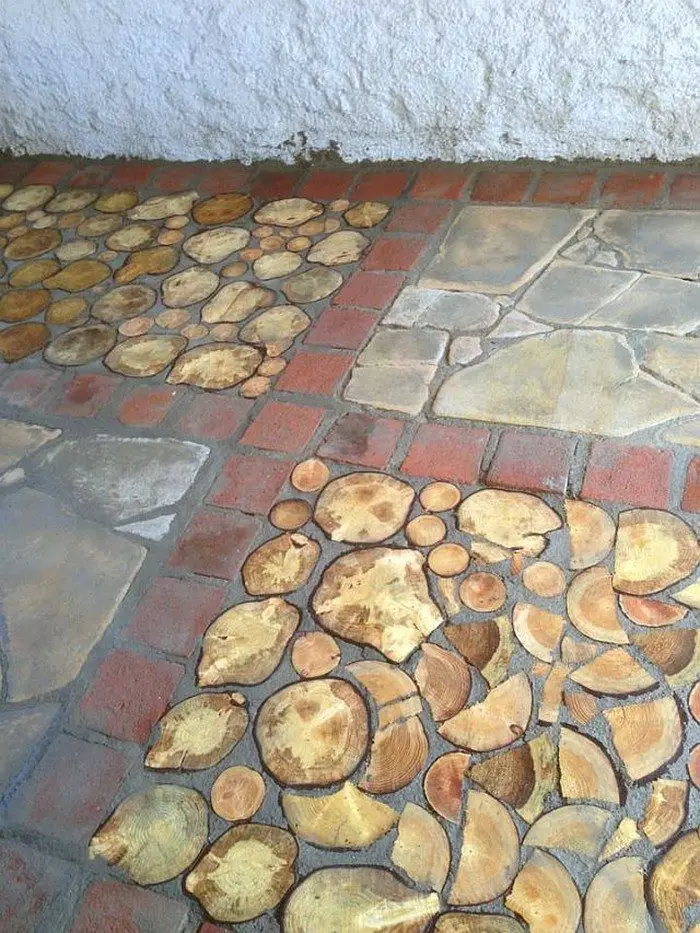
This flooring may look like a professional installer’s job, but did you know that you can DIY this cordwood floor for your home?
If you’re a fan of the rustic look then you’re surely going to love this flooring idea. It’s relatively easy considering it’s a home renovation project!
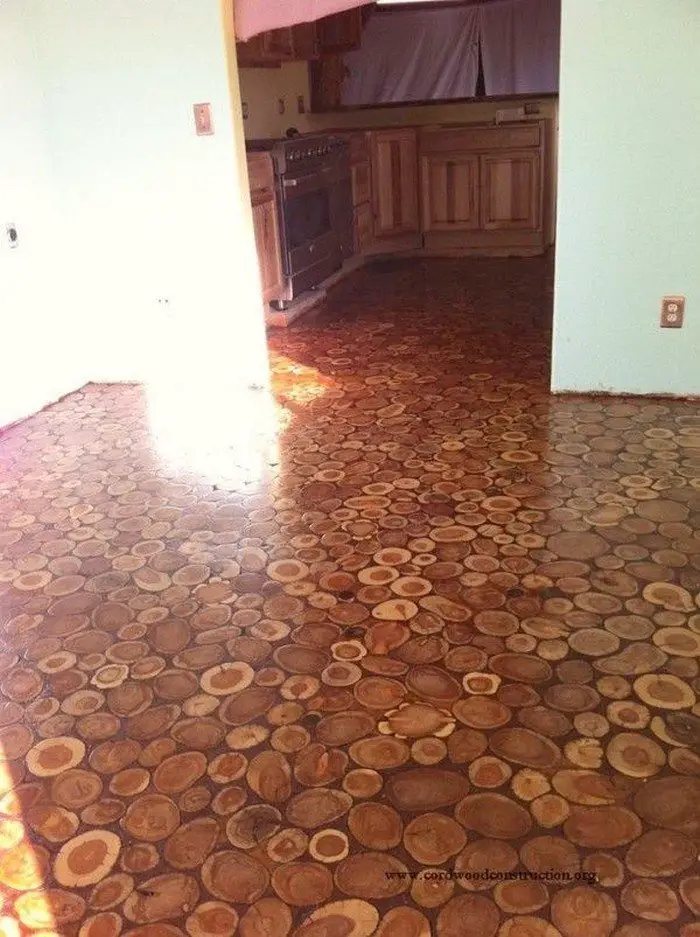
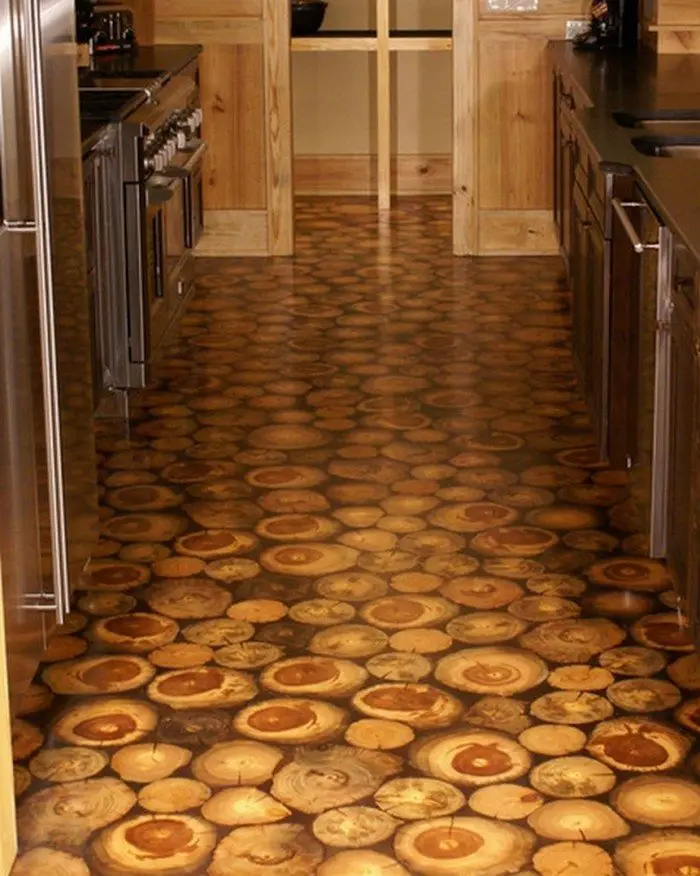
In fact, the specific project and tutorial we share below shows a kitchen floor that was done by a woman and her husband all by themselves!
The only difficult part of this flooring project is if you don’t have access to wood in your own yard. You will need to harvest ‘dead’ wood, and for this, you must secure a wood harvesting permit from your local forest service office.
After all that legal aspect and once you’ve gathered enough wood for your floor, we say it’s fun more than anything!
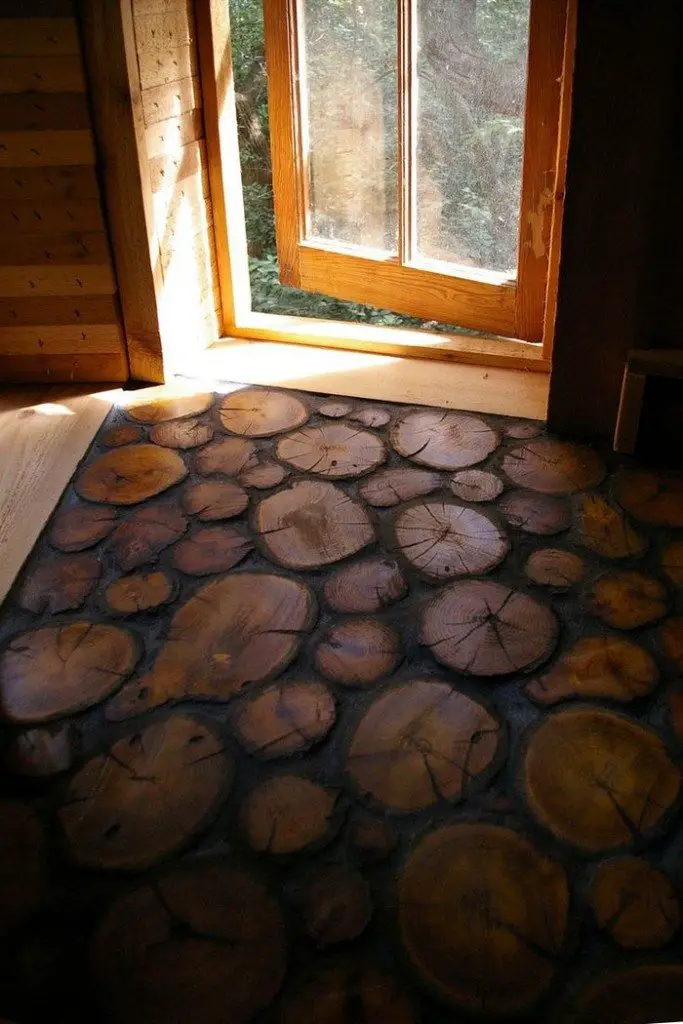
Just imagine having that floor design, knowing you did it all by yourself!
Is this going to be your next big project? :)
Contents
Building Cordwood Floors
Materials
- Dead Tree Logs (ex. Juniper, Pine)
- Loctite PL Premium Construction Adhesive
- Polyurethane
- 80% Tile Grout and 20% Sawdust (for grouting spaces)
Tools
- Gloves
- Chainsaw
- Axe
- Chop Saw
- Sweeper and Mop
- Belt Sander
- Vacuum (for cleaning dust and debris)
Instructions
Step 1: Prepare the Logs
- Select and Gather Logs: Choose logs from dead trees, preferably of similar diameters. Juniper and pine are excellent choices due to their durability and appearance.
- Cut the Logs: Use a chainsaw to cut the logs into uniform lengths, typically 2 to 4 inches thick, ensuring each piece is flat on both sides for stability.
Step 2: Prepare the Subfloor
- Clean the Subfloor: Ensure the subfloor is clean, dry, and level. Use a vacuum to remove any dust and debris.
- Apply Adhesive: Spread a layer of Loctite PL Premium Construction Adhesive on the subfloor where you’ll lay the first few logs.
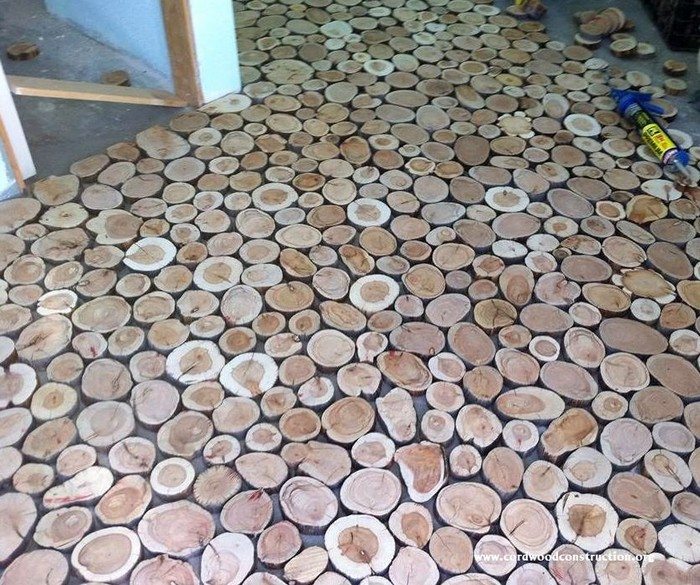
Step 3: Lay the Logs
- Start Laying Logs: Begin at one corner of the room and work your way out. Press each log firmly into the adhesive. It’s crucial to fit them as closely as possible to minimize gaps.
- Check Alignment: Use a spirit level to check that the logs are level. Adjust as necessary before the adhesive sets.
Step 4: Cut Logs to Fit
- Measure and Mark: Measure and mark logs that need to be cut to fit around corners and edges.
- Cut Logs: Use a chop saw for precise cuts on smaller pieces. An axe can be used for minor adjustments.
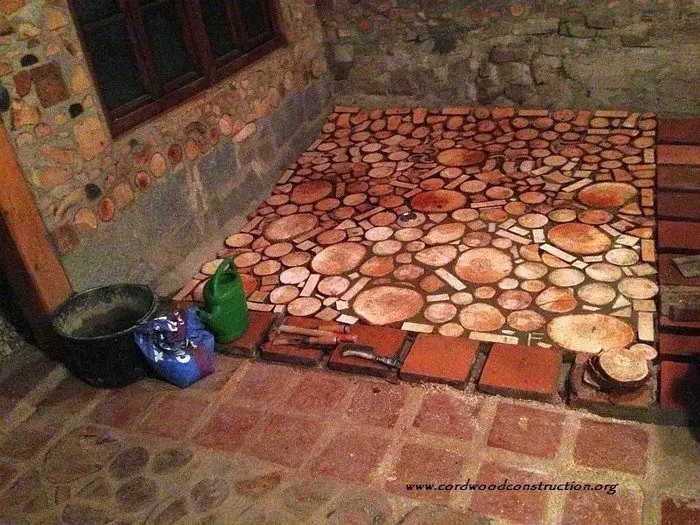
Step 5: Fill the Gaps
- Mix Grout and Sawdust: Combine tile grout with sawdust in an 80/20 ratio.
- Apply Grout Mixture: Use this mixture to fill the spaces between the logs. The sawdust will help match the grout color to the logs.
Step 6: Sanding
- Let Set: Allow the adhesive and grout to cure according to the manufacturer’s instructions.
- Sanding: Once cured, use a belt sander to sand the top surface of the logs. This will smooth out any unevenness and prepare the surface for finishing.
Step 7: Apply Finish
- Clean: Sweep and vacuum the floor thoroughly to remove all sanding dust.
- Apply Polyurethane: Apply a coat of polyurethane to seal the wood and protect the surface. Allow it to dry completely, then apply a second coat if needed.
Step 8: Final Touches
- Inspect and Clean: Check the floor for any missed spots or blemishes. Clean the surface with a damp mop.
- Cure: Allow the floor to cure for several days before placing furniture or heavy items on it.
Click on any image to start lightbox display. Use your Esc key to close the lightbox.![]()
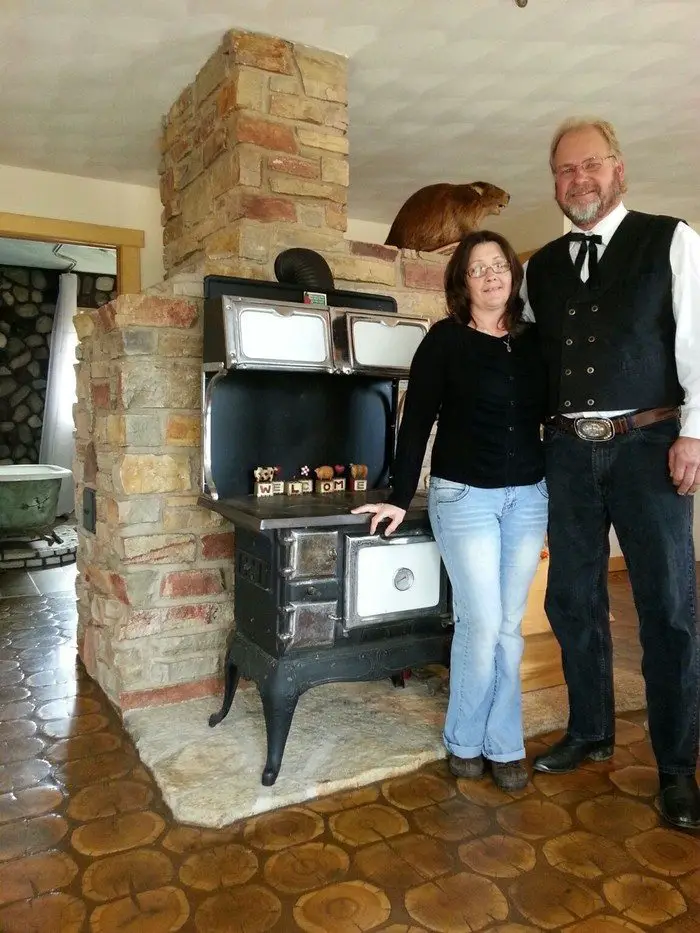
You can get step-by-step instructions from Sunny Pettis Lutz & Tony over at Cordwood Construction…
Legal and Environmental Considerations
Planning a cordwood floor installation requires careful consideration of both environmental and legal aspects to guarantee the project is sustainable and complies with local laws. This guarantees that your project moves forward legally and safeguards natural resources.
Sourcing Wood Legally
Getting the required permits is essential before taking any wood, especially from public lands or unknown holdings. Find out the particular needs and limitations by contacting your neighborhood environmental protection agency or forest service. Limits on the kind and amount of trees you can chop could be part of it.
Building Codes and Regulations
To be sure a cordwood floor is allowed by local residential building laws, check with your local building codes. Your project could be impacted by certain requirements in some areas for the materials and techniques used in flooring.
Sustainable Harvesting
When sourcing wood, especially from natural forests, practice sustainable harvesting methods that do not harm the ecosystem. Opt for dead or fallen wood instead of cutting down living trees, which helps maintain forest health and biodiversity.
Use of Non-Toxic Materials
Select adhesives, sealants, and finishes that are low in volatile organic compounds (VOCs). These materials are better for indoor air quality and are less harmful to the environment. Look for eco-friendly labels and certifications that guarantee minimal environmental impact.
Minimizing Waste
Plan your cordwood cuts and layout to minimize waste. Use smaller pieces and sawdust in other parts of your project, such as for filling gaps or even for creating smaller decorative items. Efficient use of materials not only reduces your environmental footprint but also helps in cost-saving.
Recycling and Reusing Wood
If you have access to recycled wood or can reuse wood from other projects, consider these as your first options. Reusing wood not only reduces the demand for new materials but also adds character and history to your flooring.
Addressing these legal and environmental considerations ensures that your cordwood floor project is responsible, sustainable, and compliant with local regulations. This proactive approach not only contributes to the preservation of our natural resources but also enhances the long-term viability and enjoyment of your beautiful, rustic floor.
Maintenance and Upkeep
Maintaining a cordwood floor is crucial to preserve its beauty and longevity. Proper upkeep not only enhances the durability of the floor but also keeps it looking as striking as the day it was installed.
Here’s how you can ensure that your cordwood floor remains in top condition through years of use.
Regular Cleaning
- Sweeping and Vacuuming: Regularly sweep or vacuum your cordwood floor to remove dirt and debris. This prevents the accumulation of grit that can scratch or wear down the finish. Use a soft brush attachment on your vacuum to avoid any damage to the wood surface.
- Mopping: For deeper cleaning, use a damp mop with a mild, pH-neutral cleaner. Avoid excessive water, as it can seep into the wood and cause swelling or mold growth. After mopping, go over the floor with a dry mop to absorb any residual moisture.
Spot Cleaning and Stain Removal
- Immediate Attention: If spills occur on your cordwood floor, address them immediately to prevent staining. Blot the spill with a clean, dry cloth, then clean the area with a damp cloth and mild detergent if necessary.
- Avoid Harsh Chemicals: Never use harsh chemicals, abrasives, or steel wool on your cordwood floor as these can strip the finish and damage the wood. Stick to recommended wood cleaning products to ensure safety and effectiveness.
- Natural Cleaning Solutions: For organic stains like food or mud, create a paste using baking soda and water. Apply the paste to the stained area, let it sit for a few minutes, then gently wipe it away with a damp cloth. This method is effective and gentle on the wood.
- Oil and Grease Stains: If you encounter oil or grease stains, sprinkle cornstarch or talcum powder over the area and let it sit overnight. The powder absorbs the grease, making it easier to clean up. Sweep up the powder and clean the area with a mild wood floor cleaner.
- Ink and Permanent Marker: For tough stains like ink or permanent marker, rubbing alcohol can be effective. Apply a small amount of rubbing alcohol to a soft cloth and gently dab the stain. Avoid rubbing vigorously to prevent spreading the stain or damaging the finish.
Periodic Maintenance
- Sanding and Refinishing: Over time, your cordwood floor may show signs of wear, such as scratches or dullness. Depending on the severity, you may need to sand down the surface and apply a new coat of finish. This is typically done every few years and can dramatically restore the appearance of your floor.
- Re-grouting: Inspect the grout between the logs periodically. If you notice cracking or crumbling, it may be necessary to remove the old grout and apply a new mixture. This maintains the structural integrity of your cordwood floor and prevents moisture from penetrating beneath the surface.
Preventative Measures
- Use Protective Pads: Place felt pads under furniture legs to prevent scratches and gouges on your cordwood floor. These pads should be replaced periodically as they can wear down or collect dirt.
- Rugs and Mats: Use rugs or mats in high-traffic areas or in places where water might be spilled, such as near sinks and doorways. This reduces wear and protects the floor from moisture.
- Control Humidity: Maintain a consistent indoor humidity level to prevent the wood from expanding or contracting, which can cause cracks. A humidity level of 30-50% is ideal for wood floors.
- Sunlight Protection: Protect your cordwood floor from prolonged exposure to direct sunlight, which can cause the wood to fade or discolor over time. Use curtains, blinds, or UV-protective window films to mitigate sun damage, especially in rooms with ample natural light.
- Regular Inspection: Conduct regular inspections of your cordwood floor to check for signs of wear or damage. Early detection of issues such as loose logs, pest infestations, or water damage can prevent more extensive problems and costly repairs.
- Weight Distribution: Avoid placing extremely heavy furniture or appliances directly on your cordwood floor. Use load-distributing platforms or move heavy items periodically to prevent pressure marks or indentations in the wood.
Your cordwood floor will stay a strong and beautiful part of your house for many years to come if you follow our care and maintenance recommendations. Frequent maintenance not only preserves your investment but also brings out the wood’s inherent beauty, which will make guests talk about it and you feel proud of it.
Conclusion
Constructing a cordwood floor adds unique rustic charm and warmth to any home. With careful planning, sustainable sourcing, and regular maintenance, your cordwood floor will last for years and become a focal point of your living space. Embrace this DIY project for its beauty and practicality, enhancing both the value and aesthetics of your home.


