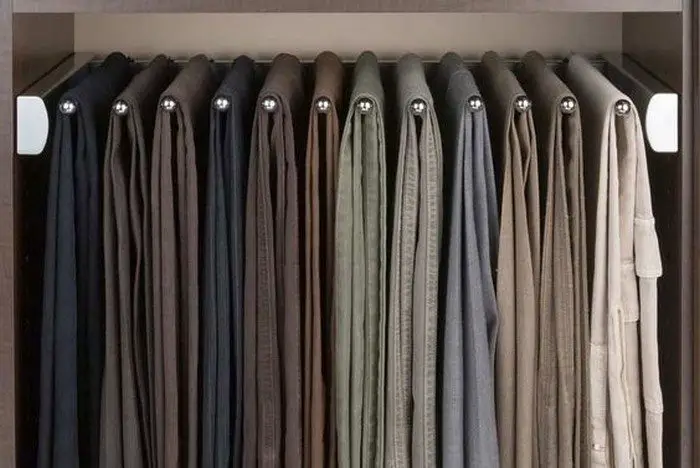
When it comes to styling your bedroom, you want to make sure you utilise space properly. You want a cosy yet practical and stylish room. There are a number of options when it comes to wardrobes – and there are quite a few ways to improve on them, too. Including a sliding pants rack.
Here’s a great project for improving your wardrobe! Though there are similar ideas you can find in stores, why buy when you can just make it yourself?
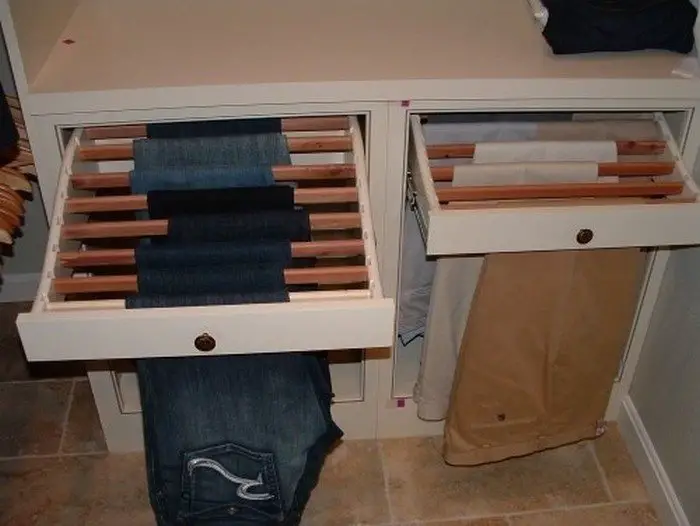
By doing it yourself, you can have a more organized place for pants without having to buy a whole new cabinet.
It’s also great for its ease of access feature, where you can simply pull and slide a pair of pants without having to move the others.
We think this is the best pants rack designed? Do you? :)
Click on any image to start lightbox display. Use your Esc key to close the lightbox. ?
Contents
Building a Sliding Pants Rack
Materials
- 1 – 1″ x 2″ x 8′ piece of wood
- 3 – 1/2″ x 48″ wooden dowel
- 1 – set of drawer sliders
- Finishing Nails
- Wood Screws
- Wood Glue
Tools
- Drill with 1/2″ Drill Bit
- Miter Saw
- Tape Measure
- Hammer
Instructions
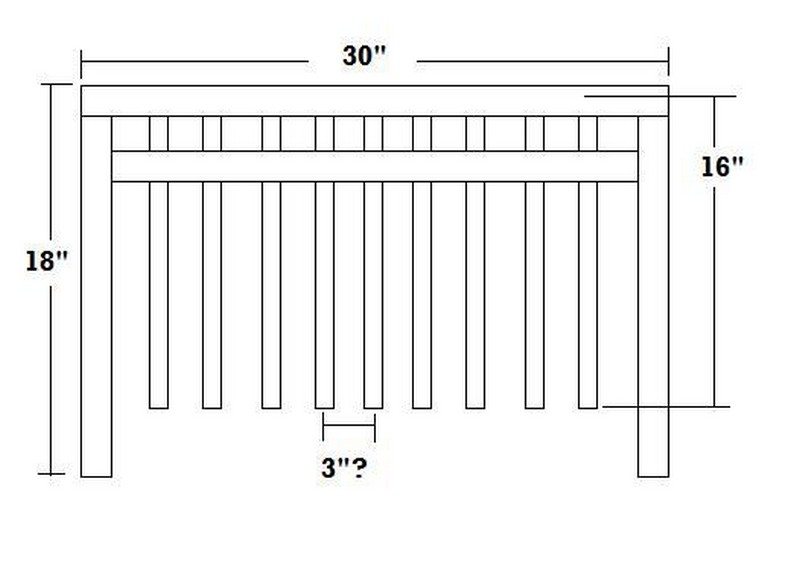
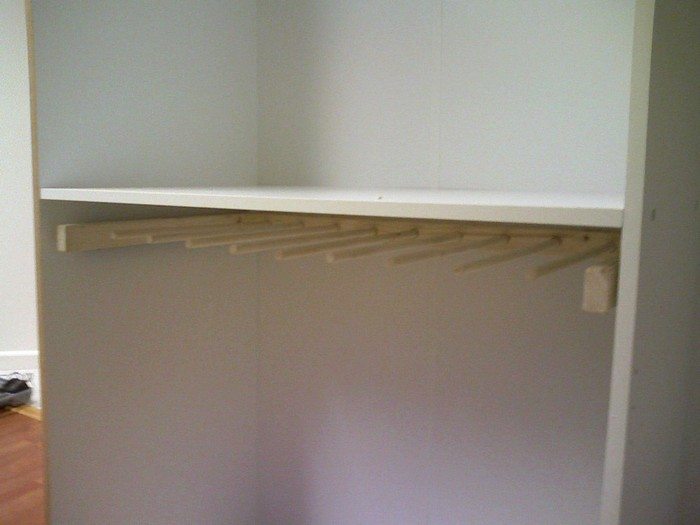
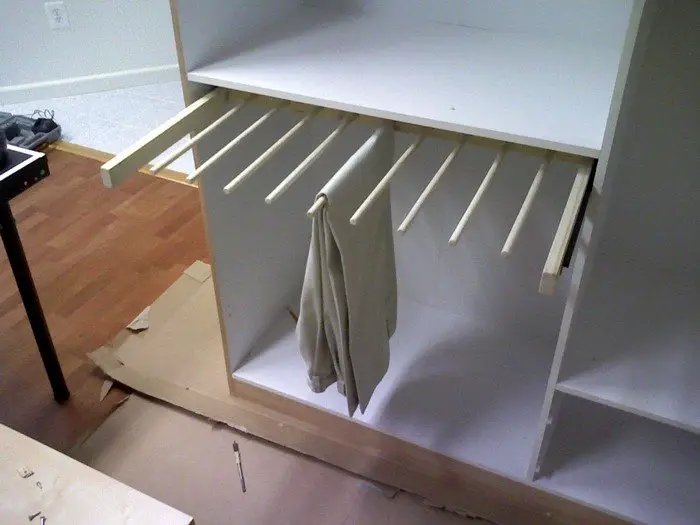
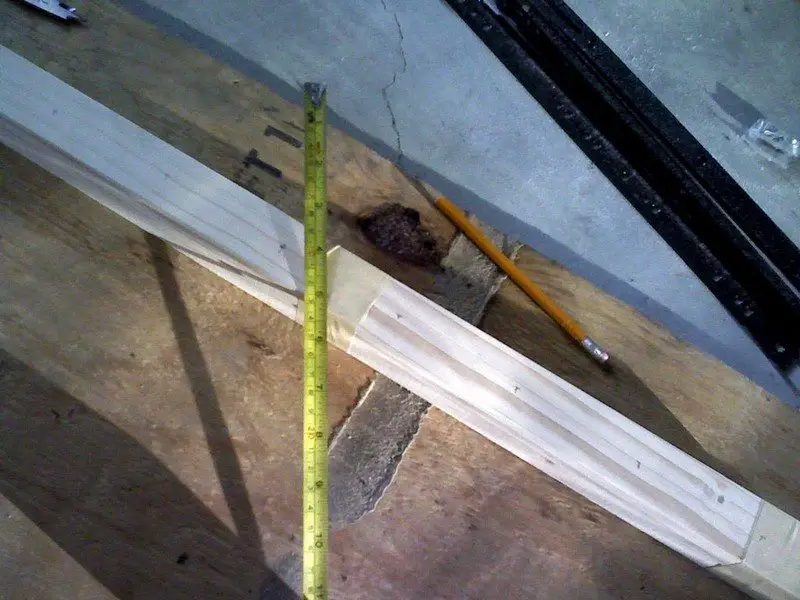
I started off by measuring the space that I was to mount this in. It ended up being 31″ x 19″. The sliders occupy roughly 1″ of space, so my needed to be ~ 30″ x 18″ or so.
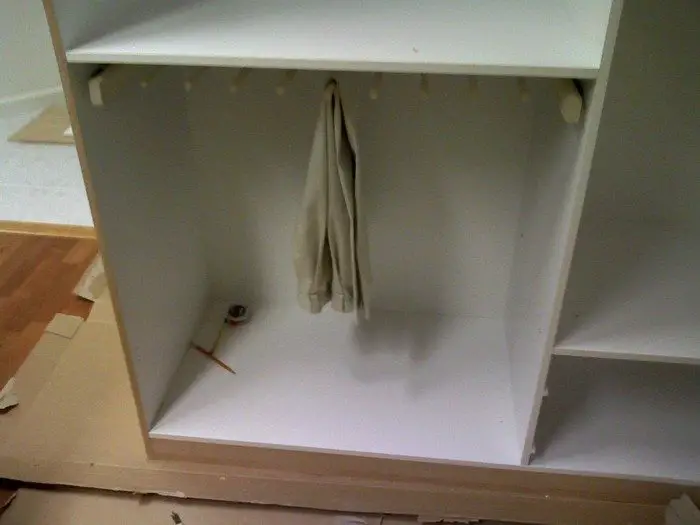
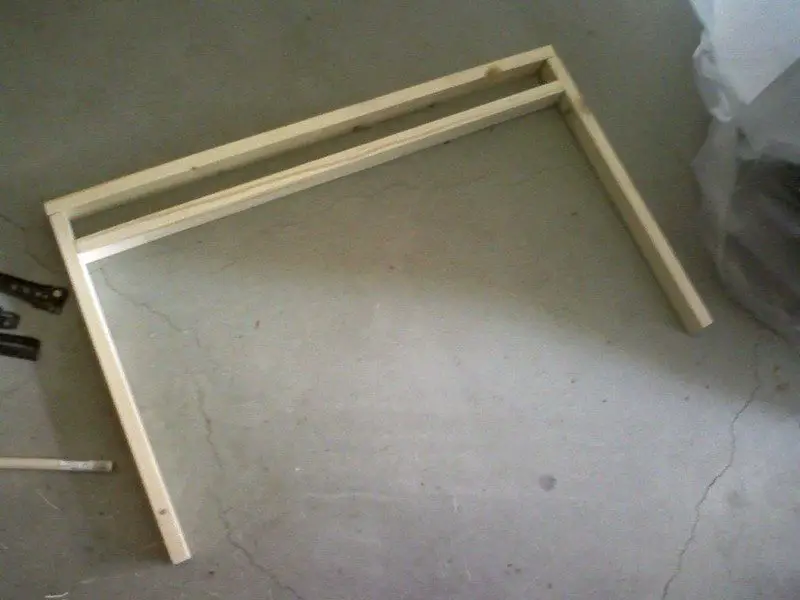
The frame of my sliding pants rack needed to be able to hold its shape and not flex, and it needed something a bit more substantial than one single hole to hold the dowels. I decided on something like this image above.
Measure and commence cutting. Dowels were cut into thirds, getting nine 16″ rods.
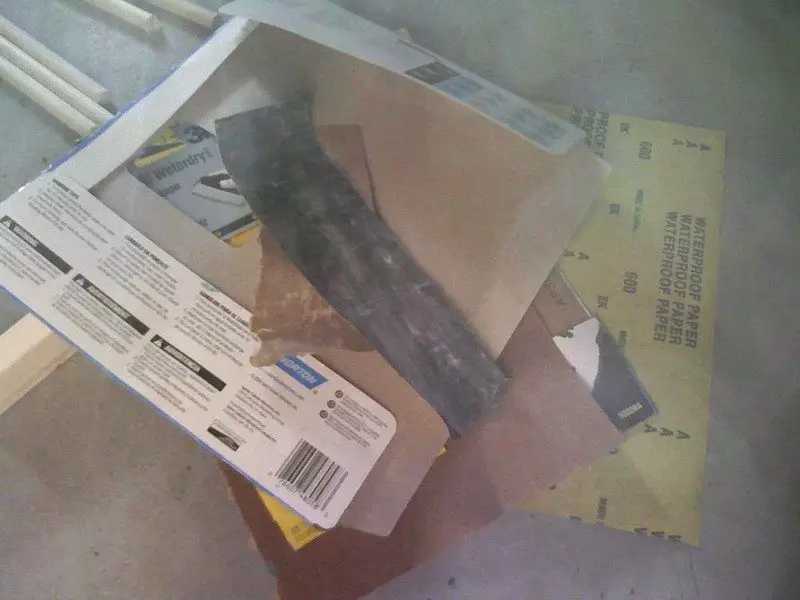
Since I don’t want wooden splinters ripping into my pants and such, the next step was to sand everything. Prepare for masturbation jokes if it so happens that your friends or neighbor walks by while you’re sanding down the dowels.
I started off with a rougher 220 grit, then 600, and finished off with 800.
Now comes the fun part…
The dowels are 1/2″. The drill bit is also 1/2″. Can you guess?

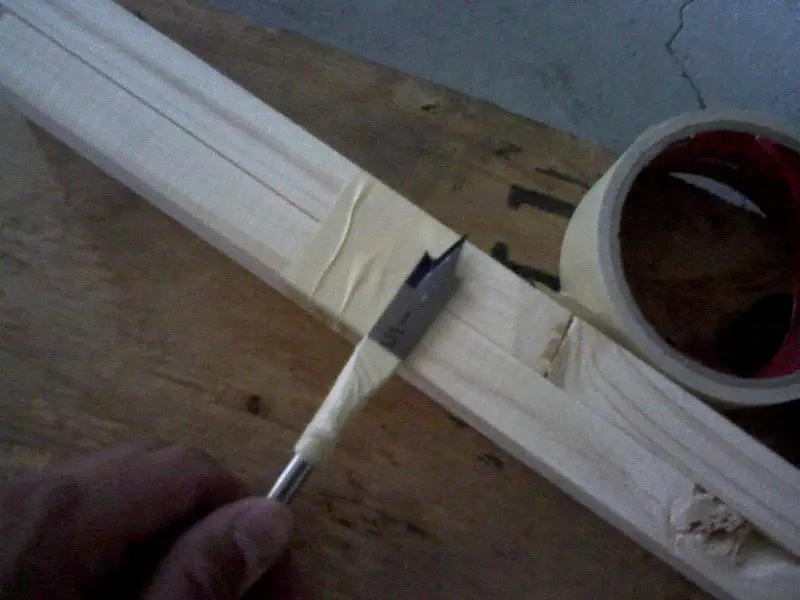
I only had one clamp, so I ended taping the two pieces of wood together and making the top piece. Be sure you leave equal amounts of space on each side.
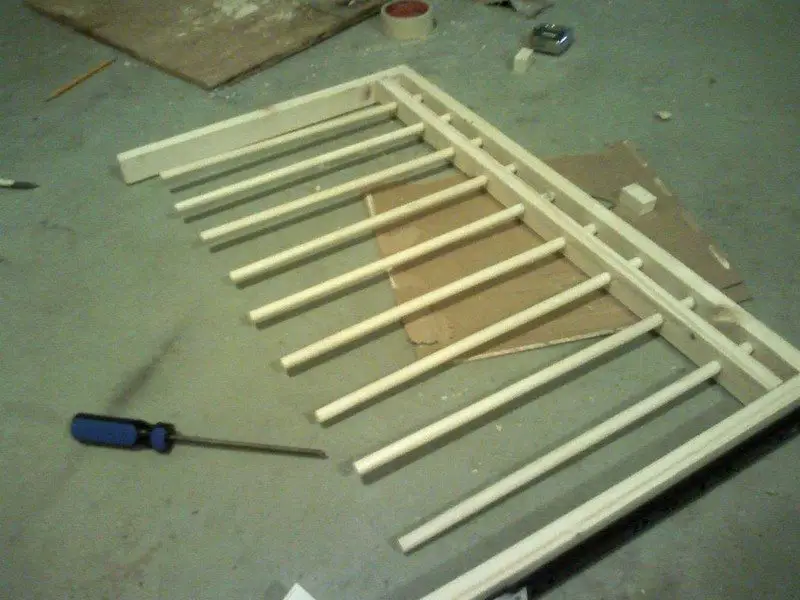
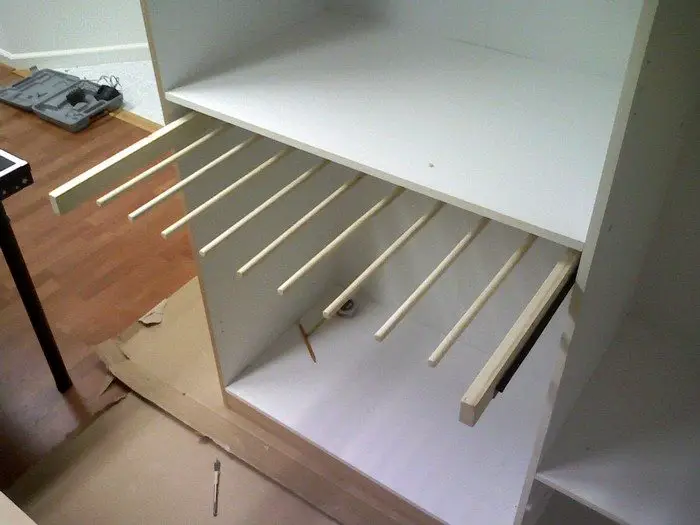
Put it together. I assembled the frame first by tacking it in with finishing nails, then drilled pilot holes and put in a screw per side. After some adjustment I glued the dowels in with some Elmer’s on steroids.
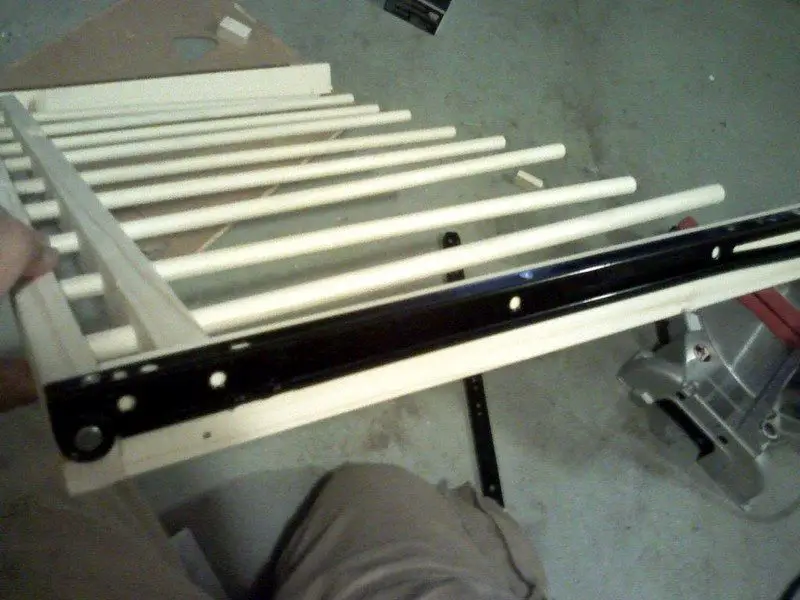
Obvious step, if its going to be on rails, they probably need to be attached. I used the supplied hardware to attach them to the frame.
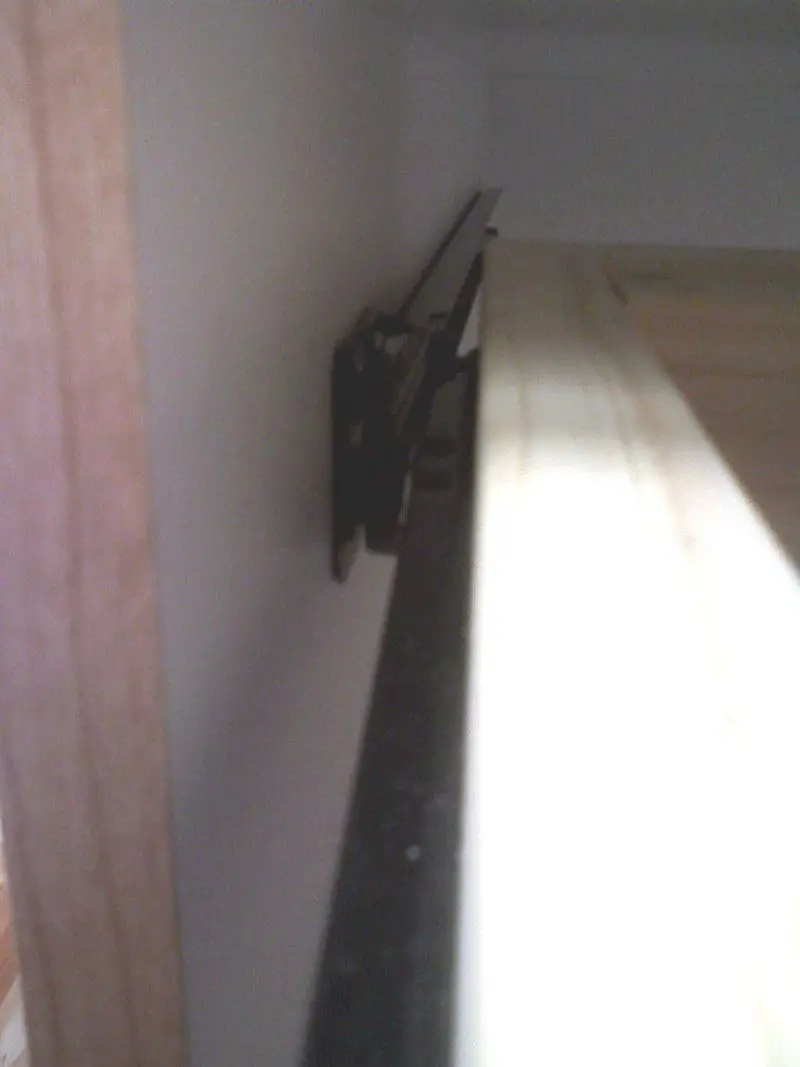
Measure how far you want the rail down, mark, and make tiny pilot holes. I used the tip of the 1/2″ bit and twisted it around some to get them started. Hold the rail in place, and attach to the wardrobe with the supplied screws.
Unfortunately, I must have messed up my sliding pants rack measurements somewhere, because my drawer was about 1/4″ too narrow and the sliders kept popping off. I ended up using a washer under each screw to remedy the problem. Remember kids, measure twice!
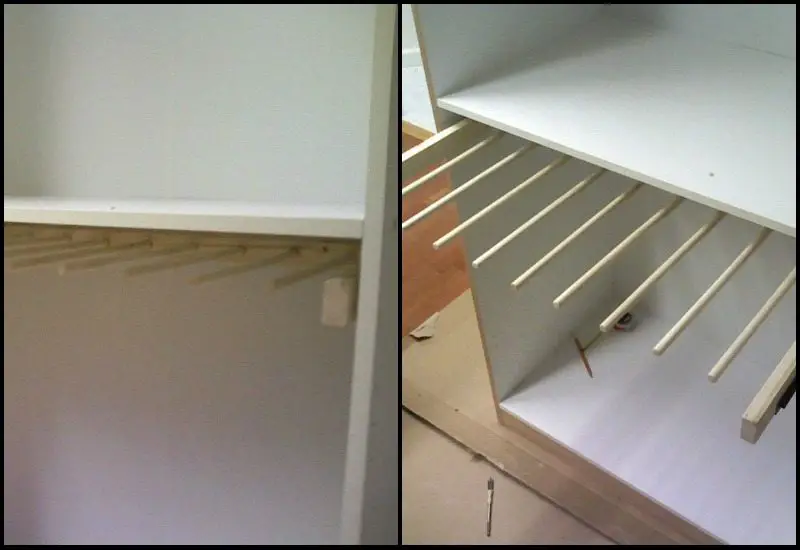
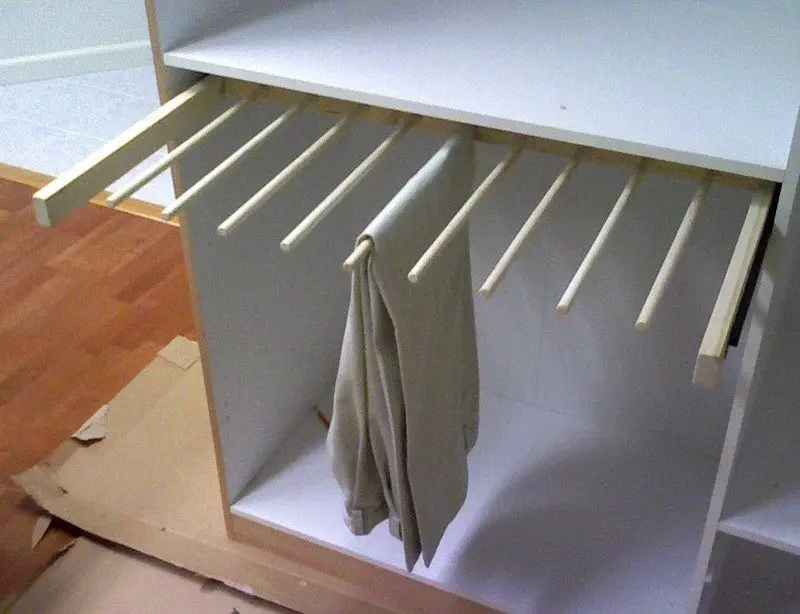
Now that that’s all taken care of, put the sliding pants rack in! If all went well, It should work. If not…. have fun tweaking it until it does :-P
The sliding pants rack doesn’t come out completely, but more than enough. If you wanted it to come out further, you could get a set of full extension sliders that roll on ball bearings and such, but I opted not to since they cost more than twice as much.

Although more dowel rods could have been added in this sliding pants rack, we think this design is perfect for its features. What do you think? Can this be further improved?
Thanks to phantazn for this great project.
Space-Saving Solutions for Small Bedrooms
Maximizing space in small bedrooms requires creative thinking and smart storage solutions. Every square inch matters, and finding ways to keep your belongings organized while ensuring the room feels open and uncluttered is key. Incorporating a DIY sliding pants rack is one ingenious method to achieve this.
This section explores how to make the most of limited space, emphasizing the role of a sliding pants rack.
Utilize Vertical Space
In small bedrooms, leveraging vertical space is crucial. Instead of spreading out, think upwards. A sliding pants rack mounted inside the wardrobe or on an unused wall frees up floor space while keeping your pants neatly organized and easily accessible. By arranging clothing vertically, you not only save valuable space but also make it simpler to view and select your outfits.
Minimize Furniture Footprint
Choosing furniture that occupies less floor space can make a room feel larger. A DIY sliding pants rack, for example, minimizes the need for bulky dressers or wardrobes. Since it slides out, it provides easy access to your pants without the necessity of opening large wardrobe doors or drawers, thus keeping the room’s walkways clear.
Opt for Multipurpose Furniture
When space is at a premium, furniture that can serve multiple purposes is a game-changer. A bed with built-in drawers underneath can provide ample storage for items other than clothing, making a sliding pants rack an exclusive space for organizing your pants collection. This focused approach to storage helps maintain a decluttered and more spacious feeling in the bedroom.
Implement Hidden Storage Solutions
Hidden storage solutions are perfect for small bedrooms. Integrating a sliding pants rack into your existing wardrobe or under a loft bed can keep your pants stored out of sight but within easy reach. This not only keeps your room looking tidy but also makes use of otherwise wasted space.
Declutter with Discipline
Regularly decluttering your space can significantly impact its feel and functionality. A sliding pants rack helps by providing a specific place for each pair of pants, encouraging you to keep only what fits on the rack. This discipline in ownership ensures that your bedroom remains a spacious and serene retreat.
Incorporating a sliding pants rack as part of your space-saving strategy in a small bedroom not only optimizes storage but also enhances the room’s overall aesthetic and functionality. With clever planning and a bit of DIY spirit, you can transform your cramped bedroom into a cozy, organized haven.
Troubleshooting Common Issues
Building a DIY sliding pants rack is an excellent way to add efficient, space-saving storage to your bedroom. However, like any DIY project, you might encounter a few hiccups along the way.
This section aims to address common issues that arise during the construction and installation of a sliding pants rack, offering practical solutions to ensure your project is successful.
Misaligned Sliders
- Problem: One of the most frequent issues is misaligned sliders, which can cause the rack to jam or not slide smoothly.
- Solution: Ensure that you measure the distance between the sliders accurately before installation. Use a level to check that they are parallel to each other and the ground. If misalignment occurs, loosen the screws, adjust the position, and tighten again. Precision is key to a smoothly operating sliding pants rack.
Inadequate Space for Sliding
- Problem: Sometimes, there might not be enough clearance for the rack to slide in and out freely, especially if the dimensions were not accurately calculated.
- Solution: Double-check the measurements of your wardrobe or intended space against the dimensions of your completed pants rack, including the sliders and the clothes that will hang on it. Consider using slimmer sliders or modifying the frame size if space is tight. Remember, a little extra room for movement is better than a snug fit.
Weak Frame Structure
- Problem: A sliding pants rack that feels wobbly or unstable can be discouraging. This usually results from insufficient support within the frame or poor-quality materials.
- Solution: Reinforce the frame by ensuring all connections are tight and adding additional support brackets if necessary. Choosing high-quality wood and hardware from the start can also prevent this issue. Sometimes, adding a cross brace at the back of the rack can enhance stability.
Dowels Not Secure
- Problem: Dowels may come loose over time, especially with frequent use, leading to pants slipping off the rack.
- Solution: If dowels become loose, remove them, apply a stronger adhesive like epoxy or wood glue, and reinsert. For a more permanent solution, consider drilling slightly smaller holes for a tighter fit or using screw-in dowels that can be easily tightened.
Difficulty with Installation
- Problem: Installing the rack inside an existing wardrobe or closet space can be tricky, especially in tight or hard-to-reach areas.
- Solution: Enlist a helper to hold the rack in place while you mark and drill the pilot holes. Use a cordless drill for easier maneuverability. If space is too tight for a traditional drill, consider using a right-angle drill attachment to reach difficult spots.
Sliders Popping Off
- Problem: Occasionally, the sliders may detach from the frame or the wardrobe due to incorrect installation or excessive force.
- Solution: Check that the sliders are correctly installed and that all screws are tightened. If the problem persists, use larger screws or add washers for extra grip. Ensure you’re not exceeding the weight capacity of the sliders with too many pants or using sliders not designed for the rack’s weight.
Addressing these common issues can significantly enhance the functionality and longevity of your DIY sliding pants rack. With patience and a bit of troubleshooting, you’ll have a well-functioning, space-saving addition to your wardrobe.
Conclusion
Building a DIY sliding pants rack offers a rewarding way to optimize bedroom space and keep your wardrobe organized. This project not only introduces a personalized touch to your closet but also challenges and enhances your DIY skills. With careful planning, precise execution, and the right troubleshooting tips, you can create a functional and stylish addition to your home.


