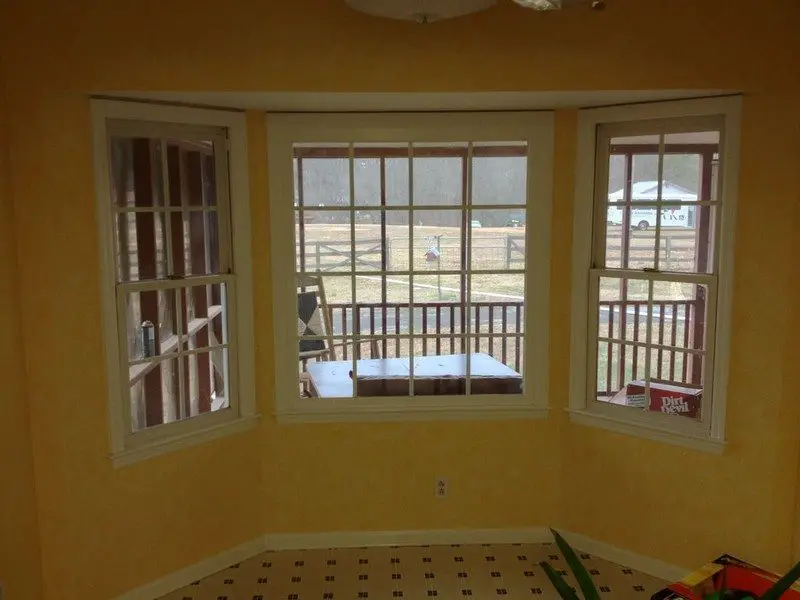
Have you got one of those large, but fairly useless landings in your house? Why not consider putting in a window seat? They take up very little floor space, but can actually make an otherwise “dead area” become a usable and attractive part of your home.

It could be a seat for a breakfast nook in the kitchen, a reading nook inside the bedroom or an extra sitting in the living room!
Materials:
- 2 – 10′ long 2×4 Timber
- 4 – 8′ long 2×4 Timber
- 4’x4′ sheet Bead Board
- 24′ long 1×4 Poplar Wood
- 1 sheet 4’x8′ 3/4″ Plywood
- 12′ long 3/4″ Cove Molding
- 3/4″ Quarter Round
- Liquid Nails
- Silcone Caulk
- Wood Putty
- Sandpaper
- Primer
- Paint
- 3 1/2″ Wood Screws
- Nails
[adinserter block=”11″]
Tools:
- Nail Gun
- Circular Saw
- Miter Saw
- Level
- Stud Finder
- Hammer
- Measuring Tape
- Kreg Jig
- Power Drill
[embedit snippet=”adsense-728×15-inline-text-only-ad”]
Steps:
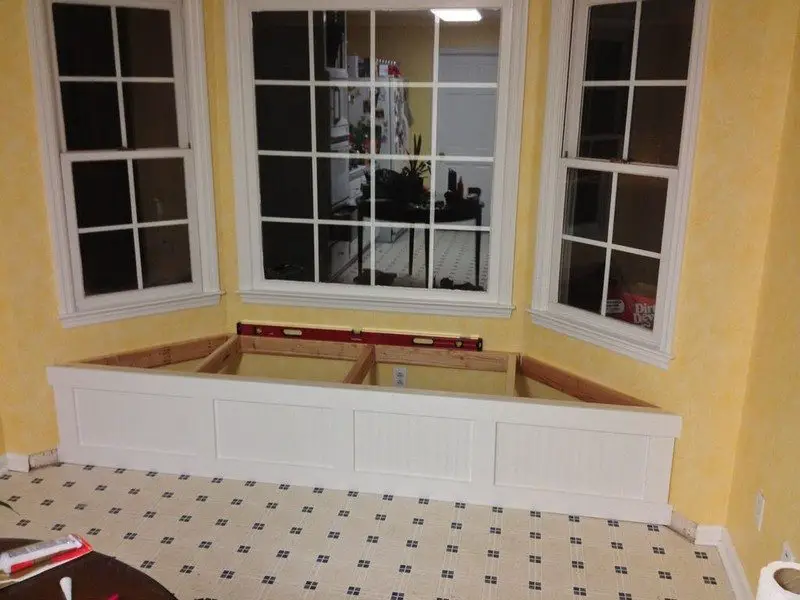
Since bay windows are not all created equal, you’ll need to measure the angles of the walls. The standard is 135° but there are other variations and the “as built” angles will probably be different. Walls are never perfectly straight, corners are never perfectly square…you get the picture. In the end, you don’t have to be super exact since a piece of trim will cover the gap between the wall and the seat, but the angle needs to follow the wall.
How deep you’d like your seat to be is the next question. I build this one to be 24″ deep so we could use a rug runner instead of cushions. Runners are 21″-23″ wide. How deep your seat is will also determine how wide it will be. At 24″ deep, mine turned out to be 8′ 5″ long. Since sheets of plywood are 8′ long it would have been easier to make the front shorter than 8′ long and let the depth work itself out. In that way you could rip an 8′ piece of plywood for the front whereas I used 2 pieces.
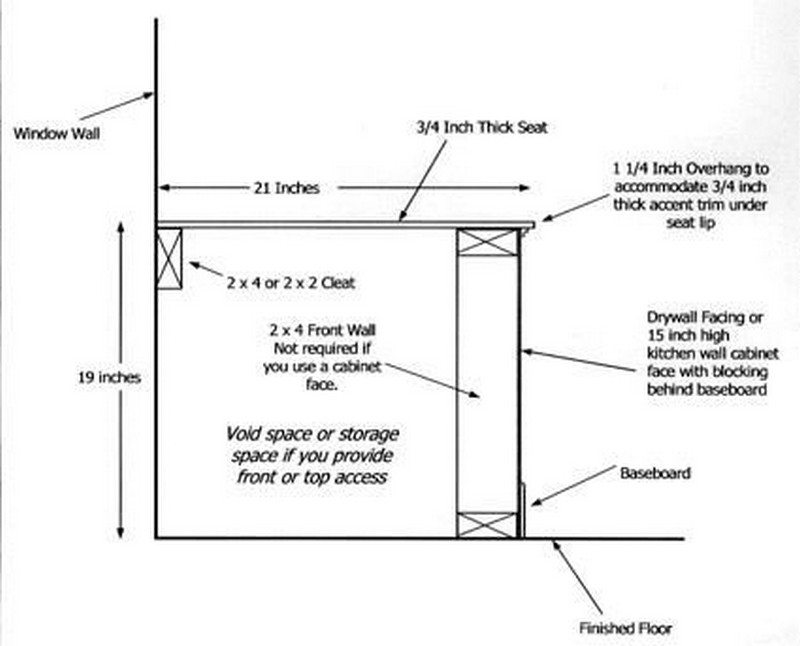
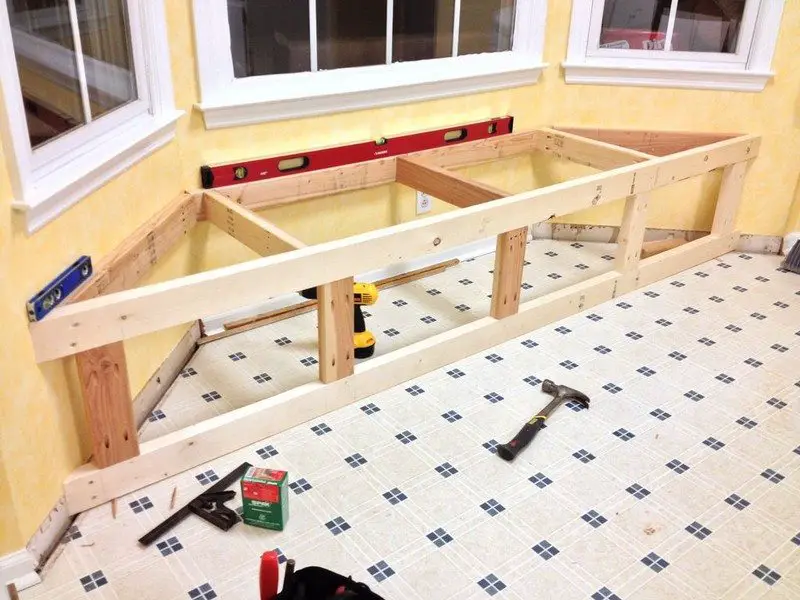
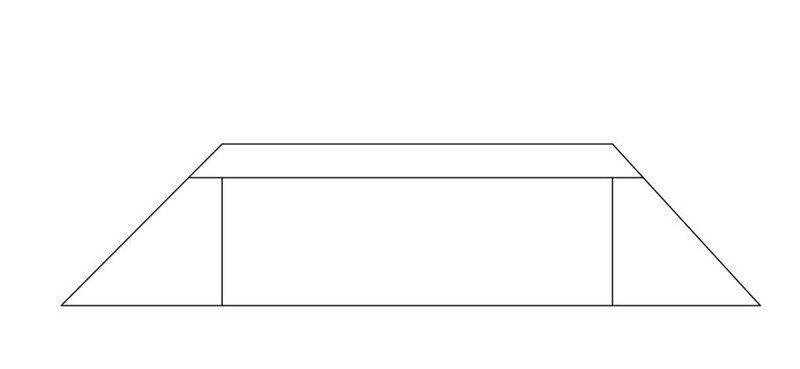
The recommended height is 19″ with a 21″ deep seat. You can see from the drawing that a window seat is actually a short floating wall anchored to 2×4 cleats on the wall. The front can be wood, sheetrock or other materials since it is only decorative. The one thing I did differently from the drawing was to place the 2x4s on edge as opposed to typical wall framing. This makes a sufficiently strong wall and also creates a bit more storage space inside the bench.
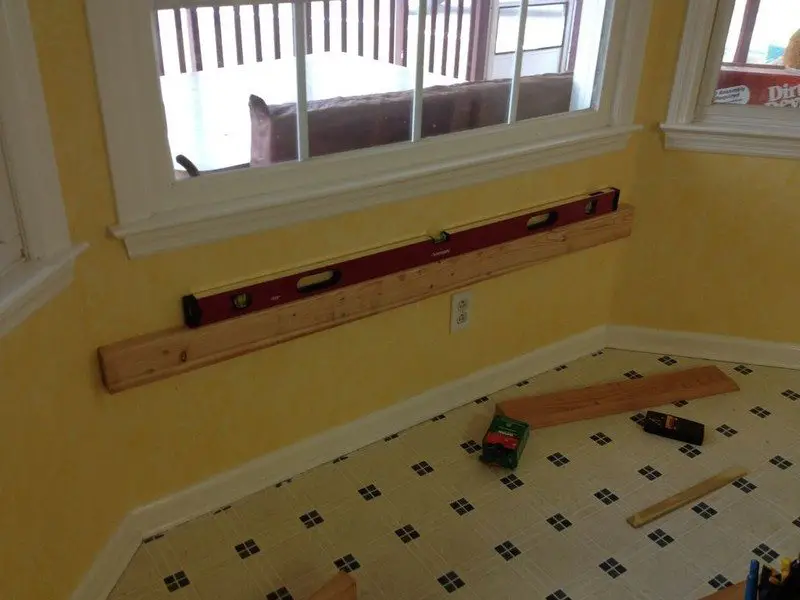
To begin framing the box, use a stud finder to locate the studs inside the wall. Normally studs are 16″ apart on center, however, there is likely to be some variation under the windows. With the stud locations marked, mount a 2×4 along the back wall using 3 1/2″ wood screws. The top of this board is 18 1/4″ off the floor so the final height will be 19″ when the 3/4″ plywood is added. Make sure the 2x4s mounted to the wall are level. There is no reason to miter the 2x4s in the corners as there is no benefit to doing so. These ends will be hidden from sight and mitering the ends would have no effect on strength.
The next step is to remove the baseboard and build the front wall frame. I chose to build the wall next so I could insure it was parallel to the back wall. Alternatively you could mount the other 2x4s on the side walls, however, this seemed a simplier way to determine where the wall would actually be located. Both the top and bottom 2x4s have 45° cuts on both ends to match the wall. The front wall is only 18 1/8″ tall so shims could be placed underneath it to bring it to level with the wall mounted 2×4. True to form, my floor had a crown in the middle and it was necessary to shim both ends.
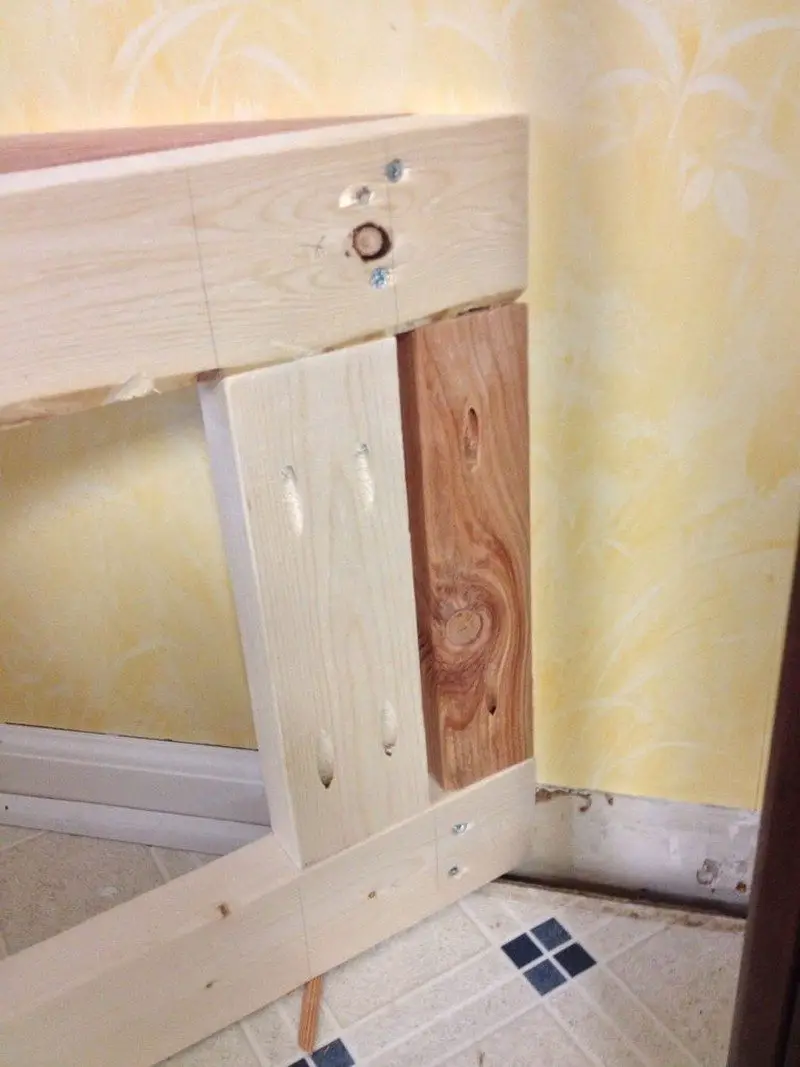
My design was for 4 front panels so I placed five 2×4 blocks in the front wall. These blocks are located behind where the poplar vertical trim pieces will be which allows for nailing. I’m not sure why I didn’t have the furthest left & right blocks all the way at the ends of the wall, but I ended up adding a block on each end for trim nailing (pic 3). Note the pocket screw holes in the blocks.
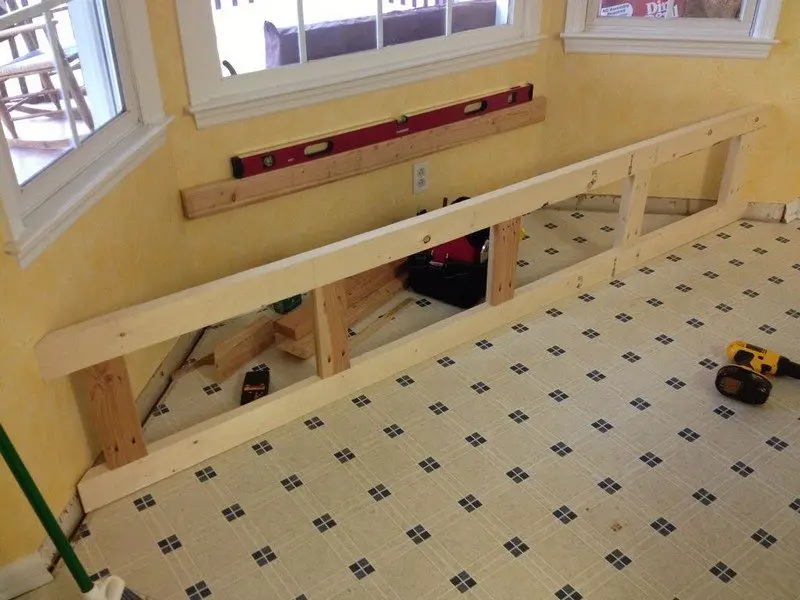
The final steps are to add the 2x4s on the side walls and add some bracing for the top. The side 2x4s have a 45° angle on the front end so it can butt up to the front wall. Once they are screwed to the walls using 3 1/2″ wood screws you can also place screws through the front wall and into the side 2x4s to lock the corner. Three 2×4 were installed between the front and back walls using pocket screws. The middle 2×4 is centered and the outer 2x4s are located where the end of the lid will rest.
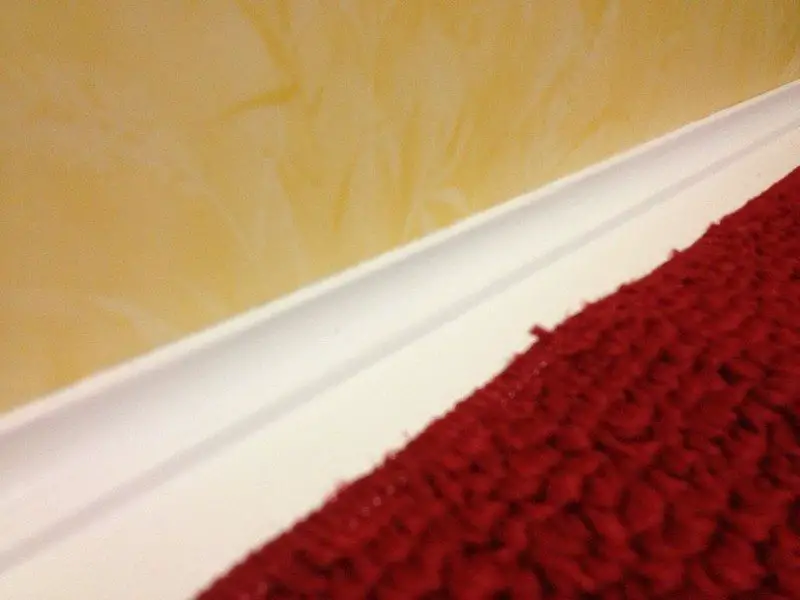
Lastly, this is a very good time to reinstall the baseboard & quarter round on the inside of the box.
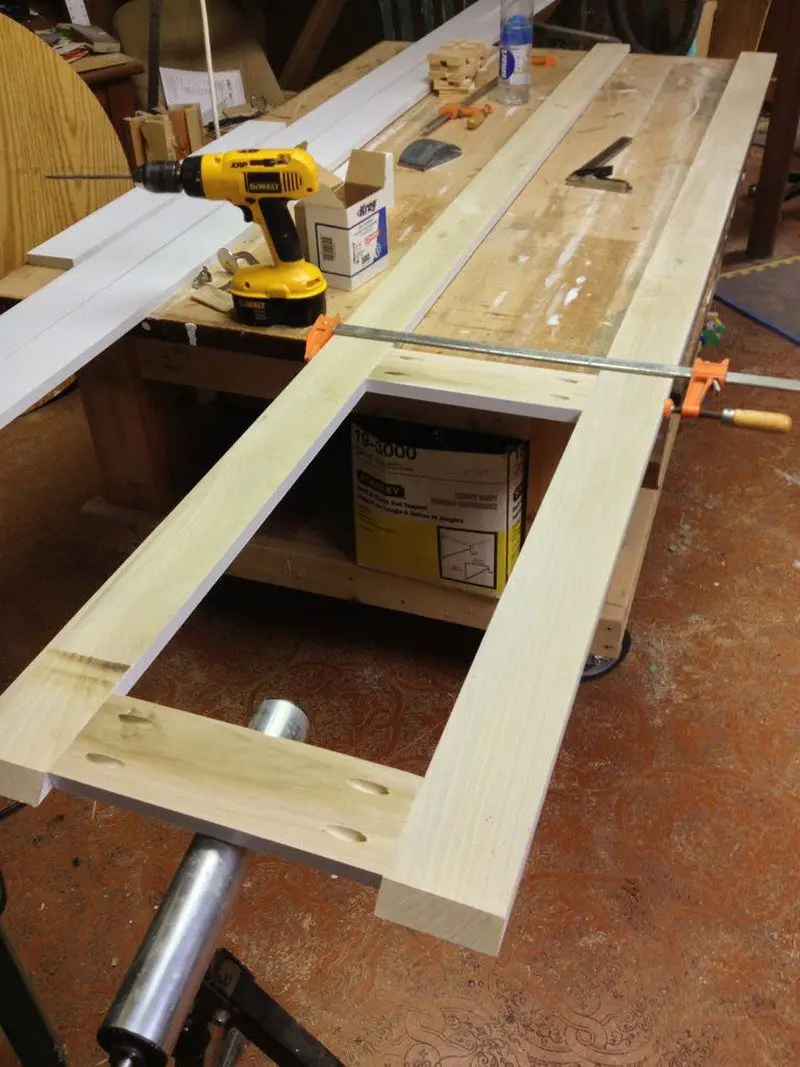
For a project of this size, I find it easier to build a faceframe in my shop as opposed to installing each board individually. Although it is not important in this case, faceframes also add considerable strength. I build the faceframe to be 18″ tall to accomodate the floor crowning which made the stiles (vertical pieces) roughly 11″ long. When this is installed, any gap will be along the floor and covered by the quarter round. Since the faceframe is shorter than the wall, it can be lifted flush with the top of the 2x4s before you nail it.
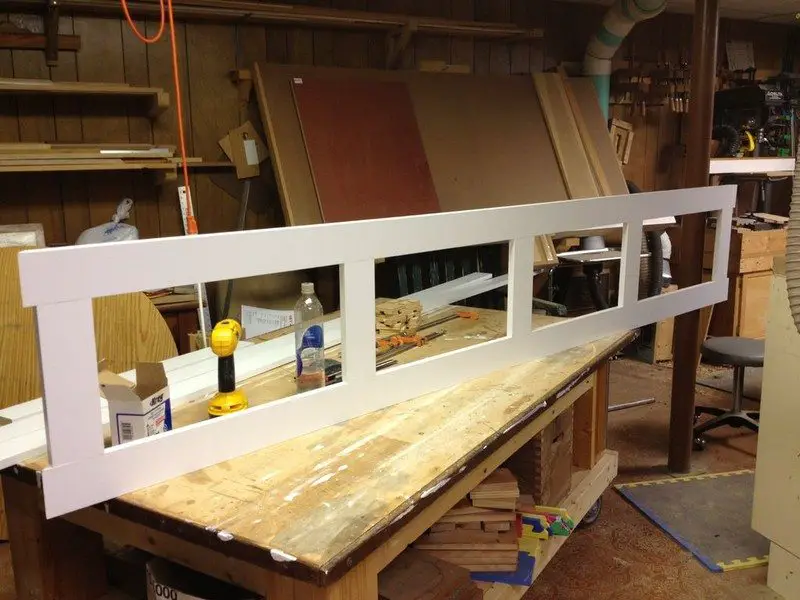
This picture shows the finished faceframe. Doesn’t it look nice painted!! You may also notice that the 2 inside rectangles are slightly smaller than the outside rectangles. This is by design to make the box look less symmetrical and “exact”. When something you build is very precise and regular, it doesn’t look natural. Nature is much more random than it is regular which can make a large symmetrical piece appear odd and less pleasing to the eye. When I have the opportunity, I try to add a bit of asymmetry to projects. No one will be able to tell you why they like it better, but they will like it better.
Now that the faceframe is ready, it’s time to cover the front of the box. I don’t have pictures of this step but it’s very straight forward. Apply a bead of Liquid Nails construction adhesive to the front of the 2x4s and nail the beadboard/plywood to the 2x4s. The only edge which will be visible is along the top lip so position the beadboard flush with the top of the 2x4s. Installing the faceframe is essentially the procedure. Run a bead of Liquid Nails on the back of the faceframe and nail it in place. Fill the nail holes with wood putty and caulk the seams with silicone window caulk.
The top of the window seat is comprised of 4 pieces of 3/4″ plywood with a 1 1/2″ strip of trim along the front edge. Pic 2 shows the shape of the pieces. I began by cutting the rear piece which is 5″ wide with 45° angles on each end. After a bit of trial and error, I found 5″ to be sufficiently wide to allow the lid to rest against the window and remain open. This piece could be wider, but not much narrower or the lid will fall down all the time.
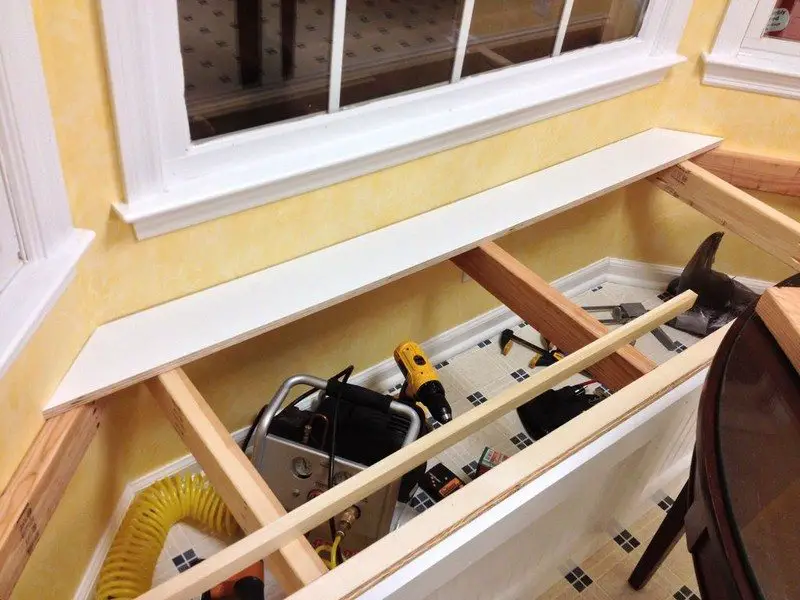
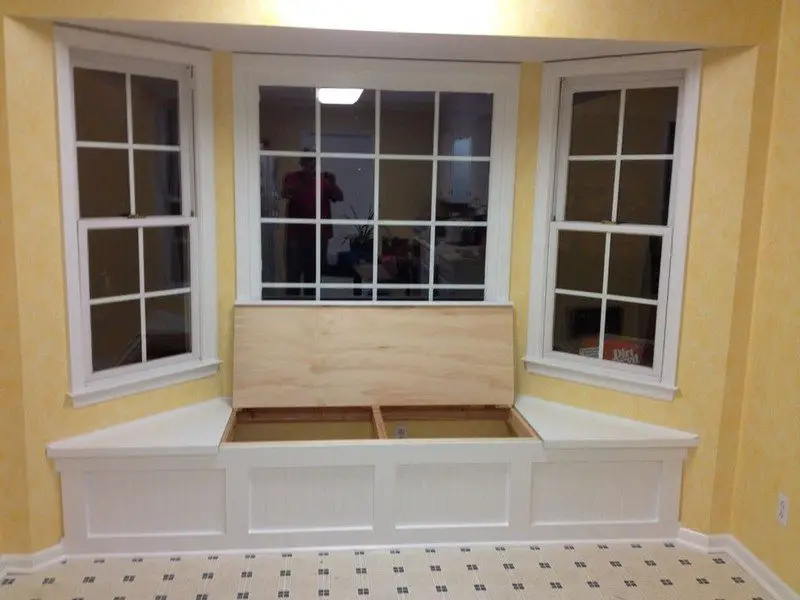
Next I measured the distance from the front edge of the 5″ piece to the front of the box to get the width of the lid. Since the piano hinge requires almost 3/16″ space I cut the lid to 19″ which was the actual distance measured. This gave me 3/16″ overhang on the front of the box when the hinge was installed. I chose to make one large lid, however, you could easily make two. Alternatively, you could also make a solid top and doors on the front. In this case, I made one lid which extended to the center line of the outside 2x4s. In this way, the side edges of the lid rest on the 2×4 for support. The lid measures 19″ x 51″.
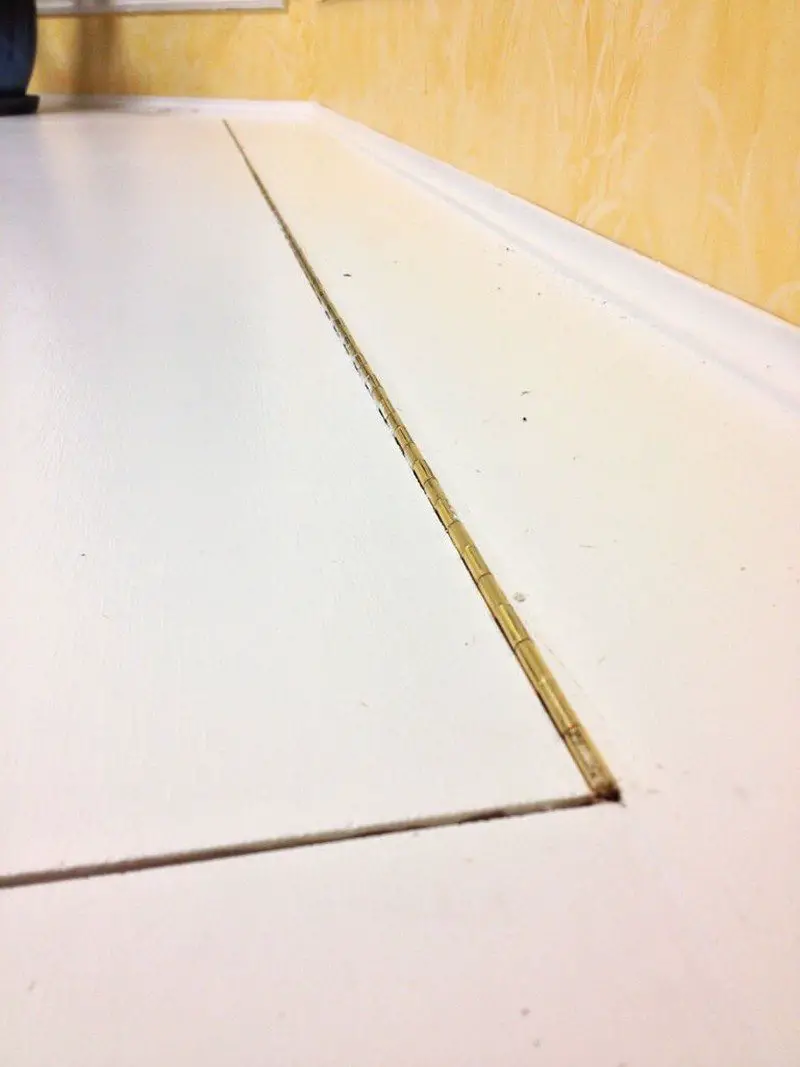
Before you glue & nail the 5″ back piece in place, it’s much easier to go ahead and attach the lid to it. This is a job you don’t want to do from inside the box. A piano hinge is a long continuous hinge which is very strong and a perfect solution for this project. PIano hinges commonly come in 30″ and 48″ versions and 48″ would have done the job. I chose instead to use two 30″ hinges so the entire gap would be filled. This was easier than mortising a space for the 48″ hinge. Piano hinges can be cut to the desired length using a hacksaw or portable grinder. The hinges I used have sides that are 3/4″ wide so I mounted them flush with the bottom of the 3/4″ plywood. In this picture you see that the hinges protrude a small bit but it’s not noticeable when the rug in laying on top of it.
With the 2 pieces hinged together, there’s a couple things that need to be done before permanently attaching them to the box. First is to mark out and cut the 2 smaller side pieces. This is most easily accomplished with the lid & back piece in place so you can measure size. Leave a 1/16″ gap between the lid and the side pieces in case the wood expands. Plywood doesn’t move much but a little gap is needed. Once the side pieces are cut, the second thing is to attach the 1 1/2″ trim to the front of the lid and 2 side pieces as in picture 5. Some wood glue and nails is sufficient.
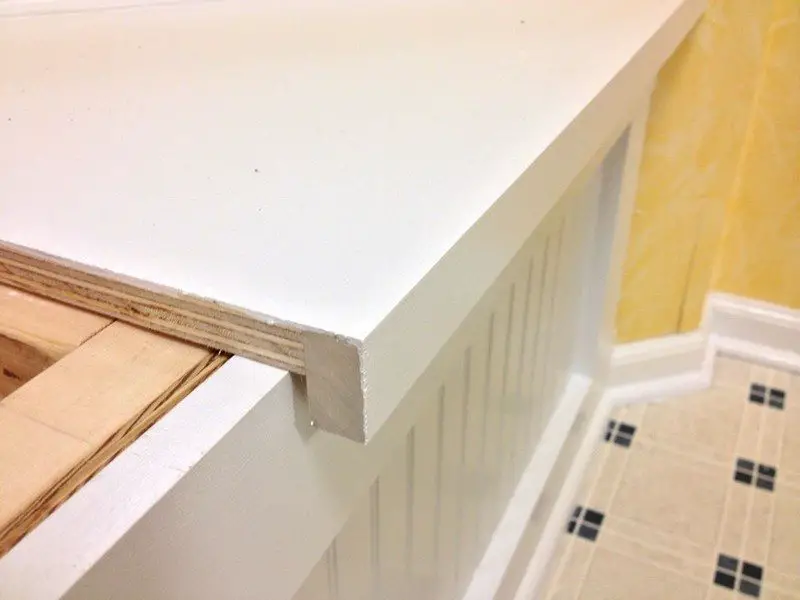
Now put it all together with some Liquid Nails and some solid nails. Lay down a bead of Liquid Nails on the 2x4s which are under the 5″ back piece and nail it in place. Then do the same with the 2 side pieces. Make sure to avoid getting the adhesive under the lid –especially when positioning & nailing the side pieces. This picture shows the 3/4″ cove molding along the top edge of window seat. I like cove molding here but you could also use quarter round or a larger piece of trim.
With everything in place it’s time to touch up the finish by filling nails holes with wood putty, caulking the seams and giving it another coat of paint.
And you’re done!
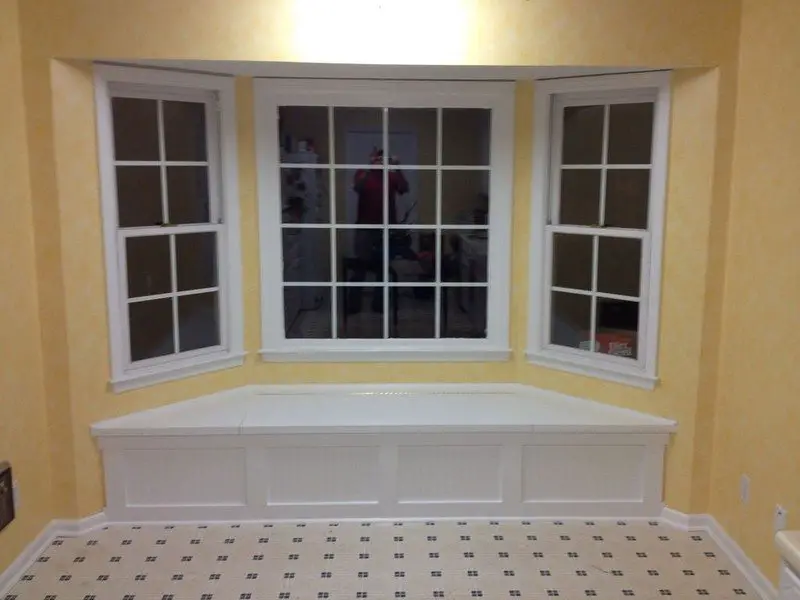
A window seat is pretty easy to build for such a large project and there’s a lot of bang for the buck too. In it’s simplest form, this seat can be built for around $100. This was a bit more because of the poplar trim and bead board on the front. Regardless it’s been worth every penny and it’s great to have some extra storage in the kitchen.
Thanks to kentdvm for this great project.
[embedit snippet=”media-net-inline-ad-728×90″]


