
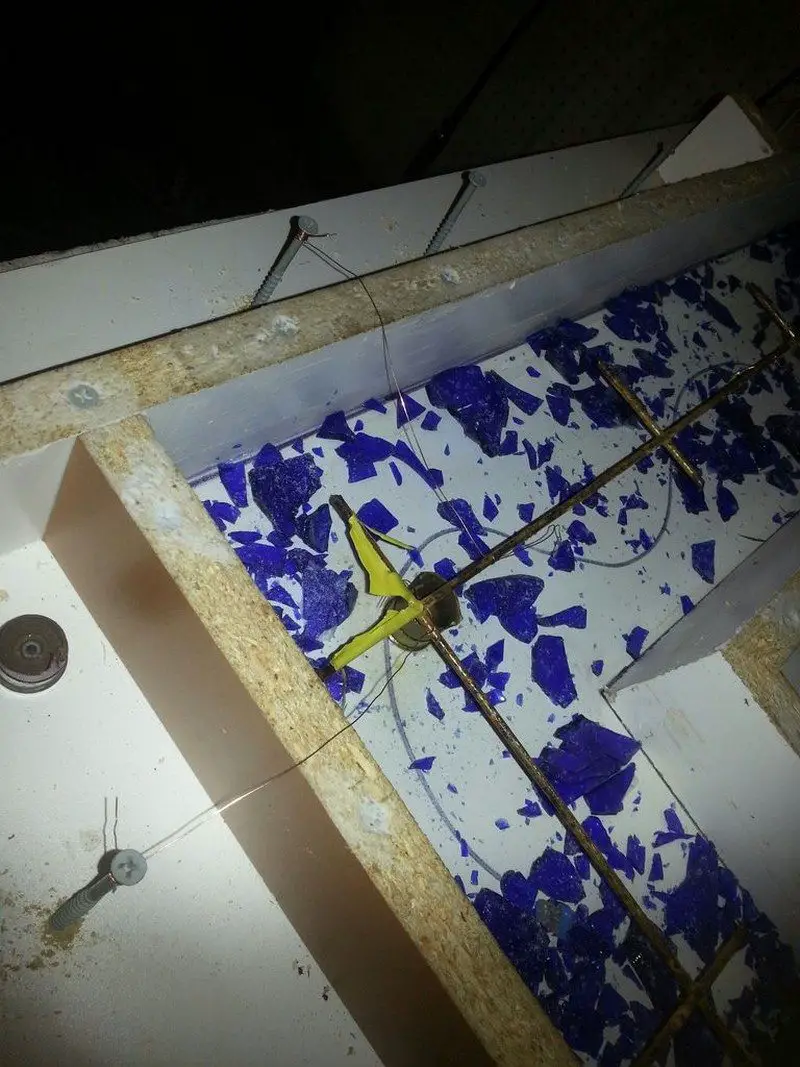
Now we need to insert remesh for added support and longevity of life. Without some kind of reinforcement it will probably fall apart at some point. Pick up some remesh from your local supplier and cut it to fit inside your form making sure that it will not come within 1″ of any wall. Then get some small pieces of 2×4 and make spacers to hold the remesh above the surface of your form while you secure it with wire.
I drilled and inserted screws on the outside of the mold every 5 inches inside and out then secured the remesh to them with copper speaker wire. Once the remesh is tied off all the way around then remove your 2×4 blocks. Whalah were ready for some more concrete.
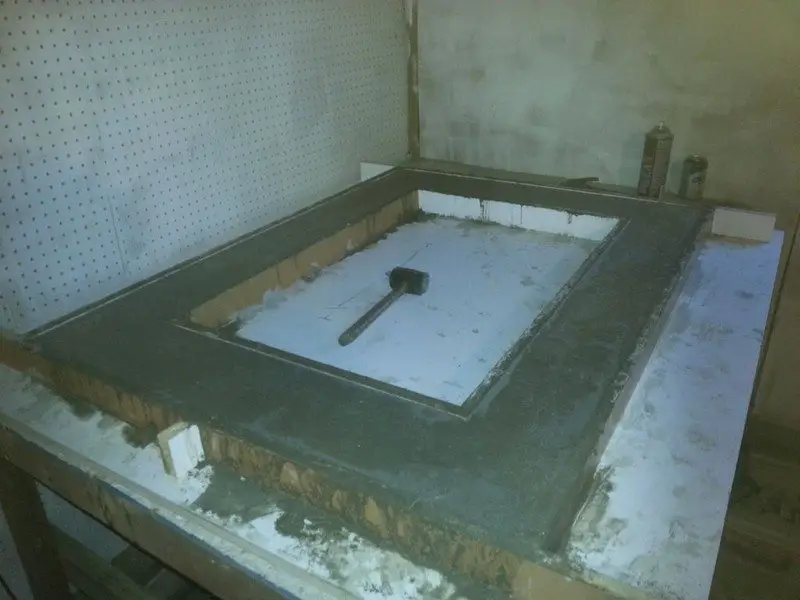
Now its time to fill your custom cap stone fire pit form with concrete. Grab a couple bags of quikrete 5000 and mix to the same consistency as the foundation maybe a hair more wet. Using your hands to start off gently lay concrete into the form all the way around the form until your about an inch deep so not to disturb the manly decor underneath.
Once you have it built up all the way around to about 1″ you can get more aggressive with it. Fill it till its slightly overflowing. Now grab a rubber mallet and begin wailing on the form in a downward motion striking the outside of the form for approx. 10-15 minutes, this is to vibrate out the air bubbles in the concrete which weaken the concrete and give a bad appearance. Let the mold sit for 20 minutes then wail on it some more. After two or three sessions screed off the overflowing form to a nice level surface.
Curing:
The curing of concrete for your custom cap stone fire pit happens over a prolonged period of time, up to 30 days. We want to catch it before it has hardened to the point of requiring diamond grinding pads which are costly, instead lets catch it while its soft enough to use traditional grinding stones and sand paper. Around day 2 or 3 is when you want to move on.
De-forming:
Once the concrete of your custom cap stone fire pit is starting to harden to the point that you have trouble scratching it with your fingernails then its time to take apart the forms and flip the capstone over so you can grind and sand it.
The outside of the form is easy remove the screws and put them back in there box for another project and remove the outside form walls. The inside walls may be more difficult. I chiseled a corner of one wall off then removed the rest one at a time. Be careful during this process and pay attention to the concrete, if you dont think its hard enough to flip then wait another day but if it is then grab a buddy and flip it over and begin the grinding process.
Grinding:
I did my grinding at a different point than most that make concrete countertops. Most suggest waiting 5 or 6 days then using diamond grinding pads to sand the concrete to a mirror finish that resembles granite. I on the other hand didnt want to go that far with it, i wanted it to look more natural.
So after two days i decided instead of waiting til it was super hard and investing in diamond pads for my custom cap stone fire pit. I would wait two days and hit it with regular sand paper and grinding wheels. I gotta say i think it turned out rather well. The concrete was dry enough to hold shape but soft enough to sand. Use a 2×4 as a sanding block if you dont have one.
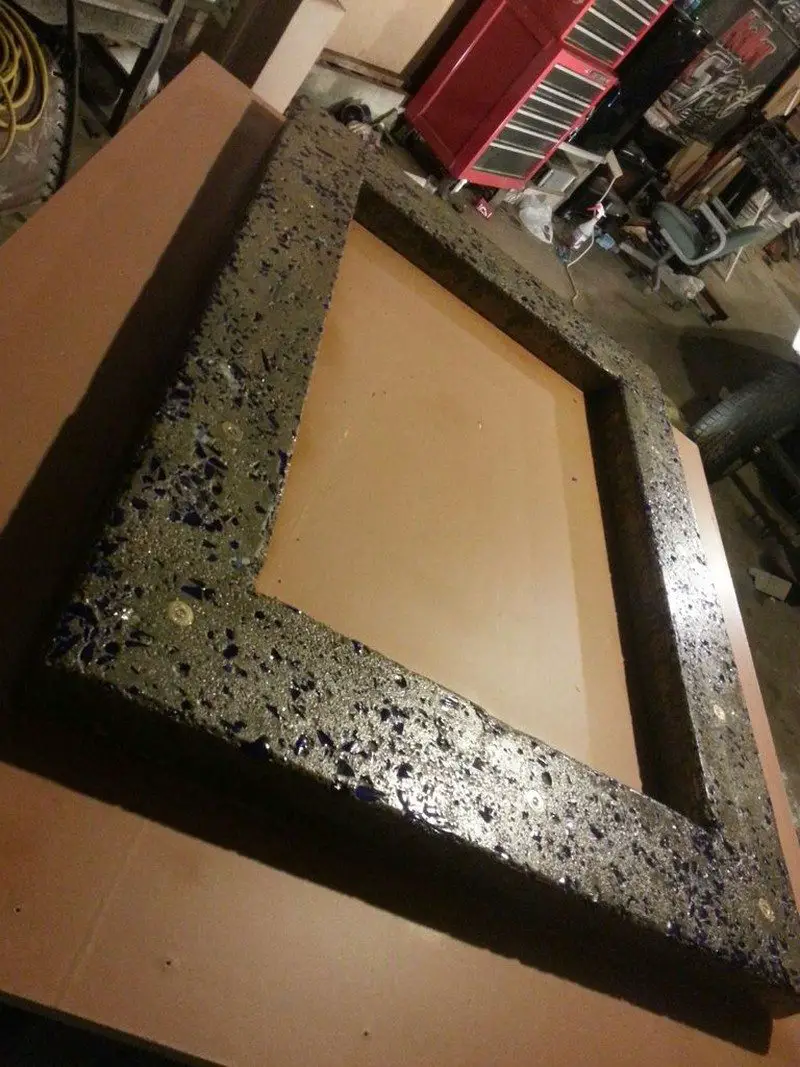
First use a regular grinding wheel to expose the aggregate and broken glass of my custom cap stone fire pit. It wont take much so dont use any pressure. Once you have the desired amount of aggregate and glass showing move on to sanding with 60 grit paper.
Use the 60 grit to get a flat surface and remove your grinder marks. A 2×4 or sanding block makes it pretty easy. Make sure to sand the sides of the capstone as well as the top and to make it extra smooth keep the capstone slightly wet. Once your done with 60 grit repeat this step with 120, 180, 220, 320, 400 and 600 at which time you will be done.
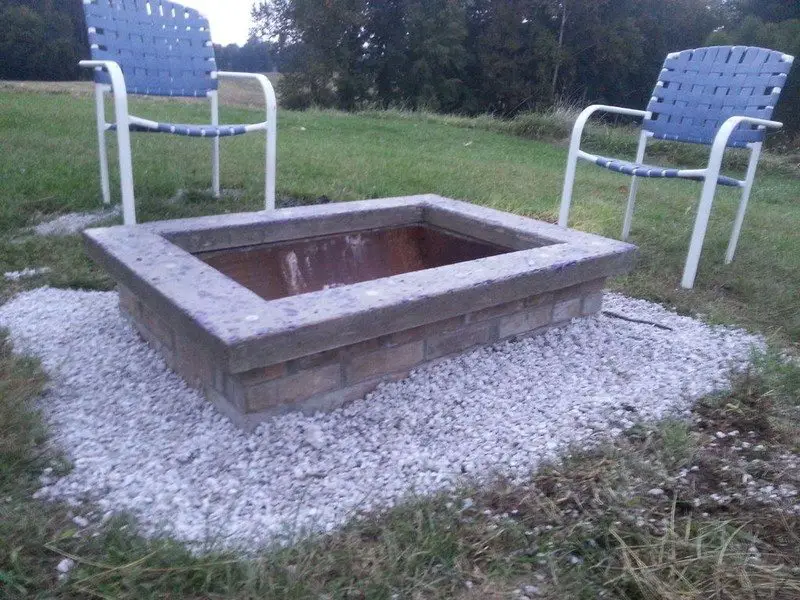
Setting the capstone. A week after the pour its time to set the capstone, theres two ways you can do it, set it in mortar, or drystack it. I decided to drystack just in case i ever needed to access the barrel. Grab a buddy and tilt the stone up and set it in place for your custom cap stone fire pit, making sure to center it.
Sealing the capstone:
Before sealing the capstone give it a good bath and let it dry very very well before sealing. After doing some tests with a thermometer i believe any sealer would work on the surface of the capstone due to the fact that it doesnt get hot. However the inside edge of my custom cap stone fire pit does, i recommend using some 1200 degree black grill paint on the inside edge, then seal the top, i used 1200 degree clear coat but may go back later with epoxy. Let it sit overnight.
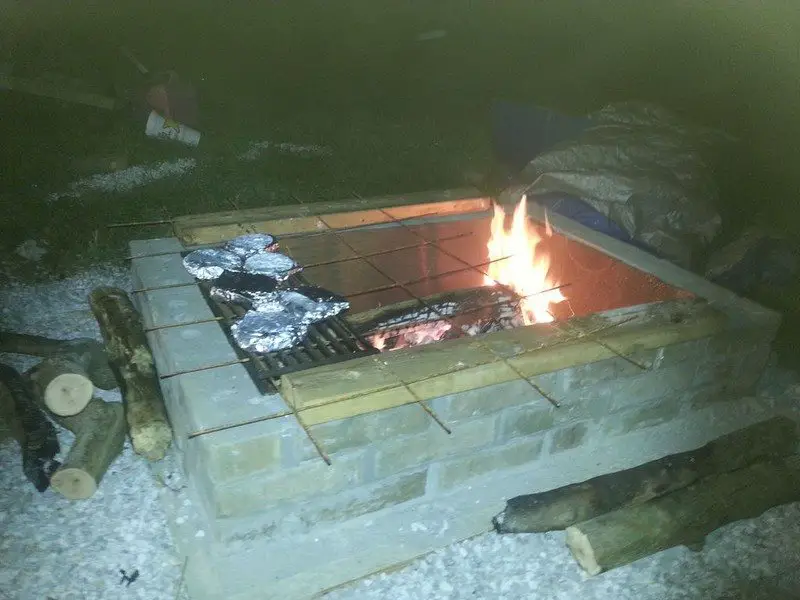
Now you need to cure the high temp paint or clear on the custom cap stone fire pit, to do this start a small fire inside the pit and let the capstone slowly warm up, the next day start a slightly bigger fire and the third days start a full size fire. This will cure the ceramic in the paint.
Custom Cap Stone Fire Pit Accessories
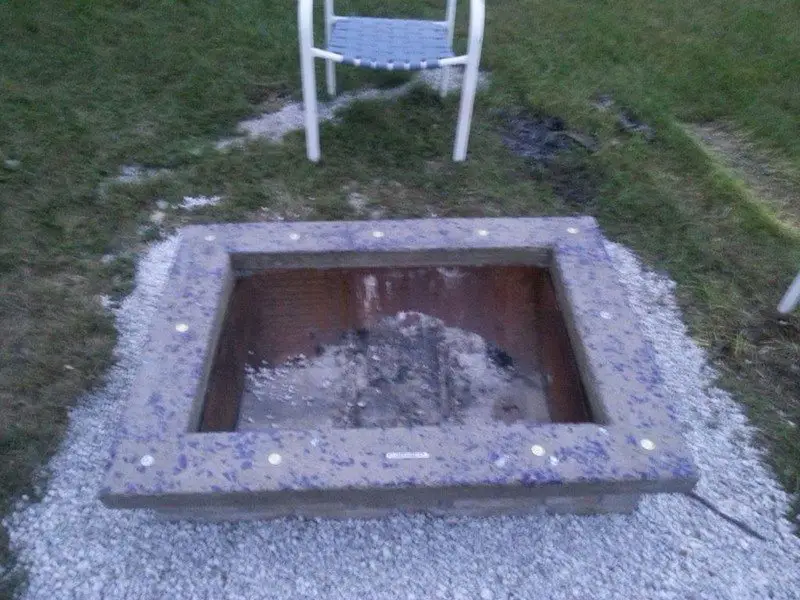
Water drainage:
Drill 1/2″ holes every 6 inches in the bottom of the barrel in the pit so water can drain out.
The man-weenie stick:
Take a green, straight stick thats around 4 ft in length and has a smaller end diameter of approx. 1/4″. Shave the end to a point, now move up 6 inches and score a line around the diameter of the stick with ur knife cutting through the outside layer of bark, move up 1″ and do the same. Score a line from the first score line to the second and peel the bark off to make a clean cut revealing the white under the bark, repeat every 6 inches.
Ash removal and barrel saver:
Take the other half of the barrel from this build and cut the circular ends off leaving you with a rounded piece of sheet metal, place in the pit as a removable bottom which makes ash removal a breeze and also keeps the bottom of your barrel from ever burning out.
Grilltop:
Almost a must for this fire pit, take some 1″ angle and expanded metal and weld together a grate that will set on the manpit then take two 1/4″ brake lines or stainless lines thats about a ft in length and bend them into a handle so you dont need gloves to pick it up after cooking with it.
Isn’t this a great fire pit design? If you are in for a grill, you can do so without any difficulties because of its wide and level top. You can even use the capstone to place your drinks, especially during the cooler nights!
It’s truly a quality outdoor feature and yet very easy to make!
Thanks to RNation0001 for this great tutorial!
Conclusion
Building a custom cap stone fire pit can be a rewarding DIY project that enhances your outdoor living space. This project not only offers warmth and a gathering spot for friends and family, but it also allows for personalization with unique materials like broken glass or custom emblems. With the right tools, materials, and a bit of creativity, you can create a functional and stylish centerpiece for your backyard.
For more incredible outdoor fire pits, check out our fire pit coffee table project!


