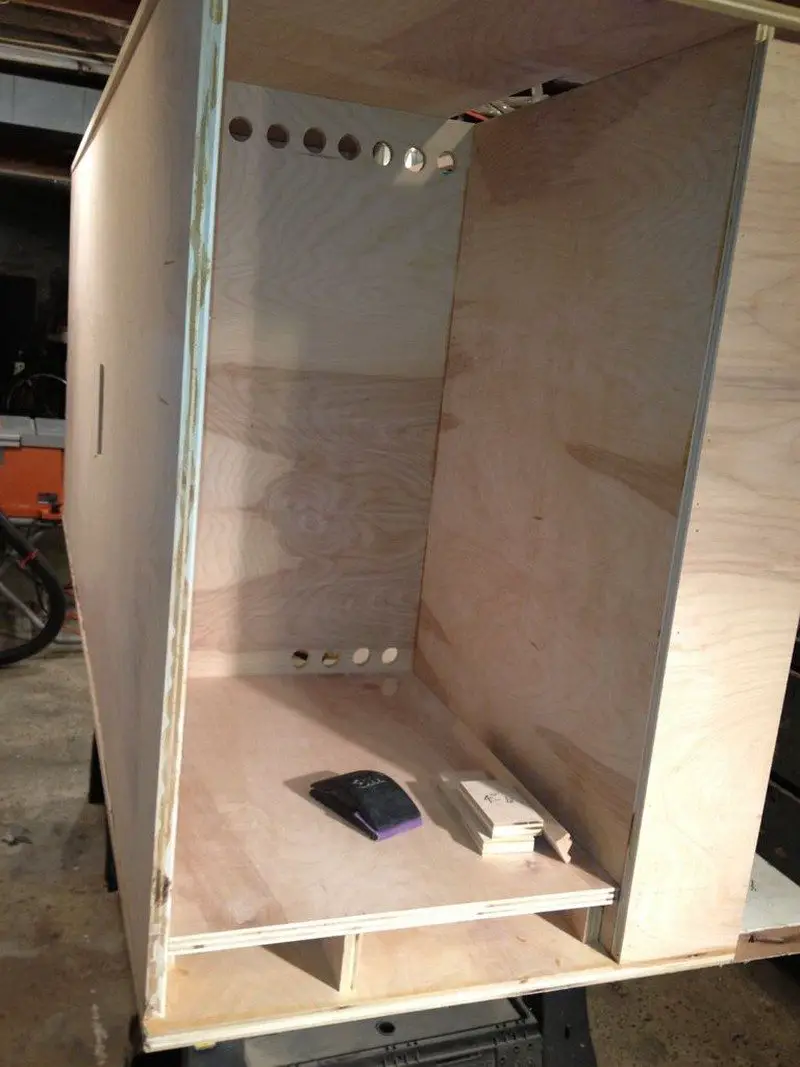
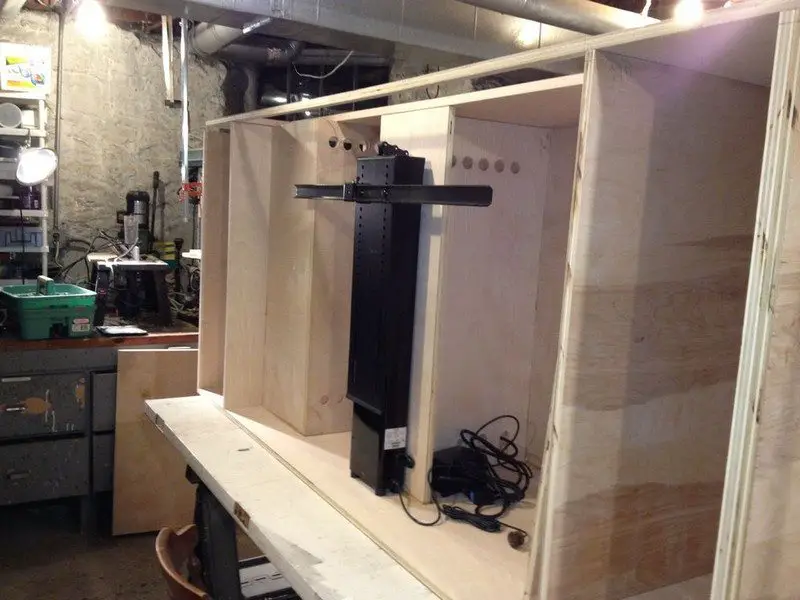
Cut holes for speaker wires and AC outlets of the TV lift cabinet Carefully measure where your AC outlet is on the wall.
- Cut a rectangle hole in the back of the TV lift cabinet with a skill saw so plug access goes through the AC outlet. If you don’t have a wall outlet, you will need to bring power up through the bottom.
- Cut a hole in the bottom to bring your speaker wires up from the floor. If your speakers go up through the top of the TV lift cabinet, you can drill holes in the top for that later.
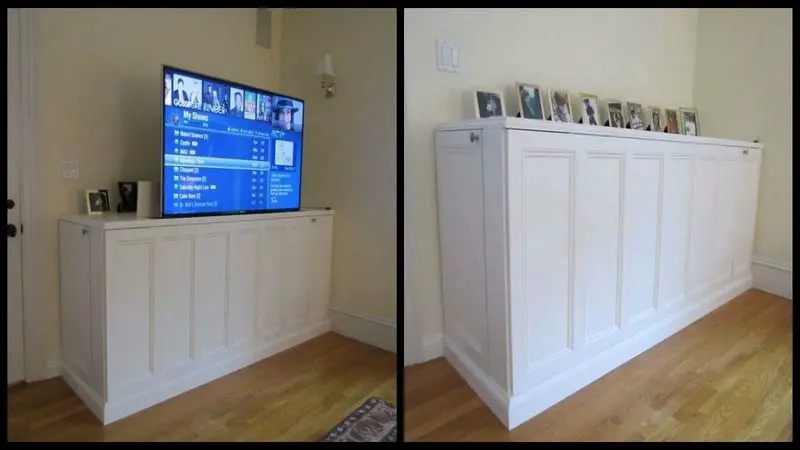
Cut the top flap door in the top and install the piano hinges. Dry fit this and convince yourself that everything lines up and is flat here by laying the top on the carcass. Note how wide your TV is and where it will hit the bottom of the top when mounted on the lift. The measurements here are for my 60″ Samsung TV which is 60″ wide and 1.5″ thick.
- Transfer the rectangle to the top panel “F” as shown in the Top Panel View drawing. Drill a hole that is wide enough to insert your skill saw blade in the 4 top panel corners of your marked lines.
- Stick the skilled saw blade in the holes and CAREFULLY cut your lines to remove the flap door rectangle. This is scrap wood.
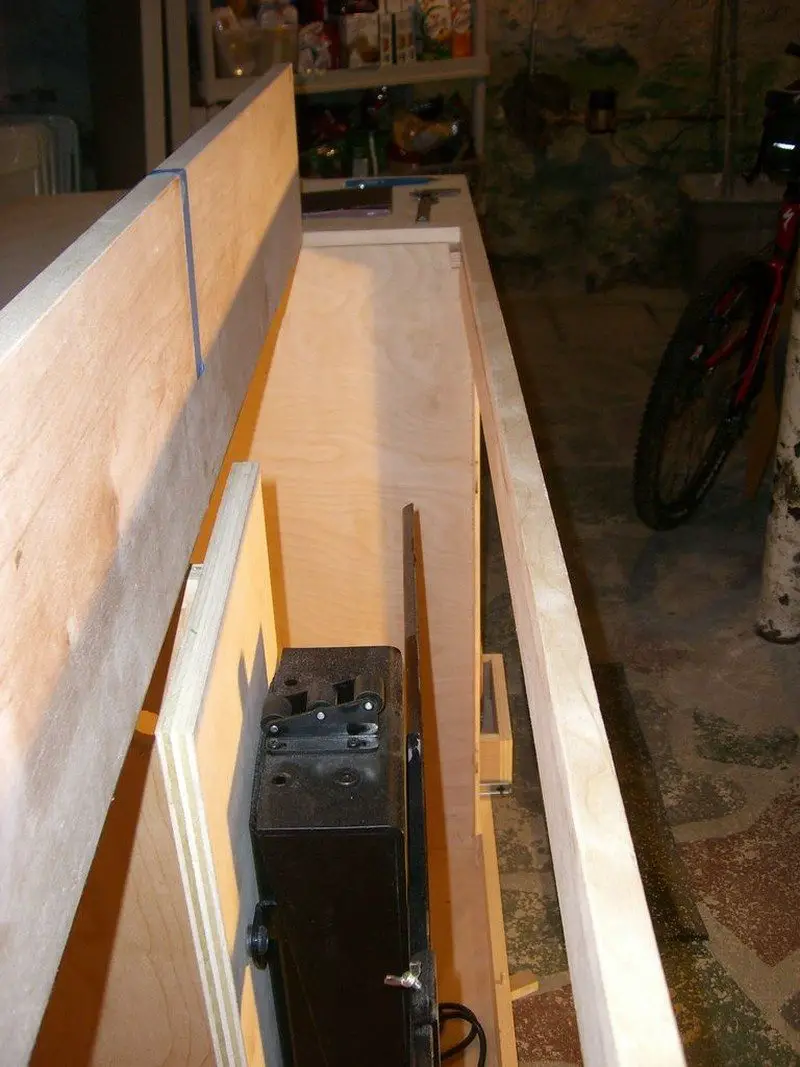
- Get a helper to help you move the carcass of your work table now. Put it on a floor or another set of saw horses nearby. You will need the flat work surface to get the piano hinge and “FD” on the top.
- Make sure that the Flap Door “FD” piece you cut will fit nicely in the top hole with at least 1/8″ clearance on each side.
- Line up the Piano Hinge with the back of the “FD” top and you will see that the “FD” top needs to be trimmed to cut a slot as shown in the Top Panel View drawing. Mark this slot and carefully use your skilled saw to cut this. Use 60-grit sandpaper to make sure everything lines up nicely and has clearance.
- Install the edge tape to all 4 inside areas on the top “F”. Install the edge tape on the 4 sides of the flap door “FD”. Do not put it in the hinge slot. Make sure there is still good clearance in the hole.
- See the videos for edge tape installation tips. When the iron is hot, carefully apply the edge tape as you did on your test pieces. Cut the edges carefully with a sharp box cutter. Using 100 grit paper ONLY, remove the excess edge tape as you did in your test pieces.
- Install the hinge screws per the video tips. The idea is to align the bottom of the hinge to be flush with your work tabletop. Mark the holes and install the hinge to the flap door first. Next, take the Flap door with a dangling hinge and attach this to the Top.
- Make sure it lifts up and down smoothly. Carefully bring it over to your carcass and lay it on top. Verify that it is where you want it to be and swings up and down nicely.
- Put in small pieces of scrap as stopblocks on the right side of the carcass were needed to support the door when it descends. Glue and clamp these stops.
DO NOT attach the top part of the TV lift cabinet yet. Do this with L brackets in the Final Assembly.
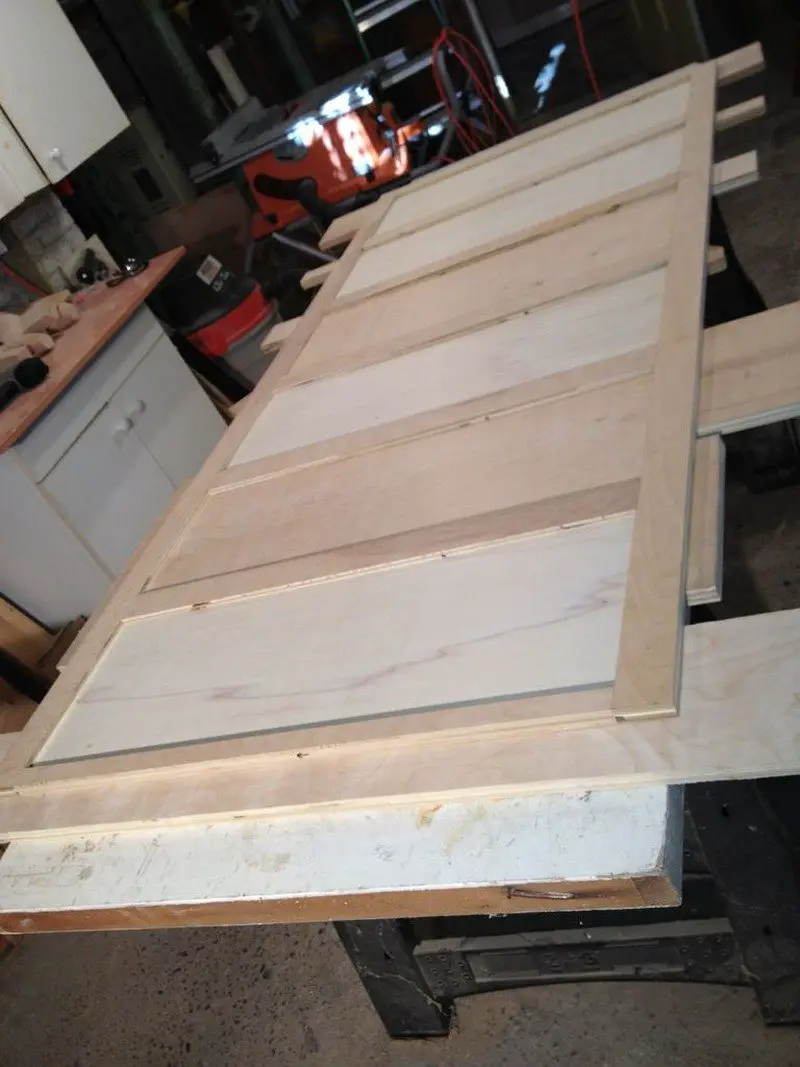
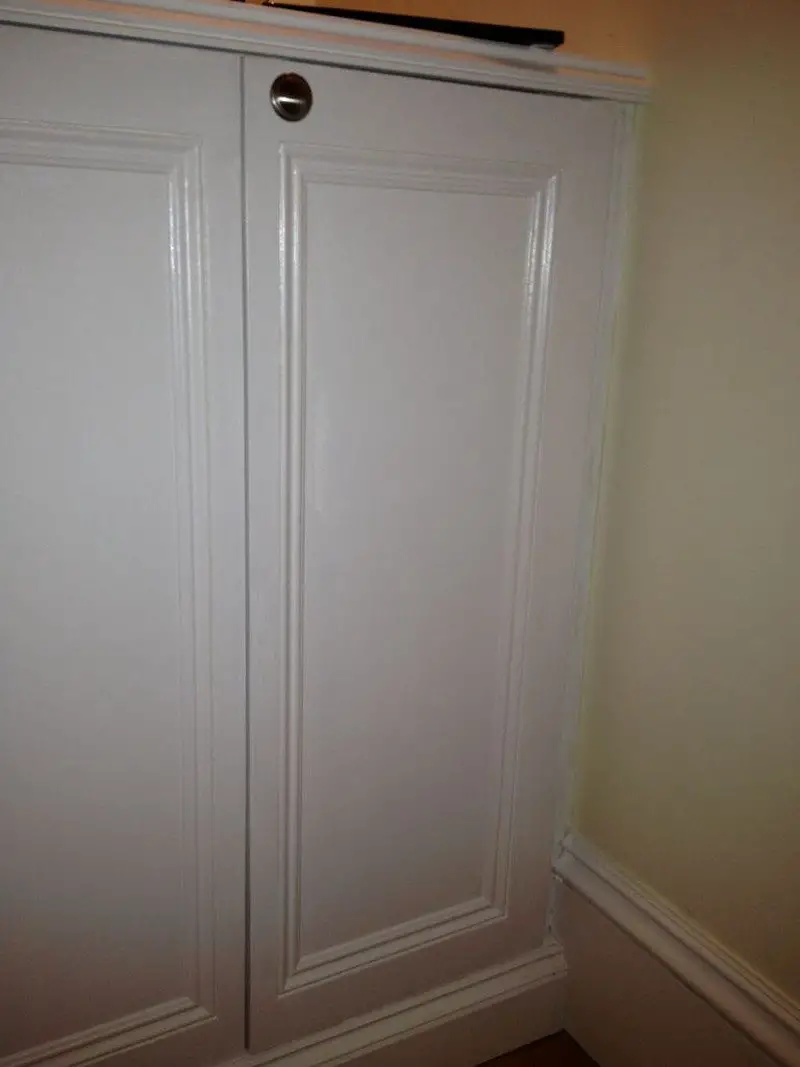
Building the doors and front panel of the TV lift cabinet feels very rewarding. They quickly become beautiful pieces for relatively low effort. Definitely watch the video clips on the door and panel sections. The rails are the top and bottom pieces. The stiles are the left and right vertical members. The rails and stiles all need to have grooves cut in them on the table saw. The centre panels’ edges will fit in the grooves.
- Set the table saw blade height to just over 1/4″. Set the fence to be 1/8″ from the blade. Make two passes through this setting to guarantee that the slot is clear of material.
- Since the 1/4″ plywood panels are 3/16″ thick, you need to move the fence 1/16″ to the right. Make 2 passes through again. Test this process out a few times on some scrap to get your technique down.
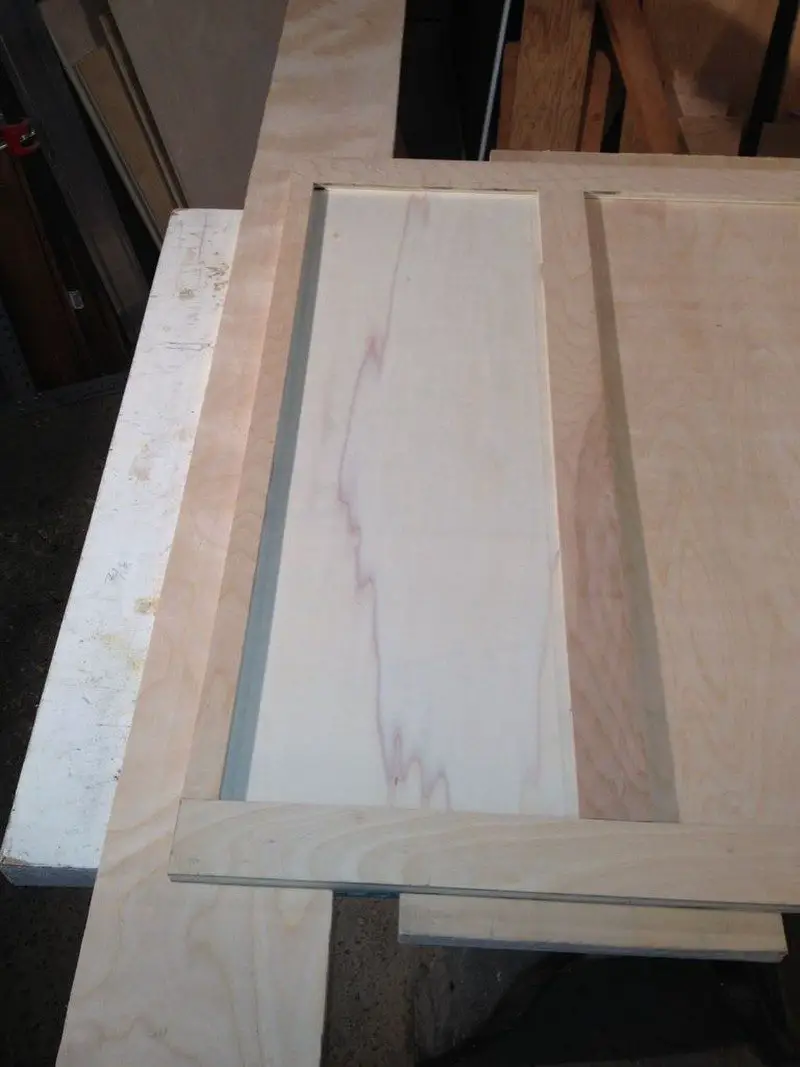
- Dry fit your door together with the 2 rails, 2 stiles, and the panel in the centre. Note that the front right door is shown in the front view drawing. The front right door has different size stiles for the right and left. The left side door is shown in the Side view drawing.
- Bring your dry-fit door over to the carcass and convince yourself that it will work. You should see a 3/8″ overlap on the 3/4″ wood edge where the hinge side will be. Note that on the right front door, the left edge of the door ends to the left of the “D” part as shown in the drawings.
- Slip in your panel and with each door, put some glue on the top and bottom of the stiles. The panel can float on the inside. Put a clamp on each side of the rails and press the glue gently until you see some squeeze-out. Let it dry for a few hours.
- Build the front panel assembly up in the same manner as the doors. Carefully verify that the test fit will fit in place with the right side door leaving about a 1/8″ gap on the right side of the front panel assembly. The left side of the front panel assembly should be centered on the 3/4″ wide edge of the piece “A3”. You will need long clamps for this part.
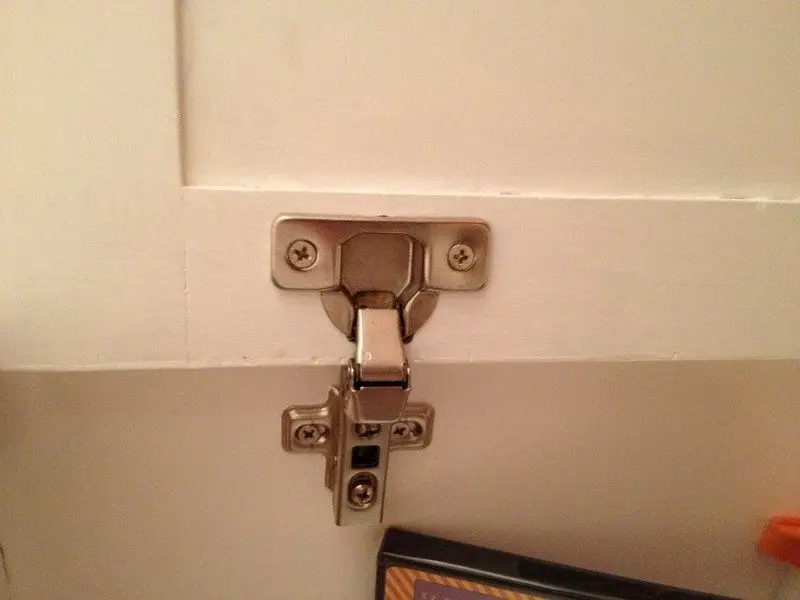
The 1/2 overlay hinges are forgiving for left/right alignment. This can be adjusted if you are slightly off in your measurements. Definitely use 2 pieces of scrap plywood to test your hinges before drilling into the real parts.
- Install one hinge centred 4″ away from the top. Install the other hinge 4″ away from the bottom. Mark a line in each 4″ position on the doors. If your hinge has a template then use that, otherwise, hold your hinge and carefully trace the outline of the bottom of the hinge on the door. Referencing the picture below, the hinge should be about 1/4″ away from the door edge.
- On a drill press, carefully hold the door or build up a platform near the drill press to hold the door stable on the drill press. Using a Forstner drill bit, drill into the outline you made. Test the hinge to see if it will fit in your home. You may need to use a smaller Forstner bit to remove additional material. You should set the stop on the drill press so you don’t drill too far into the door panel. When you have removed enough material and the hinge fits in the hole, mark, drill, and screw it in.
- Referencing the picture and the test piece you made, mark the TV lift cabinet side of the hinge. You can remove the cabinet side of the hinge plate with a quick release. Install both the plates and then click the doors into place.
Continued Page 4…


