Storage is necessary if you want to keep your home uncluttered. But thoughtfully designed storage can be difficult have. Each space is as unique as the person who occupies it. Ideally, the shape and function of your storage should fit your needs – not the other way around.
Having a storage unit that perfectly suits all our needs is one of the challenges we face when it comes to organizing our homes. This DIY dresser platform bed just might be an effective solution to your storage problem.
If you have various things that would need their space, this platform bed would help you organize them. This dresser platform bed would also make it easy for you to look for specific things instead of putting everything in one big storage bin.
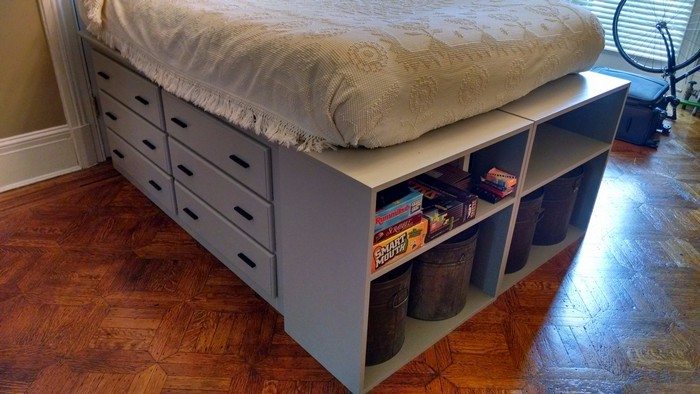
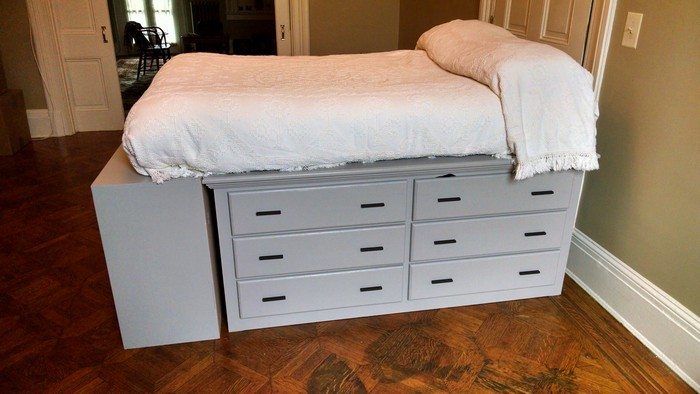
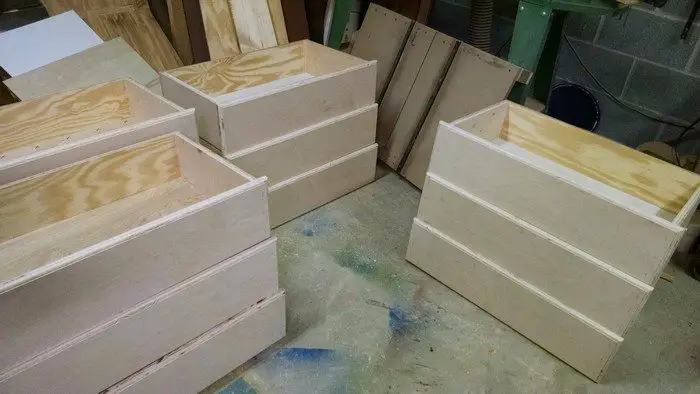
This is a DIY project, a dresser platform bed built from scratch. It consists of two long, low dressers and two bookshelves at the end.
What do you think of this dresser platform bed?
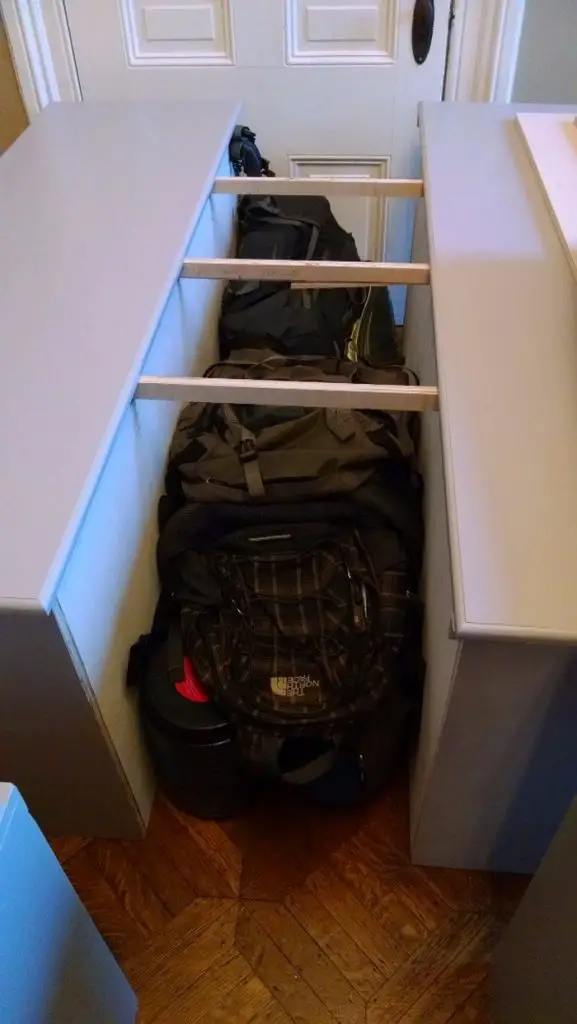
An open area in between the two dressers is provided for long-term and bulky items storage. The bookshelves are custom-built like the dressers so that their dimensions perfectly match the items you plan to store in this dresser platform bed.
With this DIY dresser platform bed, you’ve got your self-storage space for items that you don’t frequently use or would only need from time to time. You can store a wide variety of items, from travel bags, clean bedsheets to books or toys that are used every day.
Are you excited to make your dresser platform bed?
Aside from providing great storage for many items, this dresser platform bed is also a space-saving piece of furniture. What more can you ask for?
While this step-by-step tutorial provides measurements, the dimensions of your DIY dresser platform bed would depend on the size of your mattress, the available space you have, and the materials you are using. Nevertheless, this complete tutorial on the dresser platform bed serves as a great guide especially if this is your first time with woodworking!
Do you need this kind of dresser platform bed in your room? Here is how to build a bed frame with drawers.
Click on any image to start the lightbox display. Use your Esc key to close the lightbox. ?

How to Make a DIY Dresser Platform Bed
Materials:
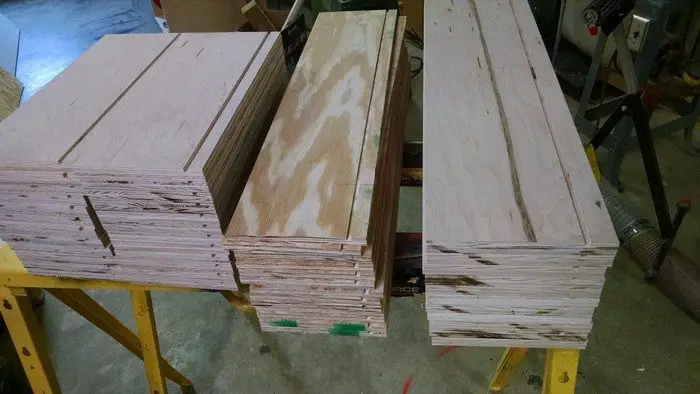
- 3 sheets ¾“ Plywood
- 1 sheet ½“ Plywood
- 2.5 sheets ¼“ Plywood
- 1 2×4
- Wood Glue
- Sandpaper
- Wood Putty
- Paint/Primer
- Plastic Drawer Runner Replacement Kit
Tools:
- Kreg Jig
- Table Saw
- Jig Saw
- Miter Saw
- Router
- Speed Square
Steps:
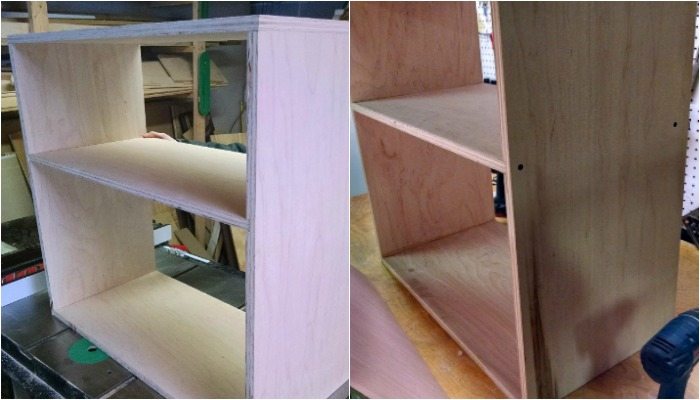
Dresser frame: Based on your desired DIY platform bed with storage size, you need to first calculate the dimensions of your dressers. We received a hand-me-down full-sized mattress, so we decided to make a flexible design that would work with either a full or queen-sized mattress. We settled on a 65” x 20” dresser top, which we would set 18” apart. Bookshelves on the end would make it long enough for a mattress.
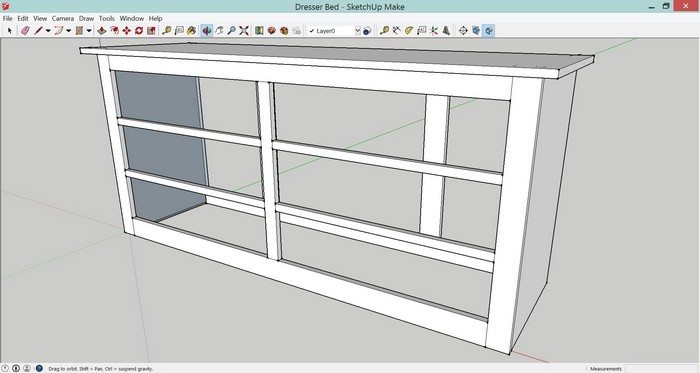
Before cutting any wood, I used a free Google sketch-up program to design a front and back panel to use for reference dimensions. On the back panel of the frame I had two 3” vertical boards for securing the runners, and I recessed the frame ¼” into the dresser so that ¼” backing would sit flush.

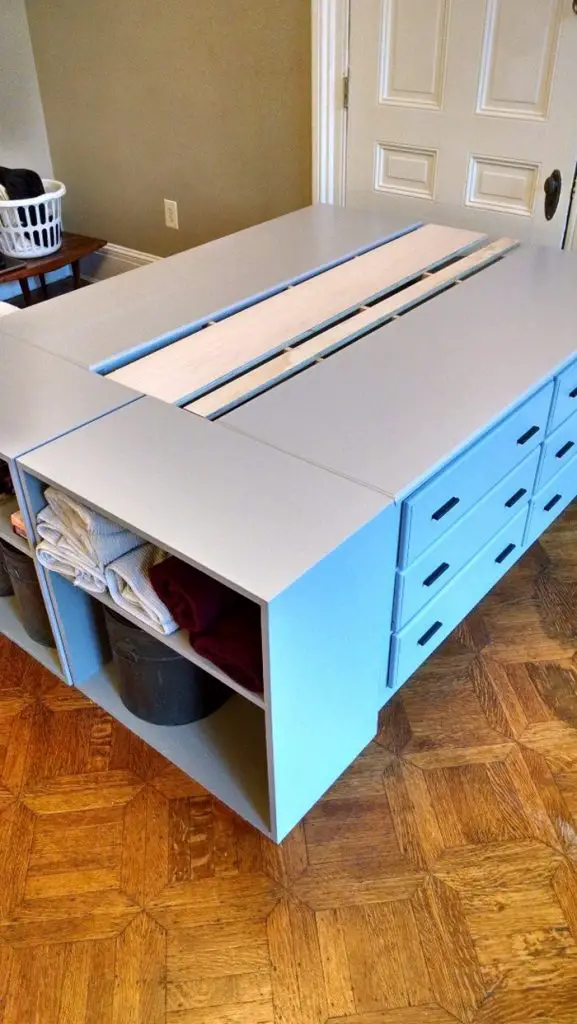
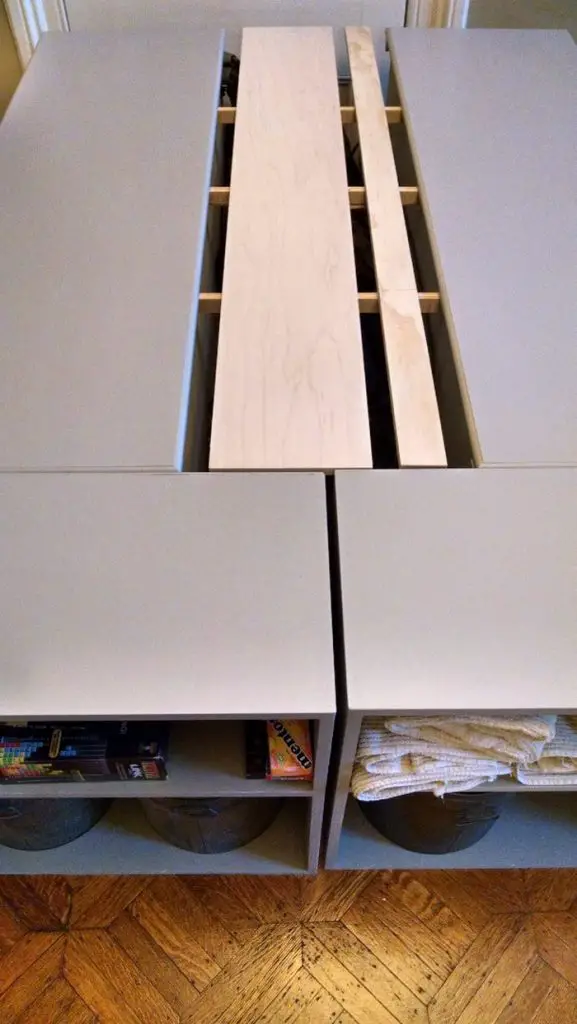
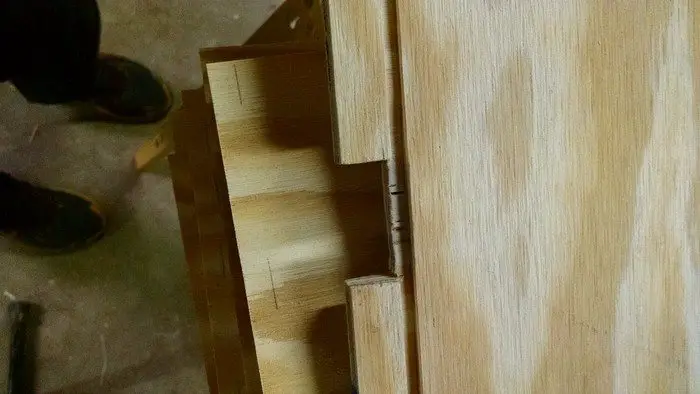
Another important forethought on the back panel was 1-1/4” deep, ¾” wide grooves along the top edge. These grooves allow cross pieces to span the 18” gap between the dressers to hold slats that will support the mattress. I made three equally spaced grooves, but if I were doing it again, I would make four grooves and have the outside ones at each end of the dresser, for added mattress support.
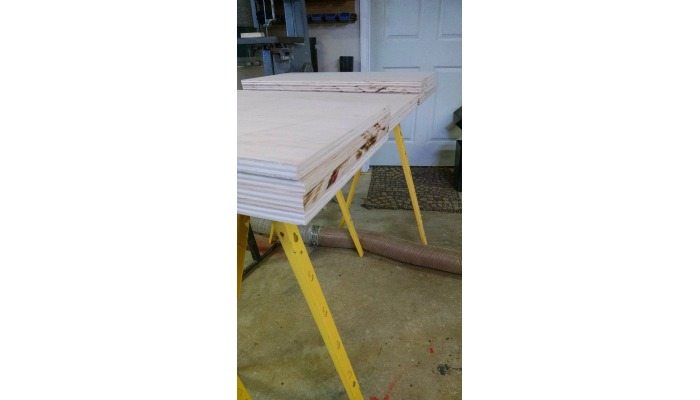
I measured all of the pieces off the google sketch model, planned the most efficient use of our ¾” plywood sheets, and cut out our pieces. While we were using the table saw and cutting ¾” pieces, we also cut out our two dresser tops and set them aside.

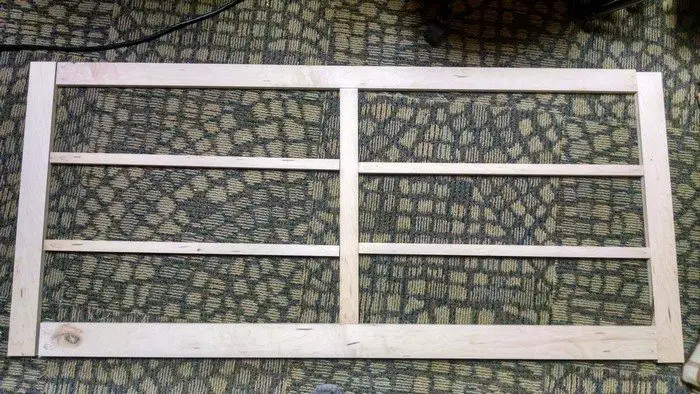
After cutting out all of the frame/side pieces and laying them out, we marked where we would use the Kreg jig at each joint including holes for attaching the dresser top. We used the Kreg jig to drill pocket holes where we marked and glued/screwed the front frame and back frame.
Getting the front panel to be square and in-plane is very important. One thing that helped us was making a piece of ¾” plywood that was the exact height our drawer spaces would be, so when we were screwing them together we used the spacer to make them all the correct height.
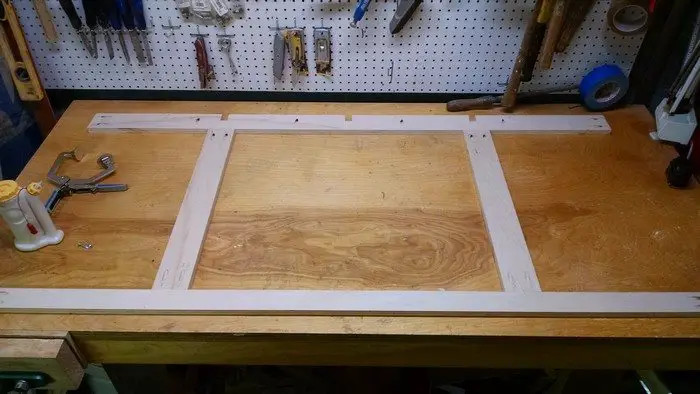
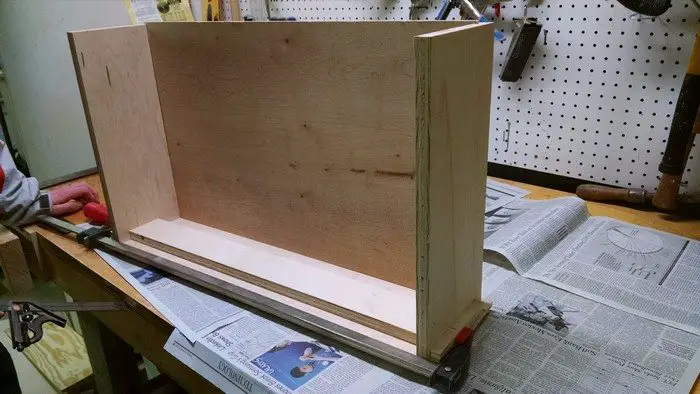
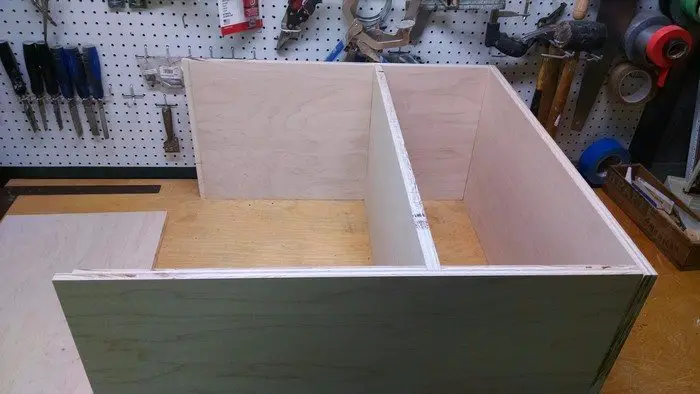
After giving the front/back frames time to dry, we assembled the basic rectangular shape of the dressers by drilling counter-sunk pilot holes and screwing them together with the addition of wood glue.
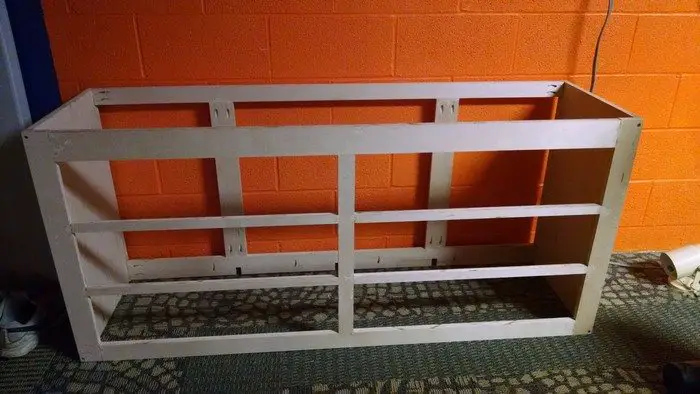
For reference, the pieces between the drawers vertically are 1” wide, and the pieces between the two columns are 1-3/4”. We left a 2-1/2” border on the top and 3” on the bottom.
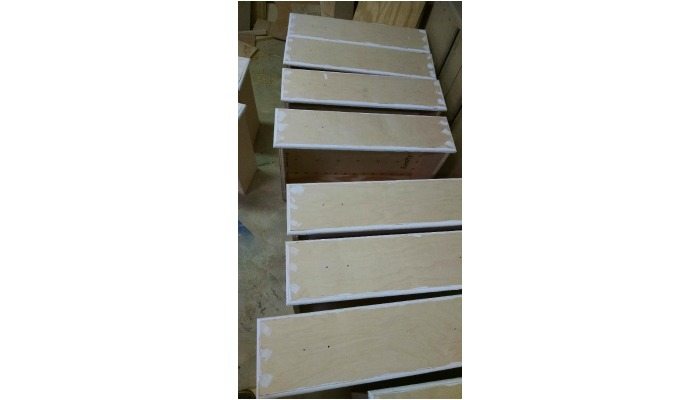
Drawers: Drawers were a little daunting at first, but after figuring out the design and style we wanted, I had a lot of fun making them. The face and sides of our drawer are cut out of ¾” plywood. The backs are ½” and the bottoms are ¼”. After determining the dimensions of all of our pieces, we cut them all to size using the table saw.
Faces: 28-3/8” by 7-3/8”
Sides: 6-5/8” by 15-3/4”
Back: 6-5/8” by 27-3/8”
We designed it so that there would be 1/8” gap on each side of the drawer when it goes into the drawer space. The face overhangs the drawer opening by ¼” on the top and the bottom and 3/8” on the sides.
We used a dado blade on the table saw set to 1/4 “ width to cut a ¼ “ deep groove 11/16” above the bottom edge of our drawer sides and back.
On the face piece, we cut the groove 1” from the bottom, so that the face would be centered over the frame opening when the drawers are closed. If you don’t have a dado blade, you can do the same thing with multiple cuts on the table saw blade.
To accommodate the drawer slides that we will talk more about in the next step, we cut a 2“ gap centered on our back pieces that extended up to the cut groove. Next we used the router to round all the edges of our drawer faces.
To assemble the drawers, we cut a spacer to the exact dimension of the inside of our drawers and cut 2 small ½” spacers, which is how much the face of our drawers overhangs the drawer sides. We used a nail gun with 1.5” brad nails and wood glue at all the surfaces to hold the drawers together. To assemble each drawer, we laid the face of a drawer down on the table, put the sides into position, slid the bottom piece into the grooves, and put the long spacer between the sides and the short spacers on the outside of the sides.
Ee used a long clamp to hold the whole assembly onto the face of the drawer. This centred our side pieces about the face and the groove for the bottom aligned the pieces vertically.
Since the clamp held the pieces together, we laid the drawer backwards and used a nail gun to nail through the face of the drawer into the side pieces. We laid the drawer back on the face, removed the clamp and used glue and nails to attach the back piece in place.
After constructing all of our drawers, we gave the glue time to set.
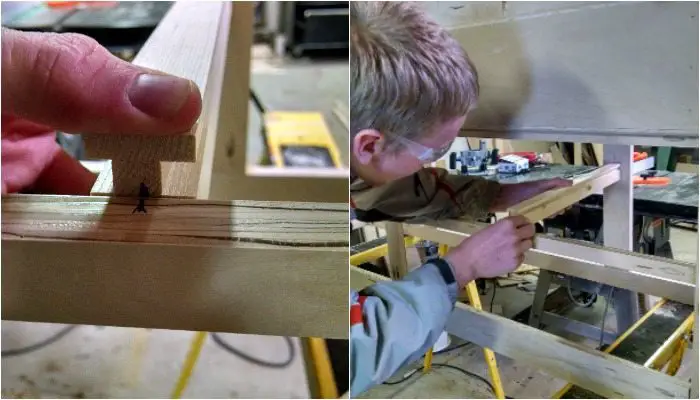
Drawer runners: We bought plastic drawer runner replacement kits for 12 drawers from Lowes. We bought them in the biggest size so that we could make wooden runners. We ripped a 2 by 4 in half and then ripped the dimensions to 1-1/16” by 1-5/8” by 16-3/4”.
Using the dado blade, we put ¼” grooves into each piece to create a t-shaped runner. After cutting each wood runner, we slid the plastic drawer runner piece over it to make sure it was a smooth fit. We screwed our plastic pieces onto the backs of all of our drawers and then installed our wood runners into our dresser frame.
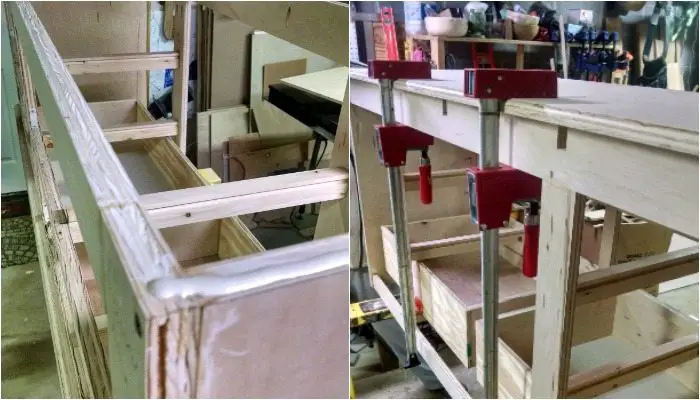
To install the runners, we re-trimmed each piece to fit exactly in the desired position. After marking the centre of the drawer space, we put glue on the front and back end, centred the piece and used a nail gun to attach the front end. Then I moved to the back to hold up the runner, while my wife put in the drawer and levelled it.
We adjusted the back of the runner so that the front of the drawer was flush against the frame. When we thought the drawer looked level and flush, I nailed in the back piece. As we went, we left each drawer in place to make sure the faces were parallel. We also labelled each drawer to ensure it could be matched back to its custom fit spot.
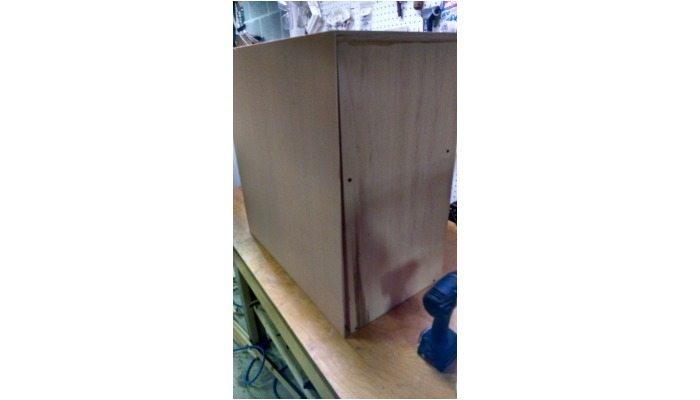
Installing dresser top and trim: To start installing the dresser tops, we first routed our tops with the same bit we used for the drawers. Next we removed all of the drawers from the dresser and set the top onto the frame. For our design, the top overhangs the frame 1.5” on the front and sides and ¾” on the back. We marked the top when we had it in place, removed it, and put glue on the joints. Then we clamped the top down and screwed it into place using the existing pocket holes we made using the kreg jig earlier.
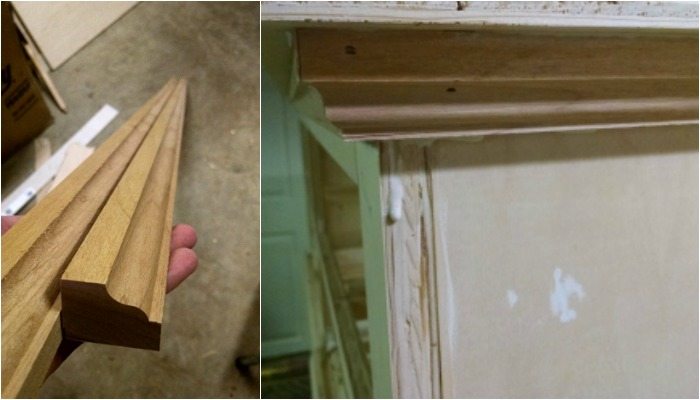
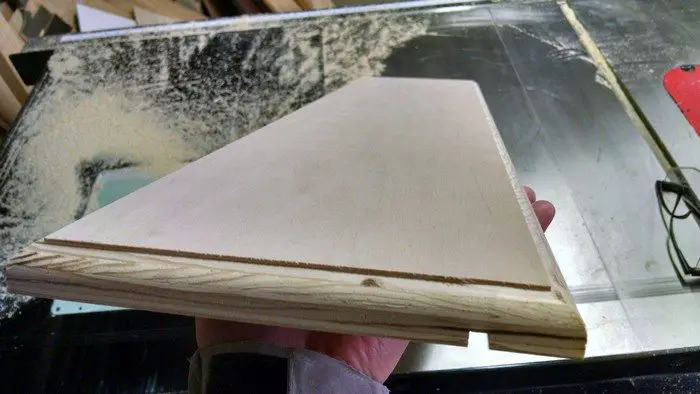
We didn’t buy any trim for this project, so we made our own with some old wood laying around. We routed one edge with a fancy looking bit, then ripped it so we got a 1-1/4” wide long strip. We made four long strips, used the miter saw to cut 45 degree angles for the corners, and nailed them under the top overhang.

I cut out ¼” and nailed it into the dresser. With that, I was structurally finished!
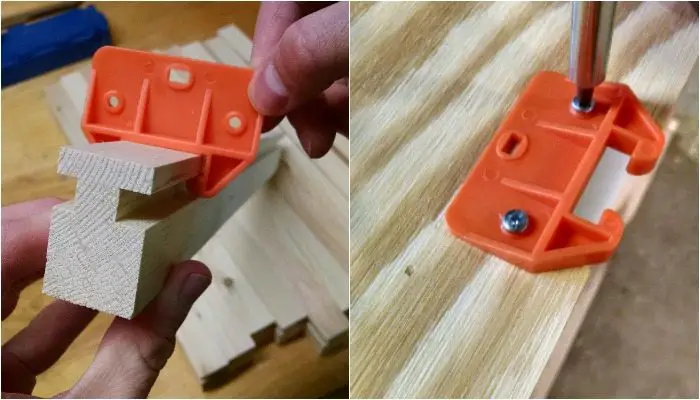
Drawer handles: My wife and I picked up some great simple hardware from a surplus store for $0.10 each! We drilled the holes for them before we painted and could hardly wait to see them on our dressers.
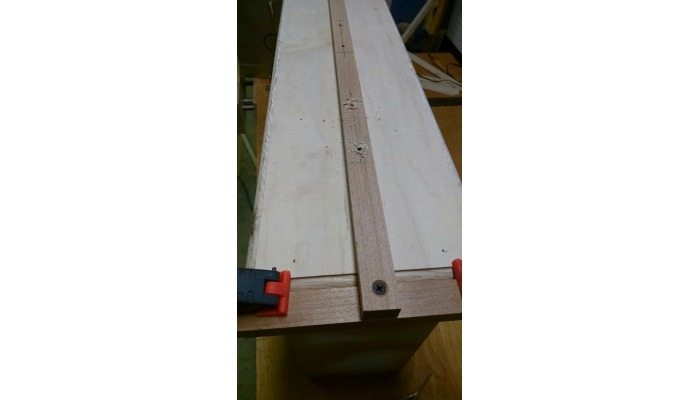
To drill the holes in a centred and repeatable way, I made a little jig to do the job. As you can see in the photo, all I had to do in each drawer was line up the side pieces with the sides of the drawer and clamp it in place, then I could drill the holes in the same place on every drawer. We also countersunk the back of the drawer face so the bolts would sit flush.
Bookshelves: The bookshelves were much easier to build than the dressers. Since our total bed platform width was 58”, we decided to make two 29” wide bookshelves. That way, we can slide one out of the way to get into the long-term storage, and they are easier to transport. We decided we wanted them to be 15” deep, which would make the whole assembly long enough for a queen size mattress. We didn’t mind that the full size mattress we have would leave a ledge on the top of the bookshelves.
Board sizes – We cut out two sets of the following, from ¾” plywood:
Top = 28.75”x15” (1)
Sides=28”x15” (2)
Shelves = 27.75” x 15” (2)
And a 28.75×28.75 piece of ¼ plywood for backing.

We chose our shelf height based on some big tin cans that we were going to use for storage on the bottom shelf, but you could make the shelf at any level. We found the dado blade to be very useful, because we just cut ¾” wide grooves ¼” deep at the bottom and at the shelf height. That made the assembly very easy.
We assembled the shelf dry (without glue) face down on the workbench, then glued and screwed the top onto the sides (remembering the countersunk pilot hole to avoid splitting). Then we did the same for the bottom shelf.
We found that our middle shelf was so snug in its groove that we just put in some screws instead of forcing it out to use glue.
We nailed the backing onto the back of the shelf and were finished!
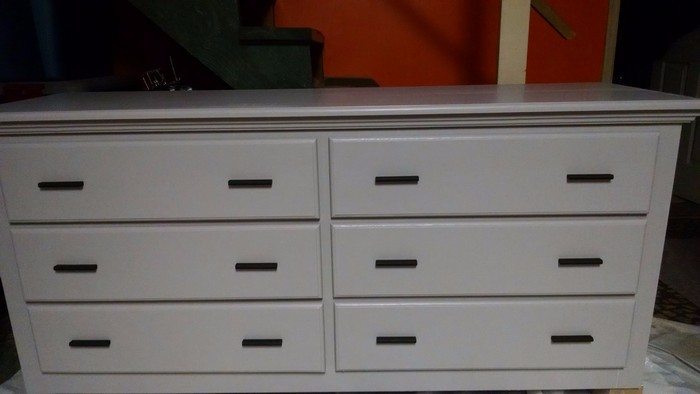
Putty, sanding, painting: Building the dressers and shelves was the most fun part, but sanding and painting was what made them look so good. Since we used plywood, we had a lot of holes and imperfections to putty, especially around the routed areas. After letting the putty set, we sanded everywhere carefully. How much you sand is up to you, and at some point you have to declare it enough and get on with the project.
We found an old white paint to use as a primer, then did two coats of a “Cathedral Gray” Behr paint, because we might have to move apartments a few times in the next four years. We figured that a nice grey would go with any paint colour.
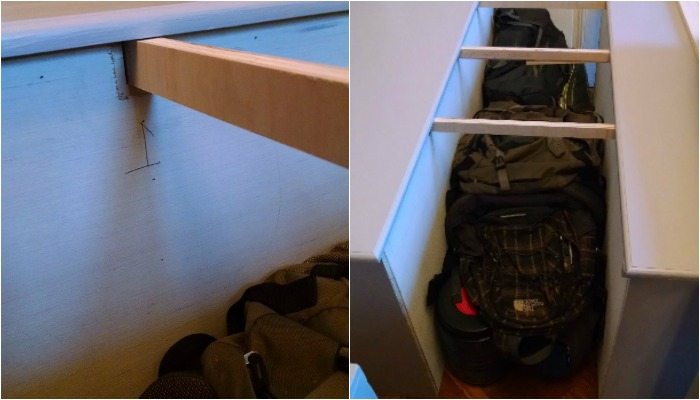
Assembly: We were very excited when we put all the pieces together and everything worked like we had planned. The night before we moved we cut out the 1-1/4” support cross pieces and some slats to hold up the mattress, and it only took 3 minutes to assemble everything and set the mattress on top. We are very pleased with the amount of storage this allows in our closet-less apartment. As you can see, all of our camping gear fits between the dressers with room to spare!
For those of you who have limited tools, time, or budget, an alternative way to accomplish a similar set up would be to only build shelves. What I would do is buy any old dresser that you can find and refinish it to whatever colour you would want (there are plenty of refinishing tutorials out there), and build shelves for the other side of the dresser platform bed and the foot of the bed. That way, you would only need to build shelves, but you would get a dresser on one side and accomplish the same look.
Thanks to JMYilla for this great dresser platform bed project!
The Wrap Up
Embarking on the journey to build a do it yourself platform bed with storage from scratch using just seven simple materials is a rewarding and practical endeavour that offers numerous advantages. This DIY dresser platform bed project allows you to create a customized piece of furniture that meets your specific needs, enhances the organization of your bedroom, and adds a touch of personal flair to your living space.
By leveraging basic woodworking skills and readily available materials like plywood, lumber, screws, and drawer slides, crafting a platform bed becomes an accessible and affordable option for DIY enthusiasts of all levels. The simplicity of the materials ensures that the platform bed remains manageable while still offering ample room for creativity and customization.
Beyond the practical advantages, building a dresser platform bed fosters a sense of accomplishment and pride in creating something with your hands. This platform bed encourages problem-, attention to detail, and a deeper connection to your living space. Moreover, the dual functionality of the platform bed frame and dresser maximizes space utilization, making it an ideal solution for smaller bedrooms or apartments.
In essence, building a platform bed from scratch is more than just constructing a piece of furniture—it’s about designing a functional and aesthetically pleasing addition to your home that reflects your style and personality. With dedication, creativity, and the right materials, you can transform your bedroom into a cozy and organized retreat that you can enjoy for years to come.
Build this dresser platform bed with just simple materials. Add flair to your bedroom with this platform bed. It’s unique and the process is straightforward.
Gather the materials to get started working on this dresser platform bed.
FAQ: How to Build a Bed Frame With Drawers
- What are some additional DIY bed frame ideas and inspirations?
- Try an elegant curved headboard to add sophistication or a sleek modern design for a timeless look. For unique touches, consider a vintage mid-century style, a house-shaped frame for kids, or footboard storage for added convenience. These projects offer endless ways to craft bed frames that suit your space while showcasing your creativity.
- How do you assemble a bed frame with bed rail brackets?
- Assembling a bed frame with bed rail brackets ensures stability and allows for easy disassembly. Start by positioning the side rails about 3 inches off the ground, using scrap wooden blocks for alignment. Attach the teeth part of the brackets to the side rails and the slots part to the headboard and footboard legs, ensuring a secure interlock.
- Add 2×4 blocks to support integrated drawers and finish the frame with paint, stain, or sealant like Minwax products for durability. Complete the assembly by reattaching any removed components and placing the bed frame in its designated spot.
- How do you assemble storage bed side rails?
- Start by cutting two pieces of ¾″ plywood for the side rails, ensuring dimensions align with your bed size. Enhance the rails with 1×3 lumber trim, attaching pieces to the edges and center for a polished appearance. For storage, cut openings in the plywood using a jigsaw, preserving the cutouts as drawer fronts, and secure the trim pieces around the panels.
- Construct a sturdy support frame with 2×4 lumber, attaching it to the side rails and reinforcing it with 1×2 or 2×2 pieces to support bed slats. This process ensures functional, durable side rails that accommodate seamless drawer integration.
- How do you build a footboard for a storage bed?
- Start by constructing a sturdy frame with 2×4 lumber, ensuring it matches the bed’s width but is shorter than the headboard. Secure a snugly fitting plywood panel within the frame to serve as the main surface.
- Enhance the footboard’s look and stability by adding decorative trim using 1×4 and 1×3 boards, and optionally, apply ⅜″ x ¾″ strips to conceal gaps and add depth. Sand all rough edges and reinforce joints with wood glue or screws for a polished and durable finish that complements your storage bed.
- How do you build a headboard for a storage bed?
- Start by constructing a rectangular frame with 2×4 lumber, using dowel pins and wood glue or pocket hole screws for strong joints. Cut a ¾″ plywood panel to fit snugly within the frame, securing it flush with the back using screws. Enhance the design by adding a 1×4 trim piece at the bottom and vertical 1×3 trim pieces on the sides for a polished appearance. Finish by gluing the trim pieces directly to the plywood for a seamless look, creating a stylish and functional headboard that perfectly complements your storage bed.
- What are the standard mattress dimensions for different bed sizes?
- Understanding mattress dimensions helps you choose the right size for your bedroom and needs. A twin mattress measures 38 inches by 75 inches, ideal for children or single sleepers. A full, or double, offers 54 inches by 75 inches, providing extra room for solo adults.
- The queen size, at 60 inches by 80 inches, is popular for couples or those needing more sleeping space, while the king, measuring 76 inches by 80 inches, is perfect for families or maximum comfort. Remember, bed frames are often slightly larger to allow for easy mattress placement and adjustment.
- What are the basic parts of a bed frame?
- A bed frame consists of four essential components that define its structure and functionality. The headboard, positioned at the top, adds both style and support, while the footboard at the opposite end complements the design.
- Side rails connect the headboard and footboard, forming the frame’s structure, with slats or a box spring providing mattress support between them. For added functionality, storage beds incorporate features like integrated drawers into the footboard or side rails, combining practicality with design.
- How do I ensure that the finish is durable?
- For a durable finish, apply multiple coats of the sealant, allowing each coat to dry thoroughly before applying the next.
- What is the process for applying stain and finish to a bed frame?
- Begin by disassembling the pieces at the joints, then stain each part individually. Once the stain is dry, apply the sealant to each piece.
- What type of finish or sealant should I apply after staining?
- Apply a clear sealant such as Minwax Polycrylic to protect the wood and give it a polished look.
- What type of stain should I use?
- Consider using a wood stain like Minwax Weathered Oak for a classic, rustic finish that enhances the natural beauty of the wood.


