
Are you a pizza lover who wants to start baking your pizza favorites at home? Here’s a DIY ‘pizza oven’ that you can make for very little money!
Sure, you can buy a pizza oven, but investing in one is usually not a practical option for someone new to making pizza. This is especially true if you’re not baking frequently enough to maximise the use of a store-bought oven.
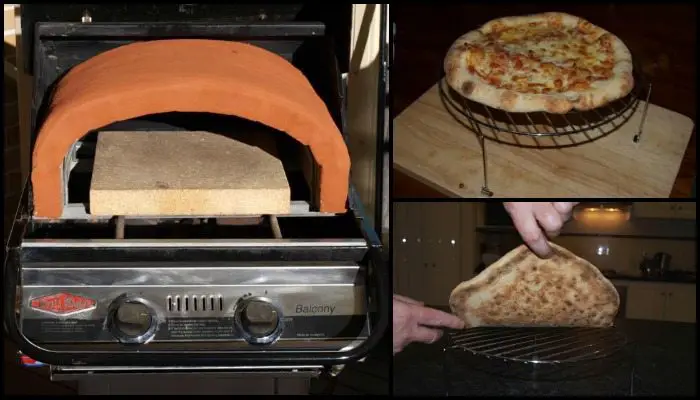
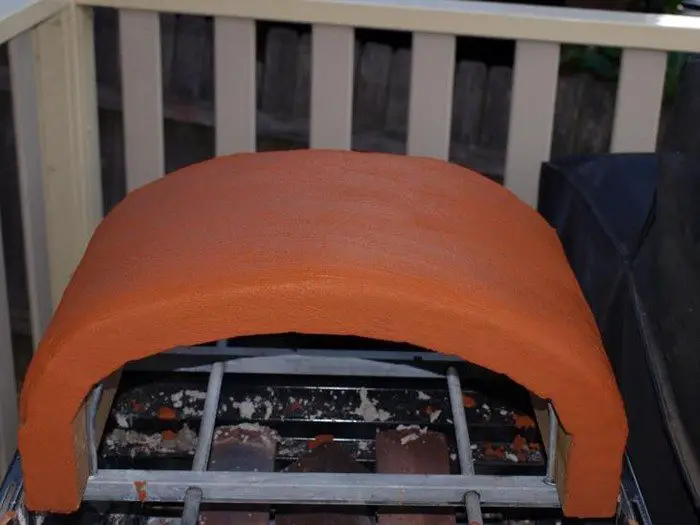
Building your own wood-fired pizza oven is a clever way to avoid unnecessary spending. But you can have one with just about any gas BBQ grill by making this DIY brick pizza dome. It’s cheap, it works and what’s even better is that you will still have the same delicious pizza that you would in a regular pizza oven!
While it’s possible to cook pizza with a hooded gas BBQ alone, the quality will never be as good as when you’re cooking under a brick dome. A good pizza needs a lot of heat. Your gas grill generates enough heat but most escapes because your BBQ grill is designed to do just that… grill! Pizzas need about 500 degrees F to really give that authentic taste and texture. This DIY pizza dome provides just that sort of heat. Here’s a quick explanation from the owner of this clever project:
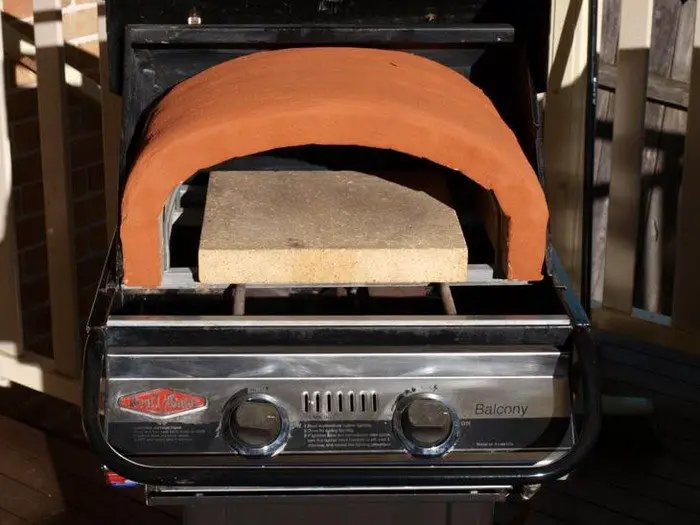
“The dome shape helps to focus the heat from the BBQ and also retains heat within the bricks as well. The pizza cooks in multiple ways. The base cooks mainly from the heat of the bottom stone, the top cooks from the radiated heat from the dome itself, and the hot air which comes from the back of the oven and through the front and then escapes through the small gap in the BBQ hood.”
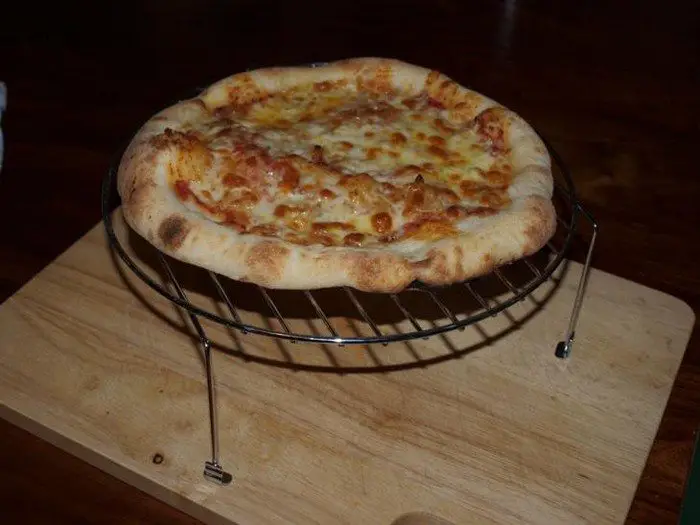
Do you like your pizza get that even bake in a rustic brick oven? This pizza dome will give you that rustic pizza. Just put it over your BBQ grill and you’re good to go!
Learn how to make one through this DIY-er’s complete tutorial..
Click on any image to start the lightbox display. Use your Esc key to close the lightbox. ?
Materials:
- Hooded 2 Burner Gas BBQ
- 4 Refractory Oven Tiles (300x300mm)
- 1 bag High Temperature Mortar Mix
- 4 lengths Hollow Square Section Steel (1m)
- 2 lengths 12mm Solid Rod (1m)
- 2 lengths 6mm Solid Steel Rod (1m)
- Metal Mesh/Chicken Wire
- Wire Tie
- Rubber Gloves
Tools:
- Drill
- Measuring Tape
- Permanent Felt Tip Pen
- Water Spray Bottle
- Trowel
Steps:
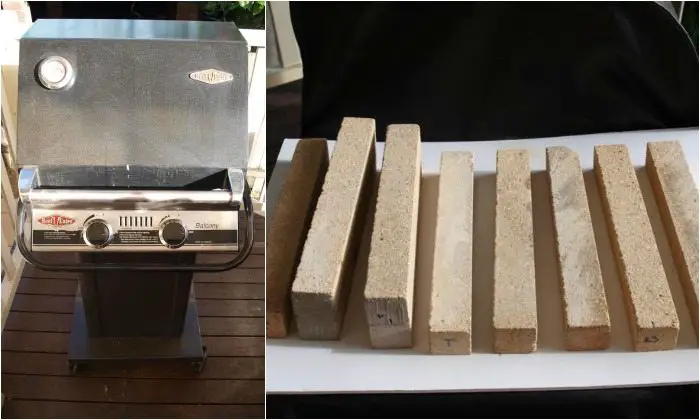
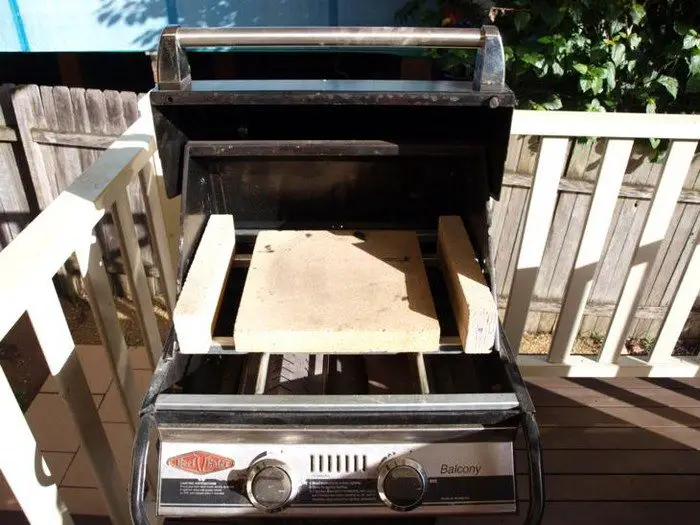
The materials you need: The BBQ Pizza Dome uses a hooded 2 burner gas BBQ as the heat source. I found mine on Ebay for A$60 (minus a few non-essential parts such as the warming tray).
You will need to cut 3 of the the tiles into strips so that they are square. For example my tiles are 40mm thick, so I cut the tiles in to 40mm strips.
A 300mm tile will give you 7 strips of 40mm. I needed 15 strips for my dome, plus a few spares.
The remaining tile is used as a pizza stone, which will sit under the dome.
Measuring and cutting: In order to get the best results it is important to check the BBQ you intend to use for the conversion for the following features.
A hood which offers good coverage of the cooking area.
An inner lip inside the BBQ & this is where the hotplate and grill plate usually sit.
I recommend that you scour sites like EBay and go to a few garage sales, as its likely you might pick up what you need cheaply.
Things like missing grill plates and side tables are often the reason other people choose not to buy, as most are looking for a BBQ to use in the conventional way.
You could user a number of materials to accomplish this, I just happen to have some spare HSS and some steel rod left over from another project.
The steps to construct the dome support are as follows.
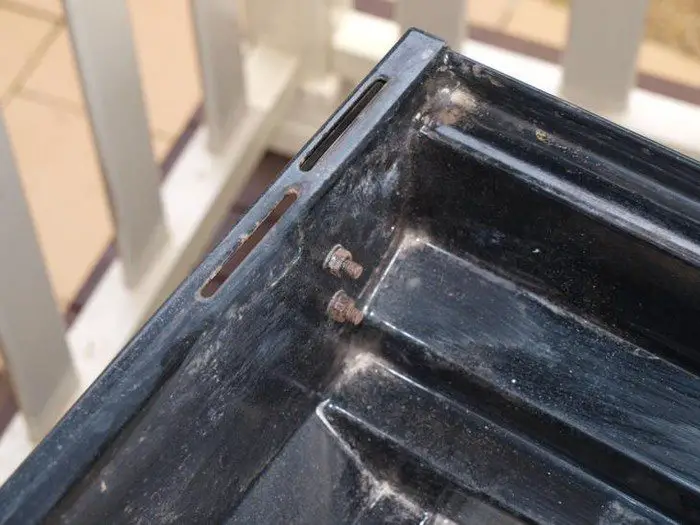
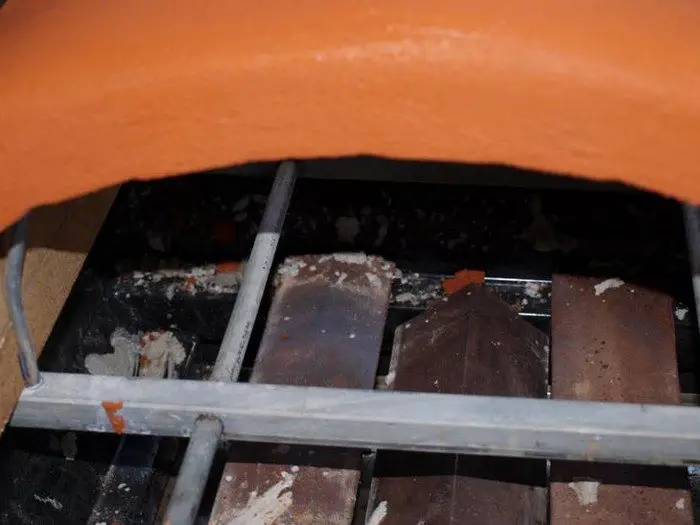
Measure up the grill area. Measure the grill area, and the inner support lip, taking into account any bolts or welded joints that may impede the placement of the steel support frame and furnace bricks

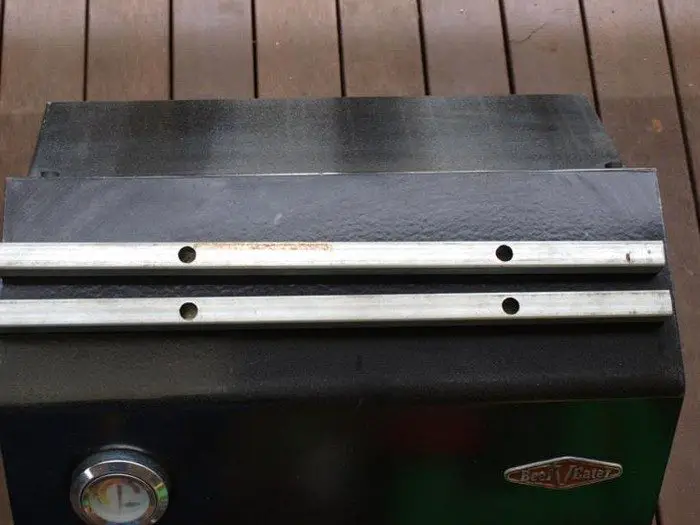
Measure and cut the steel to match the grill area. I used Hollow Square Section and some 12 mm solid round section (both mild steel).
The square section was cut to length (less 2 mm for expansion) and then drilled to take the 12mm round section.
Note: If you have access to an electric welder, you could produce a more rigid frame using HSS and reinforcing mesh.
Assembling the frame: The frame consists of 4 pieces of Hollow Square Section (HSS) and 2 lengths of 12 mm solid round section.
2 of the HSS pieces have 12 mm holes drilled completely through both the inner and outer faces and the remaining 2 pieces have holes drilled only on the inner face.
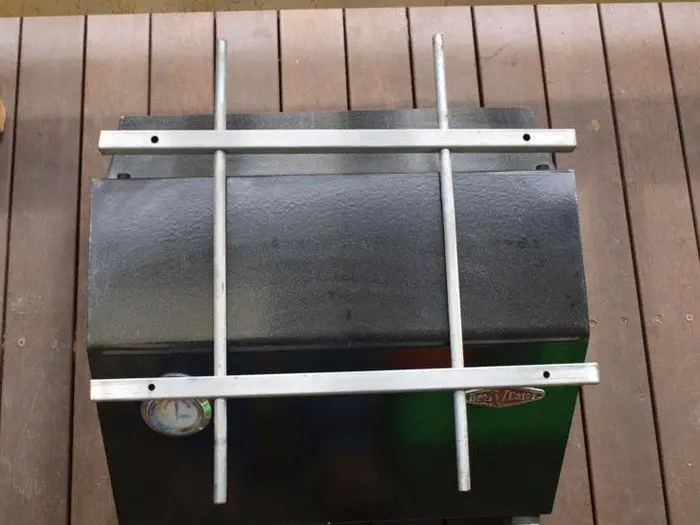
2 lengths of 12 mm solid round section were inserted through the 2 HSS with and then the HSS with the single hole was placed on the end of the rod.
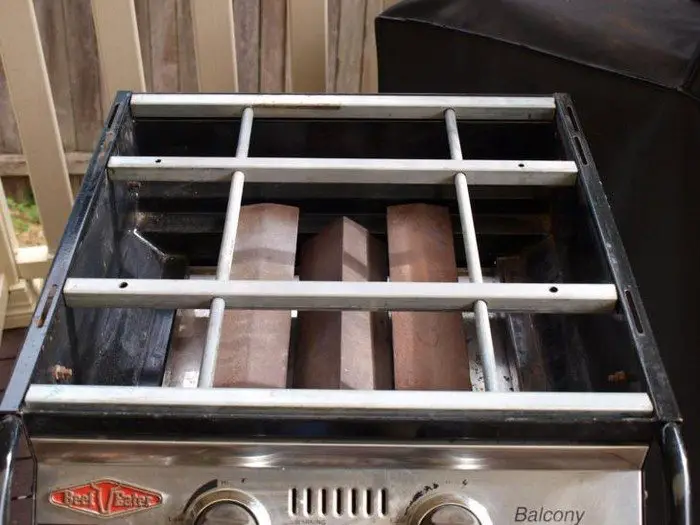
When properly fitted together, the frame drops into the lip of the BBQ at roughly the same height as the original grill plate and hotplate.
Measuring up for the dome and producing the template: Once the frame is installed you will need to confirm the maximum height the dome can be with the hood down. This will depend entirely on your BBQ and the type of hood that is fitted.
Take care to look for any bolts or fittings which may impede a tight fit against the back wall of the hood.
You also need to take into account the thickness of the refractory material you are using.
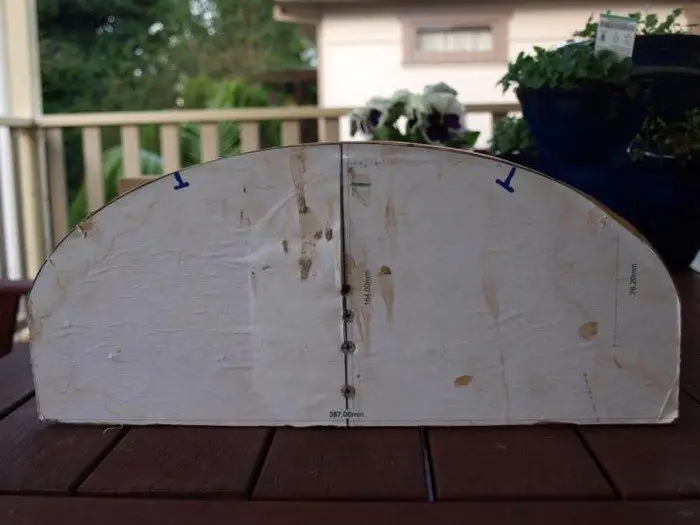
Create a dome template (Paper): Based on your measurements in taken earlier, use a computer based drawing program to assist with the template creation and ensure that your scale is 1:1
Draw a rectangle to represent the maximum height and width of the space in the BBQ.
The rectangle should have a vertical centre line drawn through it to assist with alignment.
The straight side of the dome should be twice the thickness of the refractory material. In my case the refractory tile was 40mm thick. So the straight sides need to be 80 mm.
Using a tool draw a curve from the top of the inside edge of the wall to the centre line of your rectangle where it intersects with the top. Once done, copy and mirror the shape and align it on the other side.
If you have a printer which only can print half of the template, you will need to ensure that you include the centre line in both prints so that you can align them using this line.
Print 2 copies of the dome design and cut off the excess paper as neatly as possible.
Align the two prints together using the centreline as a guide. Use sticky tape to hold them together.
Tip: If the paper you are using is thick, and you cannot see the centreline on the bottom sheet through top sheet, use hairspray or oily nail polish remover to make the top sheet transparent while you align it with the bottom one.

To create a wooden former for the dome using the paper template you can apply the template to the ply using watered down PVA glue.
Coat the surface of the plywood before applying the paper template. You will need to work quickly before the glue dries.
In order to make two identical templates, screw a second piece of ply to the first so that you can cut out both pieces in the one operation.
It is important to remember that all adjustments to the ply template must be made to both, otherwise the fit of the refractory materials will not be neat.
My dome consist of 3 main sections, the left hand side (5 pieces), the right hand side (5 pieces) and the top dome (5 pieces)
The taller ones (80mm) are the two straight pieces and are made up from two 40mm tile strips
Lay the tiles (dry fit) on the edges of the template to see if they fit correctly when laid on the template.
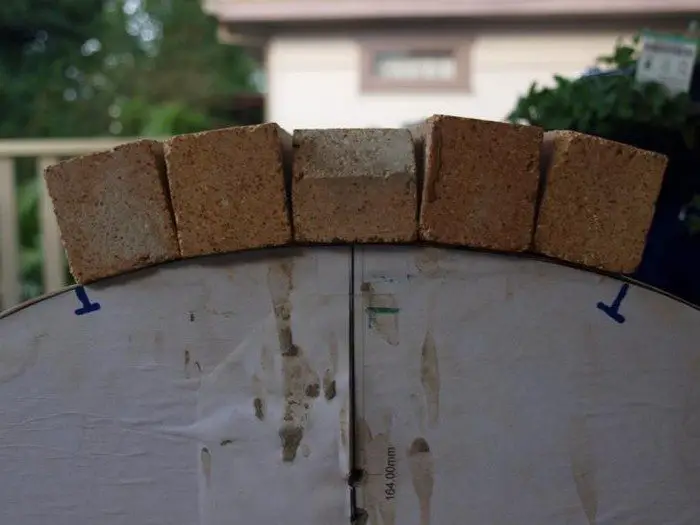
Mark the point where the last of the 5 left tiles ends on the temple, repeat for the 5 tiles on the right hand side.

Use spacers to build up each side with strips of tile until you have filled in the whole template.
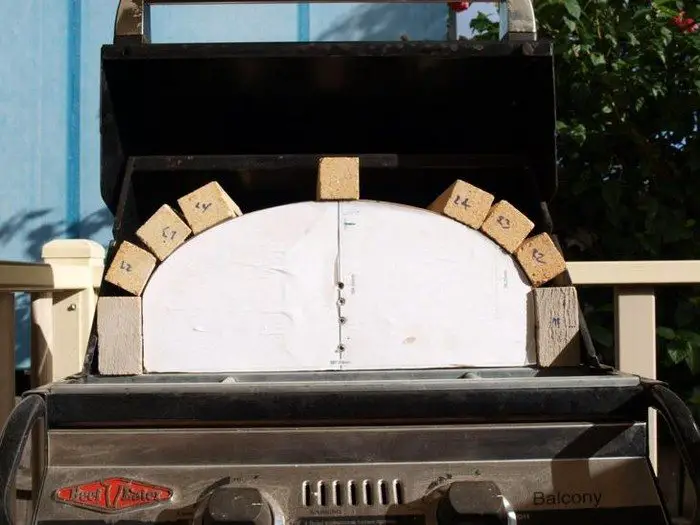
Once completed, dismantle the dome and re-assemble in the BBQ and ensure that the hood can be closed. Resolve any issues with fit by trimming the template and adjusting the placement of the tiles. Once you are happy with the fit label the end of each tile so you know where it goes.
Continued Page 2…


