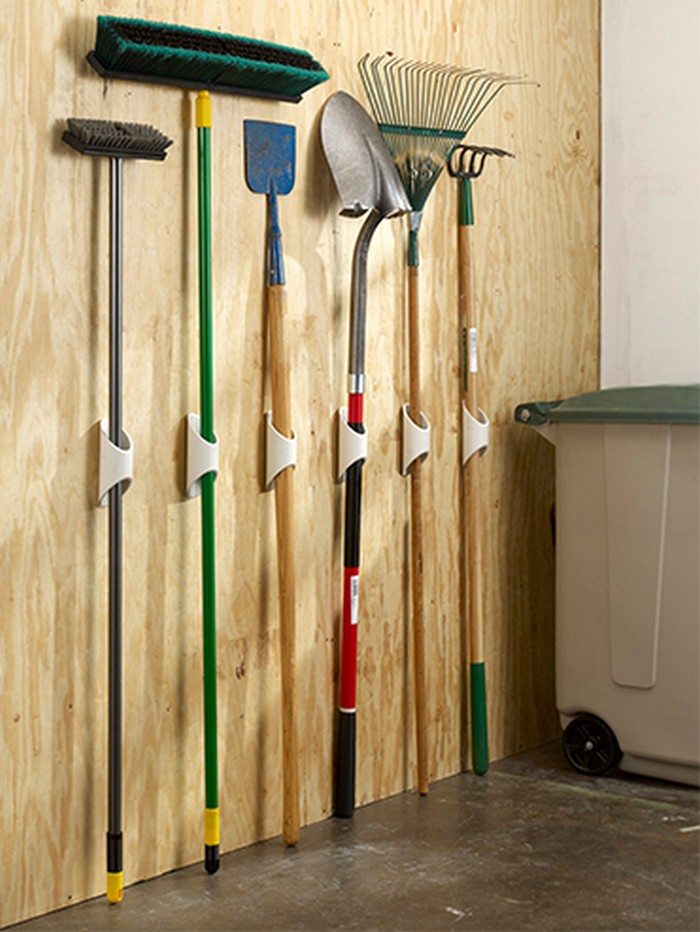
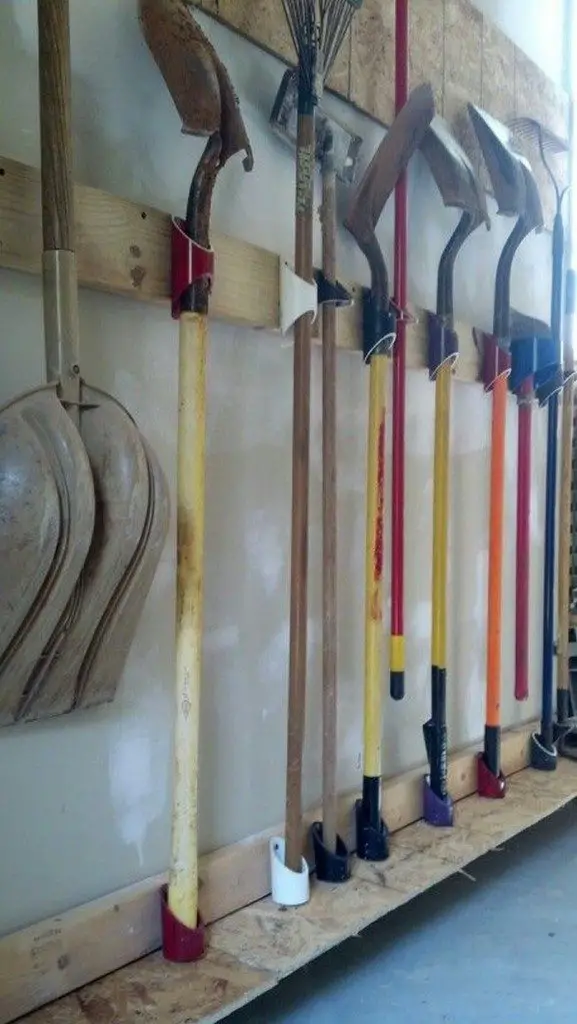
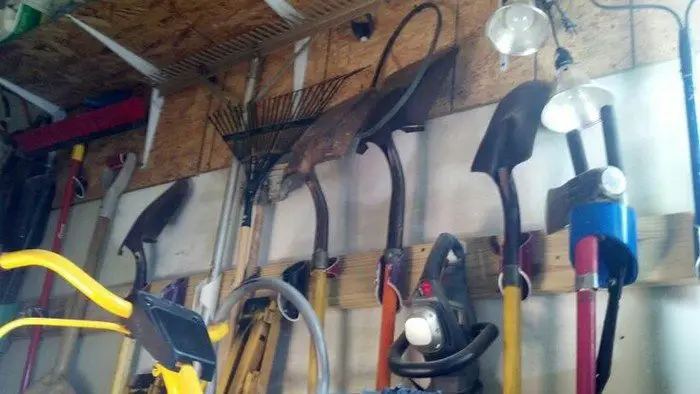
Hate looking at the chaotic jumble of your garden and yard tools? Then you probably need this storage solution! A yard tool organizer.
Yard tools are the hardest things to store without making it look like a mess. But here’s an organiser idea for them that can solve all that chaos.
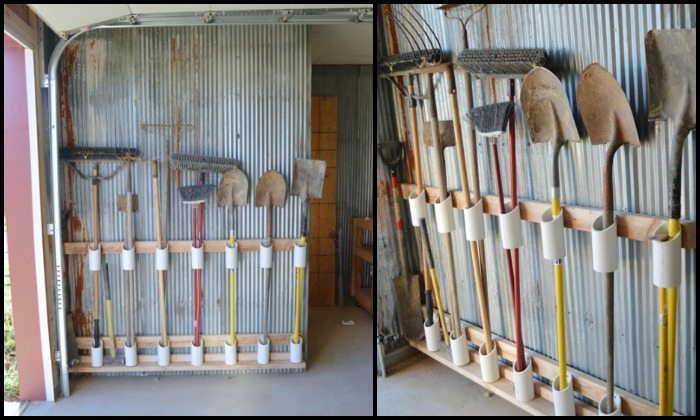
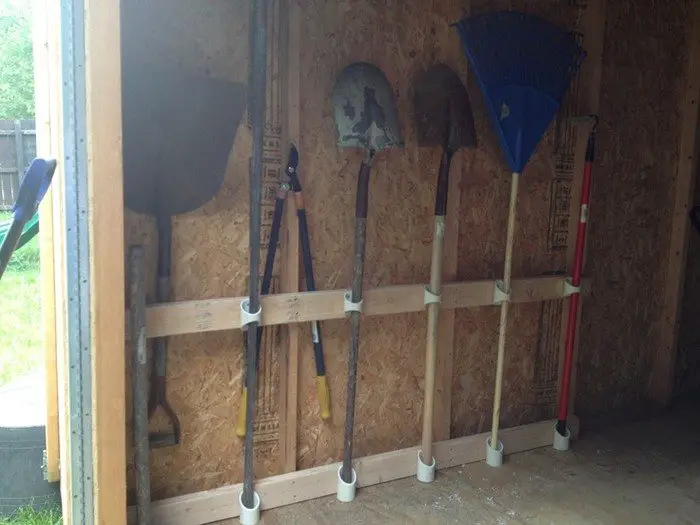
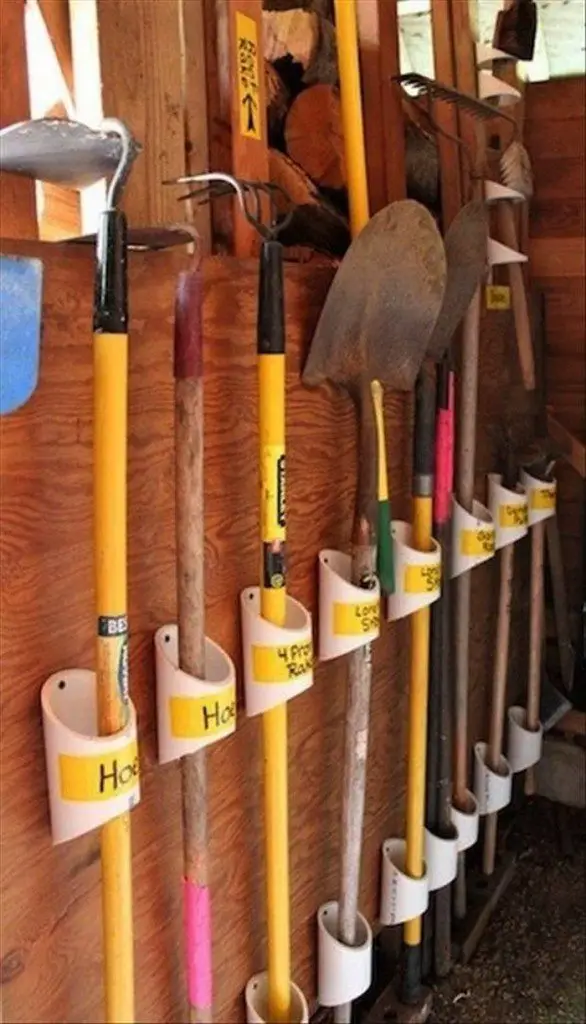
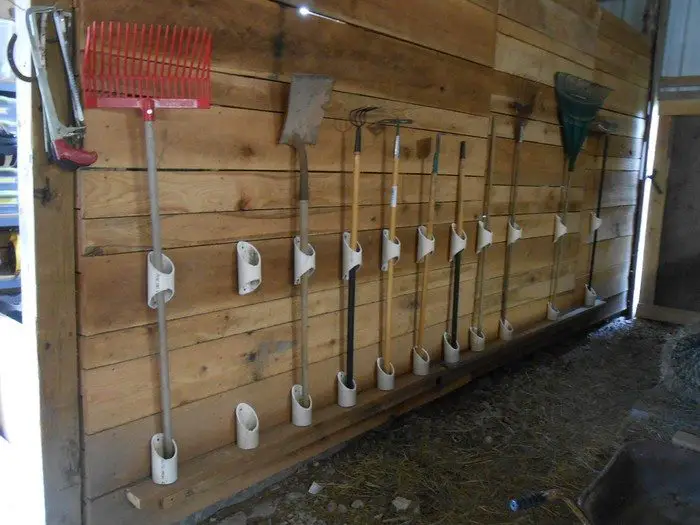
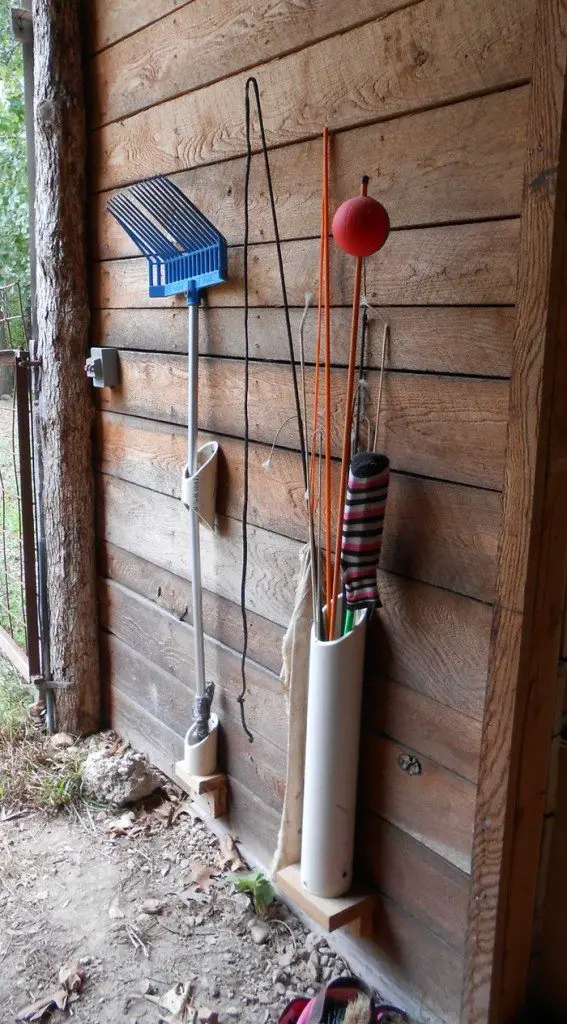
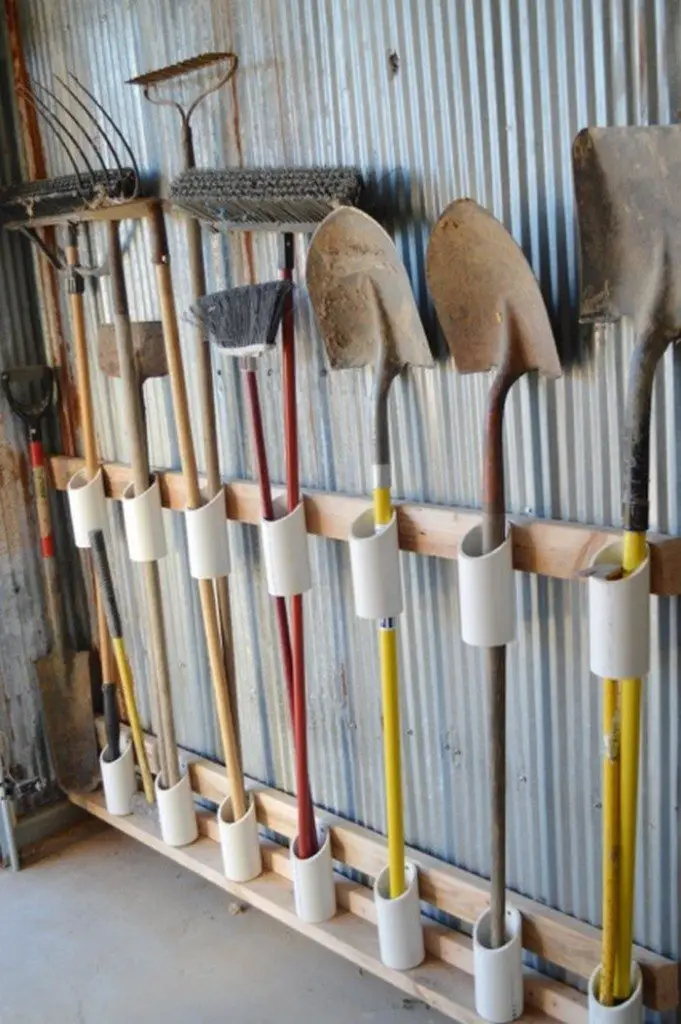
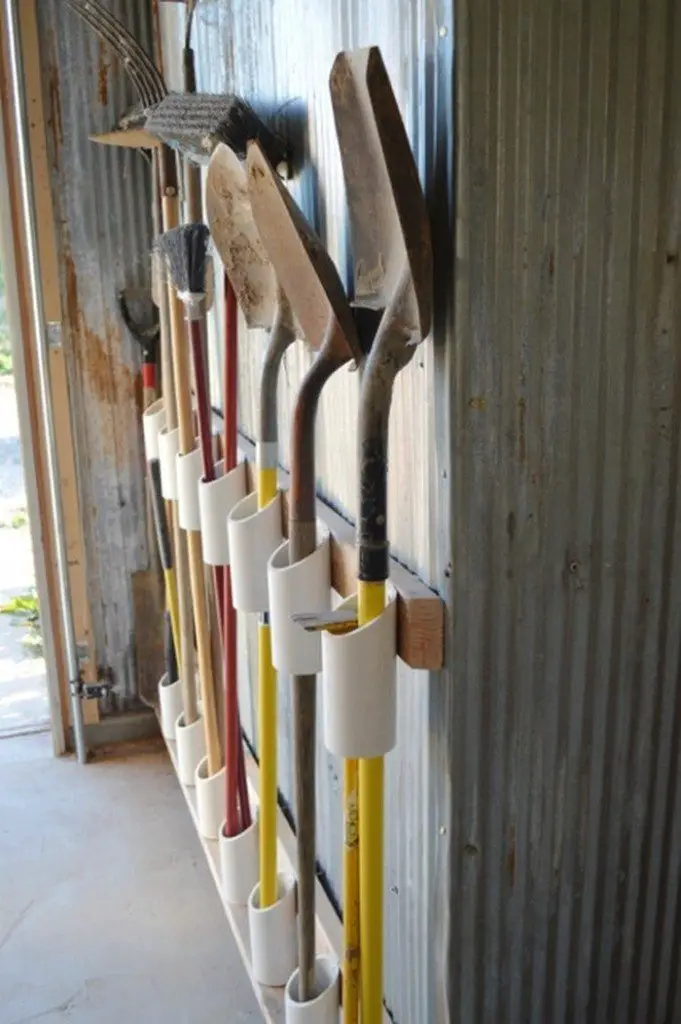
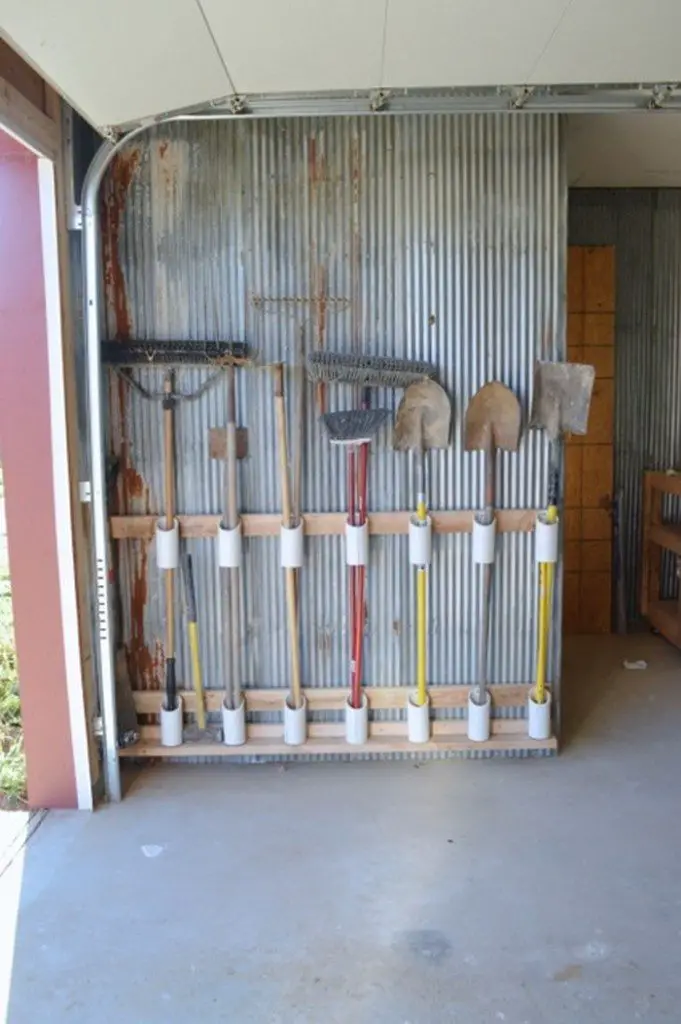
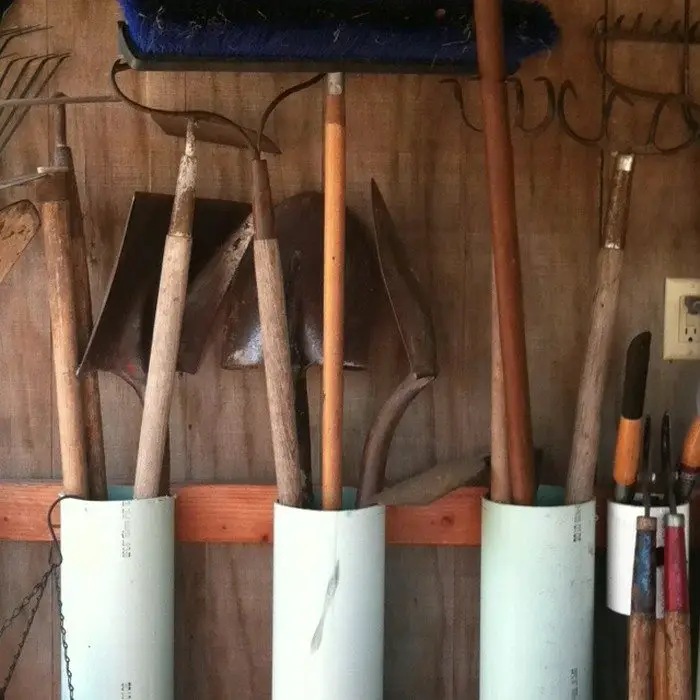
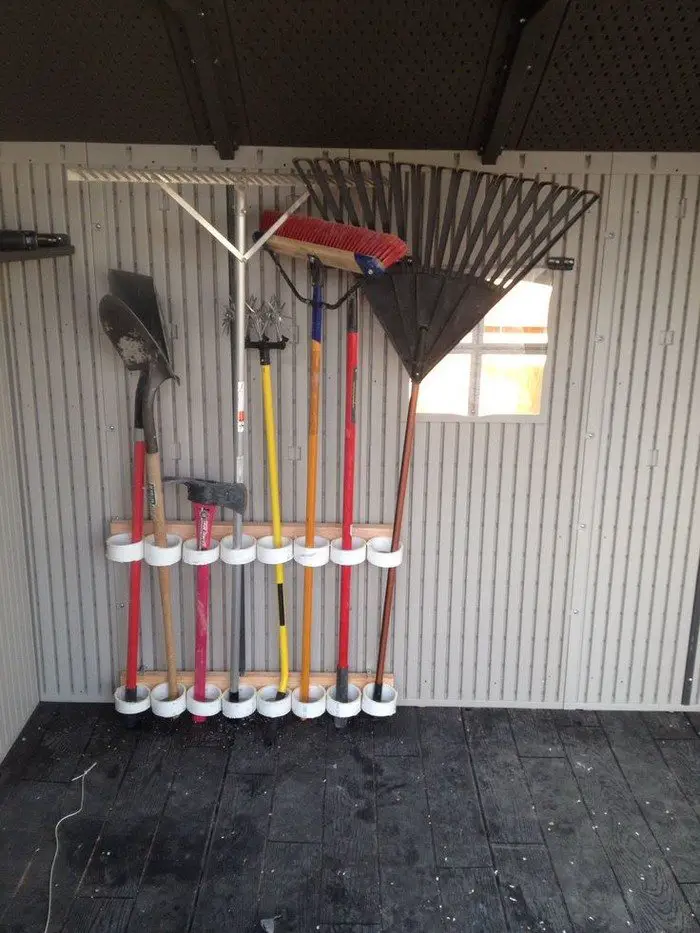
Of course, storage using PVC pipes! What’s great about this tool holder idea is that it uses very minimal space in your shed or garage. Because it’s mounted on the wall, it doesn’t get in the way of being able to freely move around your garage. It looks neat, and is very accessible, too!
This DIY tool storage idea can cost you nothing if you happen to have some excess of the materials needed from a previous project. :)
Have you built this yard tool organizer yet?
Contents
Building a Yard Tool Organizer
Materials
- PVC Pipes
- 3/4″ Plywood or Excess Wood Planks
- Sandpaper
- Screws
- Coloured Duct Tape (optional for labelling)
Tools
- Cordless Drill
- Band Saw
- Measuring Tape
Instructions
Step 1: Design Your Layout
- Measure the space on your garage or shed wall where you plan to install the tool organizer.
- Sketch a layout of how you want your tools to be organized. Consider the sizes and the frequency of use of each tool.
Step 2: Cut the PVC Pipes
- Use the band saw to cut your PVC pipes into lengths that fit your tools’ handles. Generally, 4-6 inches long sections work well for most hand tools.
- Sand the edges of each cut pipe section with sandpaper to remove any sharp or rough edges.
Step 3: Prepare the Backing Board
- Measure and cut your plywood or wood planks to the desired size for the backing board. This board will hold your PVC pipes.
- Sand the board smoothly to prepare it for mounting.
Step 4: Arrange PVC Holders
- Lay out the cut PVC pipe sections on the plywood board according to your initial design. Leave enough space between each holder to easily remove and replace tools.
- Once you are satisfied with the arrangement, mark the positions of the pipes on the board.
Step 5: Attach PVC Pipes to the Board
- Drill two holes on opposite sides of each PVC pipe section for screws.
- Place the PVC pipe back in position on the board and secure it by drilling screws through the pre-drilled holes into the plywood. Ensure the screws are of appropriate length to fix the pipe firmly without piercing through the back of the plywood.
Step 6: Mount the Organizer on the Wall
- Locate the studs in your wall where the organizer will hang. Use the measuring tape to ensure the organizer will be level.
- Drill holes in the plywood board at locations that align with the wall studs.
- Secure the board to the wall using screws long enough to reach into the studs, providing a sturdy mount.
Step 7: Label (Optional)
- Use coloured duct tape to create labels for each tool spot. This can help in keeping things organized and returning tools to their designated spots.
Step 8: Load Your Tools
- Place each tool in its respective holder. Arrange them by frequency of use or size, whichever is more convenient for you.
Click on any image to start lightbox display. Use your Esc key to close the lightbox.8-)
Alternative Materials and Styles
Creating a yard tool organizer can drastically improve the functionality and appearance of your workspace. While PVC pipes are a popular choice for their affordability and ease of use, exploring alternative materials and styles can help you customize your storage solution to better match your needs and aesthetic preferences.
Here are some different materials and styles you can consider for your yard tool organizer.
Wood Yard Tool Organizer
- Material: Solid wood or plywood offers a classic and sturdy option for a yard tool organizer. Wood can be easily customized with paint or stains and can handle heavier tools if properly mounted.
- Style: For a rustic or traditional garage, a wooden yard tool organizer can be designed with slots or hooks. You can add shelves above or below the slots for additional storage for smaller tools or garden supplies.
Metal Yard Tool Organizer
- Material: Metal, particularly aluminum or steel, provides durability and strength. It’s ideal for heavy-duty tools and outdoor environments as it resists rust and wear.
- Style: Metal yard tool organizers can be crafted with pegboards or magnetic panels, which are excellent for hanging tools. This style also lends itself well to a modular system, where you can add or remove sections as needed.
Recycled Material Yard Tool Organizer
- Material: Using recycled materials like old pallets, pipes, or barrels can be an eco-friendly and cost-effective option. These materials often provide a unique, industrial look.
- Style: Recycled materials allow for creative freedom. Pallets can be converted into vertical tool organizers with minimal modifications. Pipes and barrels can be cut and mounted to walls or made into standalone units.
Portable Yard Tool Organizer
- Material: Combining lightweight materials like aluminum with wheels can offer a portable solution, making it easy to move the organizer around as you work in various parts of the yard.
- Style: A cart-style yard tool organizer can include compartments and drawers for different types of tools, enhancing mobility and convenience. This is especially useful for large gardens or if storage space moves frequently.
Modular Yard Tool Organizer
- Material: Plastic or composite materials work well for modular systems as they are lightweight and can be easily manipulated into various configurations.
- Style: Modular yard tool organizers can consist of stackable bins or detachable hooks that can be rearranged according to the season or project. This flexibility makes it an excellent choice for dynamic workspaces where tool needs change regularly.
By considering these alternative materials and styles, you can build a yard tool organizer that not only keeps your tools neatly arranged but also enhances the efficiency of your gardening and yard work.
Customization Ideas
Customizing your yard tool organizer not only helps in keeping your tools neatly arranged but also allows you to infuse a bit of personality and efficiency into your workspace. Whether you’re looking to enhance functionality or simply want your organizer to blend better with the surroundings, there are numerous ways to tailor it to your needs.
Here are some creative customization ideas for your yard tool organizer.
Personalization with Paint and Finishes
- Idea: Give your yard tool organizer a personal touch by applying a coat of paint or protective finish. Choose colors that match your garage or garden shed’s interior to create a cohesive look.
- Application: Use outdoor-grade paint for durability, especially if your organizer is in an exposed area. You can also use stencils to add designs or labels directly onto the wood, metal, or plastic surfaces.
Labeling for Convenience
- Idea: Labelling each section of your yard tool organizer can greatly enhance the functionality by making it easier to find and replace tools quickly.
- Application: Use durable, weather-resistant labels for outdoor or garage environments. Consider using engraved tags for a more permanent solution, or chalkboard paint sections for easy rewriting as your tool collection changes.
Adjustable Components
- Idea: Incorporating adjustable components into your yard tool organizer allows for flexibility, accommodating tools of various sizes and shapes as your collection grows or changes.
- Application: Add hooks that can be moved or adjustable shelves within the organizer. Utilize slot walls where attachments can be repositioned according to the tool sizes, ensuring every tool fits perfectly.
Lighting Enhancements
- Idea: Adding lighting to your yard tool organizer can improve visibility and accessibility, making it easier to find the right tool for the job, especially in dimly lit areas like sheds or garages.
- Application: Install small LED lights above or beneath the shelves or holders. Solar-powered lights are a great option if your organizer is located outdoors and exposed to sunlight.
Decorative Touches
- Idea: Decorative elements can transform your yard tool organizer from a purely functional piece into a feature of your workspace that reflects your personal style.
- Application: Attach decorative hardware or use unique materials for hooks and holders, such as old garden tools repurposed as hangers. Incorporating elements from your garden, like vines or flowers, can also add a natural aesthetic appeal.
Magnetic Tool Holders
- Idea: Integrate magnetic strips or panels into your yard tool organizer for an easy-access, clutter-free solution, especially suitable for small metallic tools.
- Application: Install magnetic strips on the side or underneath shelves in your organizer. This is ideal for quickly grabbing and storing items like pruning shears, screwdrivers, and trowels.
Fold-Out Features
- Idea: Incorporate fold-out features to maximize space and accessibility in your yard tool organizer. This is particularly useful in tight spaces.
- Application: Design parts of the organizer, such as a workbench or additional shelving, to fold out when needed. Ensure these are sturdy and easy to manipulate for convenience and efficiency.
Weather Protection
- Idea: Adding protective features to shield your tools from the elements can extend their life and maintain their condition, especially important for outdoor or semi-outdoor setups.
- Application: Consider adding a retractable cover or doors to your yard tool organizer. Use materials like waterproof canvas or treated wood for durability against moisture and sunlight.
Utility Hooks and Bins
- Idea: Expand the storage capabilities of your yard tool organizer by adding hooks and bins for miscellaneous items that don’t fit the standard slots or holders.
- Application: Attach hooks for hanging gloves, hats, or garden aprons. Use small bins or baskets for holding gardening consumables like twine, stakes, or plant tags, which can be clipped onto the sides or incorporated into the design.
Tool Maintenance Station
- Idea: Dedicate a section of your yard tool organizer for tool maintenance to keep your tools in top working condition, making them last longer and perform better.
- Application: Include a small area with a built-in sharpener for blades, oil for metal components, and a rag holder. This station can be a pull-out drawer or a fixed part of the organizer, easily accessible during or after use.
Implementing these customization ideas can greatly enhance the functionality and appearance of your yard tool organizer, making your gardening or yard maintenance tasks more organized and enjoyable.
Conclusion
Building a yard tool organizer is a straightforward and rewarding DIY project that can significantly tidy up your workspace. With a variety of materials and customization options available, you can create a setup that perfectly suits your tools and personal style. Implementing this organizer enhances efficiency in your gardening or maintenance tasks, ensuring everything you need is neatly arranged and within easy reach.
We have more ways to organize your work space. Check out our screwdriver organizer next!