
Want your little kids to explore and be more active outdoors? Then you’ve got to give them something really fun and entertaining, like this DIY outdoor musical wall!
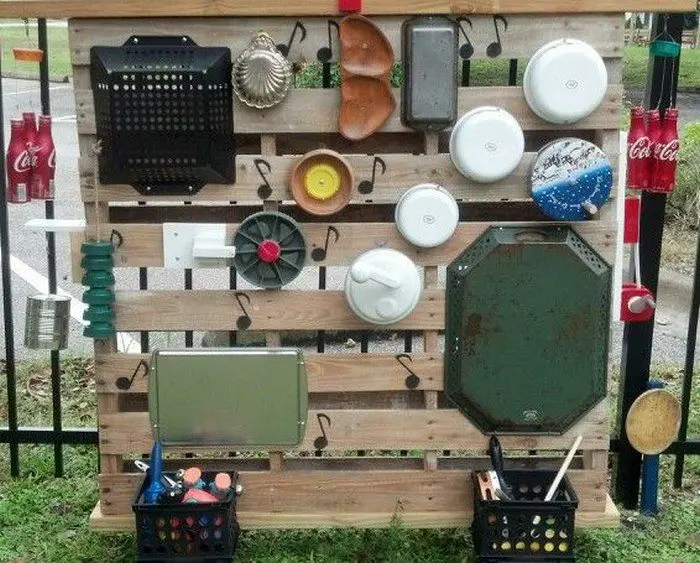
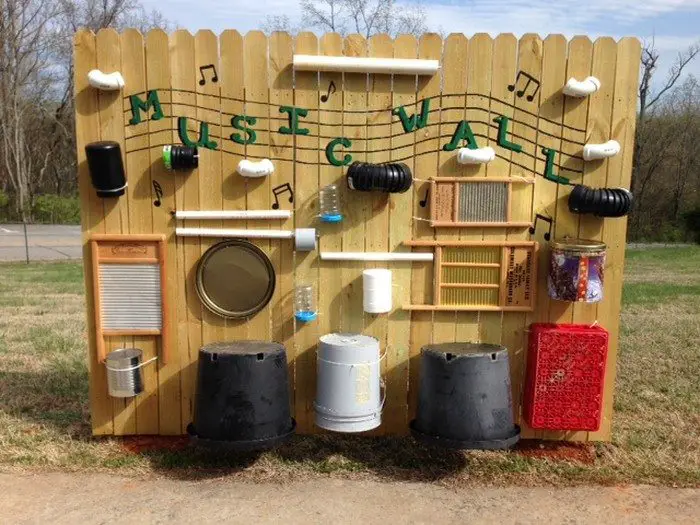
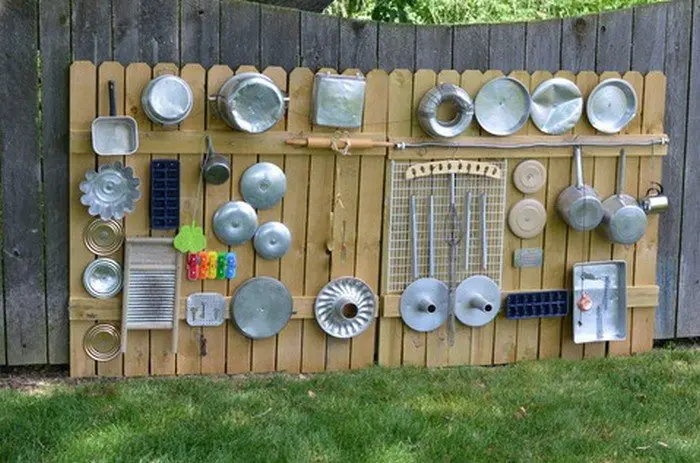
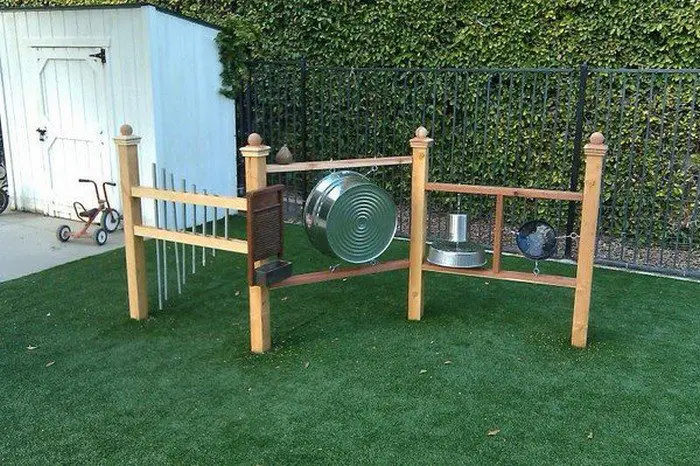
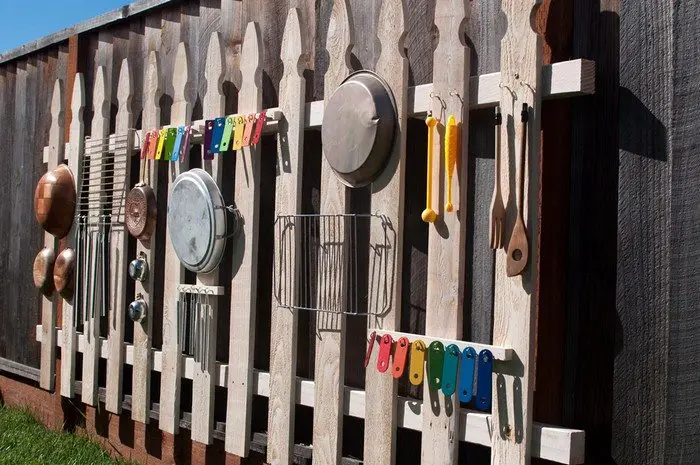
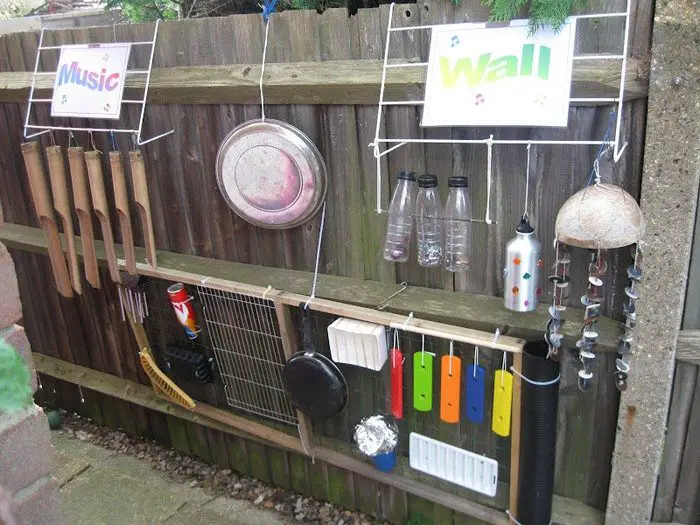
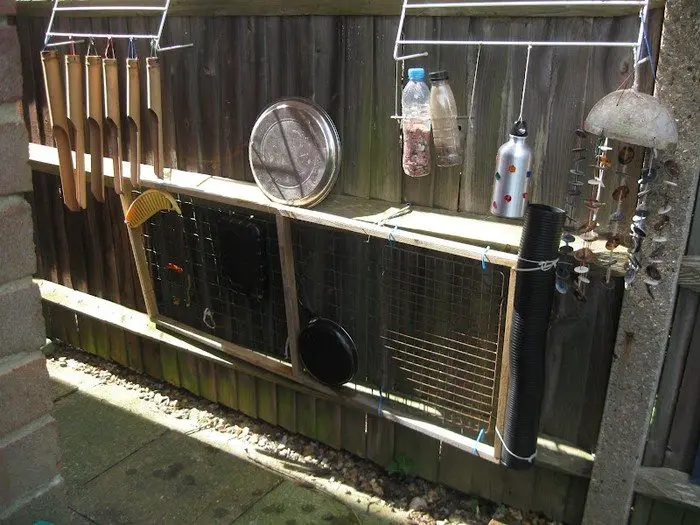
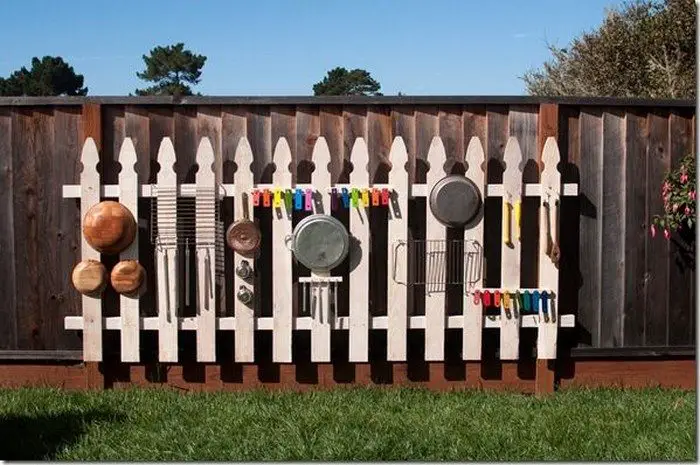
There are many ways to create an outdoor music wall/sound wall. You can use your existing fence or build something to mount the ‘musical instruments’ on, such as the 2×12 timber you see above. You can also buy peg boards or other items like a pallet.
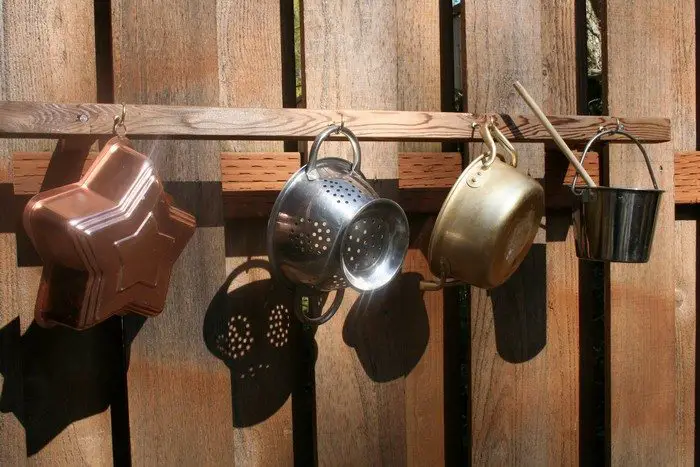
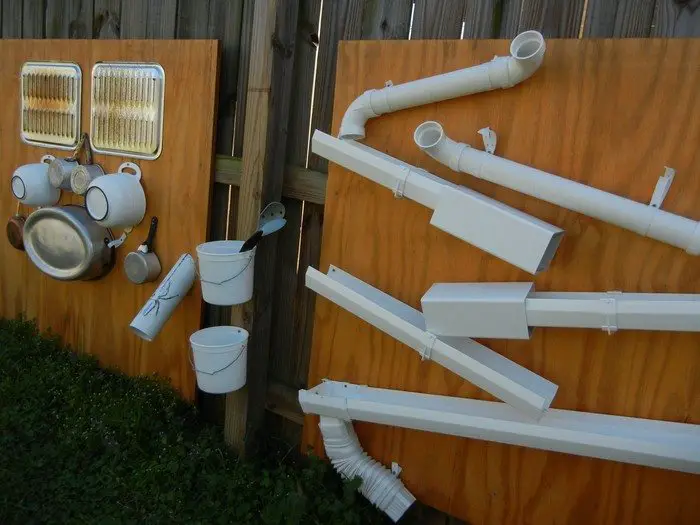
This DIY play equipment is very inexpensive, too! Anything that makes a good sound when hit by the ‘drum stick’ can be mounted on this wall. So simply search through your old items/recycling bin – you don’t need to buy new materials for this project! You can even use scrap PVC pipes from a previous DIY project or parts of a broken musical instrument or toy, like the xylophone.
As long as you put everything together so that they’re secure, this DIY outdoor music wall is a great play equipment your kids will surely love!
Want to build one for your kids?
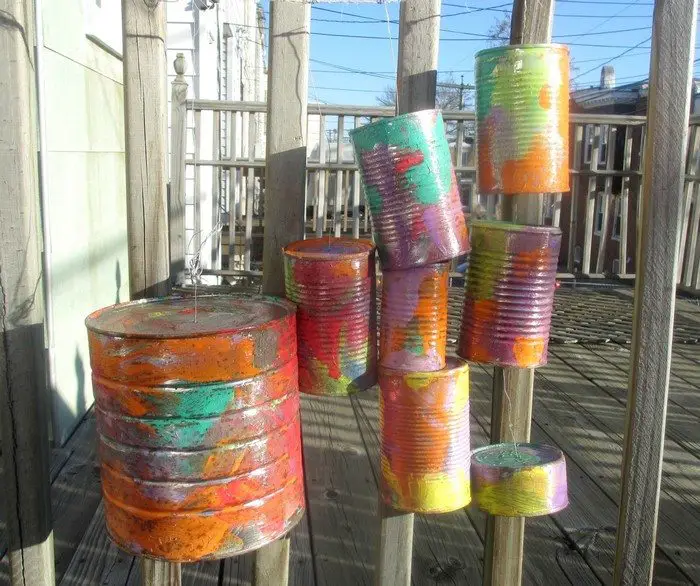
Be inspired by more examples of an outdoor music/sound wall in our album. You can also learn more about the featured music wall above by heading over to the step-by-step tutorial linked below!
Contents [show]
Crafting a Musical Wall
Materials
- 2 x 12 Timber
- 4 x 4 Timber Posts
- Bolts, Screws and Hooks
- Pea Gravel and Soil
- Colander
- Cream (tea) Dispenser
- Gelatin mold
- Broiler Parts
- Drying Rack
- Bell
- Pot lid
- “Drum Sticks” (Whisks, Large Spoons, and Potato Masher)
- Plastic Caddy with Holes (for storing “drum sticks”)
Tools
- Measuring Tape
- Circular Saw
- Spirit Level
- Cordless Drill
Instructions
Step 1: Planning and Design
- Decide on the location for your musical wall. It should be easily accessible to kids and away from any potential hazards.
- Sketch a rough design of your wall, including the arrangement of the musical instruments (e.g., colander, pot lid, broiler parts).
- Measure the space to determine how much timber and how many posts you’ll need.
Step 2: Preparing the Site
- Clear the area where the musical wall will be installed.
- Use pea gravel and soil to level the ground if necessary, ensuring a stable foundation.
Step 3: Building the Frame
- Cut the 2 x 12 timber to the desired length of your music wall using the circular saw.
- Position the 4 x 4 timber posts as the main support for your wall. The number of posts will depend on the length of your wall. Ensure they are tall enough to secure the 2 x 12 timber at a comfortable height for children.
- Use the measuring tape and spirit level to ensure that your posts are positioned evenly and stand straight.
- Dig holes for your posts, deep enough to provide stability (about 2 feet deep).
- Place the posts in the holes and secure them by filling the holes with soil, tamping down firmly. For added stability, consider using concrete.
Step 4: Attaching the Timber
- With the cordless drill and bolts, attach the 2 x 12 timber to the 4 x 4 posts to create the main frame for your musical instruments. Ensure it is securely fastened.
Step 5: Adding the Musical Instruments
- Arrange your chosen items (e.g., colander, cream dispenser, gelatin mold, broiler parts, drying rack, bell, pot lid) along the timber. Space them out to allow easy access and playability.
- Use screws and hooks to attach each item to the timber. Ensure each item is securely fastened to withstand repeated use.
Step 6: Preparing the Drumsticks
- Place the whisks, large spoons, and potato masher in the plastic caddy with holes. This caddy can be attached to the side of the music wall or placed nearby for easy access.
Step 7: Final Touches and Safety Check
- Walk around the musical wall to check for any sharp edges or loose parts. Use sandpaper to smooth out any rough edges on the timber.
- Ensure all musical items are securely attached and will not come loose with use.
Step 8: Enjoy Your Music Wall
- Introduce your children or students to the musical wall. Encourage them to explore the different sounds each “instrument” makes.
- Watch as they discover the joy of creating music outdoors.
Click on any image to start lightbox display. Use your Esc key to close the lightbox.![]()

Educational Benefits of a Music Wall
Outdoor musical walls are captivating installations that transform everyday spaces into interactive learning environments. By combining the tactile joy of hands-on play with the auditory excitement of creating music, these walls offer a myriad of educational benefits.
Below, we delve into how musical walls not only entertain but also support developmental milestones and educational growth in children.
Fosters Musical Exploration and Appreciation
Musical walls invite children to explore different sounds and rhythms, fostering an early appreciation for music. This open-ended exploration encourages children to experiment with cause and effect as they discover how their actions can create various musical outcomes. By engaging with a musical wall, children begin to understand basic musical concepts such as pitch, tone, and rhythm in a natural, intuitive way.
Enhances Fine Motor Skills
Interacting with a musical wall requires children to use their hands and fingers to strike, pluck, or shake the different elements. This interaction helps in the development of fine motor skills, improving hand-eye coordination and dexterity.
As children grasp drumsticks or tap on different items, they refine their motor control and precision. These are crucial skills for writing, drawing, and other detailed activities.
Supports Cognitive Development
A musical wall offers a rich sensory experience that stimulates cognitive development. Children learn about cause and effect as they see how different actions result in different sounds. This hands-on learning experience enhances problem-solving skills and encourages creative thinking.
Moreover, the process of creating music can support memory and attention skills. Children remember the sounds each object makes and concentrate on producing specific notes or rhythms.
Promotes Social Interaction and Teamwork
Musical walls are excellent for promoting social skills and teamwork. As children play together, they learn to share space and instruments, negotiate turn-taking, and collaborate to create music.
This communal play helps children develop communication skills and empathy as they listen to each other and adjust their play to include others. The musical wall becomes a medium for social learning, fostering a sense of community and cooperation among peers.
Encourages Emotional Expression and Regulation
Playing with a musical wall provides a unique outlet for emotional expression. Children can channel their feelings into music, using loud, energetic beats to express excitement or softer tones to convey calmness.
This form of expression can be particularly beneficial for children who may find it challenging to articulate their emotions through words. Additionally, the soothing aspects of creating music can aid in emotional regulation, offering a calming and therapeutic experience.
Stimulates Creativity and Imagination
A musical wall is a canvas for auditory creativity. It encourages children to use their imagination to compose their songs or replicate familiar tunes. This creative freedom promotes innovative thinking and allows children to experiment with different sound combinations. By providing a non-traditional instrument made from everyday objects, a musical wall demonstrates that music can be created from anything, encouraging children to think outside the box.
Connects to Cultural and Environmental Awareness
Finally, musical walls can be tailored to reflect various cultural themes or incorporate natural materials, fostering a connection to the world around us. Children learn about diversity through music and gain an appreciation for the environment as they engage with instruments made from recycled or natural materials. This awareness builds a foundation for cultural sensitivity and environmental stewardship.
A musical wall is much more than a playful addition to an outdoor space; it’s a multifaceted educational tool. Through the joy of making music, children develop crucial cognitive, motor, and social skills, setting the stage for lifelong learning and development.

Sound Quality and Musical Instrument Selection
Creating an outdoor musical wall involves more than just attaching objects to a surface; it’s an artful process that blends creativity with an understanding of sound quality. The selection of items to use as instruments is crucial, as it directly impacts the auditory experience.
This section explores how careful instrument selection can enhance the sound quality of a musical wall. The structure makes it not only an engaging play area but also a rich educational resource.
Understanding Sound Quality
The concept of sound quality encompasses the tone, pitch, volume, and timbre of the sounds produced. A well-designed musical wall should offer a variety of these elements to create a harmonious and intriguing sound experience. This diversity encourages children to experiment with different sound combinations, fostering an early appreciation for music.
Selection of Musical Instruments
The choice of items to include on your musical wall significantly affects its sound quality. Consider incorporating a mix of materials and objects to create a range of sounds:
- Bells and Pot Lids: Metallic items tend to produce sharp, clear sounds with a sustained tone. Bells can add a melodic quality, while pot lids can serve as cymbals, offering a bright, resonant sound.
- Bamboo Chimes or Wooden Blocks: Wooden elements offer a warmer, more mellow sound compared to metals. They can introduce children to different timbres and the subtle nuances of sound.
- Plastic Tubes or Containers: Synthetic materials can create a variety of sounds, from deep, percussive beats to lighter, clicking rhythms. They are versatile and can mimic the sounds of professional instruments.
- Stones or Seed Pods: Incorporating natural elements can produce unique sounds that connect children to the natural world. These items add an organic texture to the music wall and offering sounds that manufactured items cannot replicate.
Tuning and Arrangement
The way instruments are arranged and tuned on the wall can also affect the overall sound quality. Arrange items in a way that they can be easily accessed and played together to create harmonious sounds. Consider the spatial arrangement for acoustic purposes, placing items with similar sound properties near each other to enhance their collective sound.
Maintenance of Sound Quality
Regular maintenance is essential to preserve the sound quality of the musical wall. Check for wear and tear, especially on items exposed to the elements, and replace or repair as needed. This ensures that the musical wall continues to provide a high-quality auditory experience.
Inclusive Instrument Selection
Ensure the musical wall includes instruments that are accessible to all children, including those with different abilities. Items that produce sounds with a light touch or those that can be played using various methods ensure everyone can participate in the musical experience.
The selection of musical instruments for an outdoor wall is a thoughtful process that significantly influences its educational value and appeal. By offering a diverse range of high-quality sounds, the musical wall becomes a powerful tool for sensory exploration, creative expression, and auditory development.
Conclusion
Building a musical wall offers an innovative way to blend play with learning, inviting children to explore the realm of sound and music in an engaging outdoor setting. This creative project not only enhances a child’s cognitive and motor skills but also fosters social interaction and emotional expression. Ultimately, a well-crafted musical wall becomes a cherished feature of any play area, enriching the lives of all who interact with it.
We have more fun projects for kids. Check out our DIY water wall project next!


