Are you trying to maximise space in children’s bedrooms? A loft bed with stairs are one of the best solutions to get the most out of available space in a small bedroom. But they come in many different versions, all having features that will suit the needs of the owner and fit the room better.
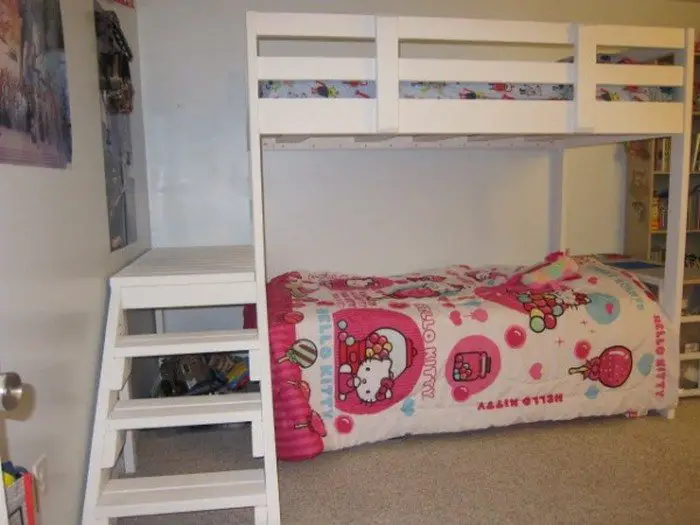
If you are still trying to find that perfect bed design for the kids, here’s one kind of loft bed that might just be what you are looking for!
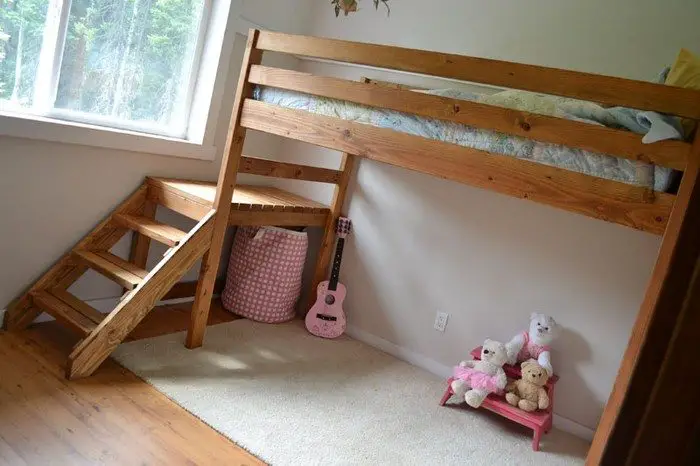
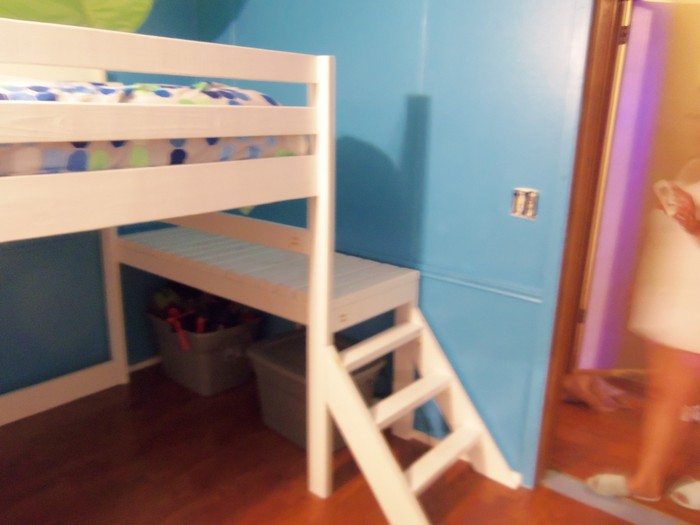
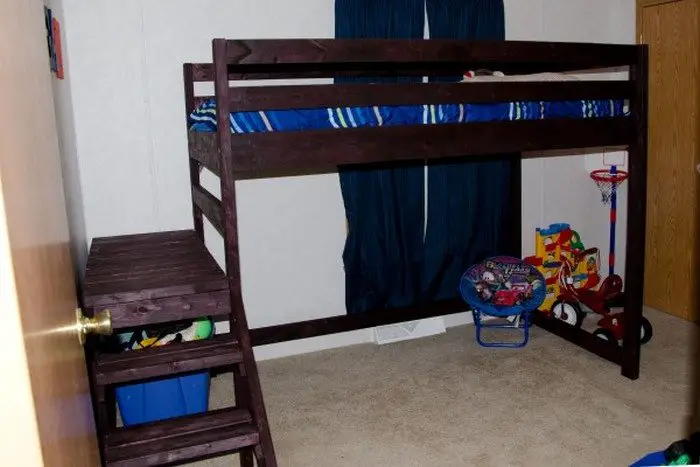
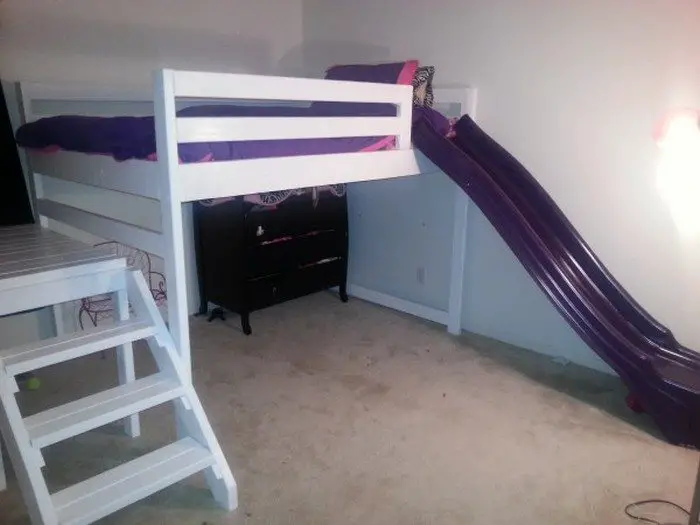
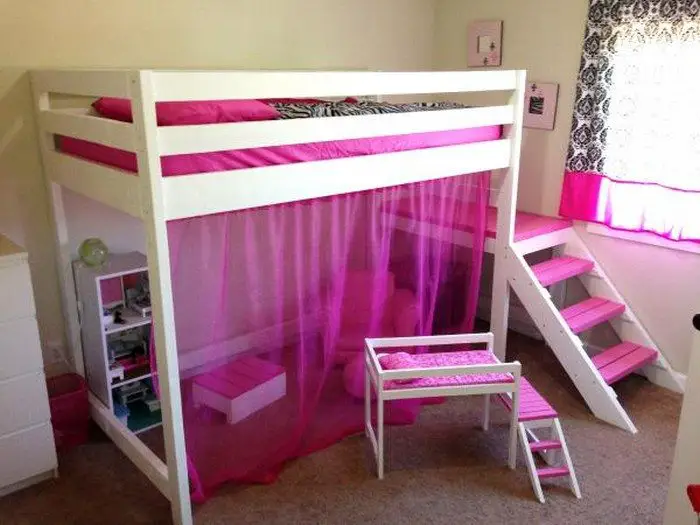
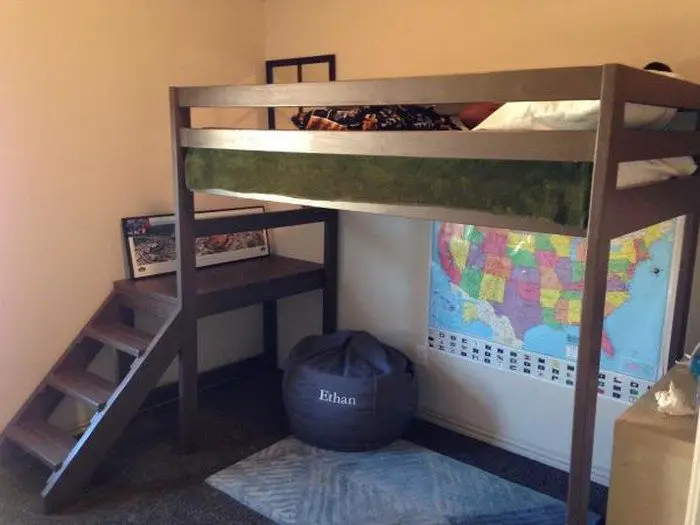
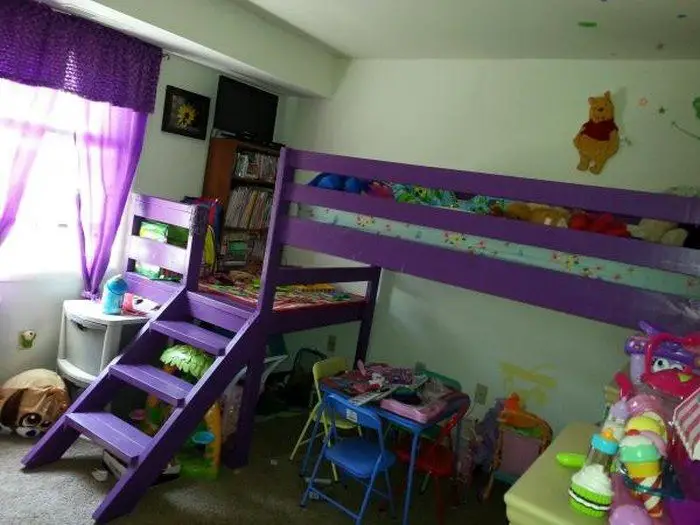
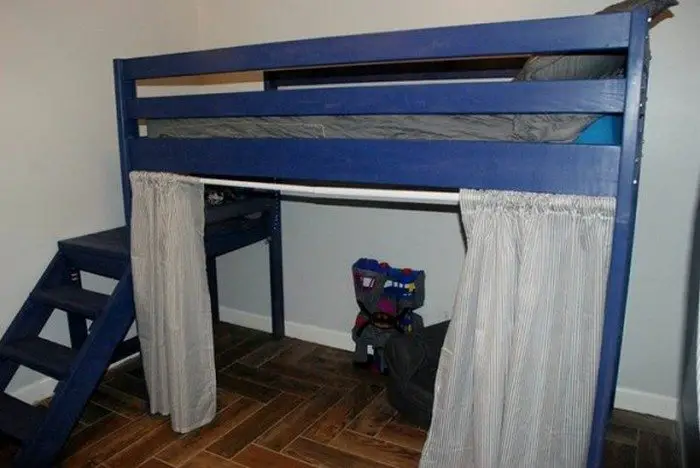
This DIY loft bed has stairs that doesn’t go all the way up to the bed. A landing is provided instead, where the kids can climb their bed from.
This loft bed design is great for parents who are not comfortable letting their kids climb a steep stair (ladder). With its short stairs and landing, kids are safer from falling from a high place.
This DIY bed is also perfect if you are taking into consideration the bedroom window. No more blocked windows with this kind of loft bed! Plus, the kids get to enjoy the view from the landing. :)
If you’ve got more available space, you can even extend the landing so that it can serve as a reading nook or a ‘balcony’ for when your kids are playing. Just make sure to add railings!
Have a close look at a few examples of loft bed with stairs from our album below to get some more great ideas!
Is this the kind of bed your kids need? :)
Contents
- 1 Building a Loft Bed with Stairs
- 1.1 Materials
- 1.2 Tools
- 1.3 Instruction
- 1.4 Safety Considerations for Loft Beds with Stairs
- 1.5 Maximizing Storage with Loft Bed Stairs
- 1.6 Incorporate Built-In Drawers
- 1.7 Create Open Shelving Units
- 1.8 Add Hidden Storage Compartments
- 1.9 Utilize the Space Under the Stairs
- 1.10 Opt for Modular Storage Solutions
- 2 Conclusion
Building a Loft Bed with Stairs
Materials
- 14 pcs of 8′ long 2×4 Timber
- 4 pcs of 8′ long 2×6 Timber
- 2 pcs of 8′ long 2×2 Timber
- 1 pc of 8′ long 1×2 Timber
- 2 ½” PH Screws
- Wood Glue
Tools
- Measuring Tape
- Speed Square
- Pencil
- Kreg Jig
- Cordless Drill
- Circular Saw
- Sander
- Safety Gear
Instruction
Step 1: Plan and Measure
Before cutting, measure the space where the loft bed will go. Use the measuring tape to determine the dimensions for the bed platform and stairs. Mark all cuts on the timber with a pencil. Make sure to include the height of the bed and the size of the stairs.
Step 2: Cut the Timber
Using the circular saw, cut the 2×4 timbers to create the bed frame and support structure. Cut the 2×6 timbers to form the stair treads. The 2×2 timbers will be used for the railing, and the 1×2 timber will act as support bracing under the stairs. Wear your safety gear when cutting.
Step 3: Build the Bed Frame
Assemble the main bed frame by joining the 2×4 pieces. Use the Kreg Jig to create pocket holes for the screws, ensuring a strong, hidden joint. Attach the pieces with 2 ½” PH screws, reinforced with wood glue. Build two side rails and connect them with crosspieces to create a sturdy rectangular frame.
Step 4: Build the Support Legs
Cut four 2×4 pieces to the desired height of the loft bed. Attach these vertical legs to the corners of the bed frame using screws and wood glue. Use the speed square to ensure that all legs are square and the bed frame is level.
Step 5: Create the Stairs
Cut the 2×6 timbers into equal lengths to form the stair treads. Space the stairs according to your design—usually 10 to 12 inches apart. Use 2×4 timbers to build the frame for the stairs. Attach the treads securely to the frame using 2 ½” PH screws and wood glue.
Step 6: Add the Landing
If your design includes a landing, build a platform from additional 2×4 timbers. Secure this to the bed frame. The landing will allow for a safer transition from the stairs to the bed. Make sure the landing is firmly attached and level.
Step 7: Install the Railing
Cut the 2×2 timbers to the desired length for the railing. Attach them to the bed platform and the landing. Use screws and wood glue to secure the railings firmly. Ensure the spacing between the railing posts meets safety standards, particularly for children.
Step 8: Sand the Wood
Once the bed, stairs, and railing are fully assembled, use a sander to smooth out any rough edges. This will make the loft bed safe and prevent splinters.
Step 9: Final Assembly and Inspection
Go over the entire structure to ensure all screws are tightened and everything is securely attached. Check the stability of the stairs, landing, and bed frame. Make any necessary adjustments.
Step 10: Finishing Touches
After sanding, you can paint or stain the bed frame to match the room’s décor. This step is optional but helps protect the wood and give the bed a finished look.
Click on any image to start lightbox display. Use your Esc key to close the lightbox.![]()



You can get more step-by-step instructions from Ana White over here…
Safety Considerations for Loft Beds with Stairs
When building or purchasing a loft bed with stairs, safety should be a top priority, especially if it’s intended for children. Loft beds offer excellent space-saving benefits, but without proper safety measures, they can pose risks.
Below are key safety considerations to keep in mind when constructing or using a loft bed with stairs.
Sturdy Construction
A loft bed with stairs must be built with strong, durable materials. Ensure that the bed frame, stairs, and any additional features like railings are constructed with solid wood or metal to support the weight of both the bed and its occupant. Secure all joints with screws and wood glue to prevent wobbling.
Proper Stair Design
Stairs are safer than ladders for accessing a loft bed. Ensure the stairs are wide enough for secure footing and spaced at appropriate intervals. Install anti-slip treads on each step to prevent slipping, particularly for young children. The stairs should also be sturdy enough to support adult weight in case parents need to assist their children.
Guardrails for Fall Prevention
Guardrails are essential for a loft bed with stairs, especially if it’s used by children. The railings should be at least 5 inches above the mattress to prevent falls during sleep. Make sure the gaps between the railing posts are narrow enough so that small children cannot slip through.
Adequate Height Clearance
The height of the loft bed with stairs should allow enough clearance between the bed and the ceiling to avoid bumps while sitting up. A minimum of 30 inches between the top of the mattress and the ceiling is recommended. This helps create a comfortable and safe sleeping environment.
Regular Maintenance
Even a well-constructed loft bed with stairs requires regular inspection. Check for loose screws, cracks in the wood, or any signs of wear and tear that could compromise safety. Tighten any loose components and replace worn-out parts immediately to maintain the bed’s stability.
Considering these safety factors ensures that your loft bed with stairs is both functional and secure for everyone using it.
Maximizing Storage with Loft Bed Stairs
Loft beds are a popular solution for making the most of small spaces, but a loft bed with stairs can provide even more value by incorporating storage into its design. By using the space under or within the stairs, you can create clever storage solutions that help keep bedrooms organized and clutter-free. Here are some creative ways to maximize storage with loft bed stairs, making your space both functional and stylish.
Incorporate Built-In Drawers
One of the most effective ways to maximize storage with a loft bed with stairs is by incorporating built-in drawers under each step. This design allows you to store clothes, toys, or books in the otherwise unused space beneath the stairs. When constructing the stairs, ensure that each drawer is deep enough to hold bulky items but still easy to pull out. Use sturdy drawer slides to ensure smooth operation and durability over time.
Built-in drawers can also be customized to meet your specific needs. For example, deeper drawers can be placed in the lower steps for larger items, while smaller drawers in the upper steps can store accessories or smaller objects. With this setup, you not only gain extra storage but also make efficient use of the space the stairs occupy.
Create Open Shelving Units
If drawers aren’t suitable for your loft bed with stairs design, open shelving units can be a great alternative. By turning the side of each step into a small shelf, you can display books, toys, or decorative items. This is especially useful for creating a space where children can easily access their belongings, promoting independence and organization.
Open shelving for your loft bed with stairs is a great option if you want easy access to stored items and prefer a more visually open look. It can also add character to the room, allowing you to display favorite items that reflect your child’s personality. The shelves can be designed at various heights to accommodate different objects, from small books to larger toys.
Add Hidden Storage Compartments
Another smart way to maximize storage with loft bed stairs is by incorporating hidden compartments into the design. Hidden storage is perfect for keeping valuable or rarely used items out of sight. You can design the stairs so that the top of each step lifts up to reveal a compartment inside. These compartments can be used to store seasonal items, keepsakes, or anything that doesn’t need to be accessed frequently.
Hidden storage compartments also add an element of fun for children, who may enjoy having their own secret places to store special items. It’s a subtle and functional addition to the loft bed with stairs that helps maintain a clean and organized room without taking up extra space.
Utilize the Space Under the Stairs
The space under the stairs is often overlooked, but it can be transformed into useful storage or even a cozy nook. You can add cabinets, cubbies, or larger shelves underneath the entire staircase to store larger items like bedding, toys, or even shoes. If the loft bed is in a teen’s room, this space could be perfect for storing school supplies, sports equipment, or crafting materials.
Alternatively, the space under the loft bed with stairs can be turned into a reading nook or play area, giving children a private corner for relaxation or play. Simply add a comfortable cushion and a few favorite books, and you have a multifunctional space that combines storage with comfort.
Opt for Modular Storage Solutions
Modular storage options are a great way for people who want adaptability to maximize loft bed with stairs. Growing children would find modular units perfect since they can be rearranged and modified to meet evolving needs. As needed, these units can comprise shelves, drawers, and baskets that can be replaced or rearranged.
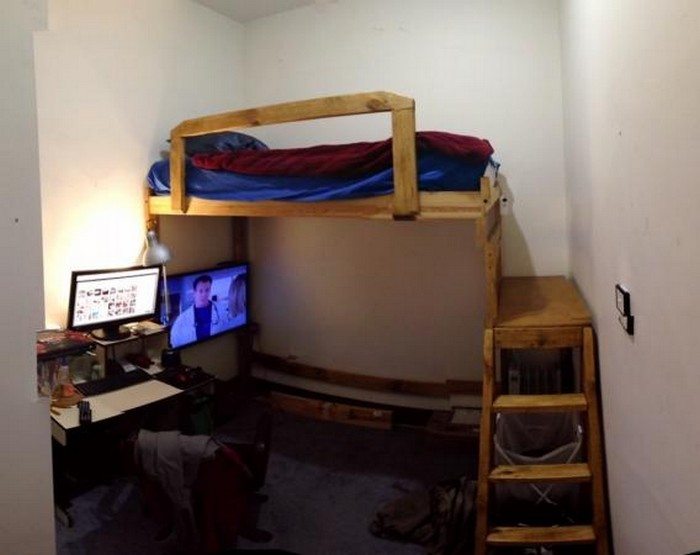
Because you can mix and match various storage elements to fit both the aesthetic of the room and your particular storage requirements, this method also lets you be creative in the design process. Modular storage guarantees that the design will change with time and gives your loft bed with stairs flexibility.
Using a loft bed with stairs not only helps keep your room neat but also gives your space-saving solution some practicality. Maximizing storage is Incorporating built-in drawers, open shelves, secret cabinets, or modular units will help you maximize every square inch in a functional and fashionable arrangement. A loft bed with stairs can provide lots of chances to combine comfort, safety, and clever storage in one smooth design whether you’re building a room for a child or a teen.
Conclusion
Building a loft bed with stairs is a practical way to maximize space and add functionality to any room. With careful planning and attention to safety, this project can provide both a cozy sleeping area and smart storage solutions. The end result will be a durable and versatile bed that suits your family’s needs.
We have more ways to boost the look of your kid’s bedroom. Check out our boy bedroom design guide!


