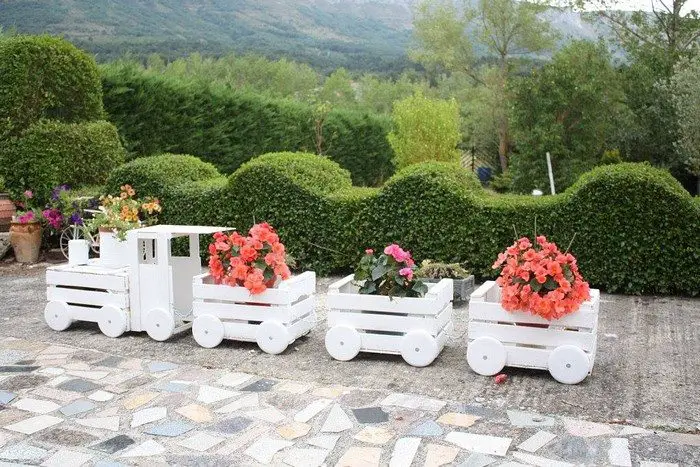
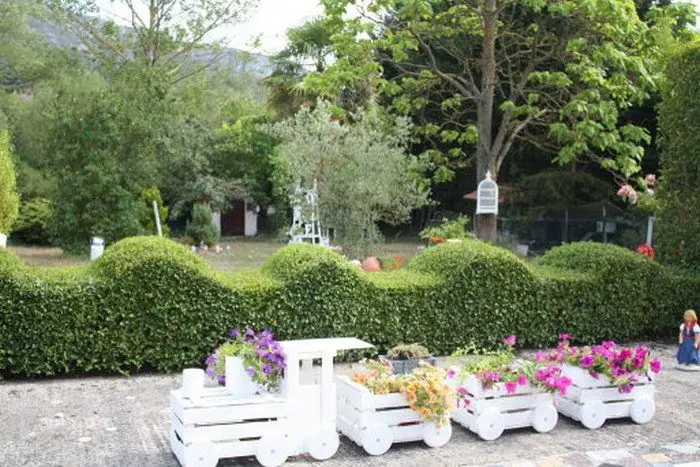
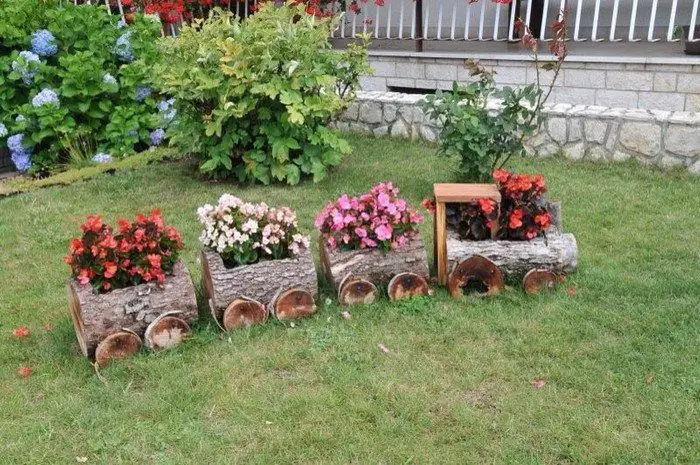
Want another fun garden idea? This train planter is easy to make and is just made out of old crates!
If you’ve got access to used wooden crates, repurposing them as train planters is one beautiful project you can do with them. It will surely make your yard a happier place, and kids especially will love them!
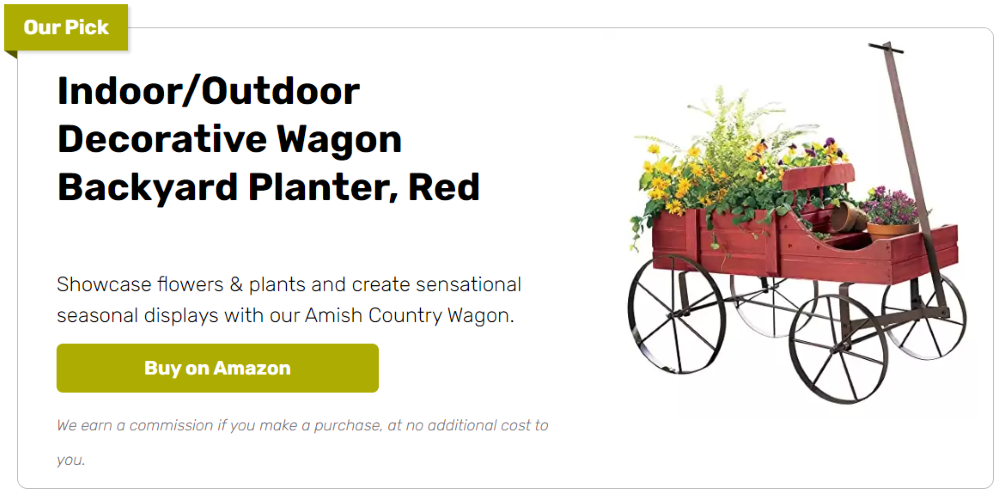
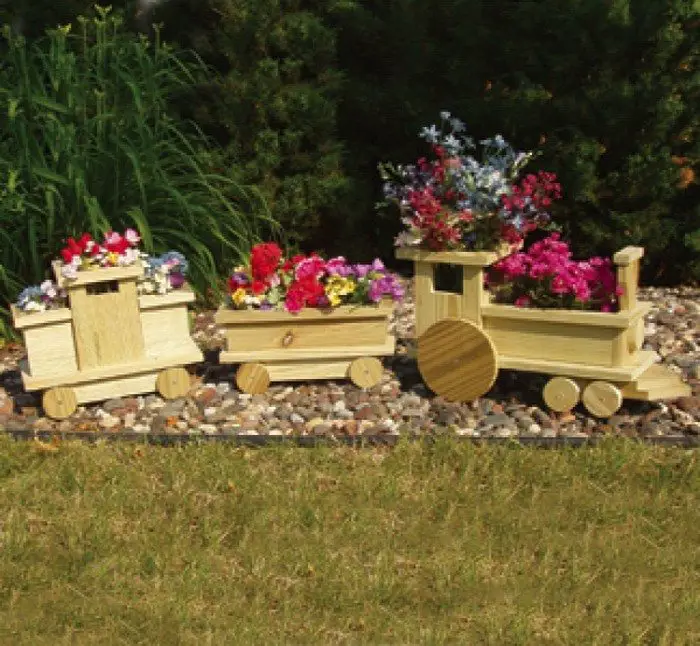
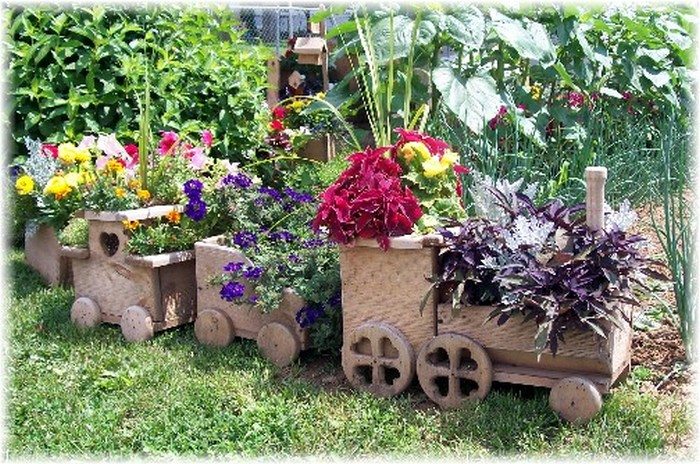
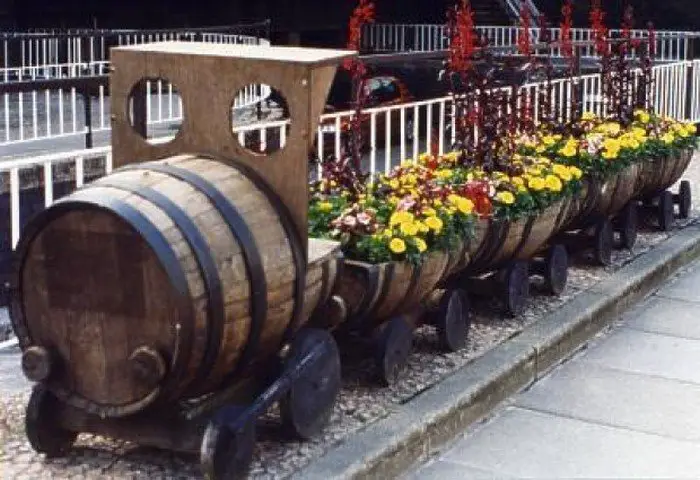
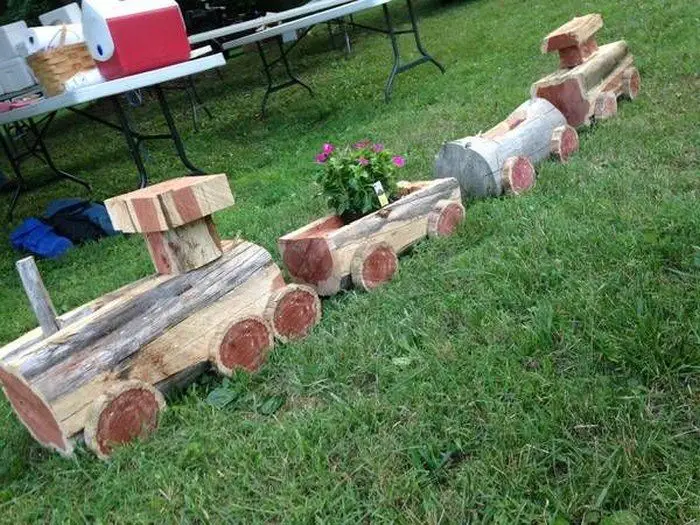
Like the idea of train planters but don’t know where to get wooden crates? We have other train planter ideas for you in our album below!
Do you know anyone who will love this garden project?
Crate train planters offer a multitude of advantages that make them a fantastic choice for gardeners and DIY enthusiasts alike.
1. Versatility: Crate train planters are incredibly versatile and can be customized to fit a wide range of gardening needs and aesthetic preferences. With various crate sizes, shapes, and configurations available, you have the flexibility to create a unique and personalized planter that complements your garden’s style. Whether you’re going for a rustic, vintage look or a more modern design, crate train planters can be adapted to suit any outdoor space.
2. Space Optimization: One of the biggest advantages of crate train planters is their ability to maximize space. By stacking the crates vertically, you can create a tiered planter system that allows you to grow a variety of plants in a compact area.
This vertical gardening technique is particularly useful for small gardens, balconies, or patios where space is limited. Crate train planters enable you to make the most of your available space and create a lush, green oasis even in tight quarters.
3. Cost-Effectiveness: Crate train planters are a cost-effective alternative to traditional garden beds or planters. Instead of purchasing expensive containers or raised beds, you can repurpose old crates and other materials to create a stylish and functional planter at a fraction of the cost. Crates are often readily available and can be acquired for free or at a low cost, making this project an affordable option for DIYers on a budget.
4. Customization: With crate train planters, the only limit is your imagination. You can get creative and customize your planter to suit your specific needs and preferences. Whether you want to paint the crates in vibrant colours, add decorative accents like stencils or decals, or incorporate other elements such as trellises or plant labels, the possibilities are endless. Crate train planters offer a blank canvas for DIYers to express their creativity and add a personal touch to their outdoor space.
5. Eco-Friendliness: Using old crates to build a train planter is an eco-friendly choice that helps reduce waste and minimize your environmental footprint. By repurposing materials that would otherwise end up in a landfill, you’re giving them new life and contributing to a more sustainable approach to gardening and home decor. Additionally, growing your own plants in a crate train planter promotes sustainability by reducing the need for store-bought produce and supporting local ecosystems.
6. Ease of Construction: Crate train planters are relatively simple to build and require only basic tools and materials. With just a few crates, some screws, and a bit of creativity, you can create a charming garden centrepiece in no time. There are plenty of online tutorials and guides available to help you through the process, making it accessible to DIYers of all skill levels. Whether you’re a seasoned gardener or a beginner DIYer, building a crate train planter is a fun and rewarding project that anyone can tackle.
7. Mobility: Another advantage of crate train planters is their mobility. Unlike traditional garden beds or planters, crate train planters can be easily moved or rearranged to suit your needs. Whether you’re reconfiguring your garden layout, redecorating your outdoor space, or simply seeking a change of scenery, crate train planters offer the flexibility to adapt to your evolving preferences.
You can rearrange the crates to create different configurations or move the planter to a new location altogether, giving you endless options for customization and versatility.
Crate train planters are a versatile, cost-effective, and eco-friendly option for adding greenery to your outdoor space. Whether you’re a seasoned gardener or a beginner DIYer, building a crate train planter is a fun and rewarding project that allows you to express your creativity and enhance the beauty of your garden.
With their space-saving design, affordability, and endless customization options, crate train planters are an excellent choice for anyone looking to create a unique and stylish garden feature.
You’ll need these materials:
- Old Crates
- Wooden Circles (or any circular object you can attach as wheels)
- Extra Plywood
- Chains
- White Paint/Spray Paint
- 2 Empty Containers (which will serve as a chimney)
- Wood Glue
- Plants
And these tools:
- Paint Brush
- Saw
- Drill
Making a sturdy train planter from crates is a creative and enjoyable project that adds a touch of whimsy to any garden or outdoor space. With just a few simple materials and some basic woodworking skills, you can transform old crates into a charming train-shaped planter that will delight both young and old alike. In this guide, we’ll walk you through the process of creating your very own train planter in eight fun and easy steps.
Steps:
Step 1: Prepare the Crates
Start by cleaning and sanding the old crates to remove any dirt, debris, or rough edges. If the crates are damaged or uneven, you may need to reinforce them with extra plywood or wooden slats to ensure they’re sturdy enough to support the weight of the soil and plants.
Step 2: Attach the Wheels
Next, attach the wooden circles or circular objects to the bottom of each crate to serve as wheels. You can use screws or wood glue to secure them in place, depending on the type of material you’re working with. Make sure the wheels are evenly spaced and securely attached to ensure the planter rolls smoothly once assembled.
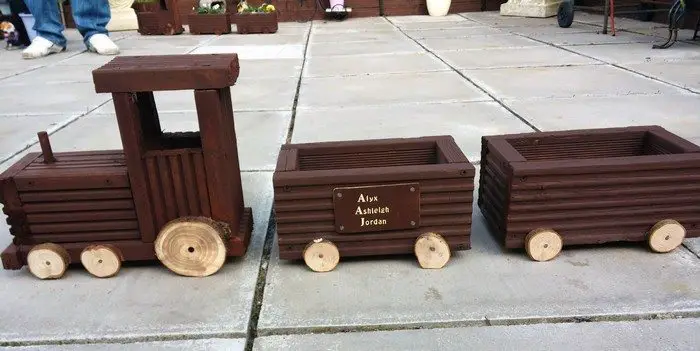
Step 3: Paint the Crates
Once the wheels are attached, paint the crates with white paint or spray paint to give them a clean, uniform appearance. You can also add decorative details such as stripes, dots, or patterns to mimic the look of a real train. Allow the paint to dry completely before moving on to the next step.
Step 4: Assemble the Train
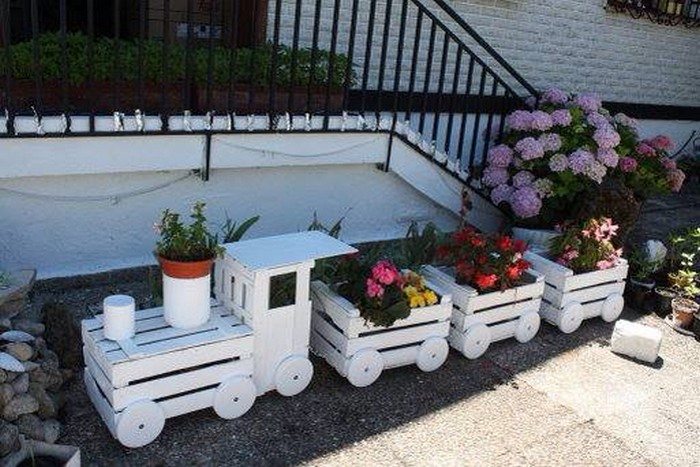
Once the paint is dry, arrange the crates in the desired configuration to create the shape of a train. Use wood glue or screws to secure the crates together, making sure they’re aligned properly and spaced evenly. You can stack the crates on top of each other to create multiple levels, with the largest crate serving as the base.
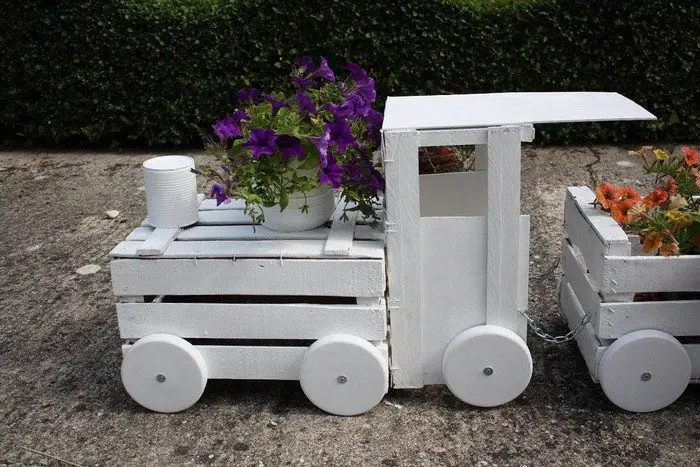
Step 5: Add the Chimneys
Place the empty containers on top of the train to serve as chimneys. You can use small flower pots, metal buckets, or any other container that fits the theme of your train planter. Secure the containers in place with wood glue or screws, ensuring they’re stable and won’t topple over.
Step 6: Attach the Chains
To complete the look of your train planter, attach chains to the front of the first crate to mimic the look of a train engine. You can also add chains to the sides of the other crates for added detail. Secure the chains in place with screws or hooks, making sure they’re evenly spaced and securely attached.
Step 7: Plant Your Garden
Finally, it’s time to plant your garden! Fill each crate with soil and plant flowers, herbs, or vegetables of your choice. You can mix and match different plants to create a colourful and vibrant display that will bring your train planter to life. Once planted, water the plants thoroughly and place your train planter in a sunny spot where it can be enjoyed by all.
Making a sturdy train planter from crates is a fun and rewarding DIY project that allows you to unleash your creativity and add a unique touch to your outdoor space. With just a few simple materials and some basic woodworking skills, you can create a charming and whimsical train planter that will delight gardeners of all ages.
So gather your materials and get ready to embark on a journey to create your very own train-shaped garden masterpiece!
Click on any image to start the lightbox display. Use your Esc key to close the lightbox.
![]()

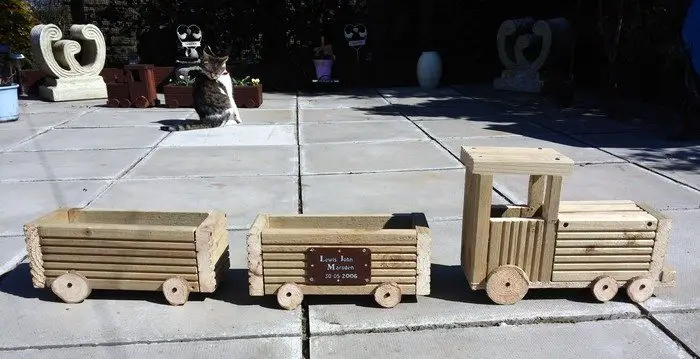
Thanks to Facilisimo for sharing tips and strategies on how to transform old crates into a train planter.
Maintaining Your Crate Train Planter
Maintaining your crate train planter is essential to ensure its longevity and keep it looking its best. With proper care and attention, you can enjoy your charming garden centrepiece for years to come. Here are some tips for maintaining your train planter:
1. Regular Cleaning: Keep your train planter clean by regularly removing dirt, debris, and dead leaves from the crates and planters. Use a soft brush or cloth to gently sweep away any buildup, being careful not to damage the wood or plants.
2. Watering: Proper watering is crucial for the health of your plants and the longevity of your train planter. Make sure to water your plants regularly, especially during hot, dry weather. Check the soil moisture regularly and adjust your watering schedule as needed to prevent overwatering or underwatering.
3. Fertilizing: To keep your plants healthy and thriving, consider fertilizing them regularly. Choose a balanced fertilizer suitable for the types of plants in your train planter and follow the manufacturer’s instructions for application. Avoid overfertilizing, as this can lead to nutrient imbalances and damage to your plants.
4. Pruning: Keep your plants looking neat by regularly pruning them to remove wilted leaves, flowers, and stems. This will not only improve the appearance of your train planter but also promote healthy growth and flowering.
5. Pest and Disease Control: Keep an eye out for pests and diseases that may affect your plants and take prompt action to control them. Inspect your plants regularly for signs of infestation or disease, such as yellowing leaves, holes, or spots, and treat affected plants with appropriate insecticides or fungicides as needed.
6. Weed Control: Prevent weeds from taking over your train planter by regularly removing any unwanted plants that may sprout up between the crates. Pull weeds by hand or use a small gardening tool to carefully remove them, being careful not to disturb the roots of your planted flowers or herbs.
7. Protect from Harsh Weather: Protect your train planter from extreme weather conditions, such as strong winds, heavy rain, or intense sunlight, which can damage the wood and plants. Consider moving your planter to a sheltered location during severe weather or covering it with a tarp or sheet to provide extra protection.
8. Stabilize the Structure: Check the stability of your train planter regularly to ensure that it remains securely assembled and upright. Tighten any loose screws or bolts, reinforce weak joints, and replace any damaged or deteriorating parts as needed to keep your planter sturdy and safe.
9. Replenish Soil and Mulch: Over time, the soil in your train planter may become depleted of nutrients and compacted, leading to poor drainage and reduced plant growth. Periodically replenish the soil by adding fresh potting mix or compost to the crates, and topdress with a layer of mulch to help retain moisture and suppress weeds.
10. Rotate Plants: To prevent uneven growth and ensure all plants receive adequate sunlight, consider rotating them periodically. Move plants around within the crates or swap them between crates to promote balanced growth and maintain a uniform appearance.
By following these maintenance tips, you can keep your old crates train planter looking beautiful and vibrant throughout the growing season. With a little care and attention, your charming garden centrepiece will continue to delight and inspire for years to come.
The Wrap Up
Crafting a crane train planter is not merely a DIY project; it’s a delightful adventure brimming with creativity, resourcefulness, and joy. Through the process of assembling this unique garden feature, you’ve embarked on a journey of transformation, turning simple materials into a charming and whimsical addition to your outdoor space.
Reflecting on the steps taken to bring this project to life, it becomes evident that each stage contributed to its overall charm and functionality. From selecting the materials to painting and assembling the crane, every decision was guided by a desire to create something special. Along the way, you’ve honed your crafting skills and discovered new ways to repurpose materials, showcasing the power of innovation and ingenuity.
One of the most rewarding aspects of this project is its eco-friendliness. By repurposing old materials and giving them new life, you’ve embraced sustainability in a tangible and creative way. The crane planter serves as a reminder of the importance of environmental stewardship and the potential for creativity to drive positive change.
Additionally, the crane planter holds sentimental value as well. It’s not just a decorative piece; it’s a reflection of your personality and style, a testament to your passion for gardening and crafting. Whether you’re admiring it from your garden or tending to the plants growing within it, the planter brings a sense of pride and fulfillment to your outdoor space.
But perhaps the greatest reward lies in the joy it brings to others. As friends, family, and neighbours admire your handiwork, the crane planter becomes a focal point for conversation and admiration. It sparks curiosity and inspires others to unleash their own creativity, fostering a sense of community and connection that enriches everyone’s lives.
The process of creating a crane train planter is about more than just building a decorative piece; it’s about embracing creativity, sustainability, and the simple pleasures of DIY crafting. So as you marvel at your creation and watch your plants flourish, take a moment to appreciate the journey you’ve embarked on and the beauty you’ve brought to your surroundings.
Frequently Asked Questions
1. Can you customize the design of your crate train planter?
Absolutely! Feel free to get creative with the design. You can paint the crates in different colours, add decorative accents, or even personalize them with your own unique touches.
2. What plants should you use?
The beauty of this project is its versatility. You can use a variety of plants, from flowers to herbs to succulents, depending on your preference and the climate of your area.
3. How do you ensure the planter is sturdy?
By following the steps carefully and securely fastening the crates together, you’ll ensure that your planter is stable and durable. Additionally, using quality materials and proper construction techniques will help enhance its longevity.
4. Can you make the crate train planter larger or smaller?
Absolutely! You can adjust the size of your train planter by using more or fewer crates. Just make sure to maintain the proportions to ensure it remains balanced and visually appealing.
5. How do you maintain the crate train planter?
Regular maintenance is key to keeping your train planter looking its best. Make sure to water your plants regularly, prune them as needed, and keep an eye out for any signs of damage or wear. Additionally, you can touch up the paint periodically to keep it looking fresh.


