Having a lot of boys living under one roof can bring some unusual issues to other households. There was a time when finding matching socks would take at least ten minutes.
We’ve moved past that stage, though. Lately, it’s been organizing a lot of hats—and I mean, a lot.
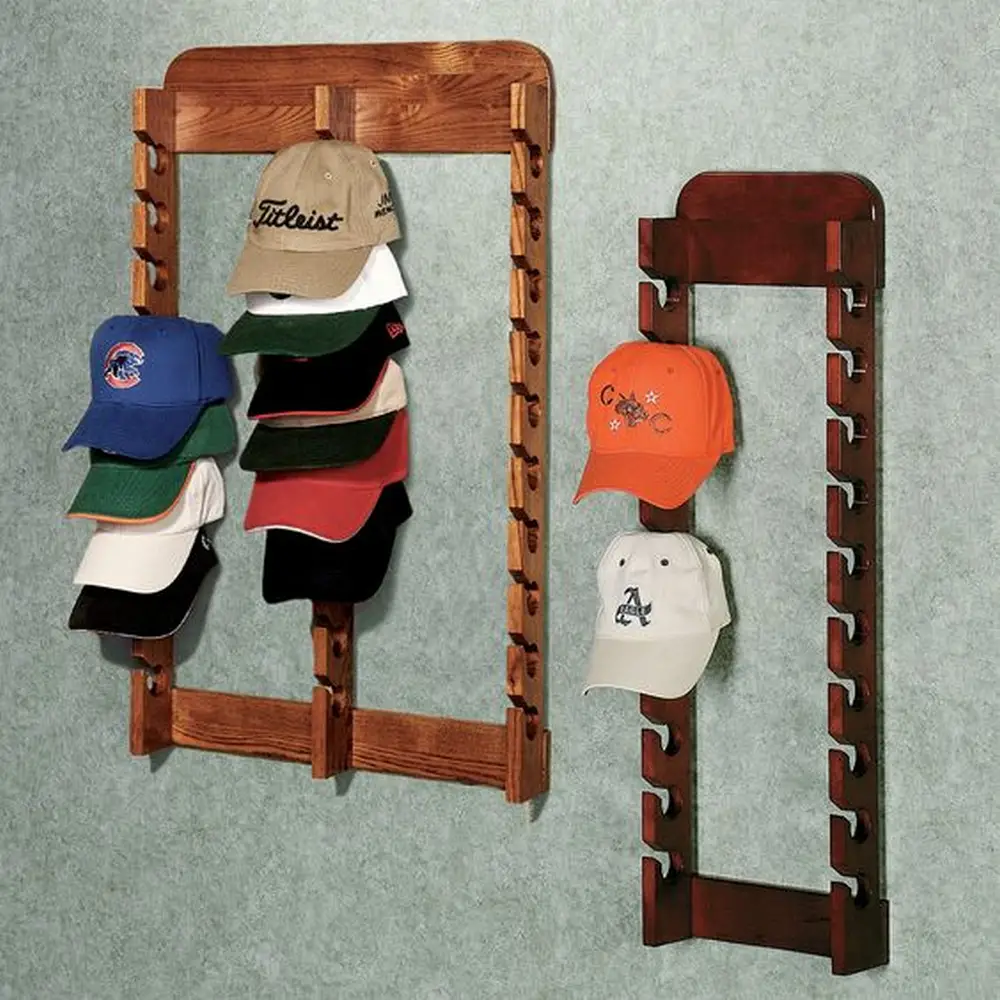
Create Your Own DIY Hat Rack: A Stylish Way to Organize Your Space
For the past years, my boys’ hats have been lying around in different rooms in the house. Some were so deformed, scrunched inside a small drawer, that they had to throw them away.
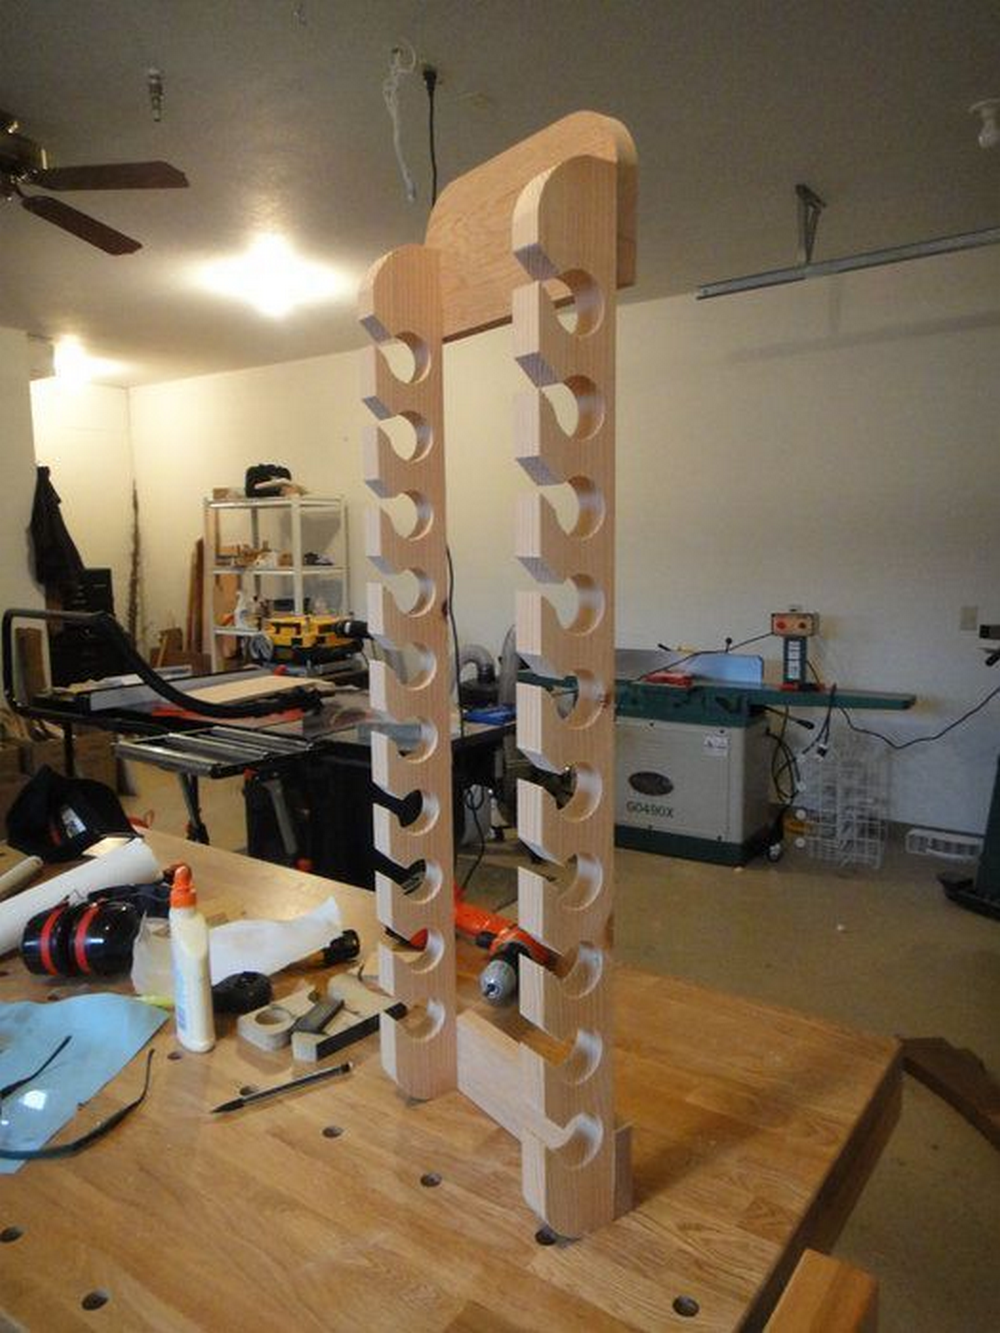
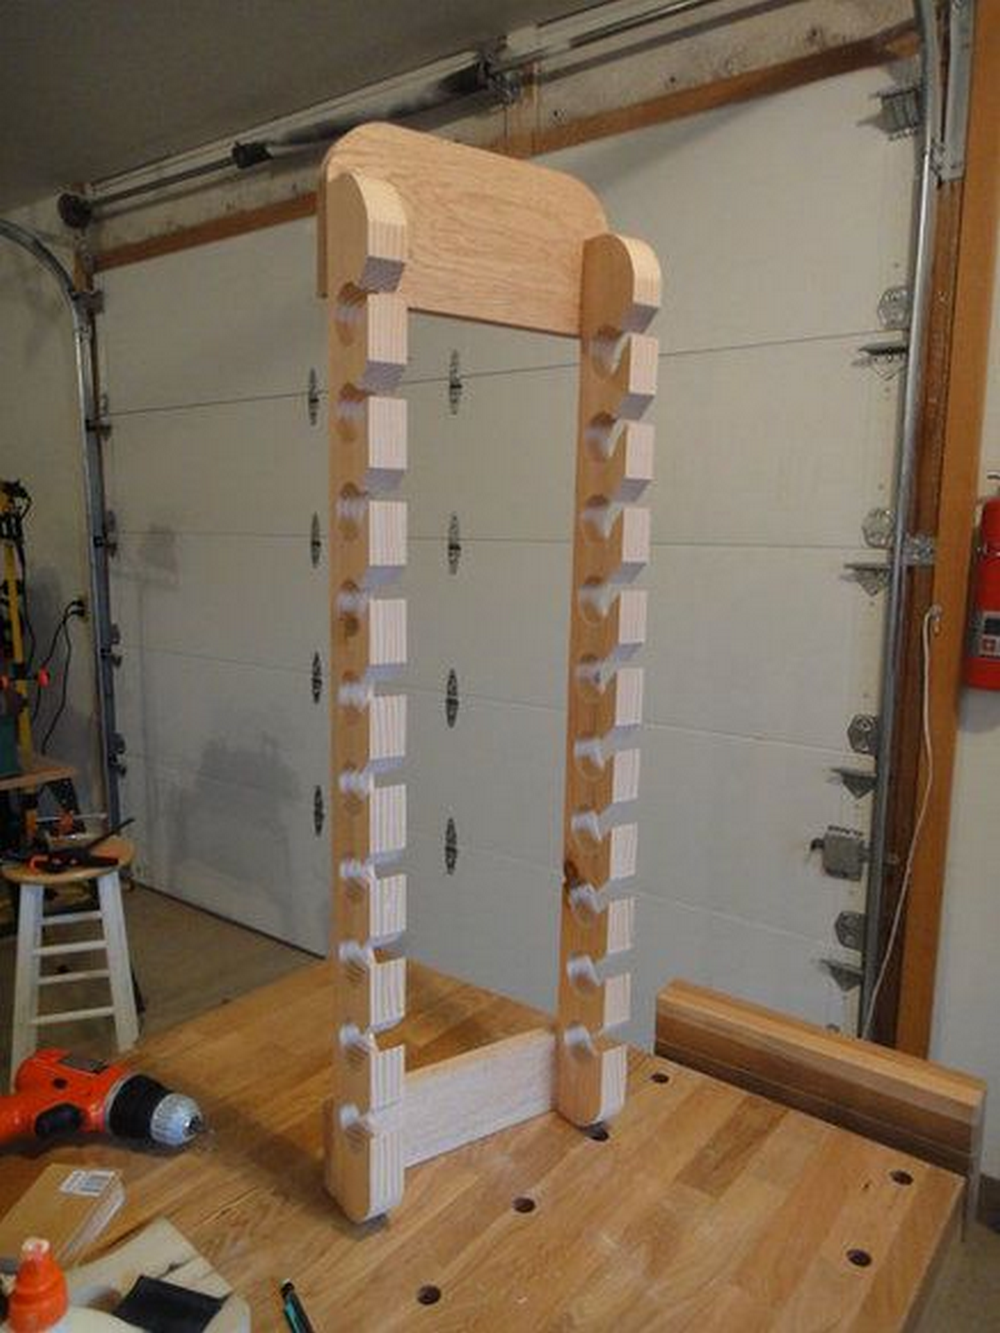
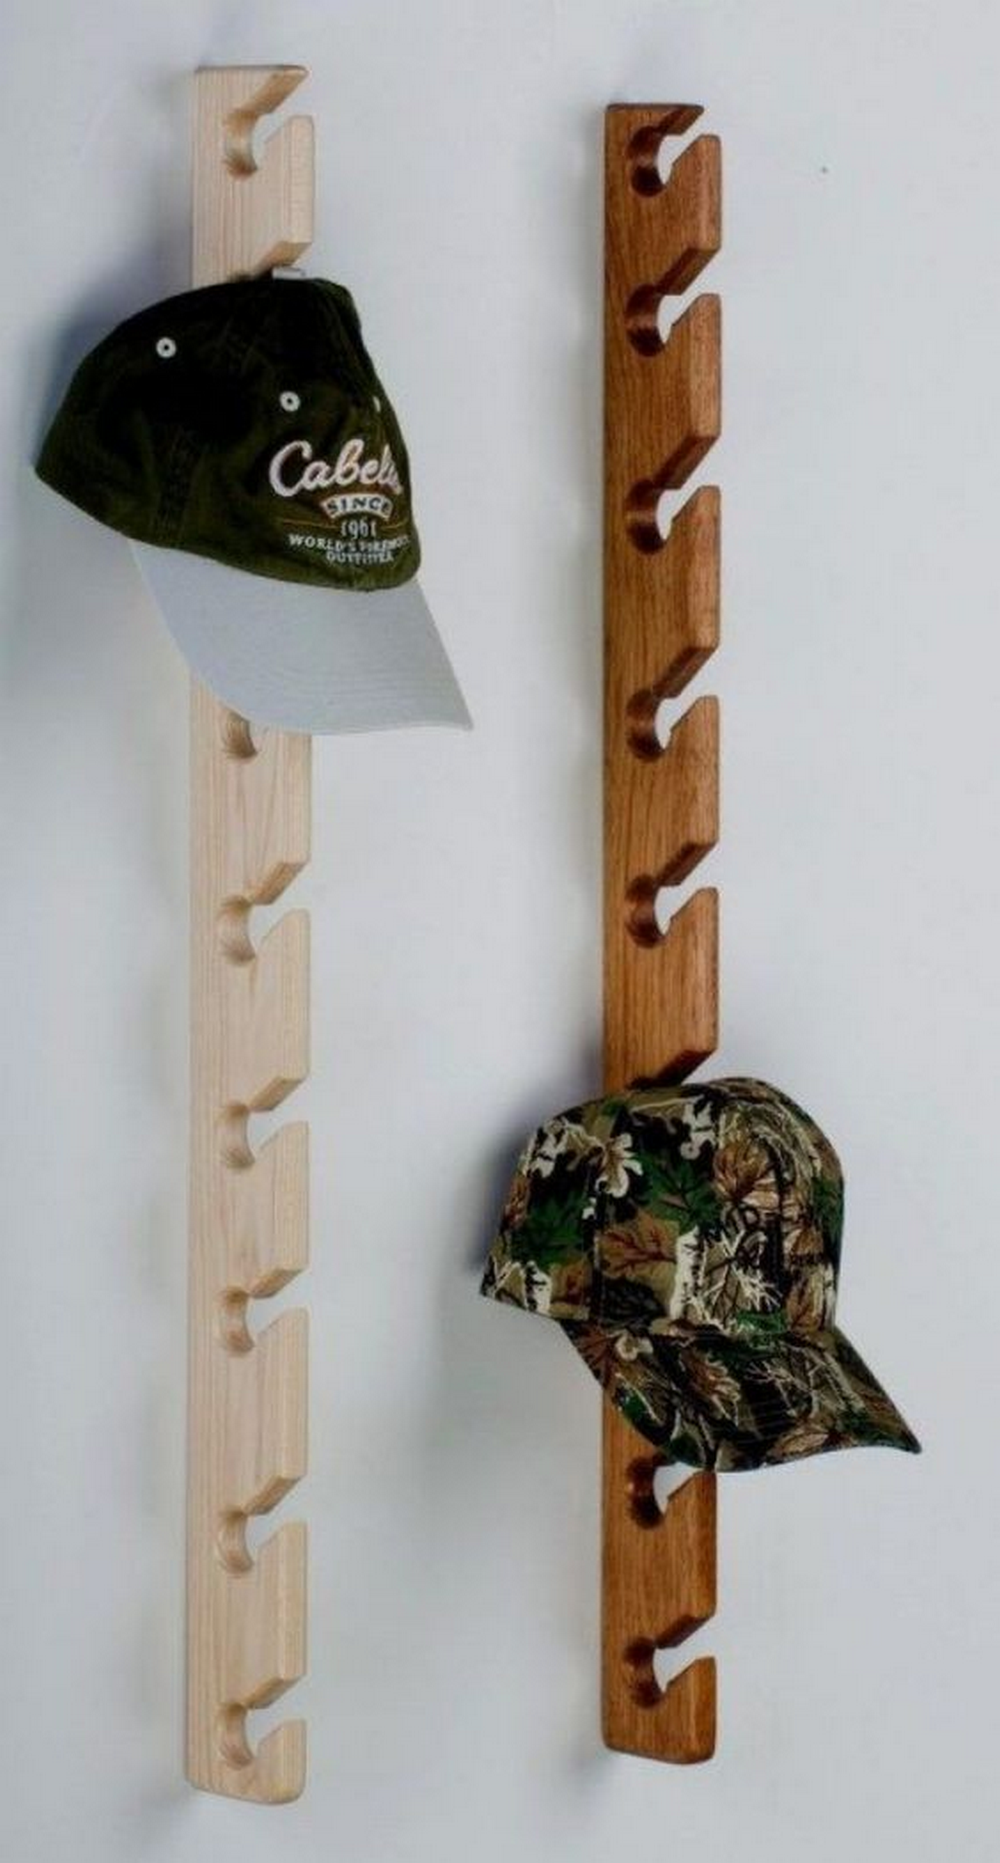
Fortunately, my husband found a great solution for organizing hats—a wooden hat rack he made himself. This is also great as part of my boys’ bedroom.

How to Build a DIY Hat Rack
It’s an easy project. It took my husband just several hours from start to finish. I love the finished product. It’s not bulky at all, perfect for putting hats up without deforming them.
Materials:
- 2 pcs 2”x4”
- 2 pcs 1”x6”
- Wood glue
- Screws
Tools:
- Pencil
- Tape measure
- Miter saw
- Mag drill
- Table saw
- Sander
- Dowel
- Sandpaper
Instructions:
Step 1: Measure and Cut the Wood
- Using the tape measure and pencil, mark the desired length for your hat rack on the 1”x6” wood pieces. This will form the back panel.
- Measure and mark the 2”x4” wood for the hooks.
- Use the table saw to cut the 1”x6” pieces to length.
- With the miter saw, cut the 2”x4” pieces into smaller sections for hooks.
Step 2: Shape the Hooks
- Cut 2”x4” pieces and round off one end of each piece using the sander. These rounded ends will serve as hooks.
Step 3: Sand Everything
- Sand all the wood pieces with sandpaper to ensure a smooth surface. Pay special attention to the edges and ends.
Step 4: Assemble the Back Panel
- Apply wood glue to join the 1”x6” pieces side by side. Use clamps to hold them together until the glue dries.
- For extra strength, you can also screw the pieces together from the back.
Step 5: Final Touches
- Once everything is assembled, give the entire hat rack a final sanding.
- You can leave the wood natural, or paint or stain it to match your decor.
- Allow any finish to dry completely before mounting the hat rack.
Step 6: Mounting the Hat Rack
- Decide where you want to place your DIY hat rack.
- Use a level to ensure it’s straight.
- Mark the drilling points on the wall.
- Secure the rack to the wall with appropriate screws and wall anchors for your wall type.
By incorporating both approaches, you can choose the method that best suits your needs and resources. Whether you prefer the minimalist elegance of clipped hats or the sturdiness of a crafted wooden rack, these steps guide you to achieve an organized and aesthetically pleasing hat display.
Click on any image to start the lightbox display. Use your Esc key to close the lightbox.
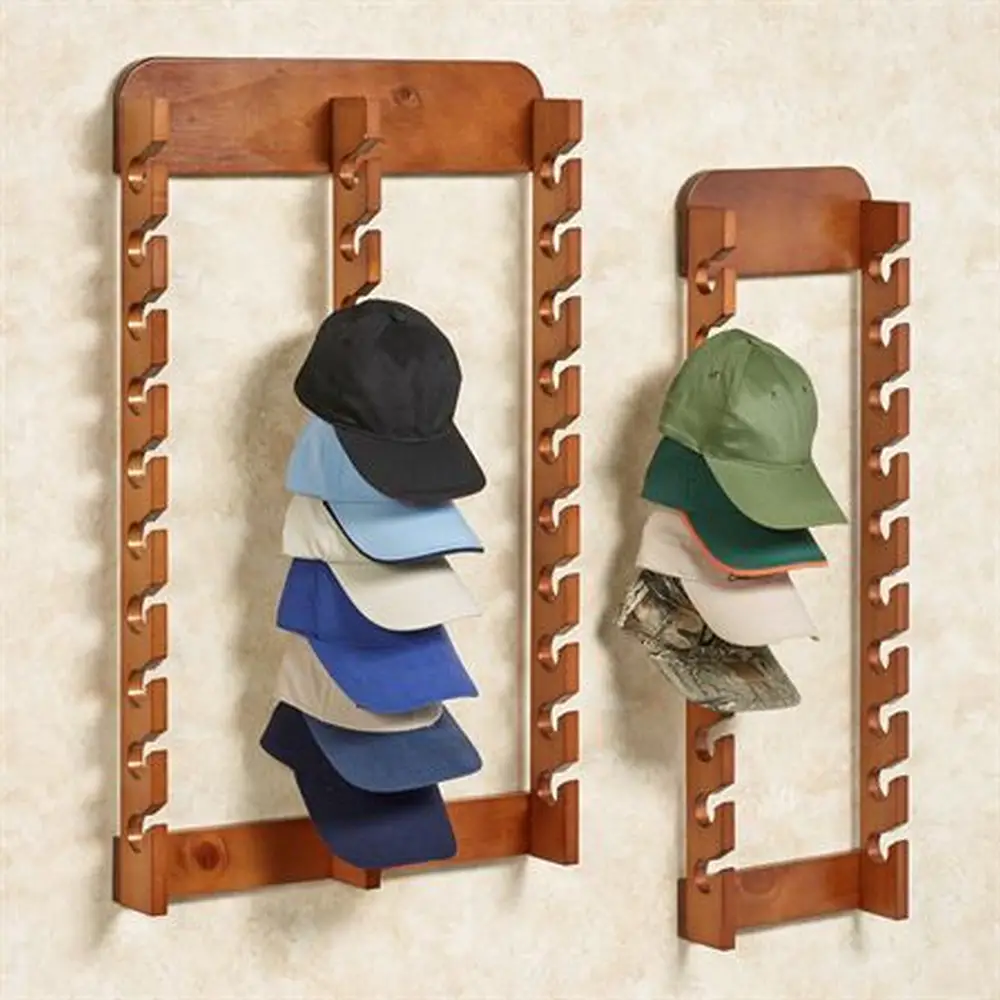

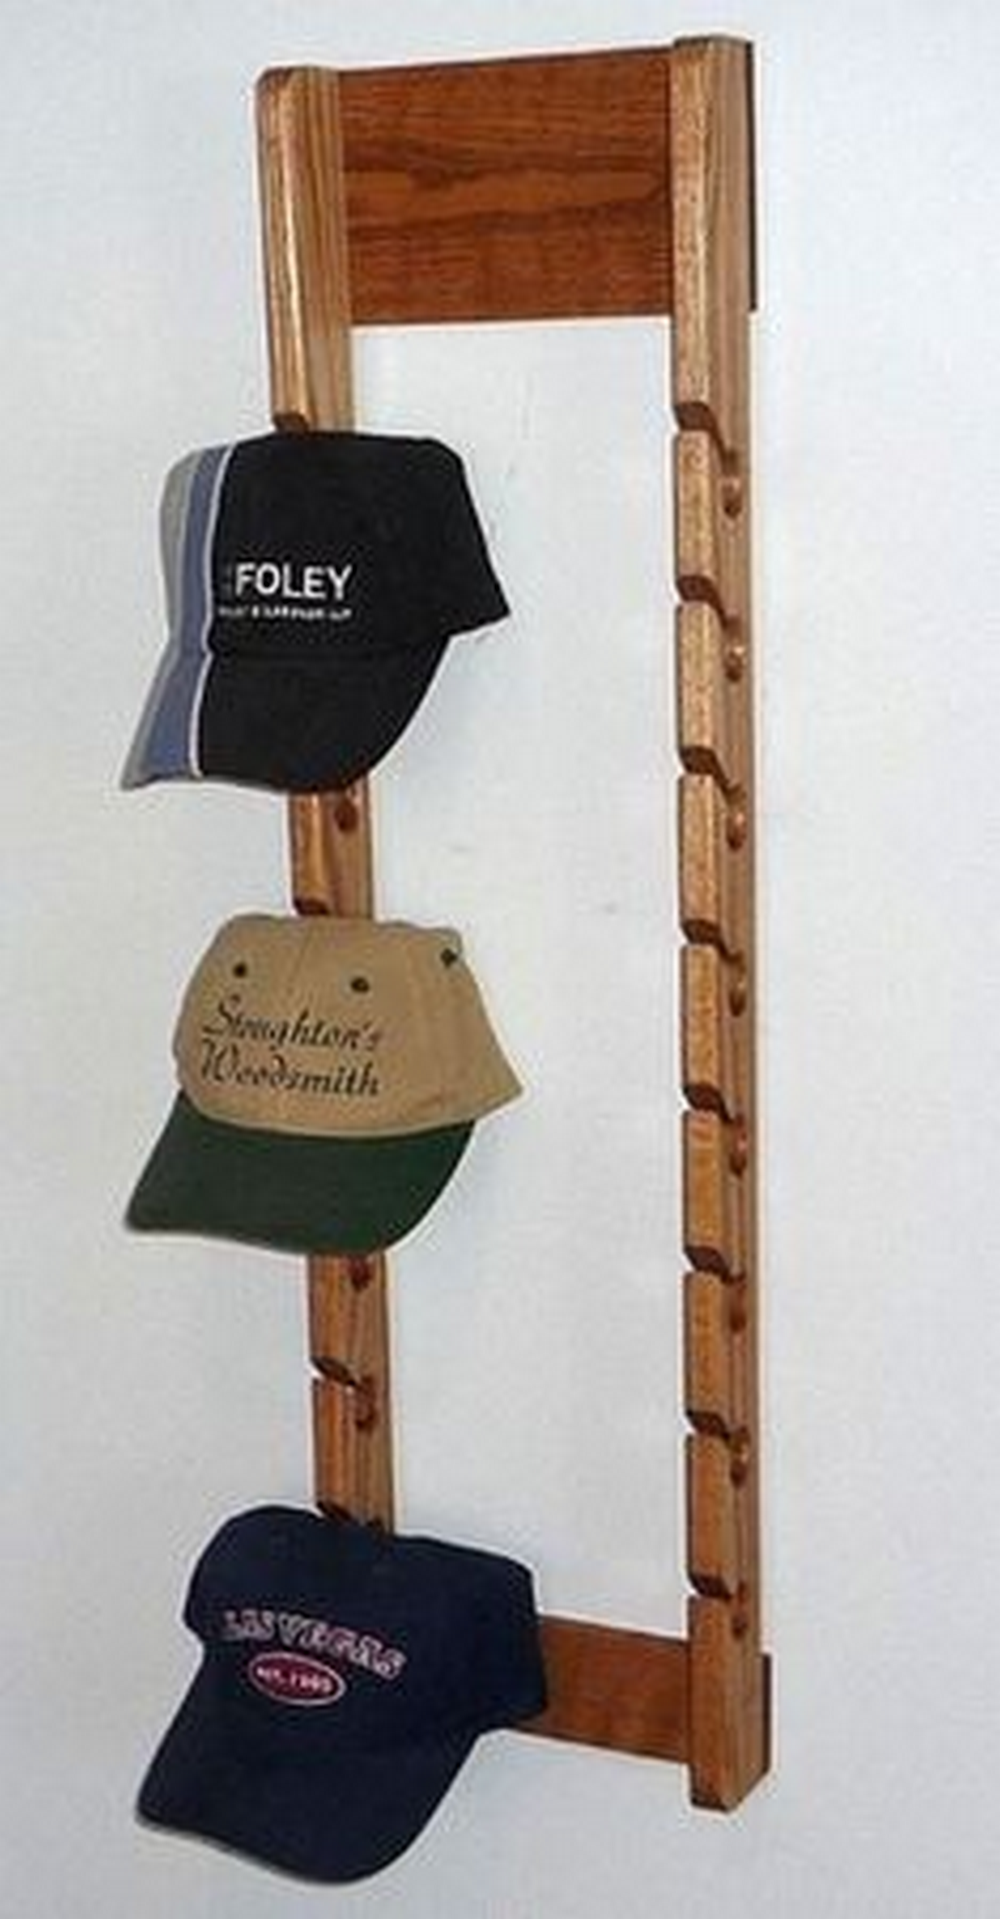
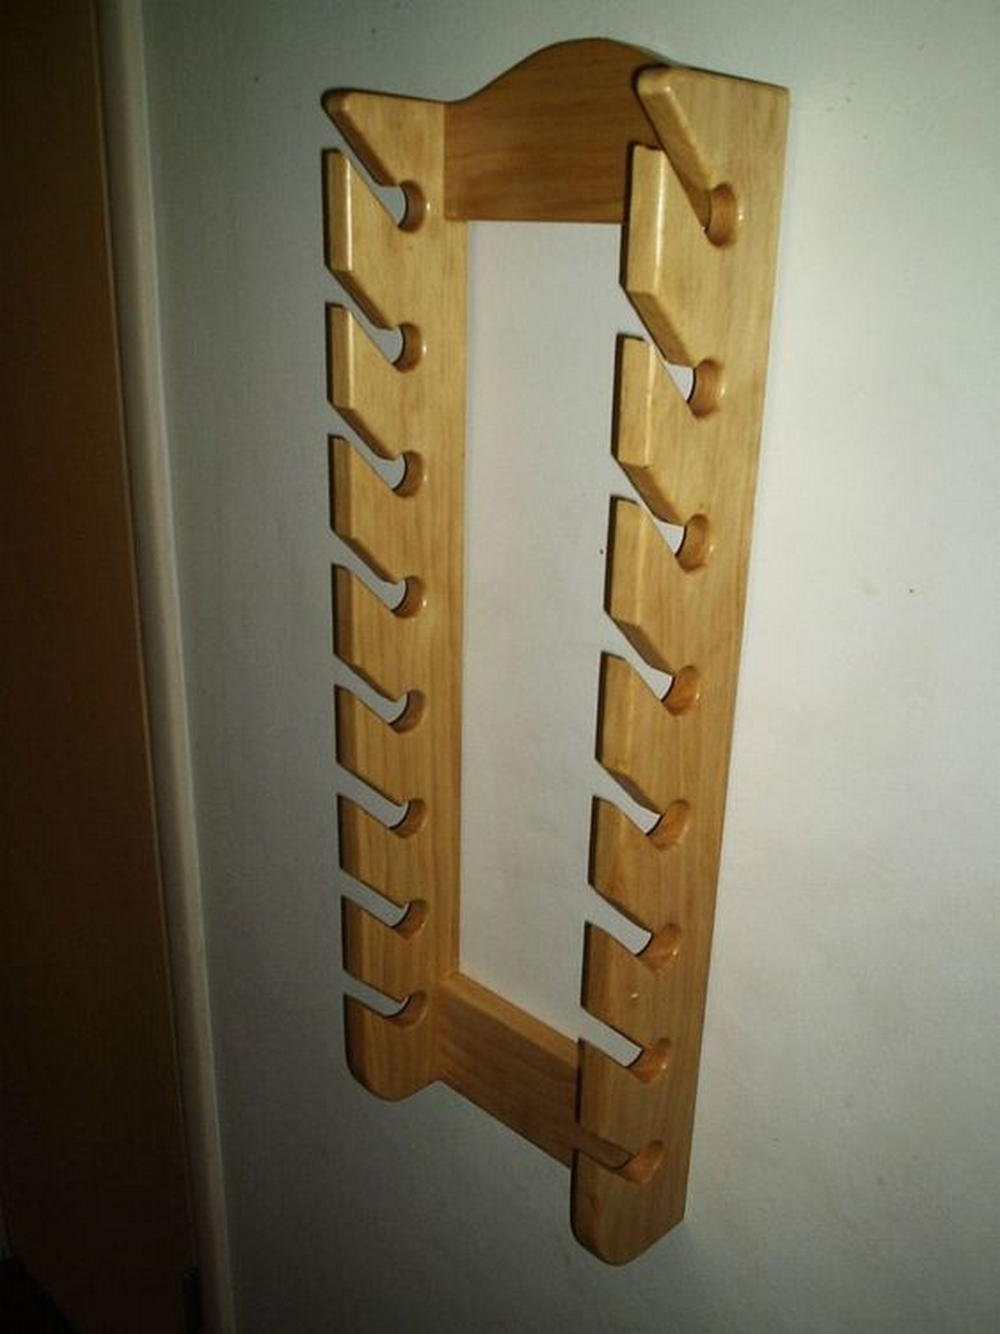


Organize Like a Pro: Simple Tips to Add Hats to Your DIY Rope Hat Rack
A simpler, minimalist approach suits your needs can also be considered. Having a DIY rope hat rack can make the job easier. You can begin by using clips to stack your hats. This method requires only the hats and clips, offering a clean, art-like presentation.
How to Measure and Cut the Rope for a Hat Rack
Creating a DIY hat rack begins with accurately measuring and cutting the rope. Here’s a simple guide to help you get started:
- Measure the Wall Space
- Begin by measuring the length of the wall or area where you plan to hang your DIY hat rack. Ensure you allow for any additional space needed for anchoring or decorating.
- Determine Rope Length
- Cut two pieces of rope that match the full length of your measured area. This will serve as the main structure of your rack. Add a little extra length to accommodate tying knots comfortably.
- Add a Shorter Piece for Layering
- For a layered look that helps distribute hats evenly, cut an additional piece of rope about half the length of the main pieces. This shorter rope will create a tiered effect, providing versatile spacing for your hats.
By layering two long ropes and one short rope, you’ll achieve an aesthetically pleasing setup that keeps your hats well-organized and easy to access.
How to Attach Ropes to Hooks for a Hat Rack
Creating a hat rack with ropes and hooks can add a rustic charm to your space. Here’s a step-by-step guide to get you started:
- Gather Your Materials:
- Select durable ropes that can support the weight of your hats.
- Choose sturdy hooks that match your decor and can be securely fastened to the wall.
- Attach the Ropes to Hooks:
- Start by securely tying one end of a rope to each hook. Use a strong knot, like a bowline or clove hitch, to ensure it holds firmly.
- Trim any excess rope after the knot for a tidy appearance.
- Consider Adding a Third Rope:
- If you find that two ropes don’t provide enough support, consider adding a third rope.
- Attach it in such a way that it isn’t visible from the top. This rope can help fill any gaps and offer additional stability for placing hats.
- Positioning and Final Touches:
- Experiment with staggering the ropes to create an interesting pattern or to balance uneven spaces between the hooks.
- Once the ropes are attached, place your hats to see how well the setup works. Adjust the ropes if necessary for optimal display and accessibility.
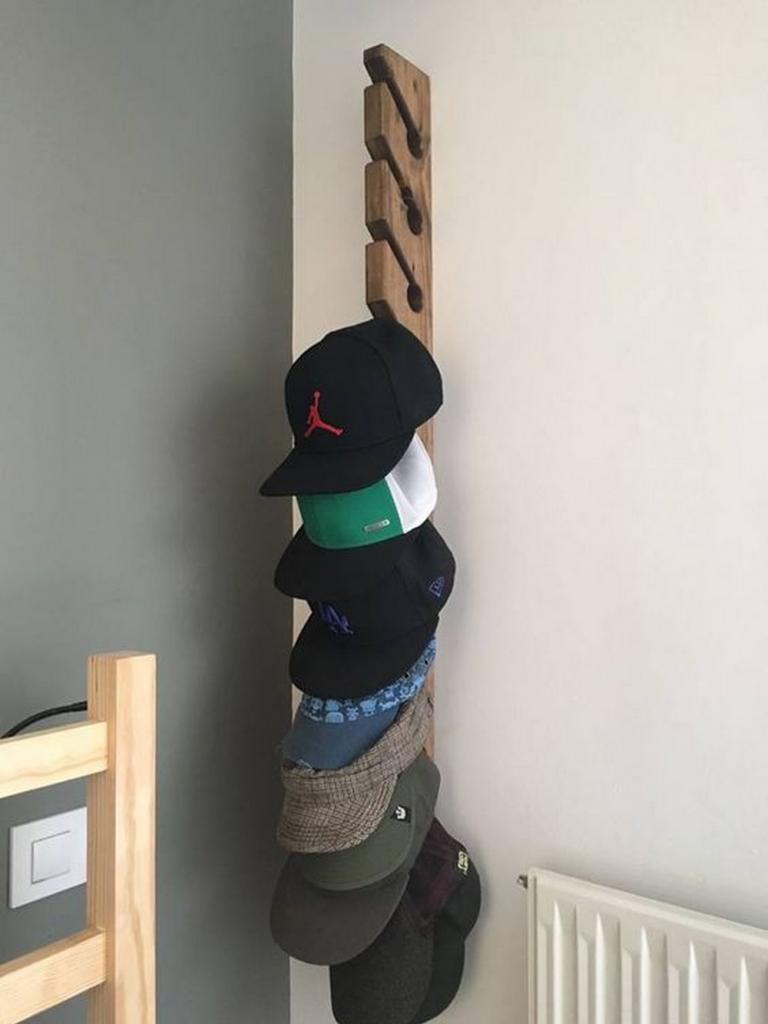
Layering hats on a rope rack offers a sleek and minimalist look, transforming your hat collection into a decorative display. Instead of cluttered spaces or bulky storage units, hats are elegantly organized, almost as if they’re part of an art installation.
The simplicity of the rope rack creates a visual appeal, allowing each hat to stand out while maintaining a cohesive overall look. For storage efficiency, a rope rack maximizes vertical space, leaving floors and surfaces free from disorder.
This method of organizing not only saves space but also makes it easy to access each hat without rummaging through piles. With a rope rack, you achieve both a functional and visually pleasing home for your hats. To set up your hats on a DIY hat rack efficiently, begin with these simple steps:
- Start at the Top
- Begin by clipping your first hat as near to the top of the rope as possible. This helps to keep the hook concealed, providing a seamless look.
- Layering Technique
- After securing the first hat, continue adding the rest of your hats in a layered fashion. Position each hat slightly beneath the one above it. This not only maintains the aesthetic but also ensures that the clips remain hidden.
- Adjust and Align
- As you place each hat, make small adjustments to keep everything aligned and balanced. This careful placement prevents any hats from tipping or looking unorganized.
This method ensures that your DIY hat rack is both functional and visually appealing, offering an elegant way to display your favorite hats.
Design Options for Your DIY Hat Rack
Creating a DIY hat rack offers endless possibilities to express your style and meet your storage needs. Whether you’re aiming for a look that’s modern, rustic, or unique, the design of your hat rack can be tailored to fit your space and taste. Let’s explore some popular design options that can inspire your next DIY project.
- Rustic Charm
- For a warm, country feel, rustic designs are perfect. Use reclaimed wood or distressed finishes to create a hat rack with character. Incorporating elements like vintage hooks or antique knobs can add to the rustic appeal.
- Modern Elegance
- Opt for a sleek, minimalist DIY hat rack if your home has a more contemporary vibe. Think clean lines and smooth finishes. Using materials like polished metal or painted wood can achieve a modern look. You can also experiment with geometric shapes for a more artistic approach.
- Creative and Unique
- Don’t shy away from getting creative. Use unexpected materials like pipes, branches, or repurposed items. This approach lets you craft a unique hat rack that reflects your style.
- Industrial Edge
- An industrial-style DIY hat rack adds a bold statement to any space. Use materials like galvanized pipes, metal flanges, and wire mesh. These elements’ raw, exposed look fits well in a modern loft or urban apartment.
- Vintage Revival
- For those who love a touch of nostalgia, a vintage-inspired design is perfect. Transform old coat racks or repurpose antique ladders into unique hat storage. Adding details like aged brass hooks or using decoupage with vintage wallpaper can enhance the old-world charm.
- Scandinavian Simplicity
- Embrace the Scandinavian style, focusing on simplicity, functionality, and minimalism. Use light-colored woods and keep the design straightforward yet elegant. This style is perfect for those who appreciate a clutter-free and aesthetically calm space.
- Bohemian Flair
- A bohemian-style DIY hat rack is all about eclectic creativity. Mix and match colors, textures, and patterns. Use macramé, beads, or colorful fabrics. This style combines various elements for a playful, free-spirited look.
- Nature-Inspired Themes
- Bring the outdoors inside with a nature-themed hat rack. Use elements like driftwood, tree branches, or floral motifs. This design can create a peaceful, earthy vibe in your home.
Each design option offers a way to make your DIY hat rack functional and stylish. Choose the one that speaks to you and start creating!
Recycled Materials for Your DIY Hat Rack: Eco-Friendly and Unique
Using recycled materials in your DIY hat rack project is environmentally friendly and infuses your creation with unique character and history. Here’s how different recycled materials can be transformed into a one-of-a-kind hat rack:
- Pallet Wood
- Pallets are often discarded after use, but they can be repurposed into beautiful DIY hat racks. Their rugged look gives a rustic or industrial feel. Sand down the wood for a smoother finish, or leave it as is for a more natural, rough texture. Pallet wood can be stained or painted to fit your desired aesthetic.
- Old Furniture Pieces
- Repurposing parts of old furniture is a creative recycling method. For example, the sides of a worn-out dresser or the back of an old chair can be transformed into a unique hat rack. This approach not only saves materials but also retains the story and charm of the original piece.
- Reclaimed Wood
- Wood from old barns, decks, or flooring carries a history that can’t be replicated with new materials. Its weathered appearance offers a charming, rustic look perfect for a DIY hat rack. Reclaimed wood is often stronger and more durable than new wood, as it has already been exposed to elements and has stood the test of time.
- Vintage Knobs and Hooks
- Reusing old knobs and hooks from previous furniture or homes gives a unique flair to your hat rack. These elements can be mixed and matched for an eclectic look, or uniformly used to create a specific style theme.
- Wine Corks or Bottle Caps
- Consider using wine corks or bottle caps for a quirky and unconventional hat rack. They can be attached to a wooden base to create a fun and creative way to hang hats.
Conclusion
Building a DIY hat rack is a rewarding project that combines functionality with personal style. With various materials and design options available, you can create a DIY hat rack that organizes your space and adds a decorative touch to your home.
FAQ for Building a DIY Hat Rack
- What materials are best for a DIY hat rack?
- It depends on your style and needs. Wood and metal are popular for their durability and aesthetic appeal. Recycled materials offer an eco-friendly option, while mixed materials can create unique designs.
- How do I choose the right design for my hat rack?
- Consider your home’s decor and the space available. Rustic, modern, industrial, and creative designs each have unique characteristics. Choose a design that complements your interior and meets your storage requirements.
- Can I make a DIY hat rack without woodworking or metalworking skills?
- Yes, there are simple designs that don’t require advanced skills. Using pre-cut wood, recycled materials, or repurposing items can make the project easier.
- What tools do I need to make a DIY hat rack?
- Basic tools like a hammer, saw, drill, and screwdriver are usually sufficient. The specific tools depend on your design and materials.
- How do I ensure my hat rack is stable and durable?
- Use quality materials and ensure all connections are secure. If using wood, consider hardwoods for added durability. Metal racks should be properly welded or bolted.
- Can I personalize my DIY hat rack?
- Absolutely! Paint, stain, or add decorative elements to personalize your hat rack. Incorporating elements like your initials, favorite colors, or thematic decorations can add a personal touch.
- How do I mount my hat rack securely?
- Use appropriate mounting hardware for your wall type. Wall studs provide the most support for heavier racks. For lighter racks, wall anchors can be sufficient.
- Is it possible to make a hat rack for a small space?
- Yes, there are many space-saving designs. Wall-mounted racks or vertical designs work well in small spaces.
- How do I protect my hats from damage on the rack?
- Ensure the rack has smooth edges. Adding padding or using rounded hooks can prevent damage to your hats.
- What specific technique can I use to achieve a minimalist look?
- To create a minimalist appearance, cover any visible components that detract from the sleek design, such as clips or hooks, allowing the structure itself to stand out as a piece of art.
- How can I make my hat rack look more like an art installation?
- You can achieve an art installation look by ensuring the design is clean and minimalist. One way to do this is to conceal any functional elements, like clips, so the focus remains on the aesthetic.


