
Play-places are sprouting up like mushrooms. They’re almost everywhere lately. Although they are quite tempting, I refuse to bring my children there because I have heard several horror stories from my co-parents.
Apparently, some kids have acquired foot and mouth disease from the play-places, specifically the ball pit for kids. Well, these may be isolated cases but I won’t risk it. So I decided to make my own PVC ball pit.
Contents
DIY Fun Zone: How to Create an Exciting PVC Ball Pit for Kid
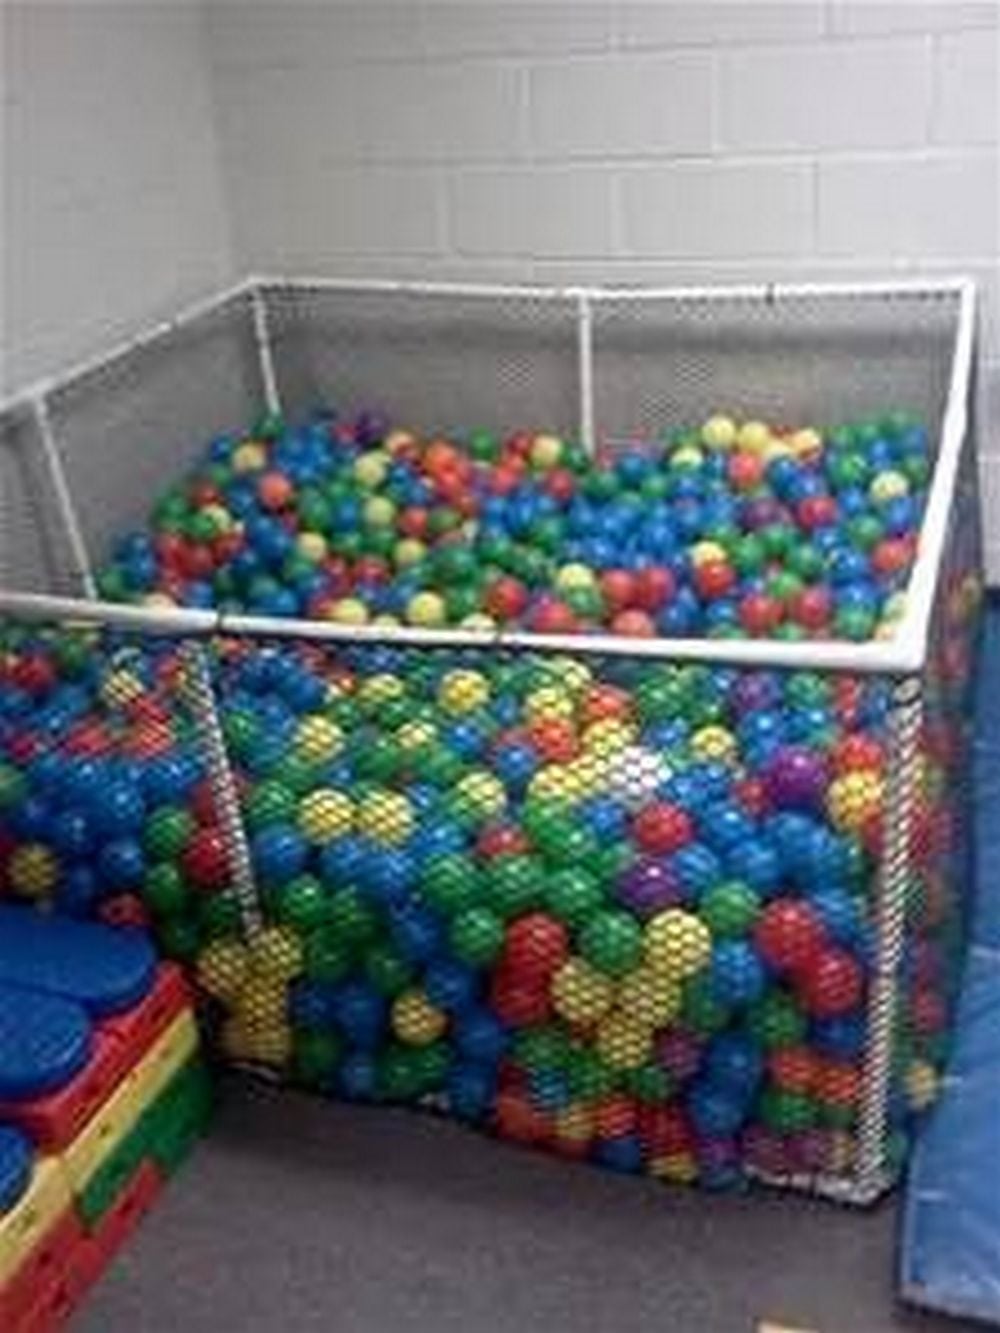
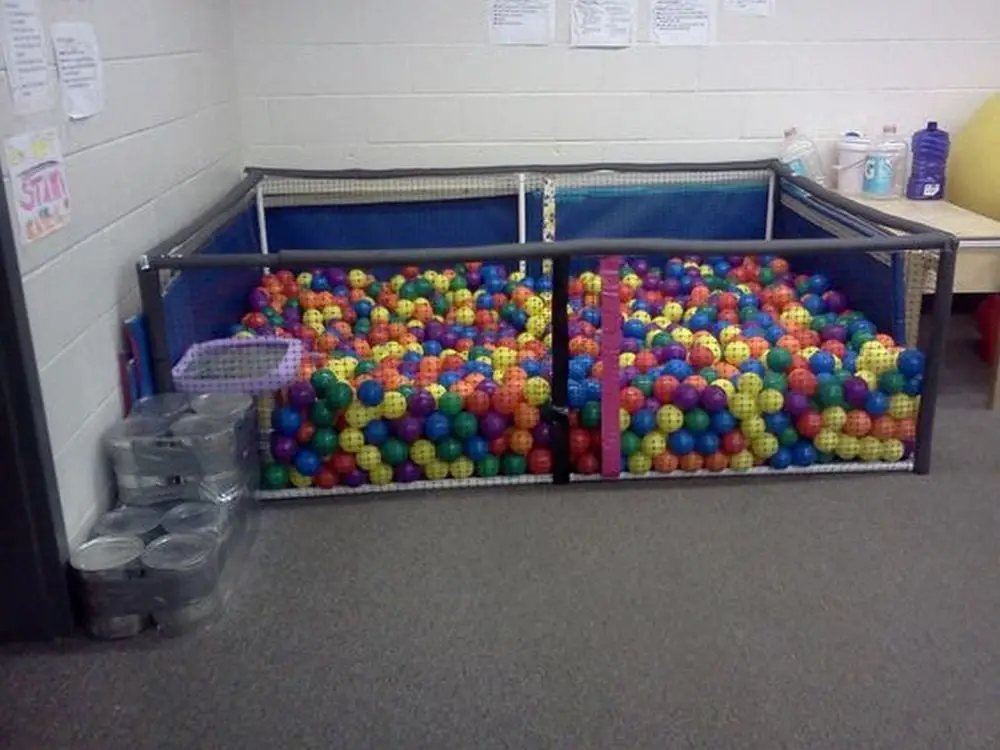
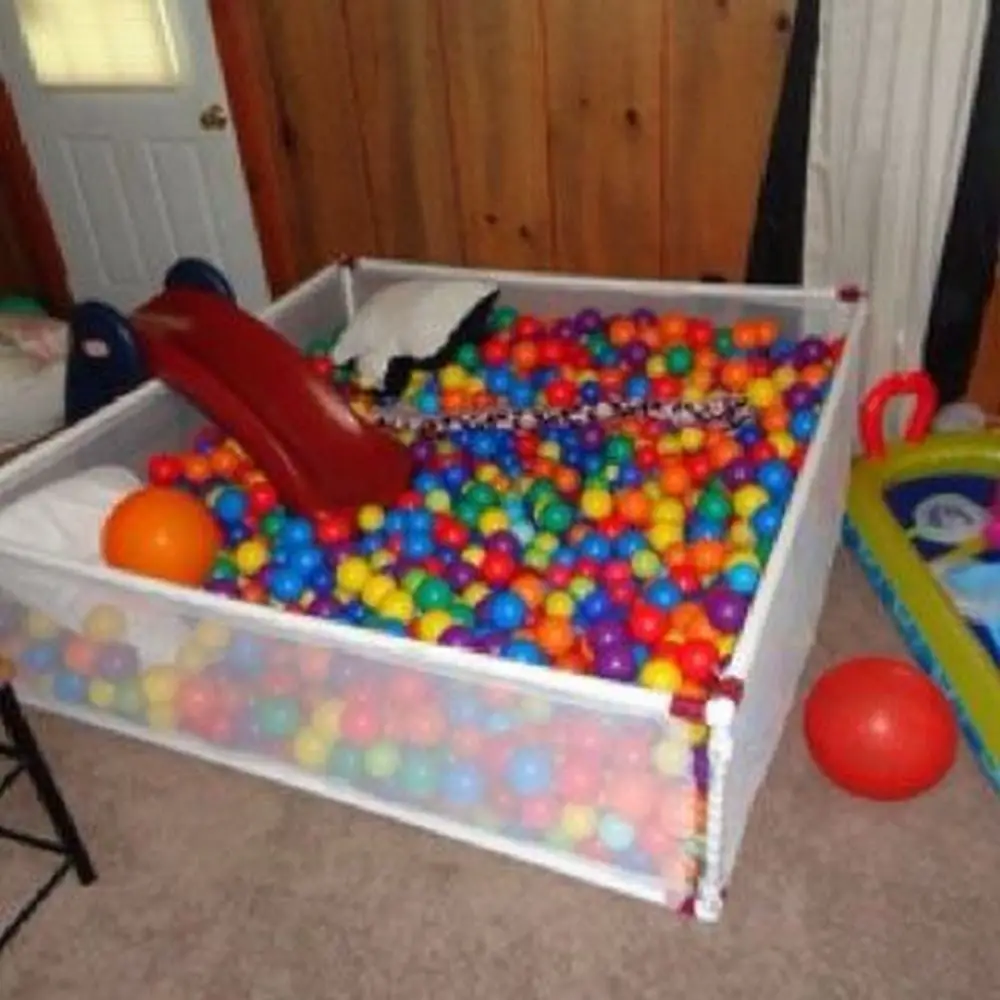
As a mother, I don’t want to deprive them of the experience of playing in a ball pit for kids. So guess what I did? I made a ball pit for kids at home. It’s a fairly easy project that involves connecting PVC pipes and putting in some netting. You and your husband, partner, or friend can work on this and finish in less than a day.
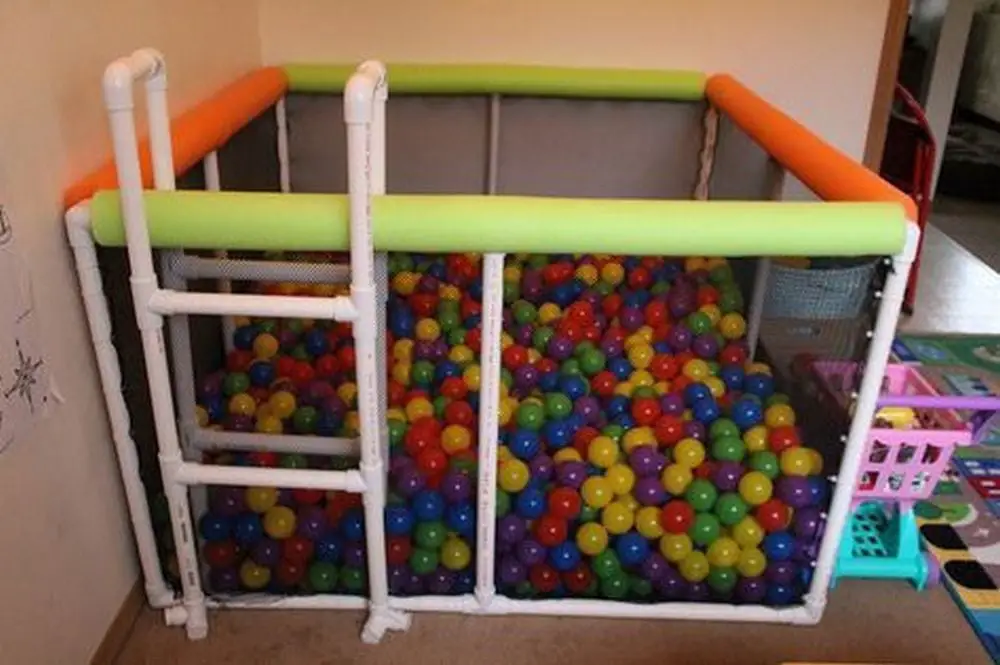
How to Build a PVC Ball Pit for Kids
Don’t put it off any longer and start making a ball pit today! Your kids will surely enjoy playing in it. Not only that, but you also get the peace of mind knowing they’re safe.
Materials Needed
- PVC Pipes
- (¾-inch or 1-inch diameter): These will form the main structure of the ball pit. Get about 20 feet for a small ball pit or more depending on your desired size.
- 3-Way Corner Connectors
- (“Y”): These connect the corners and help with stability.
- T-Elbow Connectors
- For connecting the pipes to form the frame and walls.
- Netting
- Lightweight, durable netting is best. This will enclose the sides, keeping the balls contained.
- Plastic Balls
- Choose soft, kid-friendly balls that are safe for play.
- Cable Ties
- Use these to attach the netting securely to the frame.
- PVC Glue (Solvent Cement)
- For a permanent structure, use PVC glue to secure the connections.
- Screws
- Optional, but helpful for extra strength in the joints.
- Pool Noodles
- These will cover any exposed edges, creating a softer surface to protect kids.
Additional Tools Needed
- Scissors
- For cutting the netting.
- Screwdriver
- For securing screws, if using them.
- PVC Cutter or Hacksaw
- For cutting PVC pipes to the right length.
- Sandpaper
- (100-grit): To smooth the cut edges of the PVC.
- Measuring Tape
- To measure and cut the PVC pipes accurately.
- Marker
- For marking pipe lengths.
- Safety Goggles and Gloves
- Safety first—protect your eyes and hands when cutting the PVC pipes.
Step-by-Step Instructions
- Plan the Size and Shape
- Measure the Area. Decide on a space in your home or yard for the ball pit. A 4×4-foot area works well for smaller kids.
- Sketch Your Design. Plan the basic shape, typically a rectangle or square, with a frame at the top and bottom to support the netting.
- Cut the PVC Pipes
- Measure and Mark: Use your plan to determine the length of each pipe. Mark each length with a marker.
- Cut the Pipes: Using a PVC cutter or hacksaw, cut the pipes to your measurements.
- Smooth the Edges: Sand down any rough edges with sandpaper. This step is crucial to avoid sharp edges that could tear the netting or scratch skin.
- Assemble the Base Frame
- Lay Out the Pipes: Arrange the cut PVC pipes on the ground to form the shape of your base.
- Connect Pipes with T-Elbows and 3-Way Corners: Attach pipes at the corners using 3-way corner connectors, and use T-elbows for middle joints as needed.
- Double-Check the Structure: Make sure everything is aligned before securing the joints.
- Secure Connections: If you want a temporary structure, skip the glue and use screws. For a more permanent build, apply PVC glue (solvent cement) on each joint to secure the connections.
- Build the Walls
- Attach Vertical Pipes: Insert a vertical pipe at each corner of the base. This will form the height of your ball pit’s walls.
- Connect the Top Frame: Using more T-elbows and 3-way corner connectors, attach horizontal pipes to form the top frame of the ball pit.
- Attach the Netting
- Cut the Netting: Measure and cut the netting to fit each side of the ball pit.
- Secure with Cable Ties: Starting at one corner, attach the netting to the PVC frame using cable ties, spacing them about every 6 inches. Make sure it’s taut to prevent sagging
- Trim Excess Netting: Carefully trim any excess netting for a clean finish.
- Add Pool Noodles for Safety
- Cut the Pool Noodles Lengthwise: Using scissors or a cutter, slice the noodles lengthwise so they can be wrapped around the PVC pipes.
- Cover Exposed Edges: Place the pool noodles along the top edges and any other exposed pipes, adding a layer of safety and cushioning.
- Fill with Balls
- Add the Plastic Balls: Pour in enough plastic balls to cover the bottom of the pit by at least a few inches. Aim for a depth that makes it fun but safe for children to play in.
- Final Check
- Inspect the Ball Pit: Go over each joint to ensure it’s secure, check the netting for any gaps, and make sure there are no sharp edges.
- Safety Check: Ensure the structure feels stable and can handle the weight of kids leaning on the walls.
Your PVC Ball Pit for Kids is now complete! With these easy-to-follow steps, you’ve created a safe and fun space for children to play. This project is a great way to build confidence as a DIYer, and the kids will love it!
Maintenance and Care of Your PVC Ball Pit
Keeping your PVC ball pit in top condition is vital for safety and longevity. Regular maintenance ensures a clean, safe play environment for your kids. Here are essential tips for maintaining and caring for your PVC ball pit for kids.
Regular Cleaning
Maintaining the cleanliness of your PVC ball pit for kids is crucial for ensuring a safe and hygienic play area. Here’s how to effectively clean both the balls and the PVC structure.
Cleaning the PVC Structure
- Disassemble the Ball Pit
- Start by carefully removing any screws, clips, or cable ties holding the netting in place. Then, disassemble the PVC pipes and connectors. Organize the Parts: Place all pipes, connectors, and accessories like pool noodles in one area to make reassembly easier.
- Prepare a Cleaning Solution
- Mix a mild soap with warm water. This solution is effective yet gentle enough not to damage the PVC material.
- Wipe Down the PVC Pipes
- Use a soft cloth or sponge dipped in the soap solution. Gently scrub the PVC pipes of your ball pit. Focus on joints and connectors where dirt might accumulate.
- Rinse and Dry: Rinse the PVC pipes with clean water after wiping. Dry them thoroughly with a clean towel or let them air dry. Moisture left on the PVC can lead to mildew or mold growth.
Cleaning the Plastic Balls
- Prepare a Disinfectant Solution
- Mix a gentle, non-abrasive disinfectant with water. Ensure it’s safe for use on plastic surfaces.
- Soak the Balls
- Immerse the plastic balls in the solution. Allow them to soak sufficiently to kill any germs or bacteria.
- Rinse Thoroughly
- After soaking, rinse the balls with clean water to remove any soap or disinfectant residue.
- Dry Completely
- Spread the balls on a clean surface to air dry. Ensure they are completely dry before returning them to the pit to prevent mold growth.
Inspecting the PVC Structure
Regular inspections of your PVC ball pit’s structure are key to ensuring its safety and durability. Here’s a detailed guide on how to conduct these inspections.
Checking PVC Pipes and Connectors
- Visual Inspection: Begin with a thorough visual check of all PVC pipes. Look for cracks, splits, or any signs of wear and tear. Even small fractures can weaken the structure.
- Physical Check: Gently apply pressure to various parts of the PVC structure to test its stability. This helps identify any hidden weaknesses in the pipes.
- Inspect Connectors: Examine all connectors and joints. Make sure they fit snugly and haven’t loosened over time. Loose connectors can compromise the integrity of your PVC ball pit.
Securing Connections
- Tighten Cable Ties: Check their tightness if your PVC ball pit uses cable ties. Loose cable ties can lead to wobbly structures. Tighten them as necessary, but avoid over-tightening as this can cause stress on the PVC pipes.
- Replace Damaged Parts: If you find any damaged PVC pipes or connectors, replace them immediately. Using damaged components can risk the structure collapsing.
Regular Schedule
- Set a Routine: Establish a regular schedule for inspecting your PVC ball pit. Monthly inspections are generally sufficient, but consider more frequent checks if the ball pit is used often.
- Post-Use Inspection: After heavy use, such as during a party, quickly check the structure to ensure everything remains in place and secure.
Storage Solutions
Proper storage of your PVC ball pit when not in use is essential for preserving its condition. Here’s how to store the PVC structure and balls effectively.
Dismantling the PVC Structure
- Careful Disassembly: Take apart the PVC ball pit gently. Rushing the process can damage the connectors or pipes. Keep track of all parts to ensure easy reassembly.
- Organize Components: As you dismantle, organize the PVC pipes, connectors, and other components. This organization aids in quick and efficient reassembly later.
Storing PVC Pipes and Connectors
- Choose the Right Location: Store the PVC parts in a dry, cool area. Avoid places with extreme temperatures or humidity, as these conditions can cause warping or damage to the PVC material.
- Proper Arrangement: Arrange the PVC pipes and connectors neatly. This prevents them from bending or getting scratched. You might use storage bins or shelves for better organization.
Protecting the Balls
- Use Mesh Bags or Containers: Store the plastic balls in mesh bags or large containers. Mesh bags allow airflow, preventing moisture buildup. Containers protect the balls from being crushed or lost.
- Clean Before Storing: Ensure the balls are clean and dry before storing. This step prevents mold and keeps them ready for the next use.
Tips for Long-Term Storage
- Check Occasionally: If storing your PVC ball pit for an extended period, check on it occasionally. This check-up ensures no damage has occurred during storage.
- Avoid Heavy Stacking: Don’t stack heavy items on top of the PVC pipes and connectors. Excessive weight can deform or damage them.
Following these maintenance and care tips will ensure your kids’ PVC ball pit remains a fun and safe play area. Regular upkeep preserves the structure and ensures endless enjoyment for your children.
Click on any image to start the lightbox display. Use your Esc key to close the lightbox.





Safety Tips for Home Ball Pits
Creating a PVC ball pit at home provides endless fun for kids, but safety is paramount. These tips ensure your home ball pit is enjoyable and a secure play area.
Choose the Right Location
When setting up a PVC ball pit for kids, the location is crucial for safety and maintenance. Indoor ball pits are easier to keep clean and protected from weather. Placing it on a flat surface is essential to prevent accidents while ensuring stability during use. Choosing the right location ensures a safe and fun play area for kids.
Inspect and Maintain Regularly
Regular maintenance is crucial for PVC ball pit safety and longevity. Regular checks and cleaning are key. Inspect pipes, connectors, and netting for damage. Replace any worn parts promptly. Clean balls with a child-safe disinfectant and wipe down PVC structure. This ensures a safe and hygienic play area.
Use Safe Materials
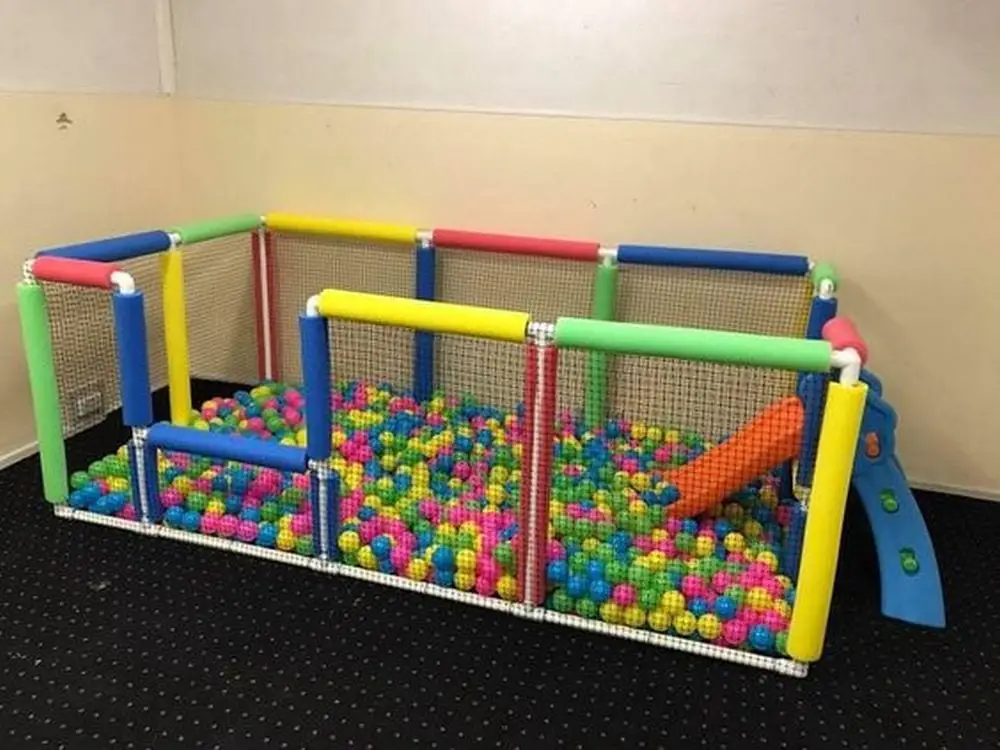
To create a safe PVC ball pit for kids, choose non-toxic, BPA-free plastic balls that are specifically designed for children’s play. These balls prevent exposure to harmful chemicals, providing peace of mind for parents. Cover any sharp or exposed PVC edges with pool noodles or foam padding to reduce the risk of bumps and scrapes. Slice pool noodles lengthwise and slip them over the edges to create a soft, cushioned barrier. This extra layer of protection makes the play area safe, ensuring kids can enjoy their ball pit without risk of injury, making it a worry-free space for fun and active play.
Supervise Playtime
Proper adult supervision and age-appropriate use are crucial for a safe PVC ball pit for kids experience. Always have an adult present to oversee play and prevent accidents. Adjust the depth of the ball pit and size of the balls based on the children’s age and size. Check manufacturer guidelines for age and weight recommendations to ensure safety.
Educate Your Kids
Teaching children safe play in the ball pit for kids is crucial. Focus on play rules and sharing space. Set clear rules for playing in the ball pit to avoid injuries. Teach children to play gently and share the space with others. Encouraging respectful play helps in creating a harmonious environment and teaches valuable social skills.
Following these safety tips will make your home PVC ball pit for kids a delightful and secure play area for your children. Safety should always come first to ensure a fun and accident-free environment.
Conclusion
Building a PVC ball pit for kids at home is a fantastic way to provide safe and fun playtime for your children. With the right materials, tools, and a bit of creativity, you can create a customized play area that brings joy and excitement to your kids. Regular maintenance and adherence to safety guidelines ensure the ball pit remains a secure and hygienic environment.
For more sustainable playground projects. Check out our seesaw play set guide!
FAQ for Building a PVC Ball Pit For Kids
- How much does it cost to build a PVC ball pit for kids?
- The cost varies depending on the size of the ball pit and the materials used. Generally, PVC pipes, connectors, and plastic balls are affordable, making this a budget-friendly DIY project.
- How many balls are needed for a standard-sized ball pit for kids?
- For a standard-sized ball pit, you will need between 200 to 500 balls depending on the size and depth. You can start with 200 balls for smaller pits and add more as needed for larger or deeper setups.
- Is it safe for toddlers to play in a PVC ball pit?
- Yes, ball pits are generally safe for toddlers if properly supervised. Ensure the balls are made from non-toxic materials and that the structure is stable. For younger children, use larger balls to minimize choking hazards, and make sure the baby ball pit is not too deep.
- Can the PVC ball pit for kids be used outdoors?
- While you can set up a ball pit for kids outdoors, it’s best to place it in a shaded area to protect the structure from extreme weather and UV rays. Avoid leaving it outside during rain or hot conditions to prevent damage to the PVC pipes and balls.
- How often should the PVC ball pit be cleaned?
- It’s recommended to clean the balls regularly, especially if used daily. A deep clean for the entire pit, including the structure and balls, should be done at least once a month. This keeps it free of germs and safe for your kids to play.
- How do I ensure the PVC ball pit is stable and safe?
- Ensure all connections are tight and regularly inspect the structure for any signs of wear or damage. Cover sharp edges with pool noodles or foam for extra safety.
- What are the developmental benefits of a ball pit for kids?
- Ball pit for kids promote sensory development, motor skills, and social interaction. Crawling, grabbing, and throwing balls help strengthen muscles and improve coordination, while group play fosters social skills like sharing and turn-taking.
- What safety measures should I consider when building a DIY ball pit?
- Make sure all PVC pipe edges are covered, such as with pool noodles, to avoid sharp corners. Secure all joints tightly and regularly inspect for any wear or damage. Supervision is key, and always discourage rough play like jumping or diving into the pit.
- Make sure all PVC pipe edges are covered, such as with pool noodles, to avoid sharp corners. Secure all joints tightly and regularly inspect for any wear or damage. Supervision is key, and always discourage rough play like jumping or diving into the pit.


