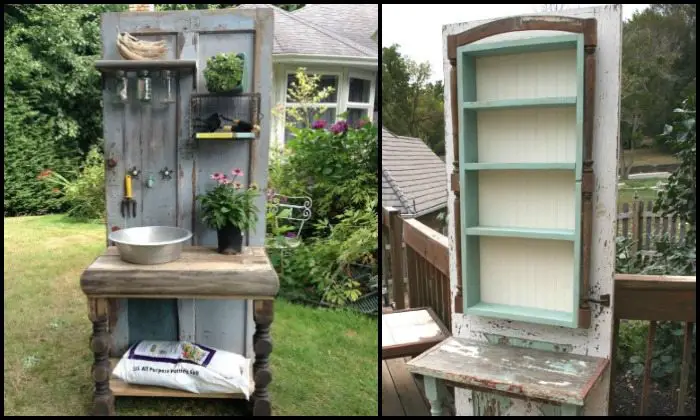
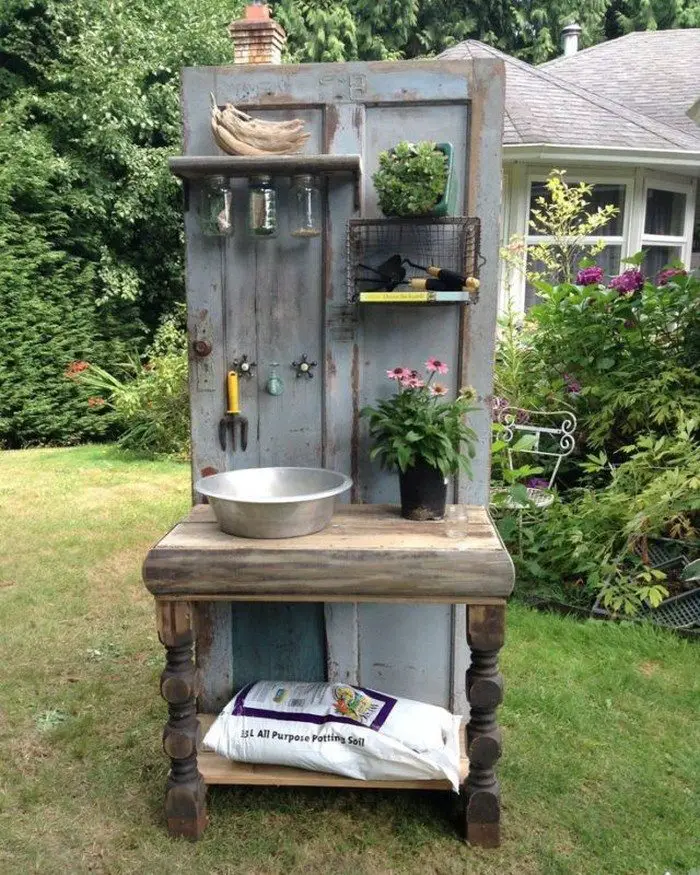
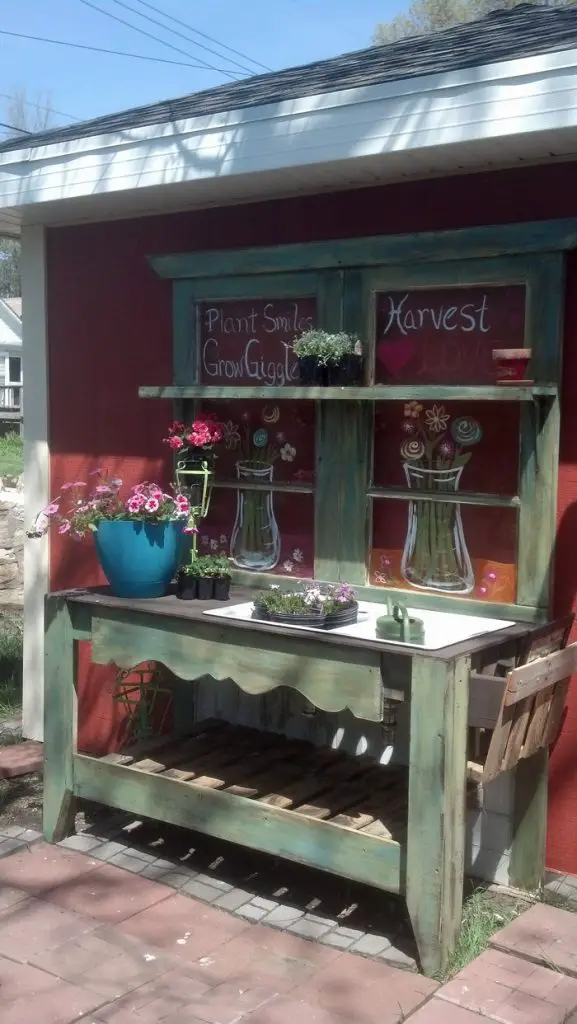
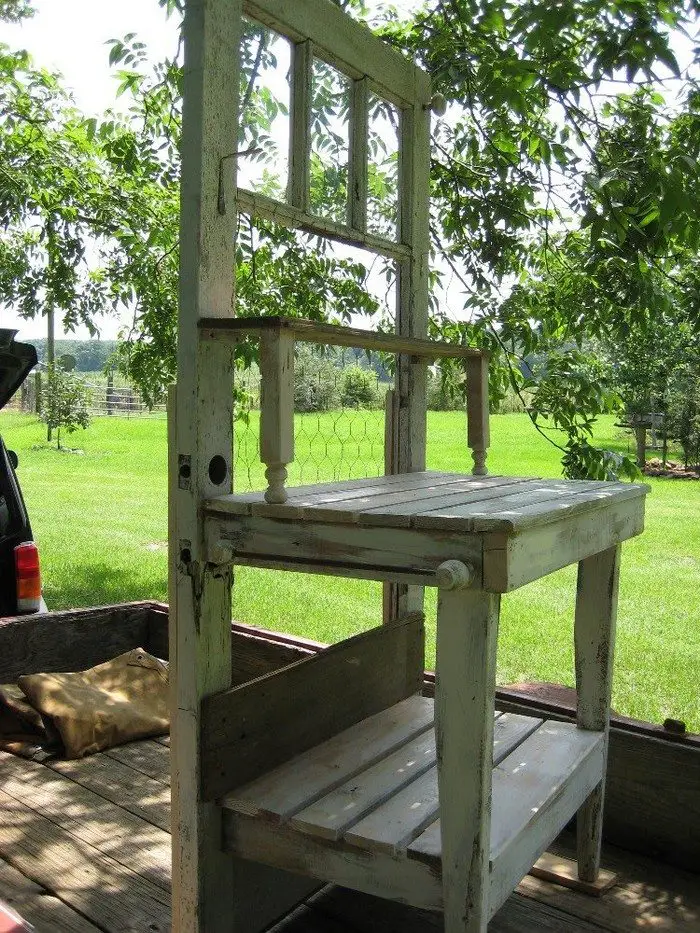
Is your garden lacking a potting bench? Well, you don’t have to think about spending a hundred dollars to get one… You can have a potting bench for just a tiny fraction of the cost by building it yourself using an old wood door!

Repurposing an old wood door is a clever idea if you need a potting bench in your garden. Aside from being cheap, this kind of potting bench would be more suited to your needs since you will be the one to build it.
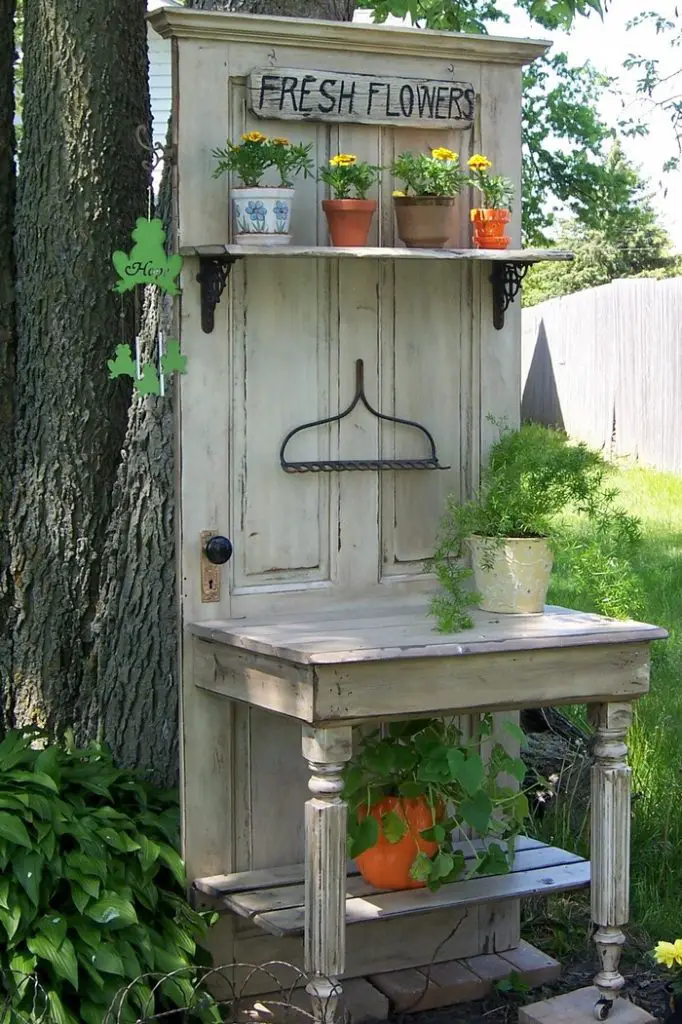
You can have it any size that you want. And the hooks for your garden tools, the number of shelves for your pots, and all other features that you want to have in your potting bench are all up to you. (Just don’t forget to include a closed storage like a drawer for items that you need to protect from bad weather ;) )
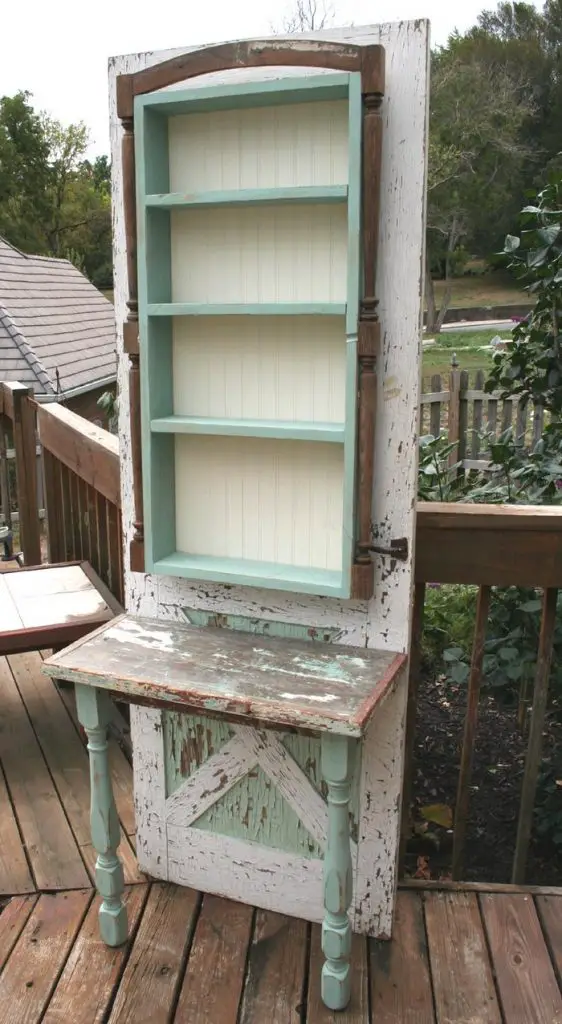
This idea can also be a no-cost project if you happen to already have a broken wooden door. And instead of buying new parts like hooks and table legs, you can use other old, broken odds and ends that might be simply gathering dust in your storage. Old silverware or keys can serve as hooks and scrap timber can be used as legs or shelving.
With this upcycling project you not only have an inexpensive potting bench, you also have a unique addition to your garden!
Is this going to be your next upcycling project?
Contents
Upcycling an Old Wood Door Into a Potting Bench
Materials
- Old Wooden Door
- Chicken Wire
- Timber Planks
- Old Silverware
- Iron Bar
- Paint
- Wood Screws
Tools
- Cordless Drill
- Paintbrush
- Saw
Instructions
Step 1: Prepare the Door
- Inspect and Clean: Start by inspecting the old wooden door for any damage. Clean it thoroughly to remove any dirt or debris.
- Measure and Cut: If the door is too large, use the saw to cut it to a suitable size for your potting bench. Ideally, the bench top should be at a comfortable height for working.
Step 2: Build the Frame
- Cut Timber and Iron Bar: Use the saw to cut timber planks and an iron bar to create the frame for your bench. Ensure the frame is sturdy enough to support the door and the weight of any gardening tasks.
- Assemble Frame: Using the cordless drill and wood screws, assemble the frame. Attach the iron bar to add extra stability and support.
Step 3: Attach the Door to the Frame
- Position the Door: Place the old wooden door on top of the frame. Make sure it’s centered and aligned properly.
- Secure the Door: Drill wood screws through the door into the frame to secure it in place. Ensure it’s firmly attached.
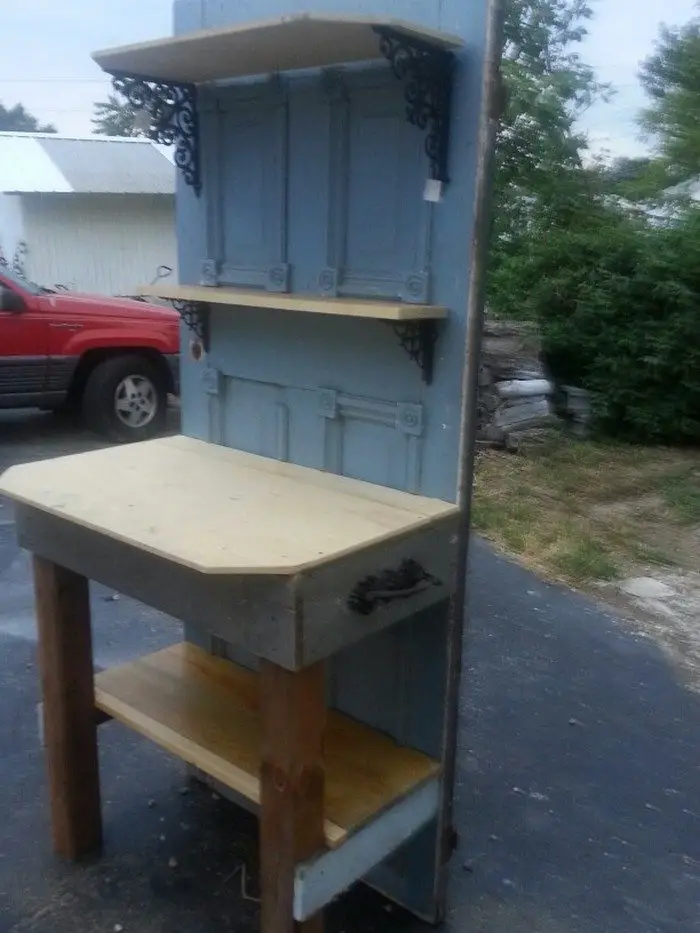
Step 4: Add Shelves and Storage
- Measure and Cut Additional Timber: Using leftover timber planks, measure and cut shelves for the potting bench.
- Install Shelves: Secure these shelves beneath the bench top or along the sides, depending on your needs and space.
Step 5: Install Chicken Wire
- Cut Chicken Wire: Measure and cut chicken wire to fit the back or sides of the bench, which can be useful for hanging tools or growing climbing plants.
- Attach Chicken Wire: Staple or screw the chicken wire into place, ensuring it’s tight and secure.
Step 6: Create Hooks from Old Silverware
- Prepare Silverware: Choose old forks, spoons, or knives that can be bent into hooks.
- Attach Hooks: Using the drill, attach these bent silverware pieces to the potting bench as hooks for hanging garden tools.
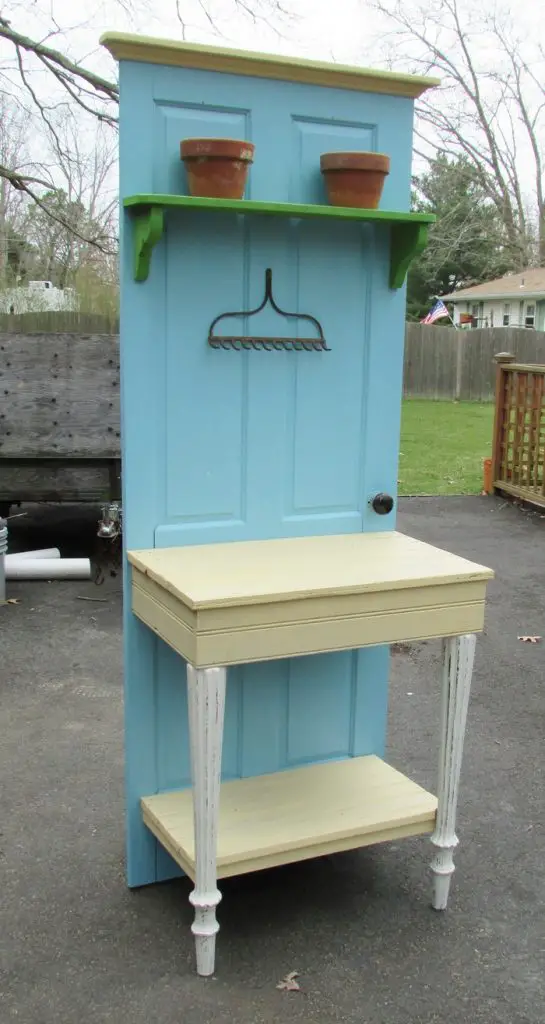
Step 7: Paint the Bench
- Apply Paint: Use the paintbrush to apply a coat of outdoor-grade paint to the potting bench. Choose a color that complements your garden.
- Let Dry: Allow the paint to dry completely, following the manufacturer’s instructions for drying time.
Step 8: Final Touches
- Inspect and Test: Once everything is assembled and dry, inspect your bench to ensure all parts are secure and stable. Test the sturdiness and the placement of hooks and shelves.
- Accessorize: Optionally, you can add further decorations such as potted plants, additional hooks, or even a small tool organizer.
Click on any image to start lightbox display. Use your Esc key to close the lightbox. ?

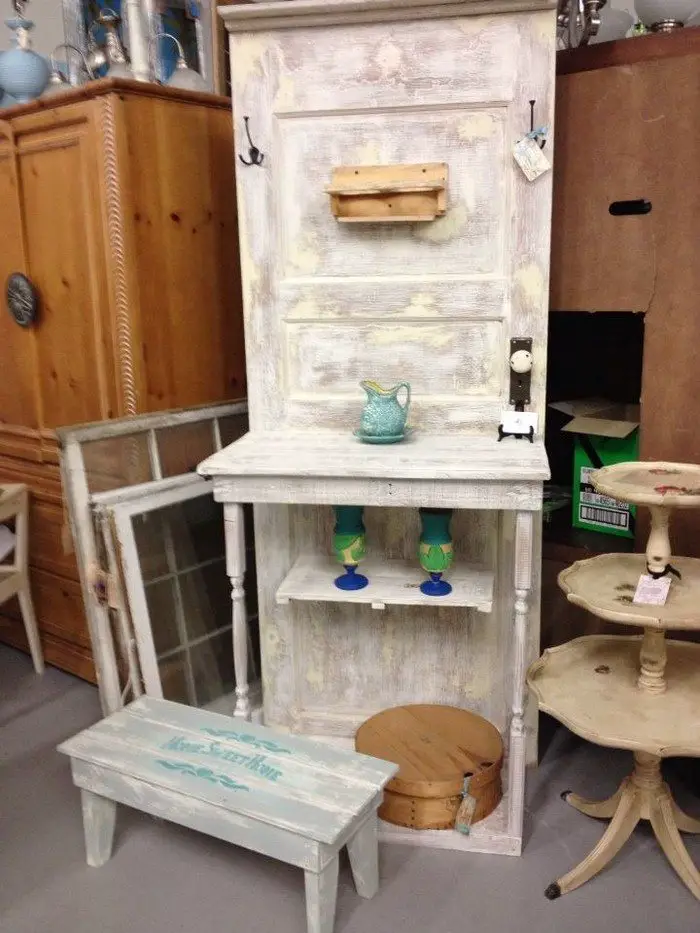
You can get step-by-step instructions from Cottage and Cabin Interiors and Collections over here…
How to Keep Your Potting Bench in Great Shape All Year Round
Building a potting bench adds functional storage to your garden. But to make sure your bench can handle the rain, sun, and temperature swings, it needs some protection.
Here are ways to keep your potting bench weather-resistant.
Pick the Right Paint
- Choose Exterior Paint: Go for a paint meant for outdoor items. This paint is made for any weather.
- Start with Primer: Put on a layer of exterior primer first. It helps the paint stick better and blocks moisture from seeping into the wood.
Seal It Up
- Apply a Clear Sealant: After painting, brush on a clear sealant. This acts like a raincoat, keeping out moisture and protecting the paint and wood from the sun.
- Keep It Up: Every couple of years, especially if you live in a place with extreme weather, give your bench a fresh coat of sealant.
Smart Placement
- Choose a Good Spot: If you can, put your potting bench under an overhang or somewhere that gets some shade. This can cut down on the beating it takes from the elements.
- Cover It Up: In the winter or during bad weather, throw a waterproof cover over your bench to keep it dry and safe.
Avoid Water Traps
- Lift It Off the Ground: Make sure the legs of your bench aren’t sitting directly on the soil. This helps prevent water from soaking into the wood and causing rot.
- Use Non-Corrosive Feet or Casters: Adding small feet or casters made from materials that don’t rust, like stainless steel or heavy-duty plastic, can help keep the legs dry.
With these easy steps, your potting bench will not only look great but also last longer, ready for whatever the weather throws at it. This means more time for you to enjoy gardening, with all your tools and supplies neatly organized at your fingertips.
Adding Functional Features
Turning an old wooden door into a potting bench is a fantastic DIY project that adds both charm and functionality to your garden. To make your potting bench even more versatile and convenient for everyday gardening, consider adding some practical features.
Here’s how you can boost the functionality of your potting bench:
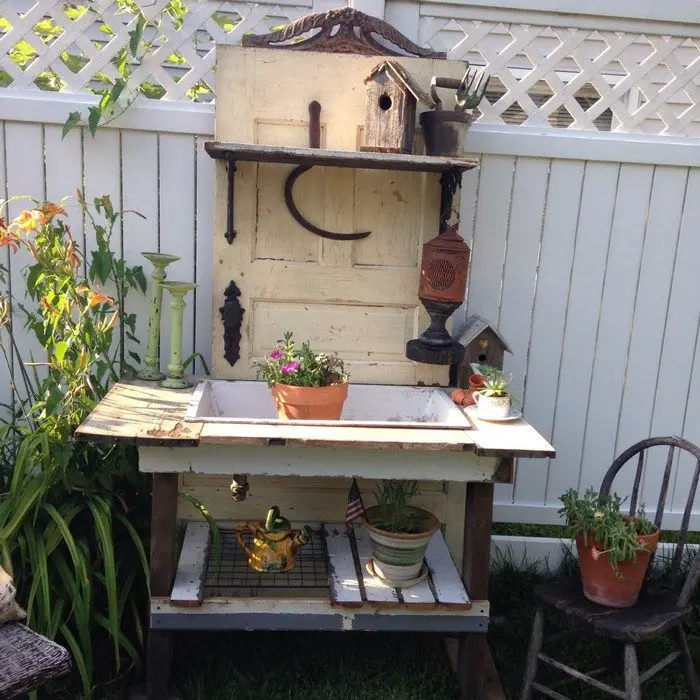
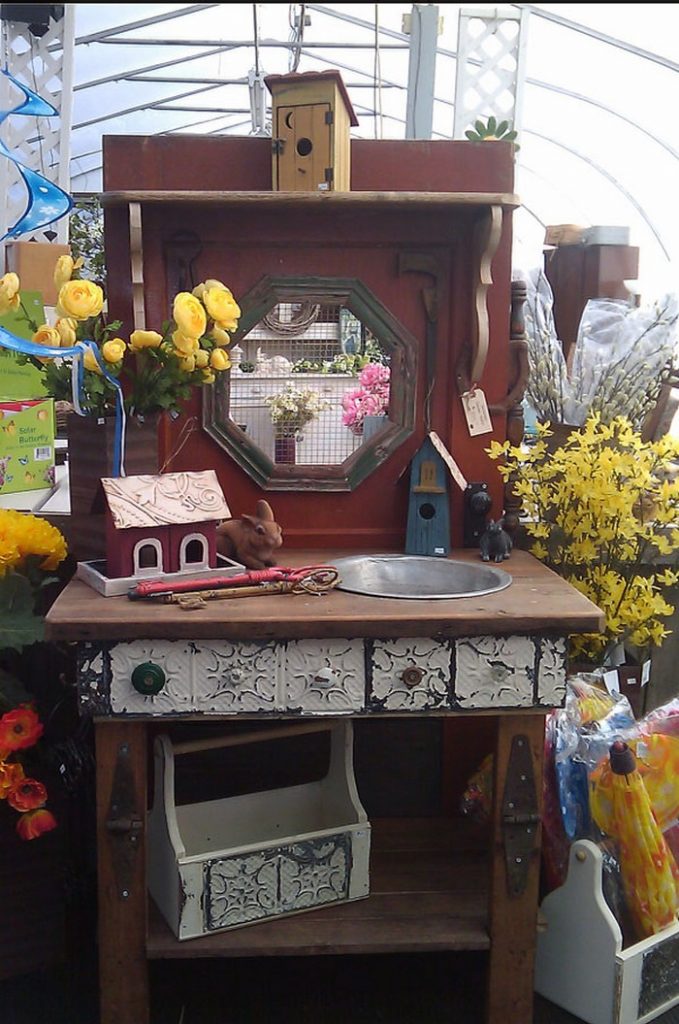
Install a Sink
- Add a Garden Sink: Installing a simple basin or an old sink can make tasks like potting plants and washing tools much easier. You can connect a hose for a water supply and even add a drain that leads directly into your garden or a bucket underneath.
Integrate a Soil Storage Bin
- Built-in Soil Storage: Carve out a space under the bench or on one end to add a bin for mixing and storing pot soil. This keeps your soil handy and tidy, preventing spills and making it easy to scoop when needed.
Add a Retractable Work Surface
- Extendable Workspace: Fit a fold-out extension to one side of your potting bench. This can be used to increase your work area when needed and tucked away when not in use, making it perfect for smaller spaces.
Create Dedicated Tool Storage
- Tool Hooks and Racks: Attach hooks or magnetic strips to hang small gardening tools, and add shelves or racks for larger items. This keeps your tools organized and within easy reach, improving your efficiency.
Incorporate Compost and Waste Bins
- Easy Waste Management: Designate spots for small compost bins or waste buckets under the bench. This makes it convenient to dispose of organic waste while gardening, encouraging a cleaner and more sustainable practice.
Setup a Potting Tray
- Removable Potting Tray: Include a lightweight, removable tray with raised edges for potting. This helps contain mess and can be cleaned easily, making your gardening tasks more manageable.
By integrating these features, your potting bench will not only be a place to work with plants but also a central hub for all your gardening activities. These enhancements will allow you to garden more effectively, keeping everything you need neatly organized and accessible.
Upcycling Tips for Beginners
Upcycling is a rewarding way to transform old materials into something new and useful, adding character and style to your home and garden. If you’re new to upcycling and considering a project like a potting bench, here are some simple tips to help you begin with confidence.
Start Small
- Choose Manageable Projects: Begin with smaller, less complex projects that require fewer tools and materials. This helps you learn basic skills without feeling overwhelmed.
Gather Tools and Materials
- Basic Tools: Collect some essential tools like a saw, hammer, screwdriver, and drill. You don’t need to buy everything new; look for second-hand tools or borrow from friends.
- Source Materials: Start gathering materials you can upcycle. Old furniture, wooden pallets, and scrap metal are great resources. Check local listings, garage sales, or recycling centers.
Plan Your Project
- Sketch It Out: Draw a rough sketch of what you want to create. This doesn’t have to be perfect but should guide your work and material needs.
- Measure Twice, Cut Once: Always measure your materials carefully before cutting. This saves materials and avoids frustration.
Learn Basic Techniques
- Do Some Research: Watch online tutorials or attend workshops to learn basic upcycling skills and safety tips.
- Practice Techniques: Before starting your project, practice cutting, drilling, and painting on scrap materials.
Embrace Imperfections
- Character Not Flaws: Upcycled projects often have imperfections. These add character and uniqueness, so embrace them rather than feeling discouraged.
By following these tips, you’ll be well on your way to completing your first upcycling project. Remember, upcycling is not just about saving items from the landfill; it’s also about unleashing your creativity and making something one-of-a-kind. Enjoy the process as much as the final product!
Conclusion
Building a potting bench from an old wooden door is not only a practical addition to your garden but also a creative way to recycle. With the right tools and some basic DIY skills, you can customize this project to fit your specific gardening needs. Enjoy the satisfaction of crafting a unique and functional piece that enhances your outdoor space.
We have more upcycling projects to help you reuse old stuff in your garage or attic. Check out our upcycled vintage suitcase side table.


