I never thought that I’d need physical help when I was pregnant. Of course, I knew that there’ll be physical limitations, but not to the extent that I’d need a hand even just in getting up from bed. I was almost helpless in my last trimester; my tummy was very big, my toes were swollen, and my back was aching 24/7.
I was fortunate enough, though, that my husband only works on weekdays with an 8-hour day shift. This means he’s able to assist me most of the time. He puts on my socks or shoes for me, cuts my toenails, and picks up stuff that I drop.
I told my husband about it and he was quite sympathetic. A few days later, he showed me the boot remover which he made. It’s a savior, really. Not to mention that it’s not only for pregnant women like me, but it just generally makes life a whole lot easier!
Contents
Making a Boot Remover
Materials
- Wood
- Wood glue
- Screws
Tools
- Tape measure
- Pencil
- Clamps
- Jig saw
- Electric drill with drill bit
- Sandpaper
Instructions
Step 1: Measure and Mark
- Use the tape measure to mark a piece of wood 18 inches in length.
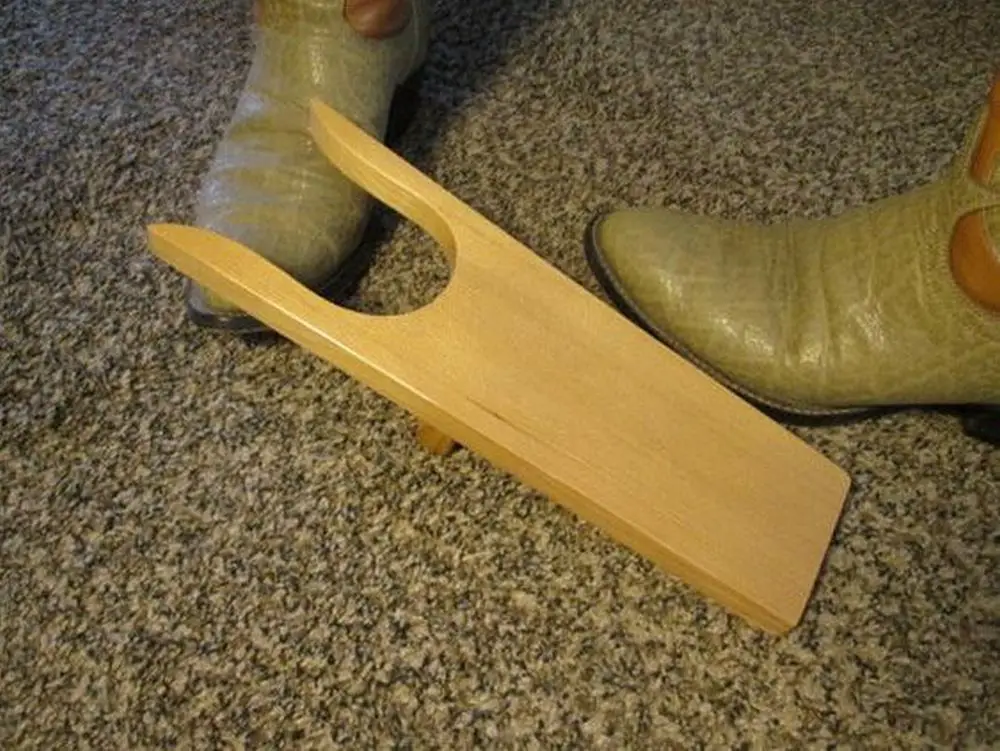
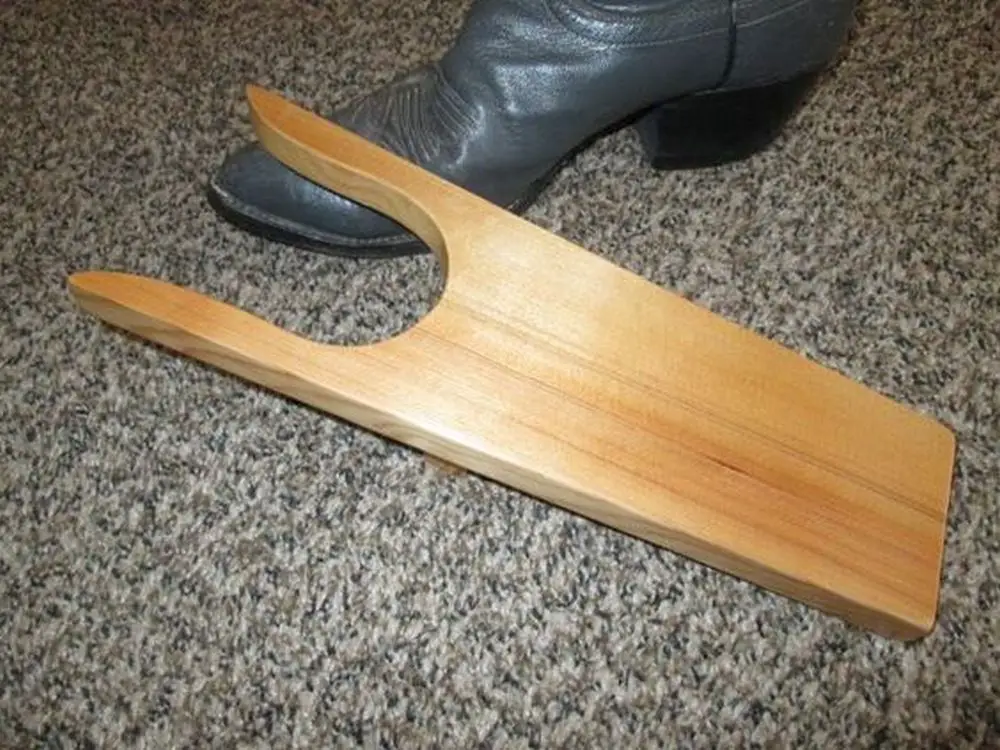
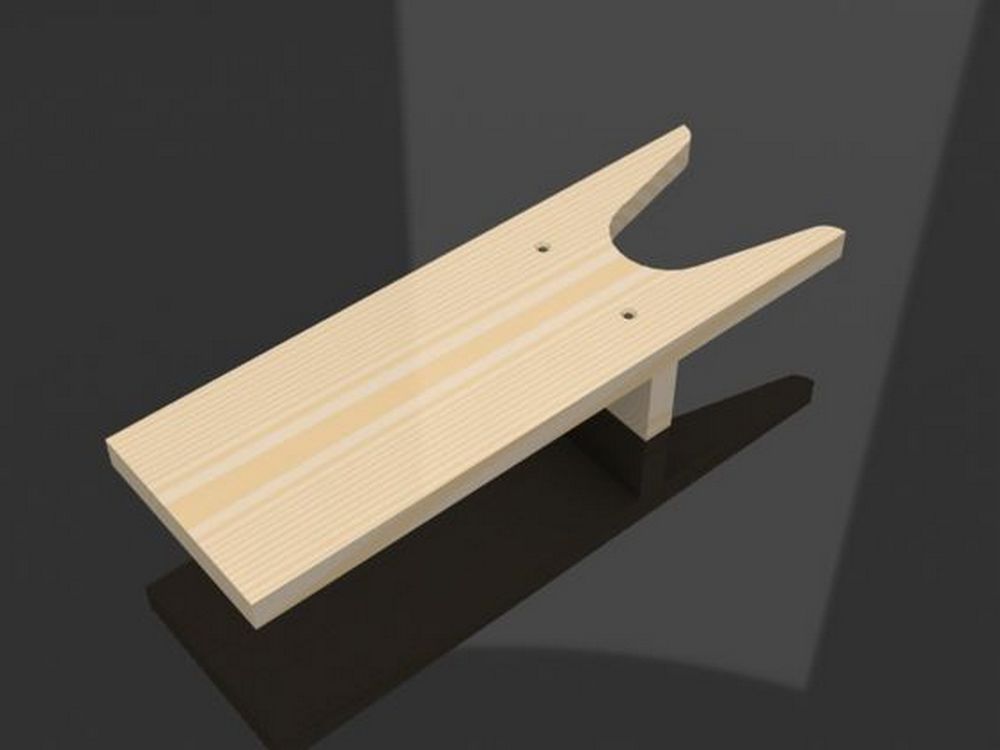
- Draw the shape of the boot remover on the wood. Typically, this is a long handle with a curved end where the boot heel will rest.
Step 2: Cutting
- Secure the wood onto your work surface with clamps to ensure it doesn’t move.
- Use the jig saw to carefully cut along the marked lines to shape your boot remover. Ensure you cut a smooth curve on the end that will cradle the boot’s heel.
Step 3: Drilling
- Mark two points for screws on the wide part of the curve, which will help secure the wood pieces together.
- Use the electric drill to make holes at these points.
Step 4: Sanding
- Sand all surfaces of the wood, especially the edges and the curved end, to remove any splinters and to smooth out all surfaces. Start with a coarser grit sandpaper and finish with a finer grit for a smooth finish.
Step 5: Assembling
- Apply wood glue along the edge of one of the wooden pieces where it will join with another piece to form the base of the boot remover.
- Press the pieces together and wipe away any excess glue that squeezes out.
- While the glue is still wet, insert screws into the pre-drilled holes to secure the pieces together.
- Allow the glue to dry as per the instructions on the glue bottle, typically a few hours.
Step 6: Finishing Touches
- Once the glue is dry, do a final sanding if necessary, particularly around the joints to ensure a smooth, even finish.
- You can paint, stain, or seal the wood as desired to match your decor or to protect it from moisture and wear.
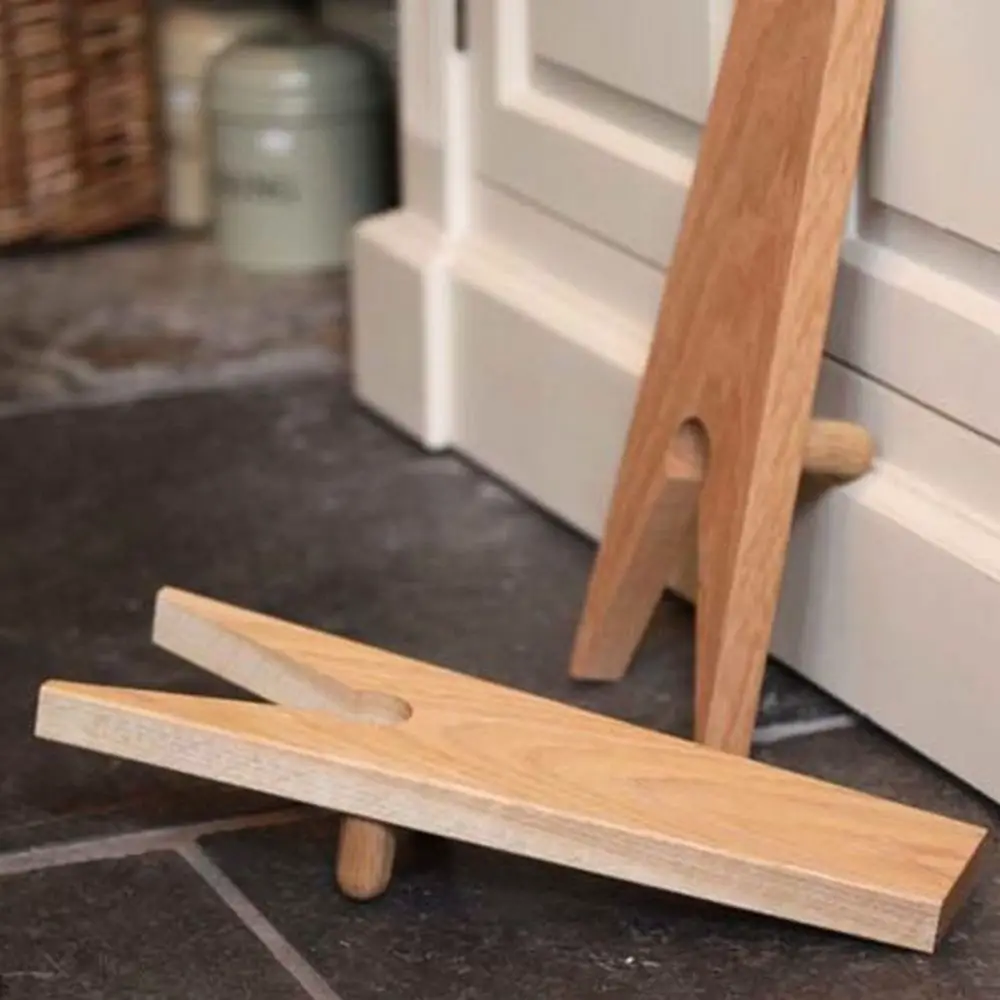
Step 7: Testing
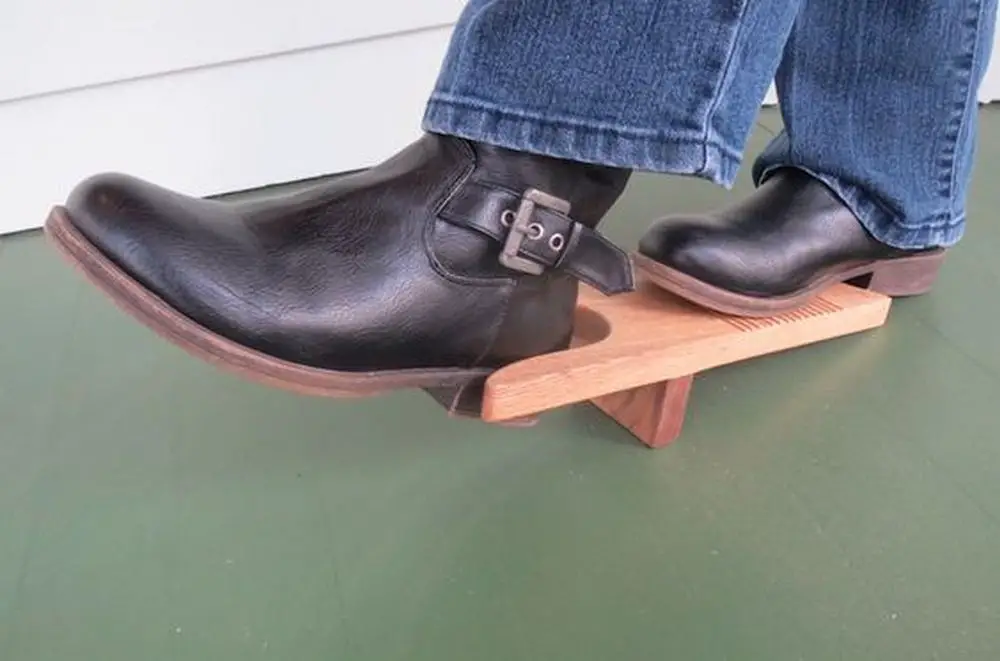
- Place the boot remover on the floor and try removing a boot by placing the heel of the boot in the curved end and pressing down on the handle with your other foot. Adjust if necessary to ensure it functions smoothly.
Click on any image to start the lightbox display. Use your Esc key to close the lightbox.
Learn to make your own boot remover by watching the video below…
Customization Ideas
Making a do-it-yourself boot remover provides a special chance to personalize this useful instrument. Tailoring one for yourself or as a present may be enjoyable and fulfilling. Here are some suggestions for making your boot remover totally your own or to match your house design.
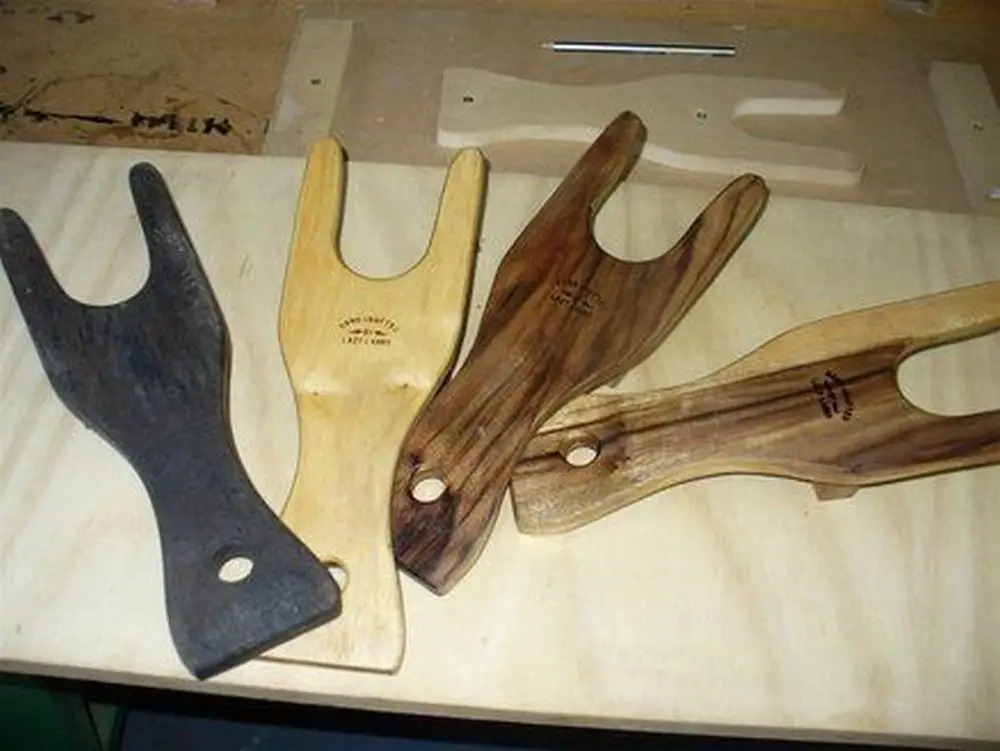
Paint It
Paint your boot remover to add a burst of color. Select your favourite colour or one that goes with your entryway. For a longer-lasting finish, use weather—and dirt-resistant outdoor paint.
Wood Stains
If you prefer a more natural look, consider staining the wood. Wood stains are available in various shades and can enhance the wood’s natural grain, giving your boot remover a classic, elegant appearance.
Decorative Carving
For those who have some carving skills, or are eager to learn, adding decorative carvings can truly personalize your boot remover. Simple designs like stars, waves, or even initials can be carved into the handle or the base.
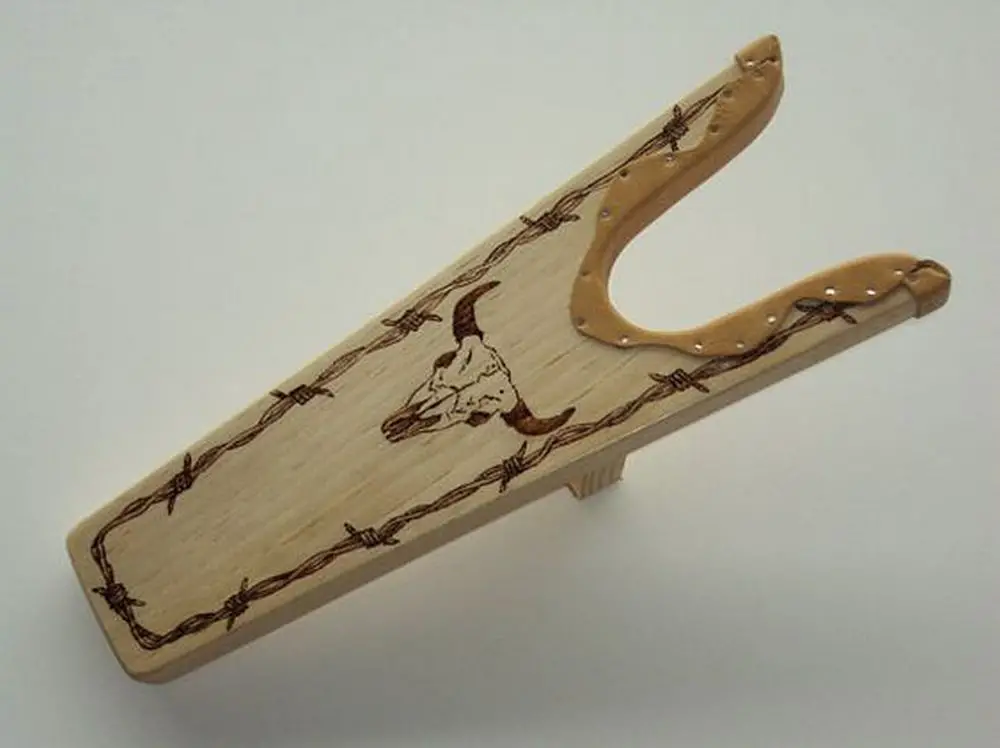
Thematic Decorations
Theme your boot remover around your favorite hobby or the seasons. For instance, nautical themes with anchors or ocean waves for beach lovers, or leaves and acorns for an autumn look. These can be painted, carved, or added on using wood burning techniques.
Functional Additions
When not in use, suspend it with a little hook on the handle or add a rubber base to keep it from slipping on hardwood or tiled floors. These upgrades make your boot remover more useful and fashionable at the same.
Top Coats for Protection
For further durability, give your boot remover a protective top coat. There are matte varnishes for a more muted appearance or glossy polyurethanes. These treatments can improve the colour and texture of any paint or stain put on top of protecting the wood.
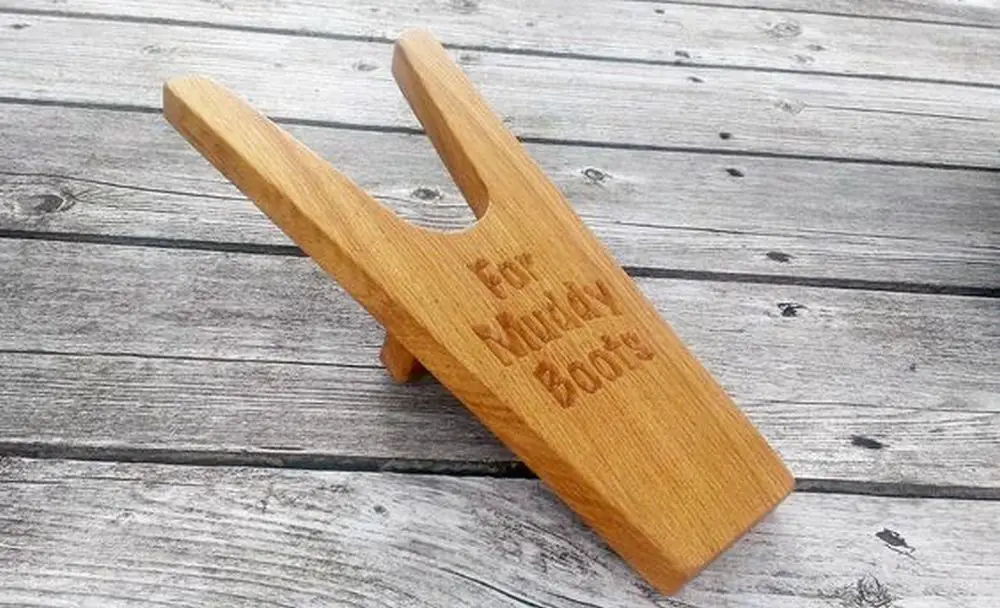
Engraving
Utilize an engraving tool to inscribe names, meaningful dates, or motivational quotes onto the wood. This adds a personal touch that makes the boot remover not just a tool, but also a keepsake.
Textures
Introduce different textures to the handle or base using techniques like wood burning or applying textured paints. This not only adds visual interest but also improves grip, which can be particularly useful in wet conditions.
Mosaic Designs
Adorn the flat surfaces with mosaic tiles or broken pieces of ceramic to create a colorful, eye-catching design. This is a great way to recycle old pottery and can make your boot remover a standout piece.
Fabric Wraps
Wrap the handle in a durable fabric or leather for a comfortable grip. This can also be a way to incorporate patterns or colors that match your home decor. Secure the fabric with a strong adhesive or decorative tacks for a finished look.
Eco-Friendly Materials
For an eco-friendly twist, use recycled materials like reclaimed wood or upcycled items for parts of the boot remover. This approach not only reduces waste but also gives the boot remover a rustic, eco-conscious appeal.
Illumination
Add a practical feature by attaching a small, waterproof LED light near the curve of the boot remover. This can be helpful for removing boots in dimly lit areas, such as garages or porches during evening hours.
Seasonal Themes
Customize your boot remover for different seasons or holidays. For instance, use removable decorations like ribbons for Christmas, or floral patterns for spring. This way, your boot remover can change its look throughout the year.
Signature Handles
Experiment with different handle designs that reflect personal style or ergonomic needs. Curved handles, spiral designs, or handles made from alternative materials like metal or composite can transform the look and feel of your boot remover.
Adding to the effectiveness and durability of your boot remover is just as important as its aesthetic appeal. These concepts will help you design a boot remover that will be a discussion starter in your house as well as useful.
Benefits for Different Users
A DIY tool designed to help remove footwear easily offers numerous benefits that can be particularly advantageous for various user groups. Here’s how different individuals might find this tool exceptionally useful in their daily lives:
For Pregnant Women
During pregnancy, bending over to remove shoes can become challenging, especially in the later trimesters. This tool provides a way for pregnant women to remove their footwear independently, reducing the strain on their back and belly, and enhancing their comfort and autonomy at home.
For Elderly Individuals
As flexibility and balance can decrease with age, the elderly can use this tool to avoid the bending and balancing act involved in removing tight-fitting shoes. This not only makes the process safer by reducing the risk of falls but also helps maintain their independence in daily activities.
For Individuals with Mobility Issues
People dealing with chronic pain, injuries, or conditions like arthritis that limit joint mobility can benefit greatly. The tool allows them to remove their shoes without bending or twisting, providing relief and preserving joint health.
For Children
Young children learning to dress and undress themselves find this tool helpful in removing boots without frustration. It supports their developing independence and motor skills, making getting ready easier and more fun.
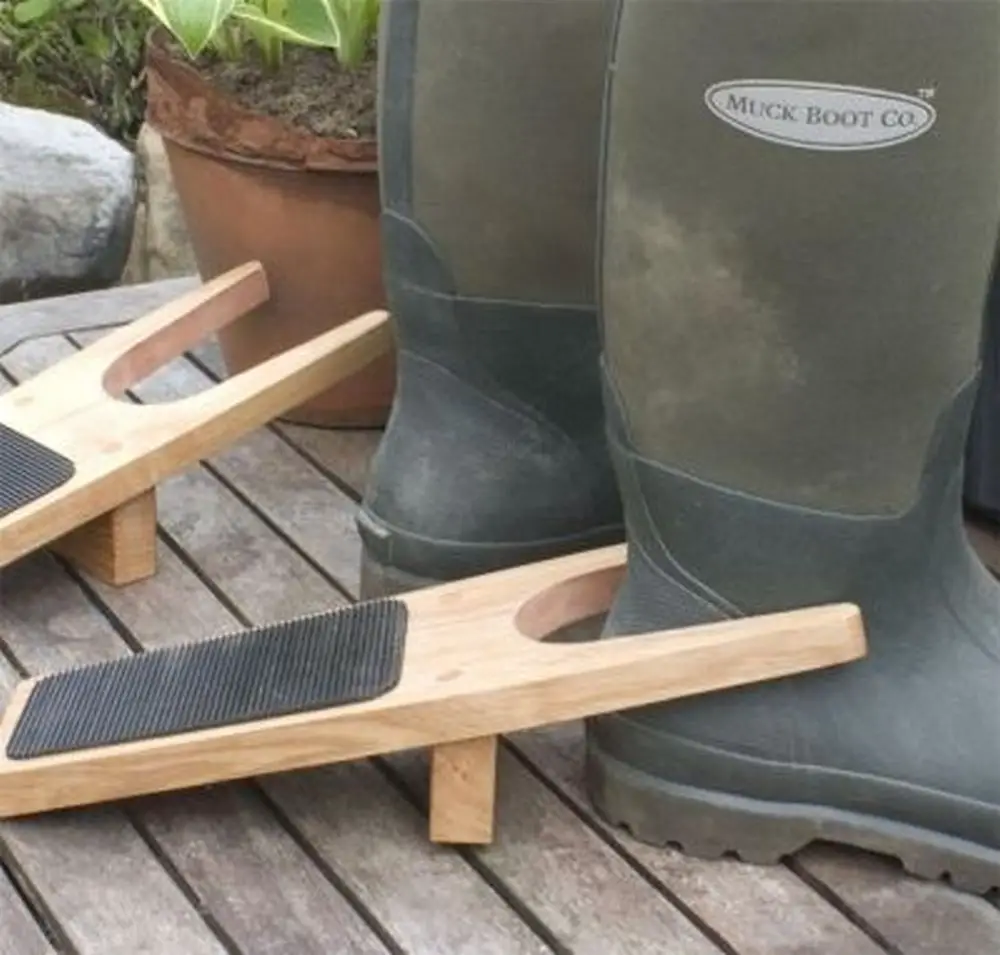
For Outdoor Enthusiasts
For those who frequently engage in outdoor activities, such as hiking or gardening, this tool proves invaluable for removing muddy or wet boots without creating a mess indoors. It aids in keeping living spaces clean and makes the transition from outdoor to indoor settings smoother.
For Busy Professionals
Professionals who need to switch between shoes, such as between outdoor boots and indoor office shoes, find this tool saves time and effort. It’s an efficient solution for maintaining a professional appearance without sacrificing convenience.
For Retail Workers or Chefs
Individuals who spend long hours on their feet and may wear heavy, protective footwear can use this tool to easily remove their shoes at the end of a long shift. This contributes to a quicker, more comfortable transition to relaxation at home.
By addressing the specific needs of these diverse groups, a simple DIY tool can significantly enhance the daily routines of many, making it a universally appreciated addition to any household.
Conclusion
Crafting your own boot remover is a rewarding project that combines simplicity with practicality. It not only eases the task of removing footwear but also adds a personalized touch to your home essentials. This tool is sure to bring convenience and style to your daily routine, making it a valuable addition for anyone.
After removing your boots, organize them with a horseshoe boot rack. Check out our guide on how to build one!


