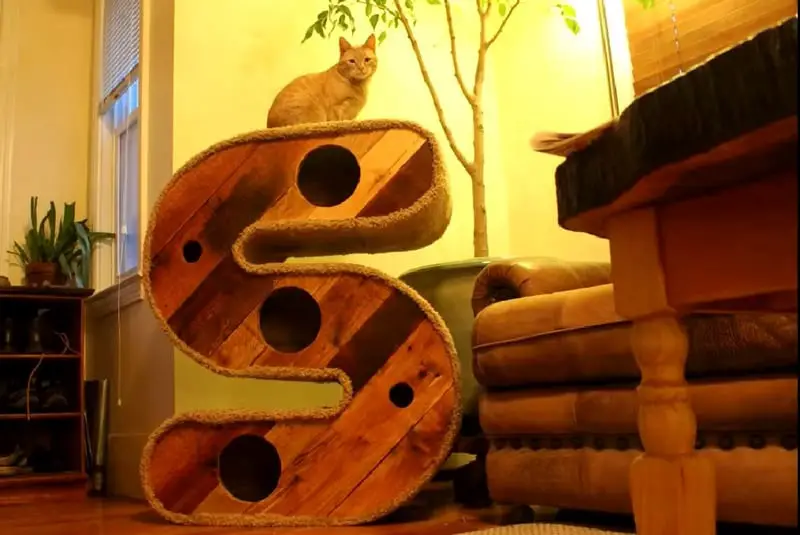
Pet owners are getting more and more creative. Nowadays, there are clothes, shoes, accessories, spas, and grooming salons for pets. And that’s just the tip of the iceberg. Some pet owners build the most elaborate houses for their furry friends.
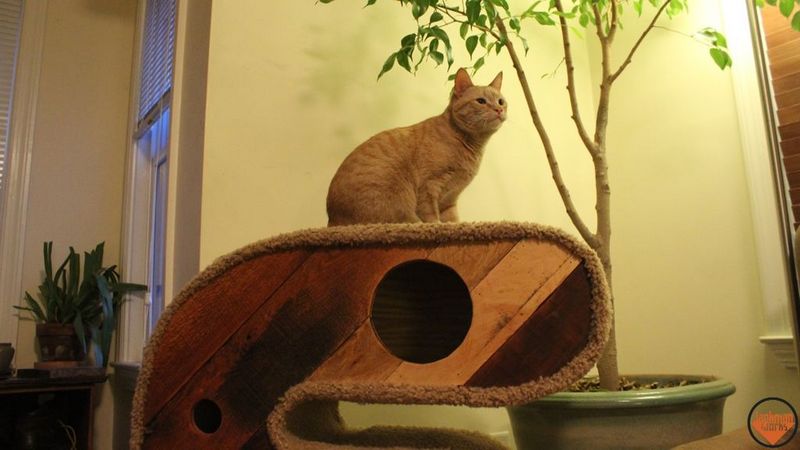
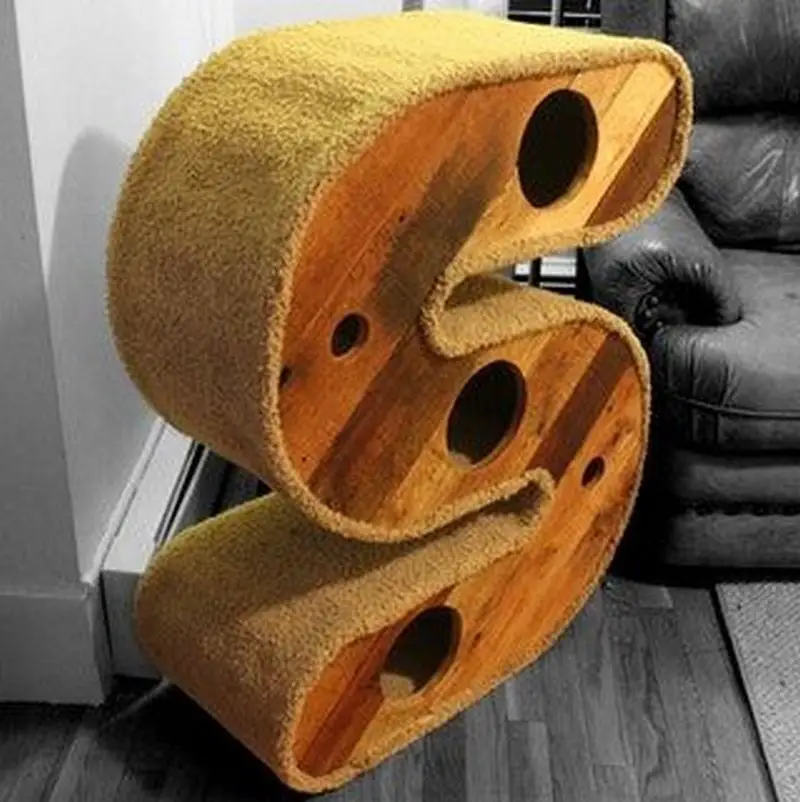
While this cat house may not be the most elaborate, it certainly is unique. It’s an S-shaped house and tunnel for your cat. This is really special – especially if your cat’s name starts with an S.
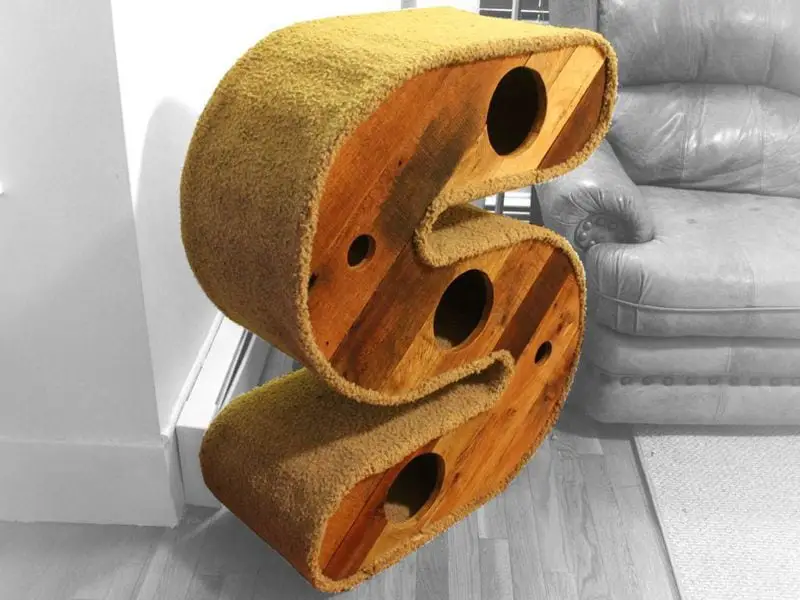
This is an inexpensive project that’ll make a great bonding activity for the family. Just keep the little kids out of the heavy-duty tools.
Contents
Building a S-shaped Cat House/Tunnel
Materials
- 1 sheet of 3/8″ plywood
- 3/4″ wood scraps
- Wood glue
- Carpet
- Spray adhesive
- Boiled linseed oil
Tools
- Tape measure
- Drywall square
- Compass
- Combination square
- Circular saw
- Jigsaw
- Benchtop belt sander
- Router
- Pattern router bit
- Table saw
- Miter saw
- Brad nail gun
- Staple gun
- Air compressor
- Bandsaw
- Wood rule
- Random orbital sander
Instructions
Step 1: Design the Cat House
Using your tape measure and compass, sketch out the basic shape and dimensions for the cat house. The size of the house will depend on your available plywood and your cat’s comfort. Aim for a balance between space and sturdiness. Use the drywall square and combination square to create precise lines and angles for the base, walls, and roof.
Step 2: Cut the Plywood and Wood Scraps
Take the 3/8″ plywood and use a circular saw to cut out the main panels for the house: the base, two side walls, the back wall, and the roof. Use the jigsaw to create door openings, tunnels, or other design features you’ve planned. For added support, cut 3/4″ wood scraps into small braces using the miter saw. These will be used to reinforce the corners and internal structure.
Step 3: Shape the Pieces
After cutting the plywood, smooth out any rough edges. Use the benchtop belt sander and random orbital sander to create smooth, rounded edges on the panels, preventing injury to your cat. If you’re creating curved sections, use the bandsaw for more intricate cuts, especially on the roof or door.
Step 4: Assemble the Frame
Begin assembling the cat house using wood glue to bond the panels together. Attach the sides to the base, followed by the back wall and the roof. Use the brad nail gun and air compressor to fasten the plywood pieces more securely. Make sure to position the 3/4″ wood scraps as internal braces at the corners and along the joints for added support.
Step 5: Routing for a Finished Look
Once the structure is built, use the router fitted with a pattern router bit to add clean edges to the door openings or other detailed features. This gives the house a polished look and makes it more comfortable for your cat to enter and exit.
Step 6: Cut and Attach the Carpet
Measure the interior dimensions of the house and cut the carpet pieces accordingly using your tape measure and utility knife. Attach the carpet to the interior surfaces of the cat house using spray adhesive. Cover the base and interior walls, creating a soft and cozy environment for your cat.
Step 7: Sand and Finish the Exterior
Sand down any sharp edges on the outside of the cat house with a random orbital sander once the carpet is in place. To guard the plywood and provide it a polished, natural finish, brush boiled linseed oil on its outside. Let the oil totally dry.
Step 8: Secure the Carpet with Staples
Particularly around the edges, use a staple gun to fasten the carpet at strategic points where it might eventually loosen. To guarantee a tight fit, press the carpet firmly into place before stapling.
Step 9: Final Touches
Look over the whole cat house for any sharp edges, loose bits, or places needing extra reinforcement. Add any last-minute additions including extra carpeted surfaces or painted designs.
Click on any image to start the lightbox display. Use your Esc key to close the lightbox.
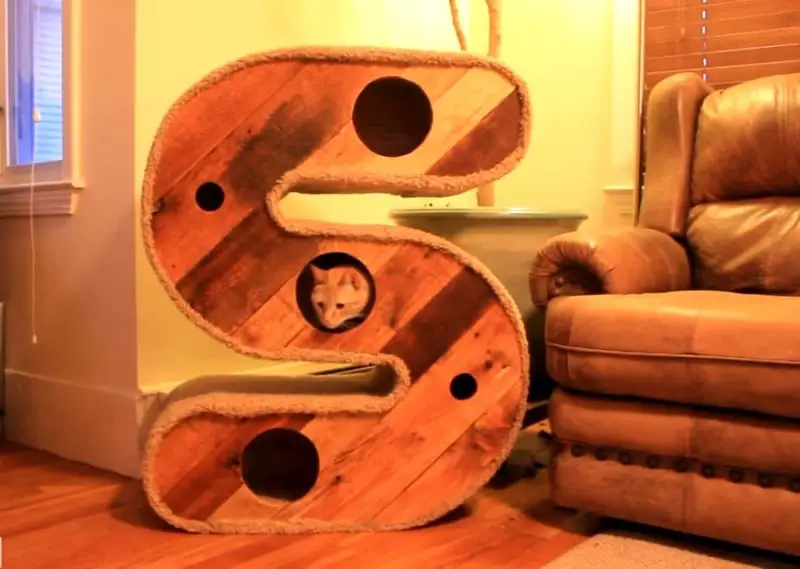
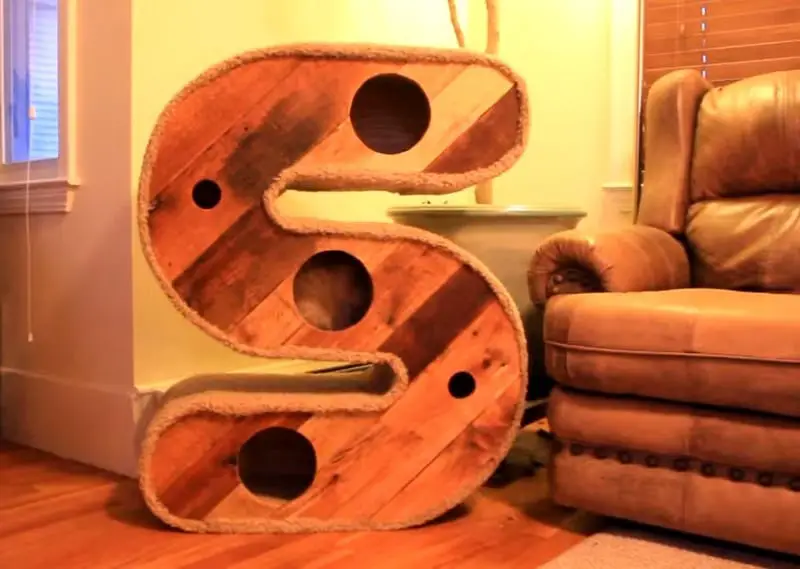

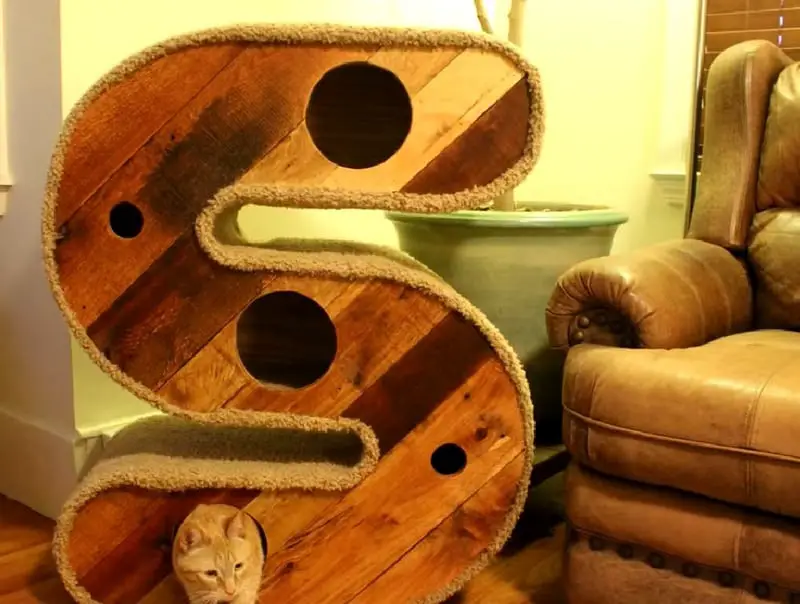

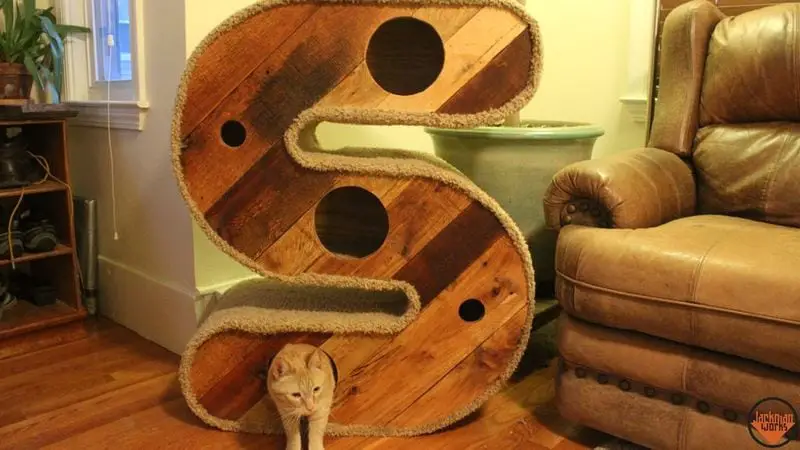
You can get a visual step-by-step instructions here…
Benefits of a Customized Cat House for Your Pet’s Comfort
A customized cat house offers more than just a fun project for pet owners. It provides a personalized space that caters to your cat’s unique needs, ensuring their comfort and happiness. A customized cat house becomes a sanctuary that encourages healthy behavior, physical exercise, and mental stimulation by tailoring the design and materials to suit your pet.
Let’s explore the benefits of providing a custom space for your cat and how it can positively impact their well-being.
Tailored for Your Cat’s Preferences
Cats are known for their strong preferences, especially regarding their environment. A customized cat house allows you to create a space that aligns with your pet’s particular tastes.
Whether your cat enjoys hiding in small nooks or lounging in wide open spaces, you can design a house that suits these behaviors. The materials you choose, such as soft carpets or durable wood, also cater to their comfort. Additionally, if your cat has specific likes or dislikes regarding height or the number of entrances, a customized house allows you to accommodate these needs.
Encourages Healthy Behavior
A well-designed cat house can encourage healthy behaviors such as climbing, jumping, and scratching. Including elements like scratching posts or climbing platforms makes your customized cat house a multifunctional space that satisfies your cat’s natural instincts.
This can help prevent destructive behavior around your home, as your cat has a designated space to scratch or play. Additionally, having a space designed specifically for them gives cats a sense of ownership, reducing stress and anxiety, especially in multi-pet households.
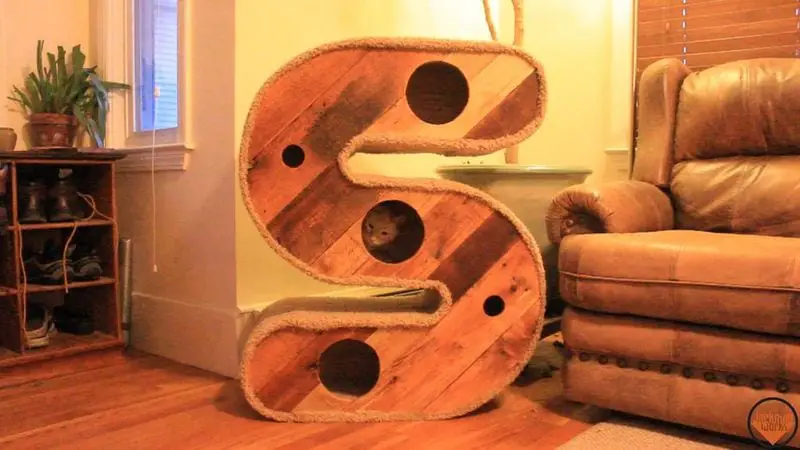
Provides Mental and Physical Stimulation
Cats need both mental and physical stimulation to stay healthy. A customized cat house allows you to include features that challenge your pet. To keep your cat engaged, you can add tunnels, hiding spots, or interactive elements like dangling toys.
These features provide a space for physical activity and stimulate your cat’s mind, preventing boredom. A bored cat may develop negative behaviors such as excessive meowing, scratching furniture, or overeating. You are supporting your cat’s mental and physical health by offering a stimulating environment.
Improves Comfort and Safety
Comfort and safety are paramount when designing a customized cat house. You control the quality of materials used, ensuring that the house is sturdy, non-toxic, and safe for your cat.
Soft, plush materials like carpet can make the interior more comfortable, while smooth edges and secure joints reduce the risk of injury. A custom house can also provide warmth and protection from external elements outdoors. You can even include insulation or weatherproofing to ensure your cat stays cozy year-round.
A Personal Space for Relaxation
A customized cat house gives your pet a space to retreat and relax. Cats often seek out quiet, enclosed spaces where they can feel secure. By providing a dedicated spot where they can rest without disturbance, you create a safe environment.
This space can be essential for reducing stress, particularly in households with young children or other pets. Additionally, you can personalize the house with features that your cat finds calming, such as soft fabrics or a view of their favorite spot.
A customized cat house enhances your cat’s comfort and provides numerous benefits for their health and happiness. By considering your cat’s preferences, designing for their physical and mental stimulation, and ensuring their safety, you create a space to improve their overall well-being.
Safety Tips for DIY Cat Houses
Safety should always be a top priority when building a DIY cat house. Creating a cozy and functional space for your pet is important, but ensuring the structure is safe for your cat is crucial. From selecting non-toxic materials to designing sturdy construction, these safety tips will help you build a comfortable cat house and secure for your feline friend.
Use Non-Toxic Materials
One of the most critical safety tips when building a cat house is to use non-toxic materials. Cats often scratch, chew, or rub against surfaces, so any harmful chemicals could pose a danger. Choose wood that is untreated or finished with pet-safe stains. If you plan to use adhesives or paints, ensure they are labeled as non-toxic and safe for animals. Avoid any materials with sharp or rough edges that could harm your cat.
Ensure Sturdy Construction
A DIY cat house must be built to last and support your cat’s activities. Use solid, durable materials like plywood or hardwood for the main structure, and secure all joints with appropriate fasteners such as screws, wood glue, or nails. If your design includes multiple levels or climbing platforms, make sure they are firmly attached and can support your cat’s weight without wobbling. A poorly constructed house can collapse or injure your pet during play.
Smooth Out All Edges and Surfaces
Sharp or rough surfaces can be sensitive to cats and damage their paws, skin, or eyes. After cutting wood or material, use sandpaper or a sander to smooth down all edges. Close attention to areas near doors, windows, and corners where your cat might climb or leap. If you are using carpet or fabric, be sure it is tightly bound and free of any loose threads or staples.
Proper Ventilation
Whether the cat house is enclosed or features sections, make sure you design enough ventilation. Houses designed for outdoor use or those in hot climates especially depend on this. Create airflow by cutting little windows or air vents into the walls. If the house has a roof, make sure it doesn’t trap heat, and think about including airy materials to keep your cat cool and cosy inside.
Use Pet-Safe Fasteners and Tools
Attaching fabrics or carpets requires careful use of a staple gun or nail gun. Make sure no sharp points are revealed and that every fastener is totally buried. Steer clear of small bits, screws, or nails that might come free and cause a choking hazard. Before letting your cat explore the whole construction, be sure everything is safe and secure.
Choose Stable Placement
The location of the homemade cat house is equally crucial to its building. Ensure it leans on a level, stable surface to prevent wobbling or tipping. If the house has several levels, consider anchoring it to a wall or the floor to keep it from falling over during active play. Make sure the construction is weatherproof and firmly anchored to resist wind and other forces for outdoor use.
Check for Small Hazards
Check the cat house for little hazards that might endanger your pet once it’s built. Search for loose threads, sharp nails, or potentially dangerous rough areas. Eliminate any small objects that might be swallowed, then make sure any removable components are tightly attached. Check the cat house often for wear and tear; fix as necessary to maintain the area’s safety for your cat.
Following these safety guidelines will help you to make sure your homemade cat house not only serves your cat’s needs but also provides a safe and secure environment. Knowing that their new home was designed with their well-being in mind, your pet will welcome it with comfort and confidence.
Conclusion
Constructing a cat house is a fulfilling endeavor that lets you design a cozy and unique area for your feline friend. By focusing on design, materials, safety, and your cat’s needs, you can ensure that the house satisfies them. The end result is a comfortable, useful house that stimulates and comforts your pet.


