When it comes to furniture, it’s wise to choose pieces that are both functional and stylish. When you’re putting it up on a wall, go for something that doubles as art.
In addition to useful functions, your choice of furniture conveys your sense of style and overall personality. Contemporary furniture design ranges from clean and minimalist to vibrant, creative, and exciting.
Let’s take shelves as an example. You don’t have to stick to the typical rectangular shelves anymore. There are lots of trendy designs available nowadays.
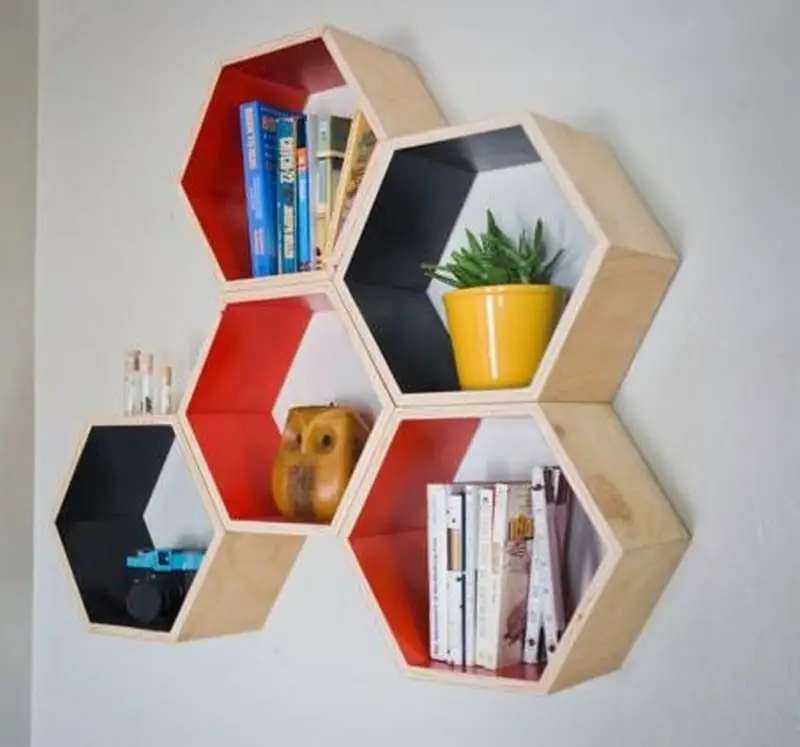
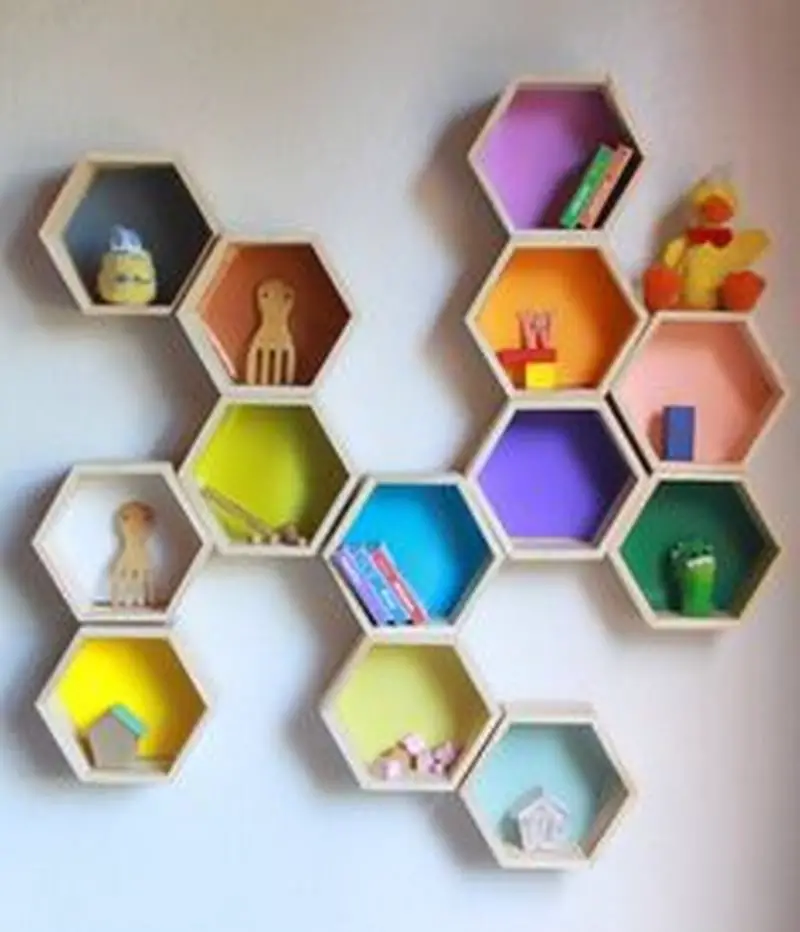
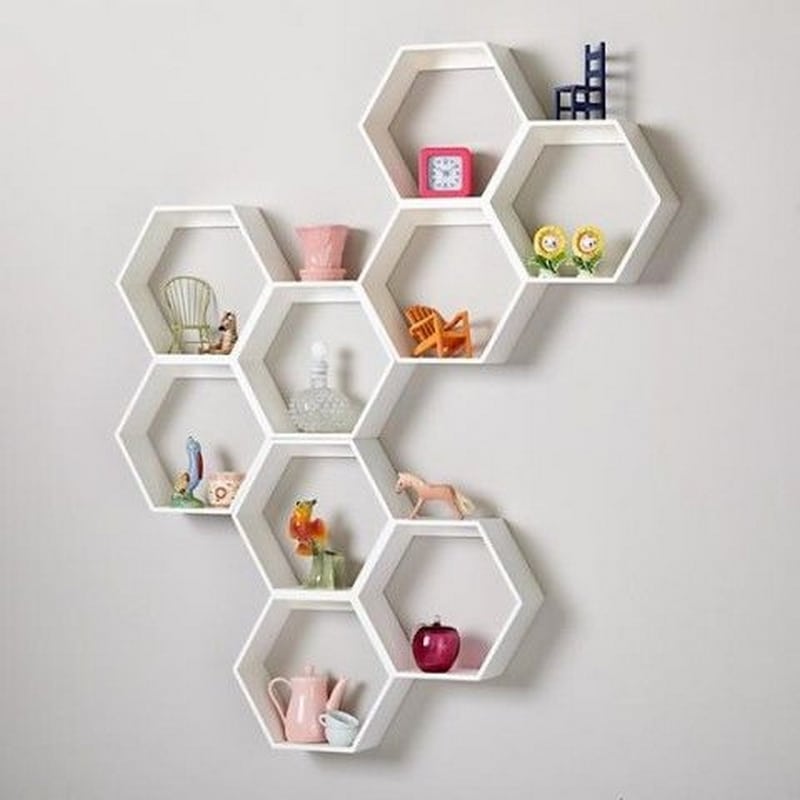
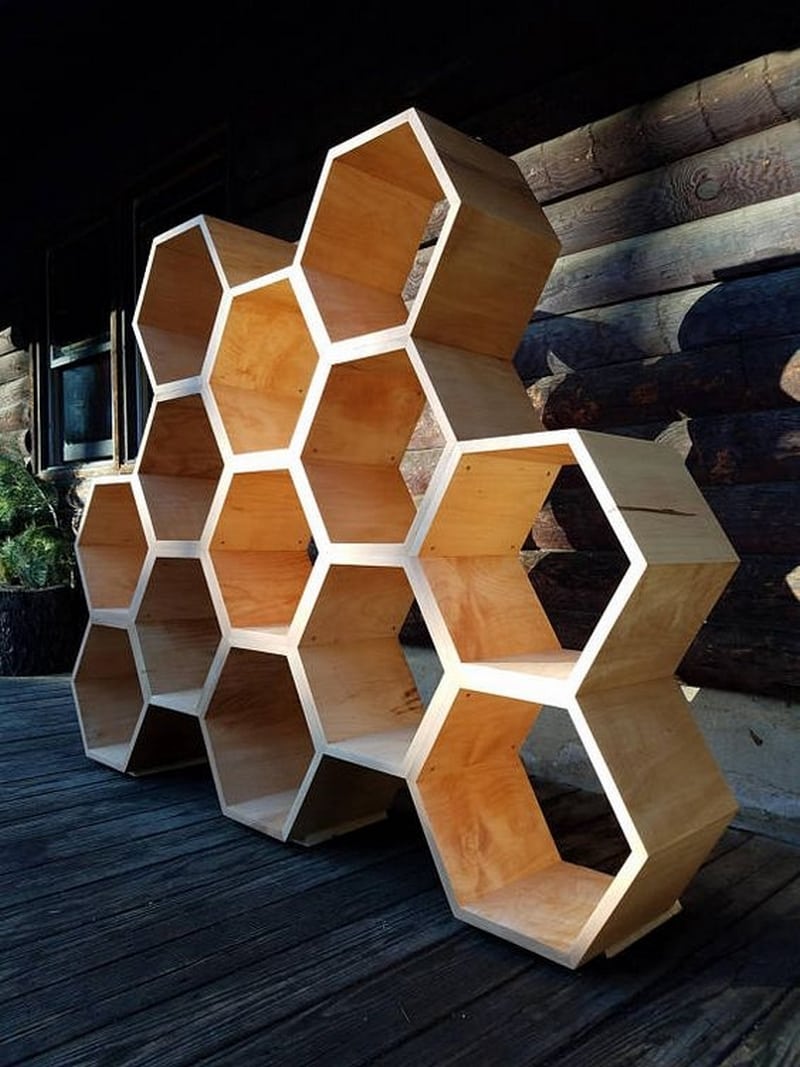
Hexagonal shelves have become popular because of their interesting shape. They’re also known as honeycomb shelves because, well, they look like a bee’s honeycomb.
Once you mount them on a wall, they really look appealing. They can look fun and playful but classy at the same time.
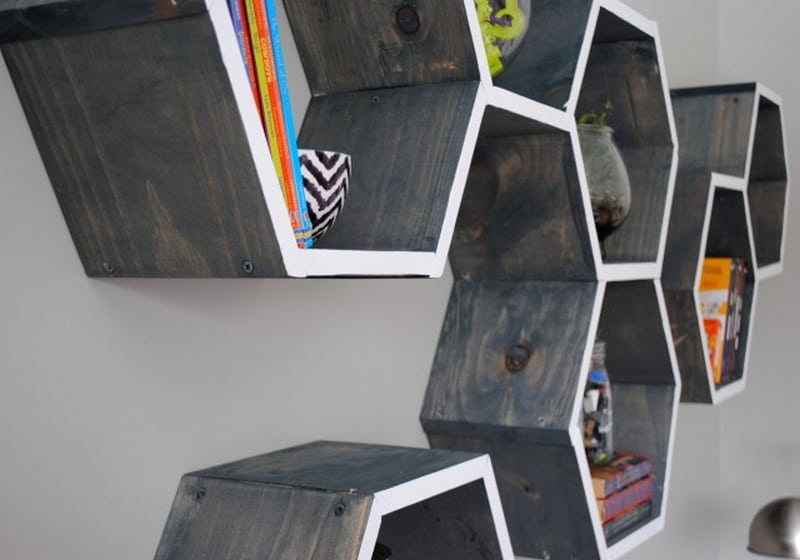
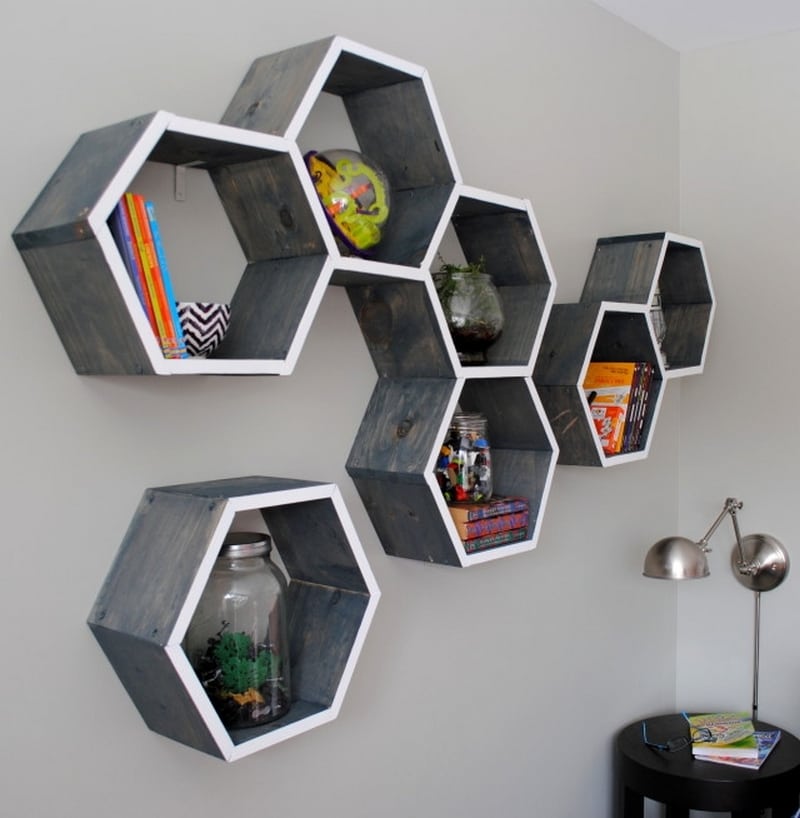
These DIY honeycomb shelves aren’t very easy to make. But the finished product is definitely worth all the time and effort.
Contents
Building Honeycomb Shelves
Materials
- 7 pcs – 1″ x 6″ x 6′ long pieces of wood – each shelf took approximately (1) board
- 1-1/2″ wood screws
- 1-1/2″ corner brackets
- Plastic toggle anchors
- Stain or Paint – depending on how you want to finish the shelf surface
Tools
- miter saw
- tape measure
- drill
- sander
- level
- pencil
Instructions
Measure and Mark Cuts:
- Use the tape measure and pencil to mark your wood. Each side of the hexagon will be the same length. For standard size, mark six pieces at 12 inches each.
- Remember, each board needs a 30-degree angle cut on both ends. This ensures that when assembled, the boards will form a perfect hexagon.
Cut the Wood:
- Set your miter saw to a 30-degree angle.
- Carefully cut each marked piece of wood, ensuring both ends are cut at a 30-degree angle in opposite directions. This means each piece will be a parallelogram with angles oriented correctly for assembly.
Sand the Edges:
- Use the sander to smooth all cut edges. This step is crucial for a seamless fit and a polished look.
- After sanding, wipe down the wood to remove any dust.
Assemble the Hexagon:
- Lay out six pieces of wood to form a hexagon on a flat surface. Make sure all joints fit tightly together.
- Drill pilot holes at each joint where the boards meet. This helps prevent the wood from splitting.
- Use the 1-1/2″ wood screws to join each piece together at the corners. Tighten screws firmly but be careful not to overtighten and strip the wood.
Attach Corner Brackets:
- To add extra stability, attach 1-1/2″ corner brackets to the inside corners of your hexagon.
- Mark the bracket positions with a pencil, pre-drill holes, and then screw the brackets in place. This reinforces the structure, ensuring it stays secure over time.
Finish the Shelves:
- Depending on your preference, either stain or paint your shelves. Follow the product instructions for the best results.
- Allow the shelves to dry completely before handling.
Mount the Shelves:
- Determine the location for your honeycomb shelves on the wall. Use a level to ensure they will be straight.
- Mark the wall through the holes in the corner brackets for drilling.
- Drill holes into the wall and insert plastic toggle anchors. These anchors provide secure mounting points.
- Align the honeycomb shelf with the anchors and screw it into place using the wood screws.
Final Adjustments:
- Use the level again to make sure the shelf is perfectly horizontal.
- Tighten any loose screws to secure the shelf firmly in place.
Click on any image to start the lightbox display. Use your Esc key to close the lightbox.
You can get more step-by-step instructions here…
Design Variations and Customization for Honeycomb Shelves
Honeycomb shelves are a versatile and stylish addition to any room. Their geometric design not only serves as functional storage but also adds an artistic element to your decor. While the classic honeycomb shelf is stunning on its own, there are countless ways to customize and adapt it to fit your personal style and needs. Below, we explore various design variations and customization options to make your honeycomb shelves truly unique.
Different Sizes and Configurations
Adapting to Different Spaces:
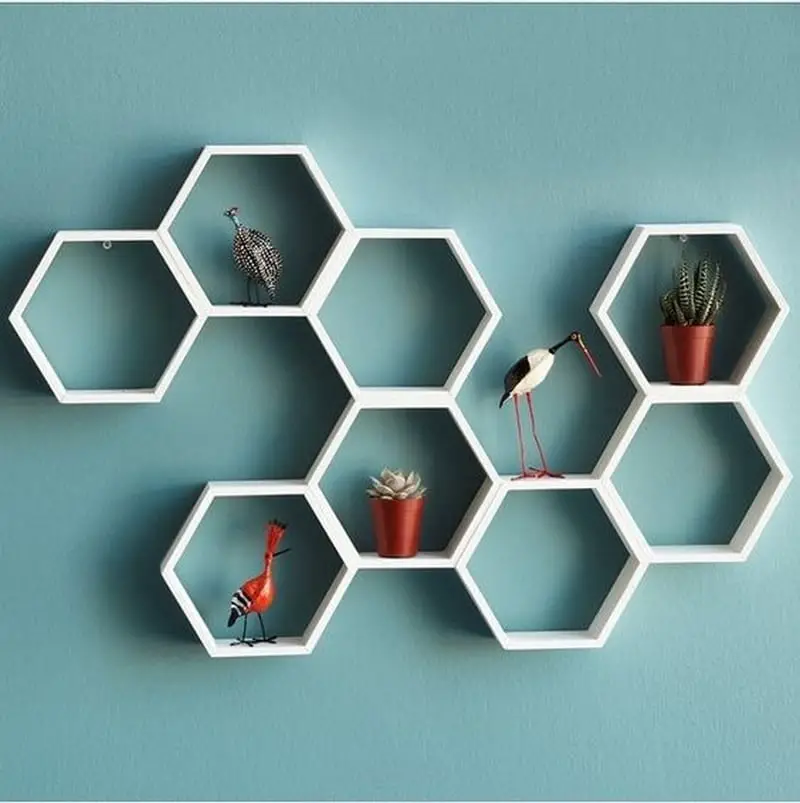
Honeycomb shelves can be scaled up or down to fit any space. Whether you’re looking to make a large statement piece or a small, subtle addition, adjusting the size of each hexagon allows you to tailor the shelves to your room’s dimensions. Consider creating a mix of large and small hexagons to form an eye-catching display that covers an entire wall or just a corner.
Combining Multiple Shelves:
Create a dynamic look by combining several honeycomb shelves of different sizes. This modular approach lets you expand or rearrange your shelves over time, perfect for adapting to changing storage needs or redecorating plans. Experiment with different layouts to find the configuration that best suits your space and aesthetic.
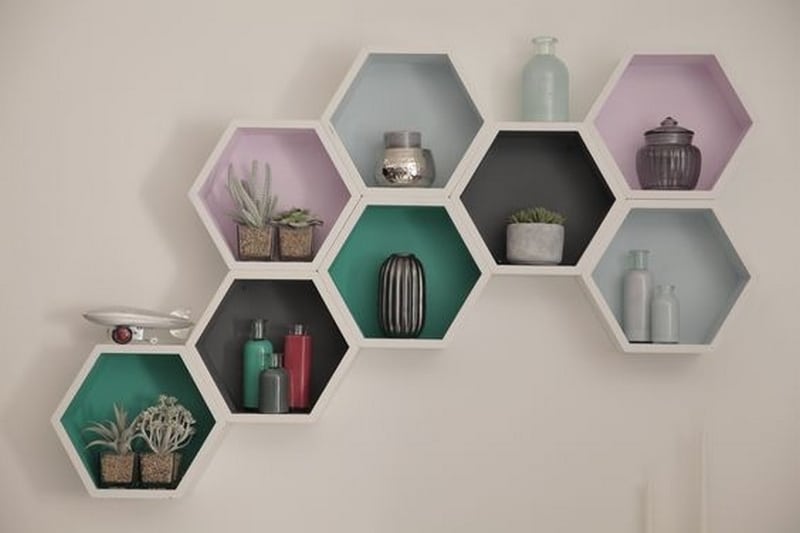
Creative Finishes
Stains and Paints:
Finishing your honeycomb shelves with stain or paint can dramatically change their look. Opt for a natural wood stain for a rustic or traditional feel. For a more contemporary or bold statement, paint the shelves in vibrant or contrasting colors. Mixing different finishes within a single display can add depth and interest.
Decorative Touches:
Add a personal touch by incorporating decorative elements. Line the interior of each hexagon with patterned wallpaper or fabric to create a unique backdrop for your items. For a more industrial look, consider using metal brackets or trim. You can even attach small hooks or knobs to the lower edges of the shelves to hang keys, jewelry, or other small items.
Alternative Materials
Reclaimed Wood:
Using reclaimed wood gives your honeycomb shelves a rustic and eco-friendly charm. The varied textures and colors of reclaimed wood can make each shelf unique and add a sense of history to your decor. This approach is not only environmentally friendly but also adds character and a vintage appeal.
Metal and Plastic Options:
For a modern twist, try constructing honeycomb shelves from metal or plastic. Metal shelves offer a sleek, industrial vibe and can be painted or left raw for different effects. Plastic shelves, on the other hand, can be lightweight and come in a variety of colors, making them suitable for playful or contemporary spaces.
Customizing honeycomb shelves allows you to blend functionality with personal style. Whether you choose to experiment with different sizes, finishes, or materials, these shelves can be tailored to complement any decor. Embrace these design variations and let your creativity shine through. Your unique honeycomb shelves will not only serve as practical storage but also as a captivating focal point in your home.
Functional Uses and Decor Inspiration for Honeycomb Shelves
Honeycomb shelves are not just visually appealing; they also offer versatile storage and display options. Their unique geometric shape and modular nature make them suitable for a variety of applications throughout the home. Whether you need extra storage or want to create a stylish focal point, honeycomb shelves provide endless possibilities. Here are some functional uses and decor ideas to inspire your next project.
Practical Applications for Every Room
Kitchen Storage Solutions:
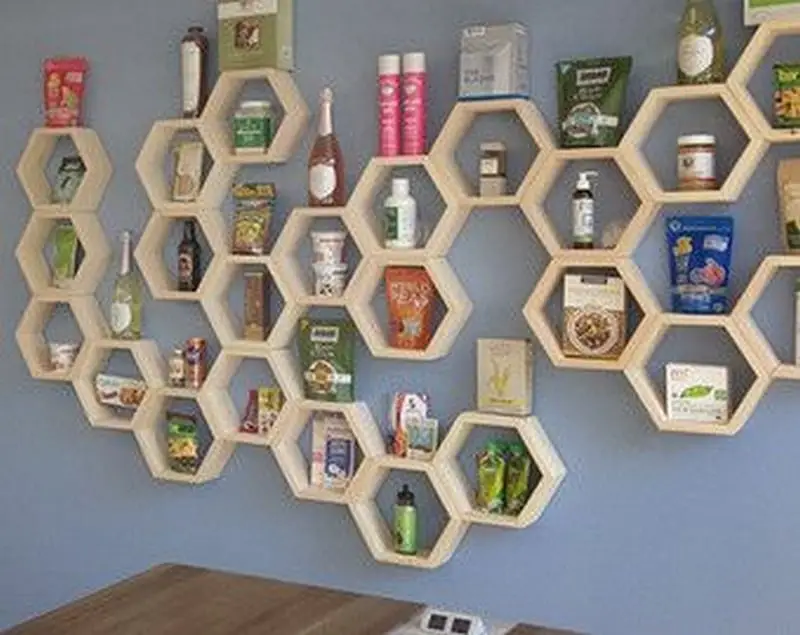
In the kitchen, honeycomb shelves can be a chic and practical solution for organizing spices, jars, and cookbooks. Their open design makes it easy to see and access ingredients, while adding a touch of modern flair to your culinary space. Consider mounting them above your countertop or as a feature on a blank wall to keep essentials within reach and neatly displayed.
Living Room Display:
Transform your living room with honeycomb shelves as a centerpiece. Use them to showcase decorative items such as vases, photo frames, and collectibles. Their honeycomb structure allows you to create interesting arrangements, mixing small and large items to create a balanced and engaging display. Group multiple shelves together for a dynamic wall feature that combines form and function.
Office Organization:
In a home office, honeycomb shelves offer an innovative way to keep supplies organized. Store books, stationery, and tech accessories within easy reach while maintaining a clean and uncluttered workspace. Their modular design makes them ideal for customizing to fit your specific needs, whether you require a single shelf or a complete organizational system.
Decorating Tips for Stylish Displays
Color Coordination:
When styling honeycomb shelves, consider the color scheme of the items you display. Grouping items by color can create a cohesive and visually pleasing look. For instance, display blue and green ceramics together for a calm, serene effect, or mix vibrant colors for a more lively and energetic vibe. The hexagonal shapes can also be painted in different shades to complement the room’s palette.
Thematic Decor:
Embrace a theme for your honeycomb shelves to enhance their decorative impact. In a child’s room, fill the shelves with toys, books, and whimsical decor items to create a playful and functional space. For a minimalist aesthetic, choose monochromatic items and sleek, modern decor to maintain a clean, streamlined look. Seasonal themes, such as festive decorations for the holidays or fresh flowers in spring, can also keep your decor updated and relevant.
Balance and Proportion:
Achieving balance is key when arranging items on honeycomb shelves. Mix different sizes and shapes to avoid a cluttered appearance. For example, pair a few large statement pieces with smaller decorative items. Use the geometric lines of the shelves to guide your placement, ensuring that no single section feels too heavy or crowded.
Seasonal and Themed Decor Ideas
Seasonal Transitions:
Adapt your honeycomb shelves to the changing seasons by rotating the decor. In autumn, fill the shelves with warm-toned decorations like pumpkins and foliage. During the winter holidays, add festive ornaments, fairy lights, and winter-themed accents. This approach keeps your space feeling fresh and relevant throughout the year.
Personal Collections:
Display personal collections on your honeycomb shelves to showcase your interests and personality. Whether it’s a series of travel souvenirs, a collection of vintage cameras, or an assortment of small plants, these shelves can highlight your unique tastes. Arrange your collections thoughtfully, allowing each piece to be appreciated within the overall display.
Honeycomb shelves are more than just storage solutions; they are opportunities to express creativity and style. By exploring their functional uses and embracing decor inspiration, you can transform these geometric shelves into personalized works of art. From practical storage to stunning displays, honeycomb shelves bring both elegance and utility to any space.
Conclusion
Building honeycomb shelves is a rewarding project that combines creativity with functionality. These shelves not only provide stylish storage but also serve as a striking decor element in any room. With a bit of time and effort, you can create a unique piece that adds both beauty and practicality to your home.
For more creative shelf ideas, check out our DIY guitar shelf project!


