Most homeowners have, at some point, personally experienced the dreaded bare patch on the lawn.
No matter how beautiful the rest of our lawn is, those bald spots will always gnaw at your satisfaction. Before attacking these ugly spots with an arsenal of lawn care products, it is important to determine the origin of the problem.
Contents
- 1 Why Does Your Lawn Have Bare Patches?
- 2 The DIY Lawn Aerator: A Better Alternative
- 3 Landscaping and Aeration
- 4 Safety Precautions
- 5 FAQ for DIY Lawn Aerator Article
- 5.1 What is the best time of year to use a DIY lawn aerator?
- 5.2 How often should I aerate my lawn with a DIY lawn aerator?
- 5.3 Can I use a DIY lawn aerator on wet soil?
- 5.4 How deep should the spikes of a DIY lawn aerator penetrate the soil?
- 5.5 Is it necessary to water the lawn after using a DIY lawn aerator?
- 5.6 Can I overseed my lawn immediately after using a DIY lawn aerator?
- 5.7 How do I maintain my DIY lawn aerator?
- 5.8 Is a DIY lawn aerator as effective as a commercial one?
- 5.9 What safety gear should I wear when using a DIY lawn aerator?
- 5.10 Can I aerate a newly seeded lawn with a DIY lawn aerator?
- 6 Conclusion
Why Does Your Lawn Have Bare Patches?
Sometimes, even with dedicated lawn care, the ground may not be as healthy as it appears. Bald patches on your lawn could indicate the presence of compacted soil.
Just like clogged noses and throats impede our ability to breathe freely, plants struggle to thrive when the soil is compacted and air circulation is limited.
Consequently, they fail to receive the necessary nutrients, leading to lacklustre growth and bare patches on the lawn.
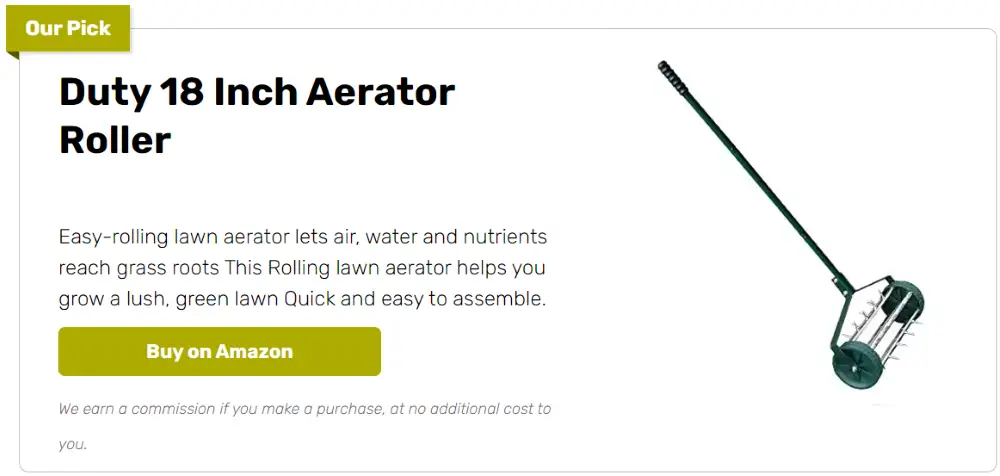
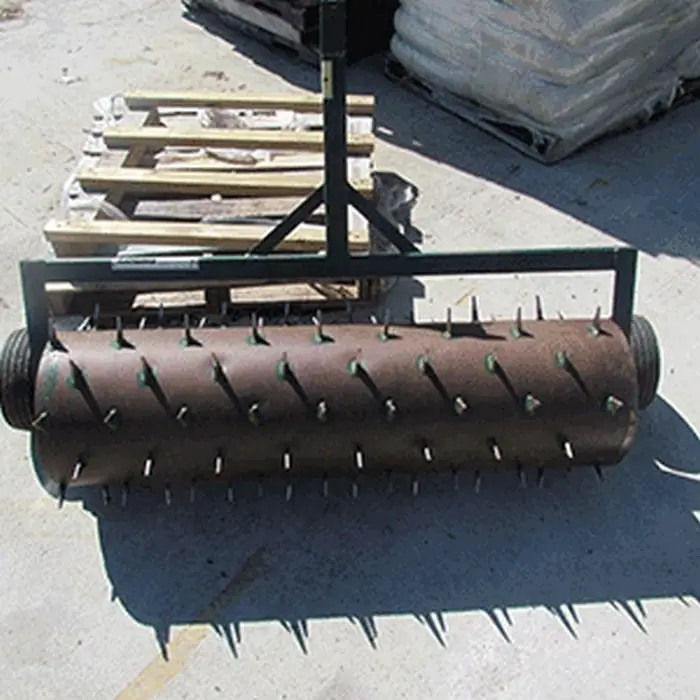
To rejuvenate your lawn and promote healthy growth, aerating the soil is essential. Lawn aerators can be purchased from local gardening stores, but they require significant effort to operate.
Traditional aerators involve stabbing the ground forcefully and pushing down with all your might. While this method does yield results, it can be physically demanding and tiresome.
The DIY Lawn Aerator: A Better Alternative
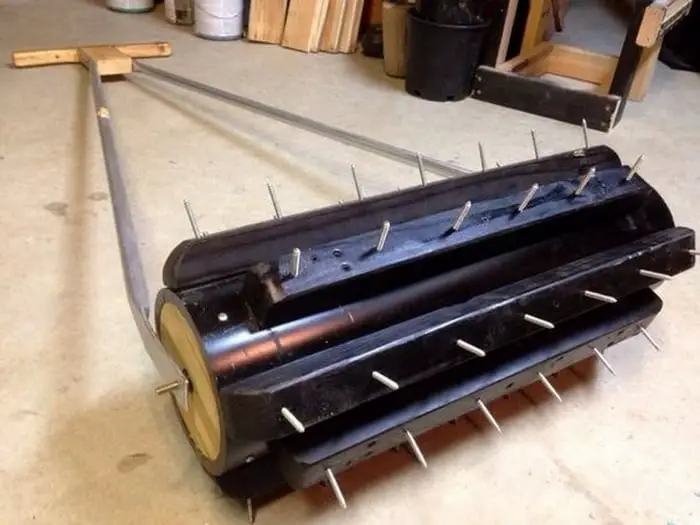
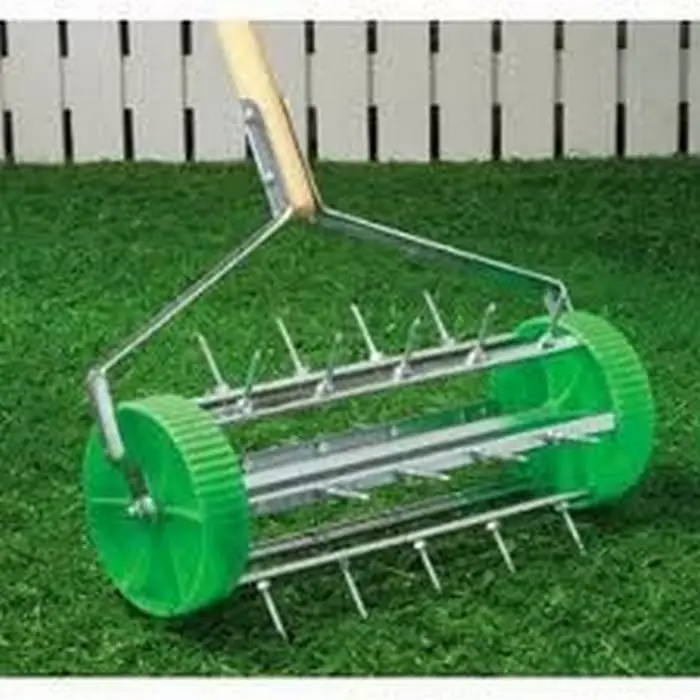
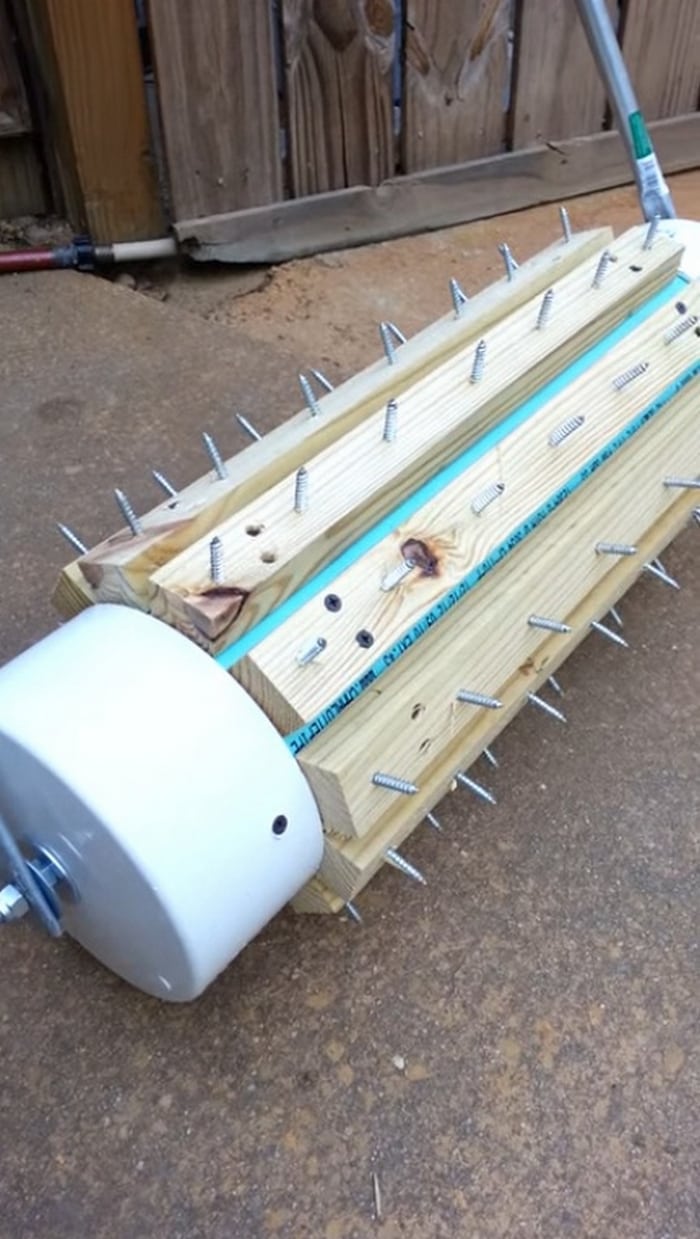
Thankfully, there is a superior alternative that comes straight from the DIY gods—the DIY lawn aerator. This DIY solution simplifies the aeration process, making it easier and more convenient for homeowners.
The DIY lawn aerator features small wheels that allow for effortless maneuverability. Instead of exerting force to penetrate the ground, you simply push it forward, just like a cart.
The spikes on the DIY lawn aerator burrow deep into the soil, creating pathways for air, water, and nutrients to reach the roots of your plants.
Gather the things that you need and start working on this DIY lawn aerator today.
Materials:
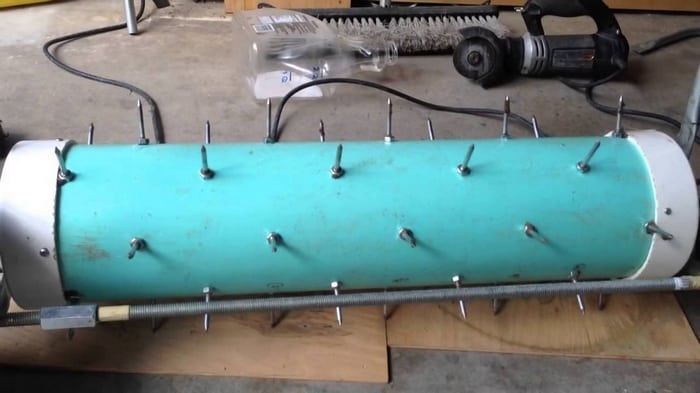
- 6” PVC pipe 2 feet long
- The 6-inch PVC pipe serves as the main body of the DIY lawn aerator. It provides a sturdy structure and acts as the backbone of the aerator.
- The length of the pipe allows for effective aeration of the soil when the spikes penetrate the ground.
- ½” electrical conduit pipe
- The 1/2-inch electrical conduit pipe is used to create the handles of the DIY lawn aerator.
- These handles provide a comfortable grip and allow you to maneuver the aerator easily across your lawn.
- The conduit pipe is lightweight yet durable, making it an ideal choice for this purpose.
- Wood strips
- The wood strips are attached to the bottom of the PVC pipe.
- They serve as support and stability for the aerator, ensuring that it remains level while in use.
- The wood strips prevent the spikes from digging too deep into the ground, maintaining the desired depth for aeration.
- 2” no. 12 wood screws
- These wood screws are used to attach the handles to the PVC pipe.
- They securely fasten the handles, ensuring they remain in place during the aeration process.
- The no. 12 wood screws are strong and reliable, providing the necessary stability for the DIY lawn aerator.
- 2” hex head bolts
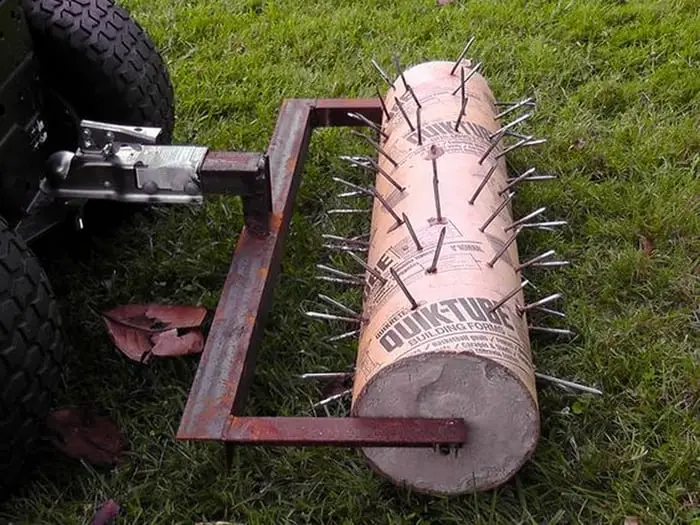
- The hex head bolts play a crucial role in the aeration process. They are inserted into the drilled holes on the PVC pipe, leaving a portion exposed to act as spikes.
- These spikes penetrate the soil when the DIY lawn aerator is pushed across the lawn, creating channels for air, water, and nutrients to reach the roots of your plants.
- small tires/wheels
- The small tires or wheels are attached to the bottom of the PVC pipe, allowing for smooth movement of the DIY lawn aerator.
- They make it easier to push the aerator across your lawn, reducing friction and facilitating better maneuverability.
- The tires or wheels also help distribute the weight of the DIY lawn aerator evenly, preventing it from sinking too deep into the ground.
- Cement
- The PVC pipe serves as a crucial support structure, and filling it with cement adds weight to the DIY lawn aerator.
- This weight ensures that the nails penetrate the soil effectively, enhancing the aeration process.
Tools:
- Drill
- The drill is used to create holes in the PVC pipe. These holes will later accommodate the hex head bolts, which act as the spikes for aerating the soil.
- Make sure to select a drill bit that matches the size of the bolts for precise and secure hole drilling.
- Screwdriver
- The screwdriver is used to attach the handles to the PVC pipe. After cutting the electrical conduit pipe into two equal lengths, the screwdriver is used to fasten the handles securely to the main body of the DIY lawn aerator.
- This ensures that the handles remain firmly attached and provide a stable grip during use.
- PVC Pipe cutter or Handsaw
- This will be used to cut the PVC pipe into the desired length.
Step-By-Step Tutorial
Cutting the Pvc Into Size
Measure and mark the PVC pipe to the desired length of 2 feet using a measuring tape and a marker. Ensure that the cut is straight and clean to maintain the integrity of the pipe. You can use a handsaw or a PVC pipe cutter to make the cut.
- To use a handsaw, securely hold the PVC pipe in place and carefully cut through it using long, smooth strokes. Apply even pressure to avoid jagged edges or splintering.
- Alternatively, if you have a PVC pipe cutter, align the cutter’s blade with the mark on the pipe. Rotate the cutter around the pipe, gradually tightening it with each rotation until it cuts through the PVC.
- After cutting, check the edges of the PVC pipe to ensure they are smooth and free from any roughness or burrs. You can use sandpaper or a deburring tool to remove any imperfections.
By cutting the 6″ PVC pipe to a length of 2 feet, you are creating the main body of the DIY lawn aerator. This length provides sufficient reach and coverage during the aeration process.
Preparing the Handle
Measure and mark the ½” electrical conduit pipe at the desired length of approximately 12 inches. Use a measuring tape and a marker to ensure accurate measurements.
To cut the electrical conduit pipe, you can use a hacksaw or a pipe cutter. Place the pipe securely in a vice or hold it firmly in place. Align the cutting tool with the marked area and apply steady pressure while sawing or rotating the cutter. Continue until the cut is complete.
- Create the handles:
- Take the two equal lengths of the electrical conduit pipe that you just cut. These will serve as the handles for the DIY lawn aerator.
- Attach the handles to the PVC pipe using the 2″ no. 12 wood screws:
- Position the handles on either side of the PVC pipe where you want them to be. Make sure they are evenly spaced and aligned.
- Using a screwdriver, insert the 2″ no. 12 wood screws through the pre-drilled holes in the PVC pipe and into the handles.
- Apply firm pressure while turning the screws clockwise to secure them in place. Ensure that the screws go through the conduit pipe and penetrate the wood of the handles.
- Ensure secure fastening:
- As you attach the handles, make sure they are securely fastened to provide a stable grip during use. Check that the screws are tight and that the handles do not wobble or move when pulled or pushed.
If necessary, you can use additional wood screws or tighten the existing screws further to ensure a secure attachment. This will ensure that the handles remain stable and provide a comfortable and reliable grip while operating the DIY lawn aerator.
The Spikes
- Use the drill to create evenly spaced holes through the PVC pipe
- Set up a drill with a drill bit that matches the size of the 2″ hex head bolts you will be using.
- It’s recommended to use a drill bit slightly smaller than the bolts to ensure a snug fit.
- Mark hole positions:
- Measure and mark the positions for the holes on the PVC pipe. Start from one end of the pipe and work your way to the other end.
- The spacing between each hole will depend on your preference, but it’s recommended to space them evenly along the length of the PVC pipe.
- Drill the holes
- Hold the PVC pipe securely and align the drill bit with the marked positions. Apply firm pressure and start drilling into the PVC pipe.
- Keep the drill steady and maintain a straight angle as you drill through the pipe.
- Repeat this process for each marked position until you have drilled holes along the entire length of the PVC pipe.
- Ensure the holes cover the entire length of the PVC pipe:
- As you drill the holes, make sure they cover the entire length of the PVC pipe.
- This will allow the spikes, which will be inserted later, to distribute evenly and effectively across the surface of the lawn during aeration.
- Insert the 2″ hex head bolts into the drilled holes:
- Take the 2″ hex head bolts and align them with the drilled holes on the PVC pipe. Begin inserting the bolts into the holes one by one.
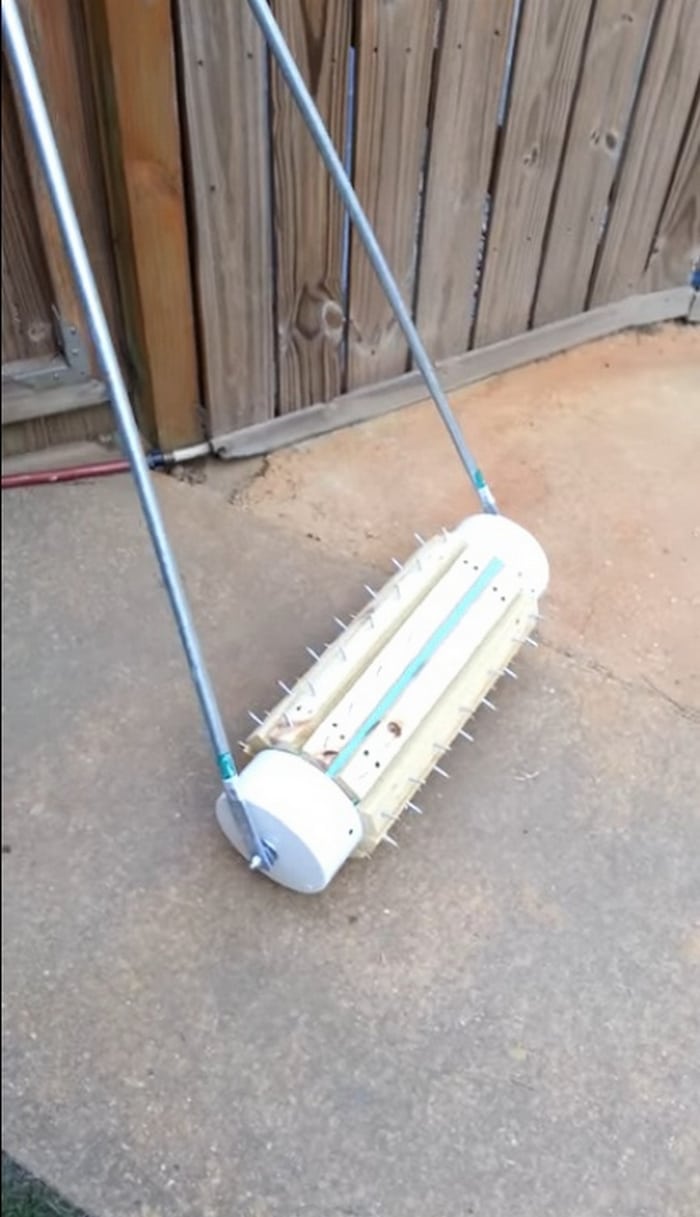
- Leave a portion of the bolts exposed:
- As you insert the hex head bolts, leave a portion of them exposed outside the PVC pipe. This exposed portion will act as the spikes for aeration.
- The length of the exposed portion can vary depending on your preference, but it’s recommended to leave around 1.5 to 2 inches of the bolt outside the PVC pipe.
- Ensure the bolts are securely in place:
- Once the bolts are inserted, ensure they are securely fastened and do not move or wobble. You can tighten them by hand or use a wrench to ensure a snug fit.
- If the bolts feel loose or have some play, you can use a washer and nut combination to secure them further into your DIY lawn aerator.
- Place a washer on each bolt and then tighten the nuts onto the exposed threads. Tighten the nuts using a wrench until they are securely fastened against the PVC pipe.
- Check for stability and alignment:
- After inserting and securing the hex head bolts, check the overall stability and alignment of the spikes. Ensure that they are straight and evenly distributed along the PVC pipe. Adjust the bolts if necessary to achieve the desired alignment.
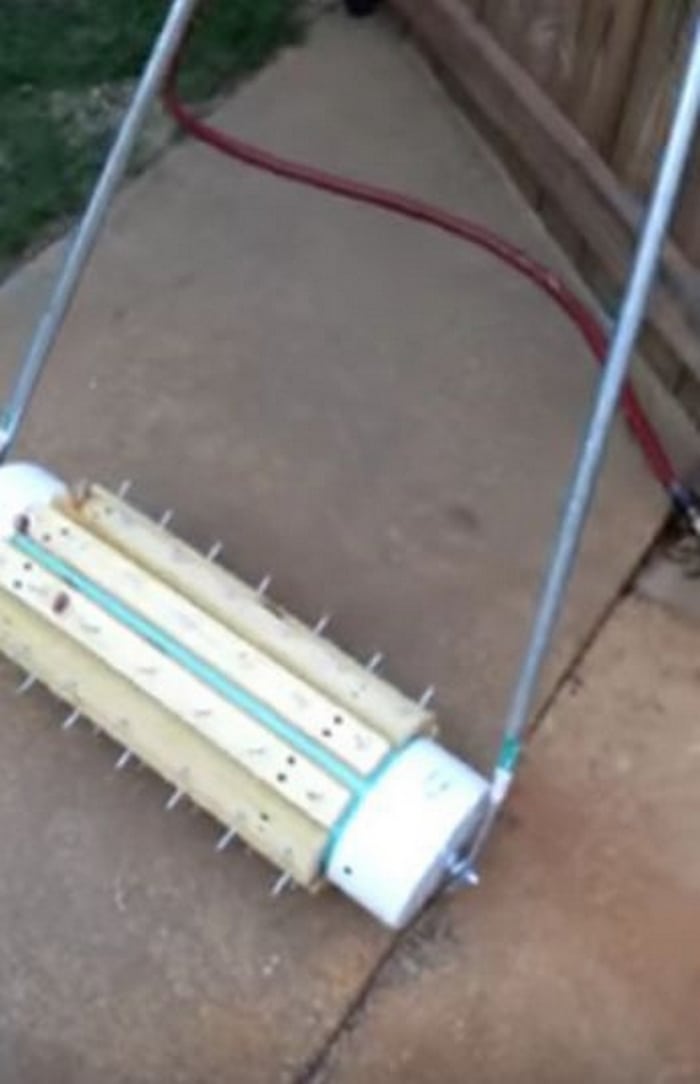
Attach the small tires/wheels to the bottom of the PVC pipe
After inserting the bolts, fill the PVC pipe with cement and allow it to cure before attaching the small tires. Take the small tires or wheels that you have selected for your DIY lawn aerator. These will play a crucial role in facilitating easy maneuverability across the lawn.
Landscaping and Aeration
A lush, healthy lawn is the foundation of a beautiful landscape. Aeration, especially using a DIY lawn aerator, plays a crucial role in maintaining the health and appearance of your lawn. Integrating aeration into your landscaping efforts enhances grass growth and boosts the overall aesthetic of your outdoor space.
Integrating a DIY Lawn Aerator into Your Landscaping Routine
Using a DIY lawn aerator fits seamlessly into your regular landscaping routine. Aerate your lawn twice a year, ideally during spring and fall, to ensure the soil remains loose and receptive to nutrients. This regular upkeep with your DIY lawn aerator promotes vigorous lawn growth, complementing your landscaping efforts.
Designing Around Aerated Areas
When you use a DIY lawn aerator, it opens up the soil, allowing for better water and nutrient absorption. Use this to your advantage by planning your plantings and garden layout. Position plants that require more water or nutrients near areas you’ve aerated. This strategic placement ensures they benefit the most from your aeration efforts.
The Aesthetic Benefits of Using a DIY Lawn Aerator
Regularly aerated lawns, with the help of a DIY lawn aerator, have thicker, healthier grass. This lushness adds to the overall beauty of your landscape. A well-aerated lawn also provides a robust backdrop for flower beds, shrubs, and other landscape features, enhancing the visual appeal of your entire garden.
Incorporating a DIY lawn aerator into your landscaping routine is not only practical but also beneficial for the visual appeal of your garden. With this simple tool, you can ensure your lawn stays healthy and beautiful, complementing all other aspects of your landscape design.
Safety Precautions
Safety is paramount when handling any gardening equipment, including a DIY lawn aerator. Understanding and following safety precautions can prevent accidents and ensure a pleasant gardening experience.
Proper Handling of the DIY Lawn Aerator
Before using your DIY lawn aerator, familiarize yourself with its components. Ensure all parts, especially spikes and handles, are securely attached. When pushing the aerator, maintain a steady pace and avoid abrupt movements to prevent injuries.
Personal Protective Equipment (PPE)
While using the DIY lawn aerator, wear appropriate protective gear. Durable gloves protect your hands from blisters and cuts. Closed-toe shoes or boots shield your feet from accidental spikes. Eye protection is also advisable to guard against any debris.
Awareness of Surroundings
Be aware of your environment when using the DIY lawn aerator. Keep children and pets at a safe distance. Avoid aerating near utility lines or sprinkler systems to prevent damage.
Safe Storage and Maintenance
After using your DIY lawn aerator, clean and inspect it for any damage. Store it in a safe, dry place out of reach of children. Regularly check for loose bolts or worn-out parts and replace them as needed.
Following these safety precautions ensures that using your DIY lawn aerator is a safe and effective way to maintain your lawn. Regular maintenance and mindful operation are key to preventing accidents and enjoying the benefits of a well-aerated lawn.
FAQ for DIY Lawn Aerator Article
What is the best time of year to use a DIY lawn aerator?
The ideal times to use a DIY lawn aerator are during the growing seasons, typically spring and fall. This timing allows grass to recover quickly and take full advantage of the aeration.
How often should I aerate my lawn with a DIY lawn aerator?
Aerate your lawn once or twice a year. Aeration might be needed more frequently if your soil is particularly compacted or you have heavy foot traffic.
Can I use a DIY lawn aerator on wet soil?
It’s best to aerate when the soil is moist but not saturated. Wet soil can get compacted further, while dry soil can be too hard, making aeration difficult.
How deep should the spikes of a DIY lawn aerator penetrate the soil?
Ideally, the spikes should penetrate 2-3 inches into the soil. This depth allows air, water, and nutrients to reach the grass roots effectively.
Is it necessary to water the lawn after using a DIY lawn aerator?
Watering your lawn after aeration helps settle the soil and provides moisture to the grassroots.
Can I overseed my lawn immediately after using a DIY lawn aerator?
Yes, overseeding after aeration is beneficial as the seeds can settle into the holes created, ensuring better seed-to-soil contact and germination.
How do I maintain my DIY lawn aerator?
Regularly check for loose parts, ensure the spikes are intact, and store the aerator in a dry place. Clean off any soil or debris after each use.
Is a DIY lawn aerator as effective as a commercial one?
A DIY lawn aerator can be quite effective, especially for smaller lawns or less compacted soil. It may require more manual effort compared to some commercial aerators.
What safety gear should I wear when using a DIY lawn aerator?
Wear durable gloves, closed-toe shoes, and eye protection. This gear will protect you from potential injuries while using the aerator.
Can I aerate a newly seeded lawn with a DIY lawn aerator?
It’s best to wait until the new grass is established before aerating. Aeration on a newly seeded lawn can disturb the seeds and hinder grass growth.
Conclusion
Transforming your lawn and saying goodbye to bare patches is within reach with this DIY lawn aerator. By aerating your lawn, you create an environment that allows your plants to breathe, receive vital nutrients, and thrive.
With just a few materials and tools, you can construct your DIY lawn aerator and enjoy its convenience and effectiveness. Say hello to a lush, green, and healthy lawn with this DIY solution.
Click on any image to start a lightbox display. Use your Esc key to close the lightbox.

Thanks to daniel19696 for this great project. You can get step-by-step instructions here…


