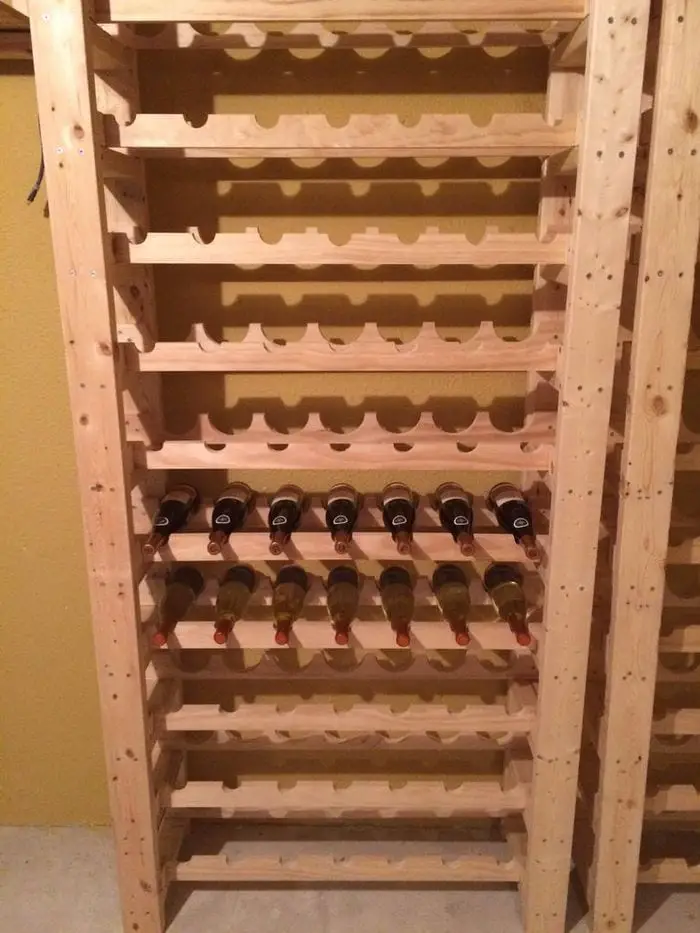
Wine aficionados, listen up – this one’s for you. This is for a do-it-yourself wine rack tower. Now you can finally store your wine collection in a safe and convenient way. And because it’s DIY, you get to customize it according to your needs and wants.

Wine racks ensure that you have a nice bottle of wine for celebrations – or for ordinary days. These racks can also be decorative pieces at home.
The key is to make the right choice when it comes to material. If not, you’ll end up with a rotting wine rack sooner than you expected. The most common ones are redwood, mahogany, and oak. Experts believe that some wood emits certain odors that can harm the wine.
You can substitute any type of wooden board here. The materials listed below are what the DIY-er used.
Contents
Building a Wine Rack Tower
Materials
- 3″ screws, 40 per rack (assuming 10 shelves each)
- 2 1/2″ screws, 80 per rack (assuming 10 shelves each)
- 1 1/2″ screws, 40 per rack (assuming 10 shelves each)
- 1″x6″x8′ pine boards, 5 per rack (assuming 10 shelves each, at 40″ width)
- 2″x4″x10′ pine (aka studs), maybe 6 per rack
Tools
- Table Saw
- Radial Arm, Miter, or Chop saw
- Electric Drill
- Higher torque, lower rpm drill for the holes (optional, but highly recommended)
- 4″ Hole Saw
- 1 3/4″ Hole Saw
- Right angle drill adapter
- Speed Square
- Tape Measure
- Counter Sink Drill Bits
- Screwdriver bit, Philips
- Clamps
Instruction
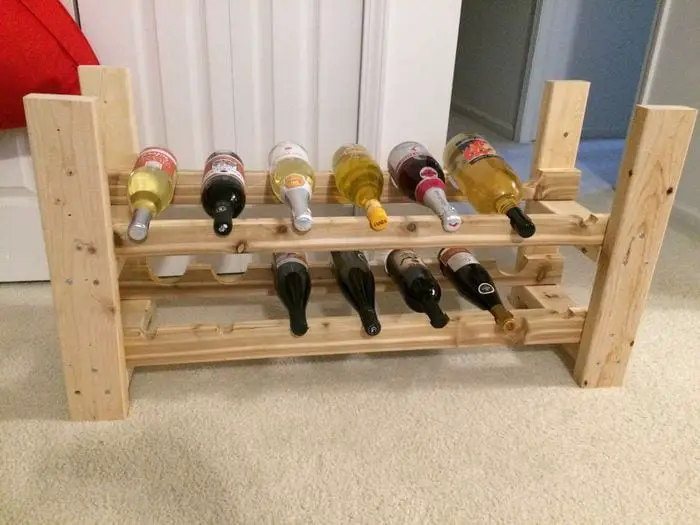
Step 1: Preparing the Materials
- Cut the Pine Boards: Using the table saw or miter saw, cut the 1″x6″x8′ pine boards into 40″ lengths. Each board will serve as a shelf, and you will need 10 shelves per rack.
- Cut the Pine Studs: Cut the 2″x4″x10′ pine studs into 84″ lengths for the vertical supports. Each rack will need 6 studs for stability.
Step 2: Marking and Drilling Holes
- Mark the Studs for Shelves: Use the tape measure and speed square to mark where each shelf will attach to the studs. Ensure even spacing depending on your preferred number of shelves.
- Drill Holes for Screws: Using the electric drill with a counter sink drill bit, pre-drill holes at each mark on the studs to avoid splitting the wood when you attach the shelves.
Step 3: Assembling the Frame
- Attach the Shelves to the Studs: Align the pine boards (shelves) with the pre-drilled holes on the studs. Use 2 1/2″ screws to secure each shelf to the studs. Make sure each shelf is level before securing it.
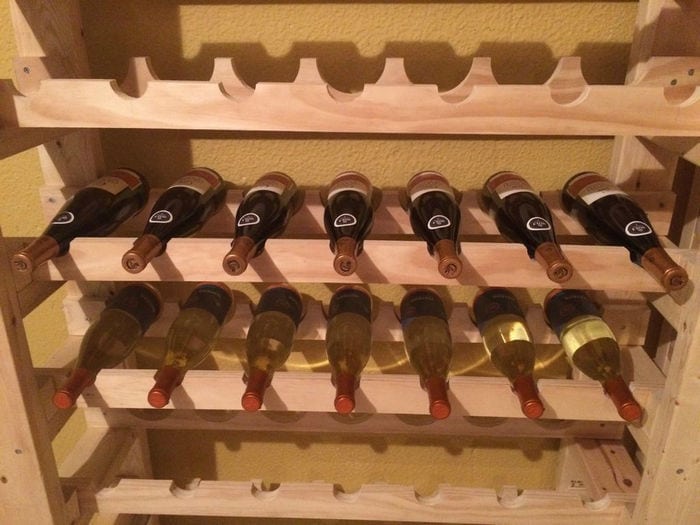
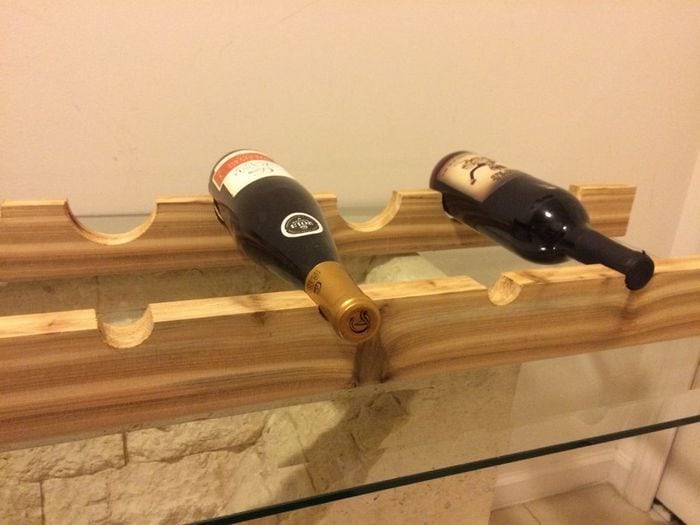
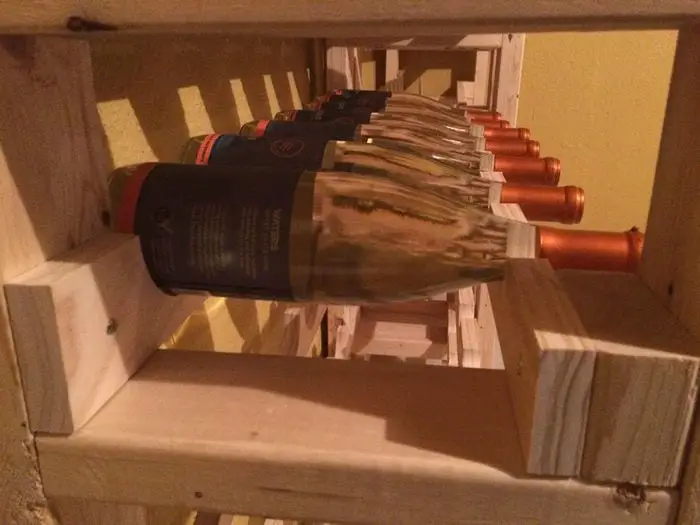
Step 4: Creating the Wine Bottle Slots
- Mark the Pine Boards for Bottle Slots: Measure and mark the center of each shelf for the wine bottle slots.
- Cut Out the Slots: Use the 4″ hole saw attached to the higher torque drill (if available) to cut out circular slots halfway through each shelf. These will serve as the holders for the wine bottles.
Step 5: Sanding and Finishing
- Sand the Rough Edges: Sand all edges of the wood, especially around the cut-out slots, to prevent any damage to the wine bottles and to give a smooth finish.
- Apply Finish: Apply a wood stain or sealant to protect the wood and enhance its appearance. Allow the finish to dry completely.
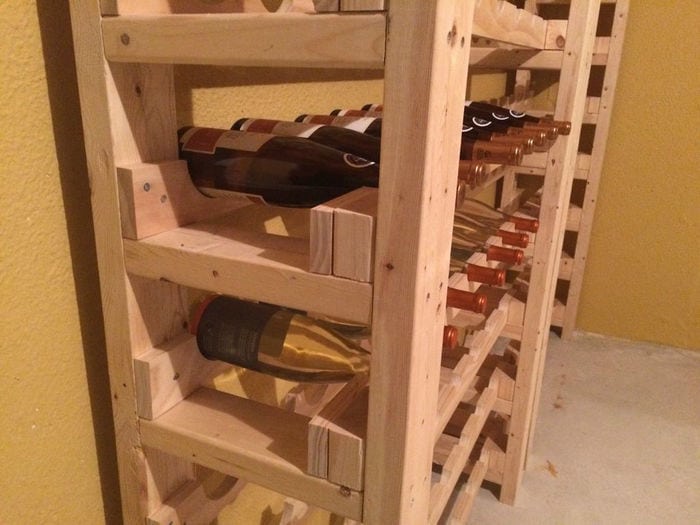
Step 6: Final Assembly
- Assemble the Rack: Align and clamp the two assembled sides together, ensuring they are perpendicular.
- Secure with Screws: Use the 3″ screws to firmly attach the sides together at the top and bottom of the rack to form a stable tower structure.
Step 7: Installation
- Position Your Wine Rack: Place the wine rack tower in a cool, dry area away from direct sunlight. If necessary, secure it to the wall for added stability.
Click on any image to start the lightbox display. Use your Esc key to close the lightbox.


You can get more step-by-step instructions here…
Climate Control for Wine Storage
Maintaining the quality and lifetime of your wine collection depends on keeping the temperature perfect. Designed to help arrange and preserve wine, a wine rack tower does not naturally shield it from fluctuations in temperature and humidity. Your wine rack tower should thus guarantee ideal conditions for wine storage:
Ideal Temperature
- Constant Temperature: Though 45°F to 65°F (7°C to 18°C) is usually acceptable, the ideal temperature for storing wine is about 55°F (13°C). More importantly than the precise temperature is its consistency; variations might ruin the wine.
- Avoid Heat Sources: Keep your wine rack tower far from direct sunlight, ovens, and radiators, among other heat sources. Too much heat can hasten aging and compromise the taste character of the wine.
Humidity Control
- Optimal Humidity Levels: Go for a 60–70% humidity. This spectrum guarantees the lifetime of the wine by preventing the cork from drying out and by reducing the oxidation risk.
- Use a Humidifier: Use a small humidifier to keep appropriate humidity levels if the area where the wine rack tower is situated usually seems to be dry.
Protection from Vibrations
- Stable Placement: Make sure the wine rack tower is positioned such that it won’t be physically disturbed by foot traffic or domestic appliances. Vibrations can disrupt the sediment in wine, compromising its taste and clarity.
Careful control of the temperature around your wine rack tower will help to improve the quality of your wine collection. Maintaining stable conditions around your wine rack tower will help your wine stay in best shape for many years to come.
Design Options and Layouts for Wine Rack Towers
When designing a wine rack tower, the key is to balance functionality with aesthetics, ensuring your collection is not only stored properly but also beautifully displayed. Wine rack towers can be customized in a variety of styles and layouts to complement any room’s décor while providing easy access and optimal storage conditions for your wine.
Here’s a look at some popular design options and layouts that can be adapted to fit different spaces and needs.
Traditional Vertical Tower
- Classic Elegance: The traditional vertical wine rack tower is a timeless choice that emphasizes height and uses vertical space efficiently. These towers can be built to accommodate anywhere from a dozen to several hundred bottles of wine, making them versatile for both small collections and serious enthusiasts.
- Design Variability: You can choose from a variety of materials like wood, metal, or a combination of both. Wood offers a classic look and works well in traditional or rustic interiors, while metal can introduce a modern touch.
Horizontal Spread Layout
- Accessibility and Display: Horizontal wine rack towers provide an easy view and access to the labels, making this design ideal for those who like to show off their collection. This layout can be particularly striking when placed against a wide wall and can be scaled to fit the space available.
- Modular Flexibility: Consider modular units that can be stacked side by side or even on top of each other. This flexibility allows the wine rack tower to grow along with your collection or adapt to changing decor styles.
Diamond or Honeycomb Pattern
- Stylish and Space-Efficient: For a more decorative approach, a diamond or honeycomb pattern offers both visual interest and efficient use of space. This design allows for individual compartments to nestle each bottle securely, minimizing the bottle’s contact with one another, which is perfect for maximizing storage capacity in a compact area.
- Material Choices: While wood is a popular choice for this style, using clear acrylic materials can add a contemporary flair and allow for an unobstructed view of the bottles from all angles.
Lattice Layout
- Ventilation and Charm: A lattice layout in a wine rack tower not only looks charming but also provides excellent ventilation around each bottle. This style is ideal for ensuring that air circulates around the bottles, an important factor in long-term wine storage.
- Customizable Features: Lattice racks can be customized with various wood types and finishes to match your home’s décor. They can also be built into existing cabinetry or used as a freestanding feature in dining rooms or under staircases.
Circular and Spiral Designs
- Unique Centerpieces: Circular or spiral wine rack towers make stunning centerpieces in a room. These designs can be engineered to wrap around structural elements like columns or integrated into furniture pieces like a kitchen island.
- Maximizing Space: This type of rack utilizes vertical space efficiently and can be an excellent option for tight spaces, adding a sculptural element to the home while keeping wines within easy reach.
Integrated Features
- Dual Purpose Designs: Some wine rack towers incorporate additional features such as built-in cooling systems or humidity controls, combining storage with optimal wine preservation technologies. Others might include areas for stemware or a bar surface for serving.
- Custom Inserts: For those with varied collections, custom inserts can be designed to hold different sizes of bottles, from standard 750 ml to larger formats like magnums and jeroboams.
A well-designed wine rack tower not only stores your wine safely but also enhances the look of your home. By choosing the right design and layout, you can ensure that your wine collection is both a focal point and a conversation starter in any setting. Whether you opt for a minimalist approach or a more elaborate configuration, the right wine rack tower can transform how you display and enjoy your wine.
Conclusion
A well-crafted wine rack tower is not just a storage solution but also a statement piece that enhances the aesthetic of any room. It offers both functionality and style, ensuring that your wine collection is displayed beautifully and preserved under optimal conditions. Investing in a quality wine rack tower elevates your wine experience, making each bottle easily accessible and ready for any occasion.
For more creative storage ideas for your wine, check out our wine cellar staircase!